|
bodgemaster
63 GL, 76 Super (x2), 74 Primavera (x2), 79 P200, 06 Fly 150
Joined: UTC
Posts: 7957 Location: So Cal |
UTC
quote
What SaFiS and chandlerman said... epoxy will seal that right up. Btw, I've been using Loctite Metal Epoxy instead of JB Weld lately. Good stuff, sets up 100x faster, flows better and seems to adhere just as well or better than JB.
|
|
|
UTC
quote
I got the JB weld original 15 hours to cure.
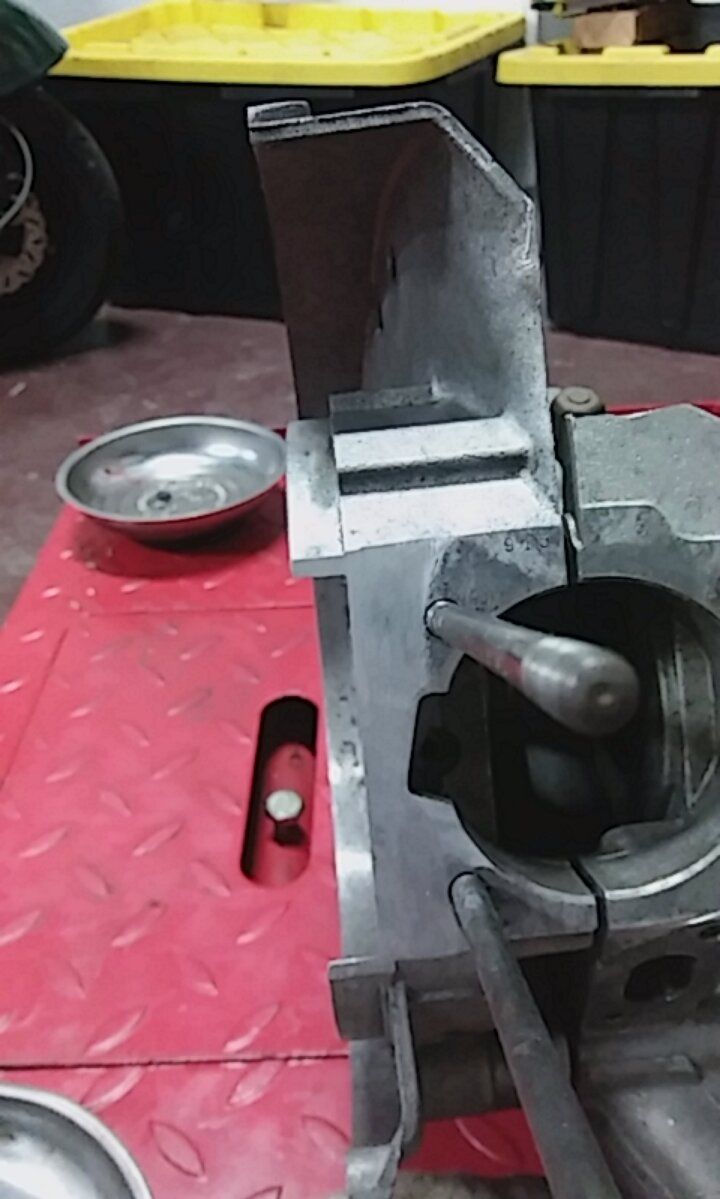
I think I can take piston out pretty easily. Maybe if I put the epoxy on both sides the bond will be stronger. I'll clean the surface first. It's certainly easier just to put it on the flywheel side only. Here's a pic of the porting, I had it done.
|
|
bodgemaster
63 GL, 76 Super (x2), 74 Primavera (x2), 79 P200, 06 Fly 150
Joined: UTC
Posts: 7957 Location: So Cal |
UTC
quote
In addition to cleaning, be sure to scuff the area where you're applying the JB. Epoxy needs a surface with "tooth" to really bond.
|
|
UTC
Innovator
63 GL, 62 VBB, 05 Stella, 66 Smallstate, 66 Lammy S3, 63 Lammy S3 Riverside
Joined: UTC
Posts: 13206 Location: Nashville 363 Days Since Last Explosion |
|
|
Innovator
63 GL, 62 VBB, 05 Stella, 66 Smallstate, 66 Lammy S3, 63 Lammy S3 Riverside
Joined: UTC
Posts: 13206 Location: Nashville 363 Days Since Last Explosion |
UTC
quote
and clean it really, really well. Having some of it taking positive pressure from the inside will help a lot with keeping it in place, too.
|
|
|
UTC
quote
Back to the drawing board
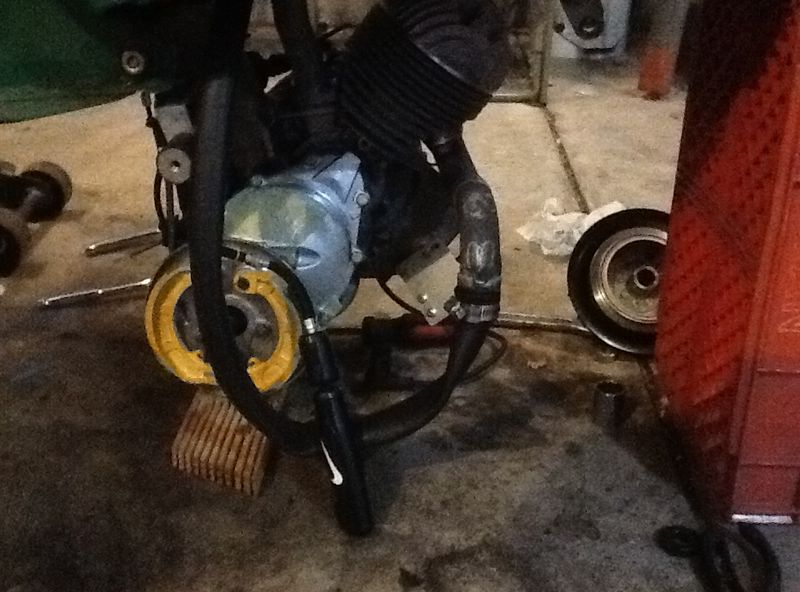
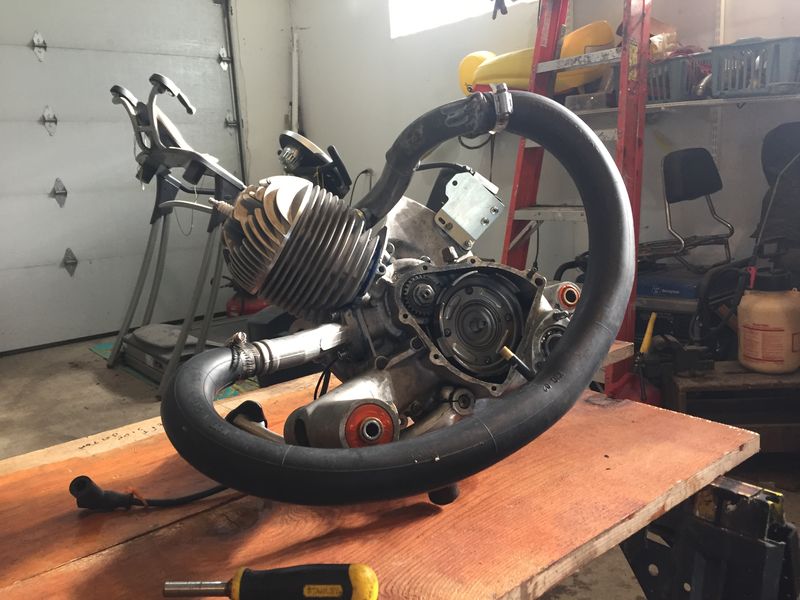
The JB weld worked fine on the cylinder, no more leak there. But the top end still won't hold pressure. I use a part of an old inner tube, a hand pump and spray bottle with soapy water, I spray every place I think could possibly leak and get no bubbles.
Going to split the cases again tomorrow. I think the flywheel side crank seal is good because I sprayed it and no air came out. If I'm not mistaken that leaves the clutch side seal and the case gasket. I am betting it's the case gasket. The exhaust has been spitting out tiny droplets of black oil. I think the oil is being sucked in from the lower end. My winter project has turned into a spring project.
|
|
UTC
Innovator
63 GL, 62 VBB, 05 Stella, 66 Smallstate, 66 Lammy S3, 63 Lammy S3 Riverside
Joined: UTC
Posts: 13206 Location: Nashville 363 Days Since Last Explosion |
|
|
Innovator
63 GL, 62 VBB, 05 Stella, 66 Smallstate, 66 Lammy S3, 63 Lammy S3 Riverside
Joined: UTC
Posts: 13206 Location: Nashville 363 Days Since Last Explosion |
UTC
quote
Re: Back to the drawing board
Vpfalcon wrote: My winter project has turned into a spring project. |
|
OP
Molto Verboso
2005 PX150 In a Part-time Relationship with a 2-Stroke Vespa Since 2007
Joined: UTC
Posts: 1876 |
|
|
UTC
quote
Split the cases, gasket looks fine so probably not a leak there. I do remember when I installed the crank seals that I put loctite 503 on both the outside and inside of the seals. I realized that the loctite should have only gone on the outer surfaces of the seals, unfortunately that was after I bolted the cases back together. That may have caused the seal to fail.
Ordered new seals. Had a bit of a mishap with the milk crate. Scooter slipped off and landed on the rear brake plate. Had to order one of those too. Luckily no damage to the motor. I am a crappy mechanic but I keep trying. |
|
|
UTC
quote
Clutch and flywheel side seals, a new gasket plus permatex gasket dressing, and the air leak is gone.
Today is a good day! I've been chasing this air leak for 3 weeks, plus all the time I wasted trying to dial in the carb, before I figured out I had an air leak. My jerry-rigged pressure tester has held steady for an hour. Good enough for me.
|
|
Johnny Two Tone
'15 GTS300, '86 PX125EFL, '01 ET4
Joined: UTC
Posts: 9070 Location: San Diego, CA |
UTC
quote
Vpfalcon wrote: Clutch and flywheel side seals, a new gasket plus permatex gasket dressing, and the air leak is gone. Today is a good day! I've been chasing this air leak for 3 weeks, plus all the time I wasted trying to dial in the carb, before I figured out I had an air leak. My jerry-rigged pressure tester has held steady for an hour. Good enough for me. |
|
|
|
Johnny Two Tone
'15 GTS300, '86 PX125EFL, '01 ET4
Joined: UTC
Posts: 9070 Location: San Diego, CA |
UTC
quote
That'll work but lose a bit in connecting it. Probably the easiest place to plumb one in would be in place of the spark plug, I'm guessing. I like to be able to just look at the gauge over time intervals.
|
|
Veni, Vidi, Posti
1979 P150X, 1983 P200E, 1987 PK125XL Elestart, 1988 T5, 1995 PX200E, 2024 GTS 300
Joined: UTC
Posts: 5533 Location: Veria, Greece |
UTC
quote
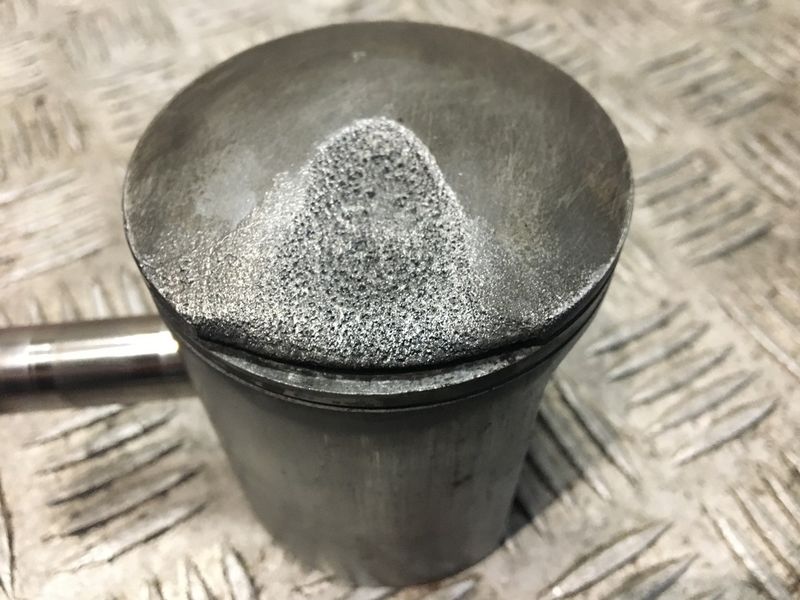
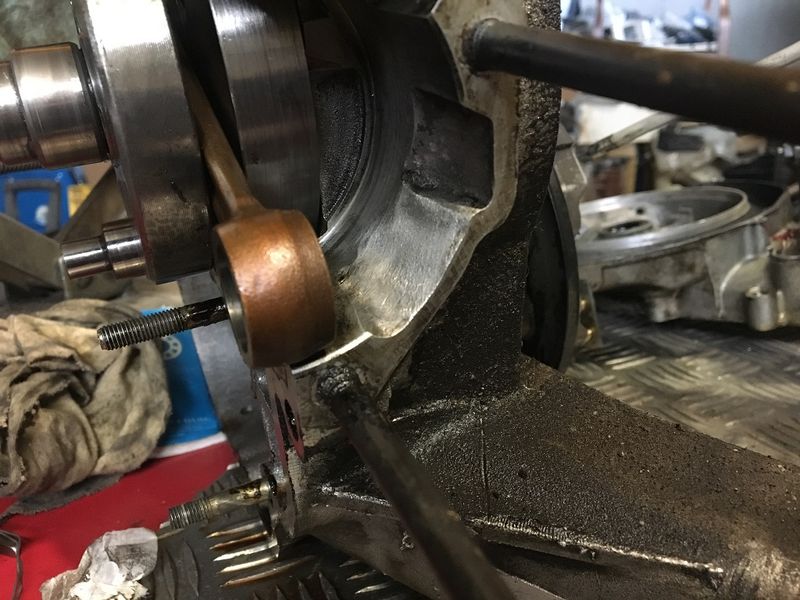
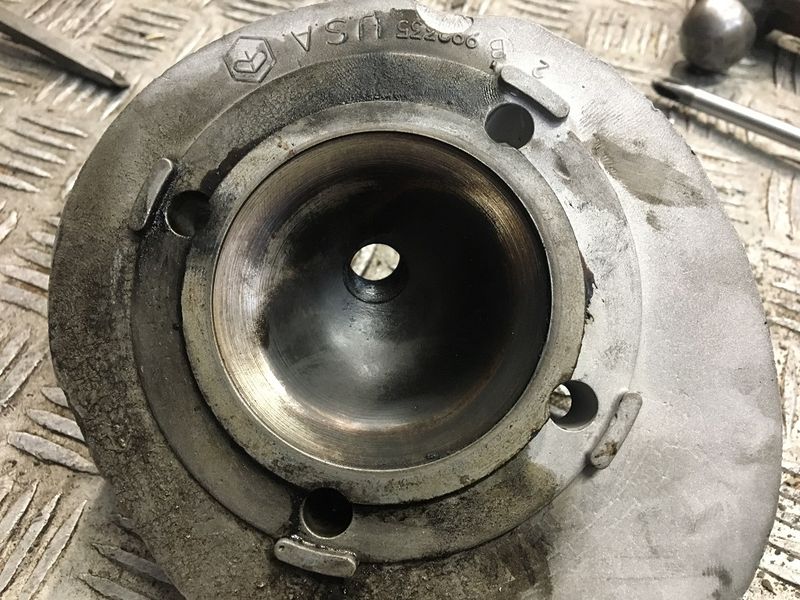
So, the yellow Rally I was working on yesterday, showed signs of seize (unstable idle and unwilling to rev a lot) cause last Saturday, my friend had told me that he lost power all of a sudden and after a while (probably when the engine cooled down) everything seemed fine. I was thinking about it all day and I'm glad I decided to take out the head. As it turns out the cylinder head had a major air leak, resulting to a melted piston. Cylinder seems fine, but I'll know tomorrow when I'll strip the engine. The engine and whole restoration was done by a "reputable" shop and my friend got the Rally 3 months ago from the previous owner. It was meant to happen but it sucks, because he has only driven the Rally for a total of 200Kms. The cylinder head was a modified Piaggio one and not a Malossi...
![]()
|
|
|
UTC
quote
SaFiS
the pictures of the piston look strange imo normally when you have eroded pistons like that either through timing , oil percentage or incorrect jetting the piston crown is clean and has a sand blasted appearance there is a lot of carbon on that piston crown for 200 kms my suspicions rest with your reputable shop |
|
Veni, Vidi, Posti
1979 P150X, 1983 P200E, 1987 PK125XL Elestart, 1988 T5, 1995 PX200E, 2024 GTS 300
Joined: UTC
Posts: 5533 Location: Veria, Greece |
UTC
quote
I meant 200Kms from when he bought it from the previous owner. The restoration and engine was done a year ago. Timing is the first thing I checked and it was OK. Oil percentage was the autolube's job (it will be checked). Jetting will be checked. Eitherway, I saw a lot of "reputable" stuff inside and on the frame...
|
|
Jet Eye Master
PX221 MHR heavily tuned, PX200 O tuned, PX181 M1XL tuned, PX166 tuned a quite bit and some motorbikes
Joined: UTC
Posts: 5463 Location: London UK |
UTC
quote
shipscat is right, there is something fishy about that piston. He's been so lucky that its only the piston that's damaged.
That oil looks quite black. Unstable tickover, not reving properly. Sure it isn't gearbox oil? What jets are in the carb at the moment? With so much of the piston edge melted over the exhaust port, the exhuast timing will be way off. Did it rev really well but lack torque when it was going? |
|
Veni, Vidi, Posti
1979 P150X, 1983 P200E, 1987 PK125XL Elestart, 1988 T5, 1995 PX200E, 2024 GTS 300
Joined: UTC
Posts: 5533 Location: Veria, Greece |
UTC
quote
Could be gearbox oil. Gaskets were really cheap (the old thin type) and the cases inside, are also dark. Clutch seal also looks cheap although I still haven't got the crank out. Jets are typical: 55/160, 160/BE3/130. Crank is cut (probably to Malossi's instructions). Unfortunately, I didn't have the chance to ride it before. Apart from the rings rattling (they have a 1mm gap inside the cylinder) it seemed to rev well and have power (we went riding on hilly roads)...
One thing I also don't like, is that they didn't "close" the "old" side ports and the clearance on the gear stack is beyond specs (0,55mm)... |
|
Veni, Vidi, Posti
1979 P150X, 1983 P200E, 1987 PK125XL Elestart, 1988 T5, 1995 PX200E, 2024 GTS 300
Joined: UTC
Posts: 5533 Location: Veria, Greece |
|
Jet Eye Master
PX221 MHR heavily tuned, PX200 O tuned, PX181 M1XL tuned, PX166 tuned a quite bit and some motorbikes
Joined: UTC
Posts: 5463 Location: London UK |
UTC
quote
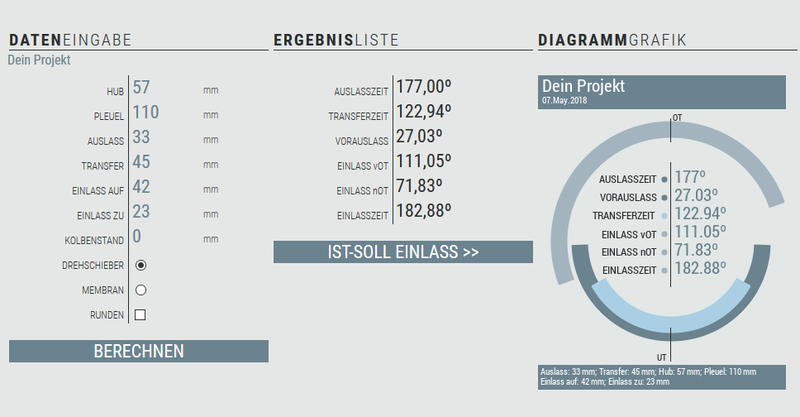
That cylinder looks like an old Malossi 210 to me. Stock they are near to 33.90mm and 47.20mm. Has that one been ported already?
|
|
Veni, Vidi, Posti
1979 P150X, 1983 P200E, 1987 PK125XL Elestart, 1988 T5, 1995 PX200E, 2024 GTS 300
Joined: UTC
Posts: 5533 Location: Veria, Greece |
UTC
quote
It is the old Malossi. No porting on cylinder, probably I "lost" few mm's dealing with the melted piston. Anyways, timing and duration wise, is it OK?? Should I open up the rotary??
|
|
Jet Eye Master
PX221 MHR heavily tuned, PX200 O tuned, PX181 M1XL tuned, PX166 tuned a quite bit and some motorbikes
Joined: UTC
Posts: 5463 Location: London UK |
UTC
quote
I expect you just want the Rally to do a better job of pulling the standard 200 gearing. There is plenty that can be done to a bolt on 210.
Are you wanting to port the cylinder? Any option to fit a 60mm crank? Opening the inlet will help, if the port timing is improved from how it is now. Otherwise no need. Can you post a picture of the modified head? |
|
Veni, Vidi, Posti
1979 P150X, 1983 P200E, 1987 PK125XL Elestart, 1988 T5, 1995 PX200E, 2024 GTS 300
Joined: UTC
Posts: 5533 Location: Veria, Greece |
UTC
quote
First off, my friend wants it to be reliable, not a screamer
He basically wants it for casual riding (he has other vespas for daily riders) and occasionally for small trips to gatherings, not something crazy... 1. There is some basic porting on the cases, I will match them to the cylinder... 2. We don't want to mess with the cylinder. I'll just put a new vertex piston, A,B,C,D whatever will fit the tolerances, after we have the cylinder measured in a shop... 3. I don't think so, but I will suggest a longstroke... Head wise, with the one that was on, I get a squish of 2,2mm so I'm thinking for a new head from MMW... https://www.sip-scootershop.com/en/products/cylinder+head+mmw+px200+for_13013940
|
|
Jet Eye Master
PX221 MHR heavily tuned, PX200 O tuned, PX181 M1XL tuned, PX166 tuned a quite bit and some motorbikes
Joined: UTC
Posts: 5463 Location: London UK |
UTC
quote
It was only that low compression head that saved that piston from blowing through. That type is more for racing than cruising.
Even though you're not porting the cylinder. I am sure you will do a proper job of lining up the transfers to the case and the filling. Also cut out the side windows in the new piston. This helps any tune, whether for screaming or for touring. After there are a few options for easy touring tuning. 1. Fit a 60mm crank. Line the piston up to zero deck and fit a better head. The MMW is a fine choice. I used one for years on my old Polossi. Take 10mm out the back of the rotary pad. 2. Keep the 57 crank but fit approx 1.2mm of base packer to set the piston 1.00mm below deck. Fit the same MMW head but the zero version. Take 12mm out the back of the rotary pad. https://www.sip-scootershop.com/en/products/cylinder+head+mmw+px200+for_13013935 (my one doesn't have the o ring but should still be ok on the 68 bore) Either of these will have a similar result. The 60 crank would be slightly faster option. |
|
Veni, Vidi, Posti
1979 P150X, 1983 P200E, 1987 PK125XL Elestart, 1988 T5, 1995 PX200E, 2024 GTS 300
Joined: UTC
Posts: 5533 Location: Veria, Greece |
|
Jet Eye Master
PX221 MHR heavily tuned, PX200 O tuned, PX181 M1XL tuned, PX166 tuned a quite bit and some motorbikes
Joined: UTC
Posts: 5463 Location: London UK |
UTC
quote
Welcome These days there is no reason for a slow scooter.
60mm is longstroke, or you mean longer! |
|
Veni, Vidi, Posti
1979 P150X, 1983 P200E, 1987 PK125XL Elestart, 1988 T5, 1995 PX200E, 2024 GTS 300
Joined: UTC
Posts: 5533 Location: Veria, Greece |
UTC
quote
Yeah, I know that. I mean maker wise, timings, etc. Should I suggest him one from Pinasco like the old one I had, maybe a Serie Pro??
|
|
Jet Eye Master
PX221 MHR heavily tuned, PX200 O tuned, PX181 M1XL tuned, PX166 tuned a quite bit and some motorbikes
Joined: UTC
Posts: 5463 Location: London UK |
UTC
quote
The cheapest 60mm that will do the job on the SIP site is a Pinasco. Need the crank degrees under 130/6 for this, the Pinasco 123/6 will do nicely. Will still need to open out the case inlet 10mm longer but will make better power mid range for cruising on.
If he wants to spend the money this will make the better set up. Could just use a standard issue Malossi head to save some money, I am sure you have a spare one somewhere. |
|
Veni, Vidi, Posti
1979 P150X, 1983 P200E, 1987 PK125XL Elestart, 1988 T5, 1995 PX200E, 2024 GTS 300
Joined: UTC
Posts: 5533 Location: Veria, Greece |
UTC
quote
So, update on the Rally. Parts came in, engine assembled and leak down test failed. The autolube will be disabled anyways, so I was thinking in taking the pin out and putting it back in along with a bit of J-B Weld...
![]() ![]() |
|
UTC
Innovator
63 GL, 62 VBB, 05 Stella, 66 Smallstate, 66 Lammy S3, 63 Lammy S3 Riverside
Joined: UTC
Posts: 13206 Location: Nashville 363 Days Since Last Explosion |
|
|
Innovator
63 GL, 62 VBB, 05 Stella, 66 Smallstate, 66 Lammy S3, 63 Lammy S3 Riverside
Joined: UTC
Posts: 13206 Location: Nashville 363 Days Since Last Explosion |
UTC
quote
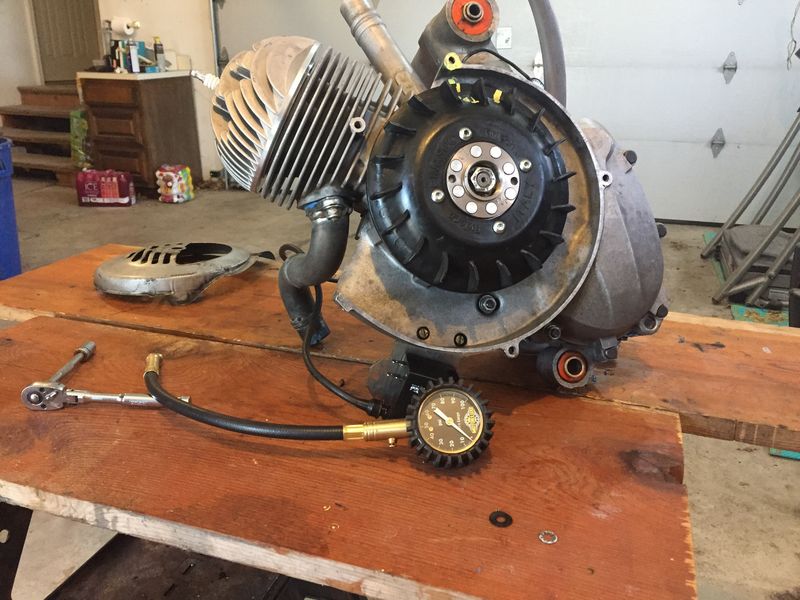
Since the thread bubbled to the top, here's a picture of my pressure test setup.
Parts all came from Amazon and the whole thing cost about $25, excluding the hose, which I already had.
No pressure, Dude!
|
|
|
UTC
quote
Re: Serious About Air Leaks
pdxjim wrote: Serious About Air Leaks I've had a lot of frustrations with my PX engine over the past several years, and I believe I have finally found and eliminated the root causes. I did this by comprehensively checking for leaks in the cases using equipment I assembled myself and I found not one, but three sources of leaks. I know others said "it sounds like you have a leak somewhere", but there isn't a lot of information how to go about finding and isolating them, so in the hope that someone else can benefit from my experiences, I'd like to share what I came up and how I determined where the leaks were. First, once you understand that a 2-stroke engine works very much like an air pump and that the vacuum induced by the piston moving upwards is what the carburetor responds to at any given throttle position, it becomes obvious that any unwanted air leaks into the crankcase makes trying to dial in a carb a pointless exercise and increases the likelihood of other more serious issues popping up sooner or later. I cannot emphasize strongly enough how important I now believe leak testing is if you want to save time and frustration when dialing in or problem-solving your engine. To my knowledge, there is no such kit currently available for the Vespa on the market, so here is what I came up with... To get started, you have to devise a way to seal up the crankcase and introduce about 5-6psi into it - no more than that or you risk damaging a seal - and there's only 3 places to do this, the inlet port, the exhaust stub, or the spark plug hole. The inlet port won't work because on a rotary valve engine the inlet port will never be open at the same time as the transfer port, and since I couldn't find a very practical way to do this through the exhaust stub, I opted for the spark plug hole, which seems to be what is usual, and the easiest way I found to do that was to use a compression tester (which I already had). ![]() Since my compression tester was a one-piece type, I had to reconfigure it with quick-connects so it would work for both leak testing and compression testing. ![]() Note: The compression tester hose will have a Schrader valve in the spark plug end that only allows air into the hose towards the gauge. This needs to be removed for leak testing or else you won't be able to pump air into the crankcase... but don't lose it because you'll have to put it back in for the compression tester to work again. (Compression testers use a special low spring-tension Schrader valve marked with a white band - supposedly auto parts stores carry these). Next, the inlet port in the case half under the carb box needs to be closed off. Using a hacksaw, file, and drill, I cut and fitted a cover plate out of a 2x24" piece of 1/8" flat aluminum stock obtained from the local hardware store, then cut a matching gasket from a piece of plumber's gasket rubber - get the black neoprene stuff, not the red rubber variety, it will hold up better to the light coat of grease that's used to seal the gasket. I deliberately made mine big enough to cover the autolube holes as well - I'll explain why later. A couple of appropriate-length 7x1.0mm bolts and washers and this part is ready. (Note that I was originally going to connect the tester to the inlet port until I realized the port timing issue and had to plug up the hole.) ![]() Next, the exhaust stub needs closing. Again, the plumbing section of the local hardware store had the answer - a flexible "coupler" with a plastic pipe cap in one end. ![]() Lastly, comes the main section... a 'T' fitting that will accept the compression tester hose, a low pressure gauge of some kind, a tire pump, and be closable with a valve to seal off the system. I wound up going with mini brass fittings because I was making a lot of this up as I went along and wanted to be able to move sections around easily until I settled on a final configuration - plastic pipe sections would probably work too and cost less. Parts used: 1/4NPT ('T', quick-couplers, hose barb fitting), 1/4 to 1/8 NPT adapter, 1/8NPT (mini ball-valve, 'tank valve'). ![]() I already had an old combo vacuum/fuel-pressure gauge from my car tune-up days past, so I used that, but 0-15psi low-pressure gauges from Winters can be had from Amazon for under $10. All the brass bits I either got from Amazon for whatever bargain price I could find, or picked up as needed at the local hardware store. Here are all the parts put together for positive pressure testing. ![]() Note: If you're putting a tester together for the first time, don't remove the Schrader valve just yet so you can first test your assembly by pumping air into it and dunking it into a bucket of water to make sure it doesn't have any leaks. A leak tester is no good if it has its own leaks. Once you've determined it's airtight, the valve can come out for testing. I found Windex worked quite well to check for leaks: it could be sprayed where needed, bubbled up visibly around a leak, and didn't leave much if any residue. Basic benchtop testing procedure... Connect the hose to the cylinder head, smear a light coat of grease under the inlet port cover and hand-tighten it into place, apply a light coat of grease on the exhaust stub and clamp the exhaust stopper into place. Next turn the crank to BDC to open the transfer ports (it may spin there under pressure if you don't), connect the tire pump and gently pump about 5-6psi into the crankcase, close off the mini valve and watch what happens. An airtight crankcase should not leak. With my engine, after chasing down and repairing the 3 different leak issues I had, it held 6psi positive pressure and 6psi negative pressure for 45 minutes without dropping at all. I didn't wait any longer because I didn't see any point. (In hindsight, I'm not sure there's any value to vacuum testing with negative pressure. Positive pressure is all you need to find the leaks. If anyone knows of a reason otherwise, please let me know). At this point, I've positively determined that my crankcase is now an airtight system and the carburetor should respond 100% as expected (that is, unless there are leaks around the carb base or airbox). Next, I fashioned another cover plate, one that goes inside the airbox itself. This way I can make sure there aren't any leaks under the airbox at the gasket. Also, this plate will come in handy should any suspicions about leaks come up long after the engine has been installed and operational... I only need to pull the carb and exhaust and use this plate with the exhaust stopper to re-test the integrity of the system without having to remove the engine from the bike. ![]() Some troubleshooting thoughts and tips... If there is a leak, first look for it on the outside by spraying Windex on the seams of the case halves in the crankcase area, the cylinder base, head, flywheel side seal, around the 4 crankcase stud nuts, etc. If it's not leaking on the outside, it must be leaking on the inside and most likely is the clutch-side main seal. If you have a bike with the seal on the inside of the bearing, you can test the seal without splitting the cases by removing the clutch cover and clutch, turning the engine over flywheel-side down supporting it as level as possible, filling the main bearing races with gear oil, and with crankcase under pressure watching for bubbles escaping through the oil in the races. (I own a PX, but if you have an older Vespa with the seal on the outside of the bearing, checking it for leaks should be even easier). If there aren't any bubbles, it can't be leaking there so no need to pull the crank to inspect/replace the seal, just turn the engine back over onto its clutch side and let the excess oil drain from the bearing. But if there are bubbles there is definitely a leak there, and the crank will have to come out and the seal inspected. If the seal appears 100% intact, it may be leaking around the edges of the seal due to the bearing housing being deformed from sloppy bearing replacement procedures. This is an issue I discovered I had and was able to fix the leak around the oil seal with Loctite 641 Retaining Compound, a more viscous version of "green" Loctite 609. If you can't find the leak on the outside, and it's not the clutch seal, it has to be leaking into the gear box some weird way. This is probably pretty unusual, but happens to be another issue I discovered as a result of two small fractures caused by a small-end bearing catastrophe a few years ago that resulted in needle bearings flying around inside the crankcase. To confirm this, closing up the gearbox is required. This is done by fashioning a 3rd cover plate for the selector box and in combination with the inlet cover plate which covers the autolube holes, pumping up the crankcase and letting it leak down while keeping the clutch breather hole stoppered up or covered with your finger. If when removing your finger air is found to escape from the breather hole, then it's definitely leaking from the crankcase into the gear box, and since you've already ruled out the clutch seal, the next step is to figure out how it's getting there. This will probably require intense visual inspection of the interior of the cases. ![]() ![]() As an added bonus, even though the gear box isn't required to be airtight, by pressure testing it you can determine if there are likely spots it will leak oil and address those while it's up on the bench. I found 2 issues this way... the o-ring on the kick starter was leaking slightly, and the other was odd... the thick square washer underneath the nut that fastens the lay shaft was slightly rotated despite the square shape and a corner was pressing on the clutch cover just enough for it to slightly fizzle there. When I realigned the square washer so that it didn't touch the clutch cover and tightened everything back down, the leak went away and the gear box now holds air. In theory, this engine shouldn't leak much of anything anymore and should run pretty clean. Lastly, if you know anyone who's tossing out a damaged clutch breather, ask for it and see if you can salvage it by cutting off the bell on top and/or cleaning up the threads. Adding an o-ring makes it a handy test hose fitting for the clutch breather. ![]() In conclusion, an airtight crankcase is essential to proper induction and carburation. Thanks again! |
Modern Vespa is the premier site for modern Vespa and Piaggio scooters. Vespa GTS300, GTS250, GTV, GT200, LX150, LXS, ET4, ET2, MP3, Fuoco, Elettrica and more.