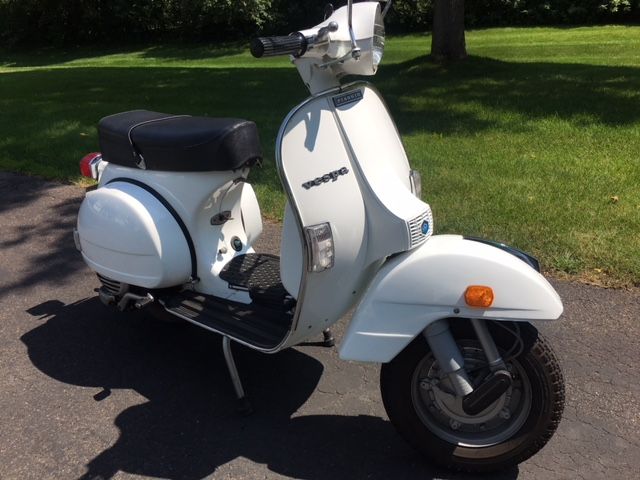
OP
@qascooter avatar
UTC

Veni, Vidi, Posti
79 P200E (Ruby), 62 Allstate (B-62), 63 VBB (Storm)
Joined: UTC
Posts: 5299
Location: Florence, OR
 
Veni, Vidi, Posti
@qascooter avatar
79 P200E (Ruby), 62 Allstate (B-62), 63 VBB (Storm)
Joined: UTC
Posts: 5299
Location: Florence, OR
UTC quote
Philos wrote:
Nice lecky work there... just one thing I picked up. Don't forget to protect the battery terminals - particularly the +. There was a good article on the SLUK site about a year ago where someone spent lots of time, $, and effort building a beautiful old vespa and it went up in flames because a tool shorted the battery + terminal to frame and started a fire.!! Luckily they were right there and managed to put it out before it did too much damage.

Maybe a couple of bits of thick electricians tape could serve the purpose.?
Thanks Philos! And thank you for the heads up - nobody needs an electrical fire. Maybe if I put a piece of heat shrink tubing over the wire and just not melt the very end so it'll cover the connection. Or maybe just some tape!

Thanks again! This reminds me of a baja bug I once owned. It had the back seat in and all of a sudden the seat was on fire! I happen to be driving down the beach and the metal battery strap was grounding the positive battery connector and turning the seat rail glowing red, which caught rhe seat on fire. So I pulled the seat up, pushed on the back window (with the flaming seat), and pop, the window popped out. And I threw the seat out and used a screwdriver on the floorboard (for clearing drainage holes in the floor) to dislodge the battery strap. Good times! Razz emoticon
@suibhne1 avatar
UTC

Member
2012 gts 300 super
Joined: UTC
Posts: 13
Location: Eugene OR
 
Member
@suibhne1 avatar
2012 gts 300 super
Joined: UTC
Posts: 13
Location: Eugene OR
UTC quote
Hey, what an epic thread!

I'm thinking of getting a P and I live in Oregon too (Eugene).
Since this thread is pretty recent, I'm wondering what you paid for the bike originally?

It looks amazing!
@philos avatar
UTC

Banned
2001 LML 150 2t
Joined: UTC
Posts: 382
Location: Queensland, Aus
 
Banned
@philos avatar
2001 LML 150 2t
Joined: UTC
Posts: 382
Location: Queensland, Aus
UTC quote
qascooter wrote:
Philos wrote:
Nice lecky work there... just one thing I picked up. Don't forget to protect the battery terminals - particularly the +. There was a good article on the SLUK site about a year ago where someone spent lots of time, $, and effort building a beautiful old vespa and it went up in flames because a tool shorted the battery + terminal to frame and started a fire.!! Luckily they were right there and managed to put it out before it did too much damage.

Maybe a couple of bits of thick electricians tape could serve the purpose.?
Thanks Philos! And thank you for the heads up - nobody needs an electrical fire. Maybe if I put a piece of heat shrink tubing over the wire and just not melt the very end so it'll cover the connection. Or maybe just some tape!

Thanks again! This reminds me of a baja bug I once owned. It had the back seat in and all of a sudden the seat was on fire! I happen to be driving down the beach and the metal battery strap was grounding the positive battery connector and turning the seat rail glowing red, which caught rhe seat on fire. So I pulled the seat up, pushed on the back window (with the flaming seat), and pop, the window popped out. And I threw the seat out and used a screwdriver on the floorboard (for clearing drainage holes in the floor) to dislodge the battery strap. Good times! Razz emoticon
Wow.. What a story!! Glad it ended ok.

It's easy to forget how dangerous batteries can be.

Looking good.
OP
@qascooter avatar
UTC

Veni, Vidi, Posti
79 P200E (Ruby), 62 Allstate (B-62), 63 VBB (Storm)
Joined: UTC
Posts: 5299
Location: Florence, OR
 
Veni, Vidi, Posti
@qascooter avatar
79 P200E (Ruby), 62 Allstate (B-62), 63 VBB (Storm)
Joined: UTC
Posts: 5299
Location: Florence, OR
UTC quote
Suibhne1 wrote:
Hey, what an epic thread!

I'm thinking of getting a P and I live in Oregon too (Eugene).
Since this thread is pretty recent, I'm wondering what you paid for the bike originally?

It looks amazing!
Thanks Suib! I paid $2k, then there was getting it here to Florence from Seattle. Another $450. Then rubber stuff and bits to get it dialed in. $300. So under $3k. I could have done it cheaper, but I had a good feeling about this one so it was worth a little extra.
@suibhne1 avatar
UTC

Member
2012 gts 300 super
Joined: UTC
Posts: 13
Location: Eugene OR
 
Member
@suibhne1 avatar
2012 gts 300 super
Joined: UTC
Posts: 13
Location: Eugene OR
UTC quote
That is about what I was thinking I would pay for a good runner.
What you have cooked up is well worth the 3k, kudos!
OP
@qascooter avatar
UTC

Veni, Vidi, Posti
79 P200E (Ruby), 62 Allstate (B-62), 63 VBB (Storm)
Joined: UTC
Posts: 5299
Location: Florence, OR
 
Veni, Vidi, Posti
@qascooter avatar
79 P200E (Ruby), 62 Allstate (B-62), 63 VBB (Storm)
Joined: UTC
Posts: 5299
Location: Florence, OR
UTC quote
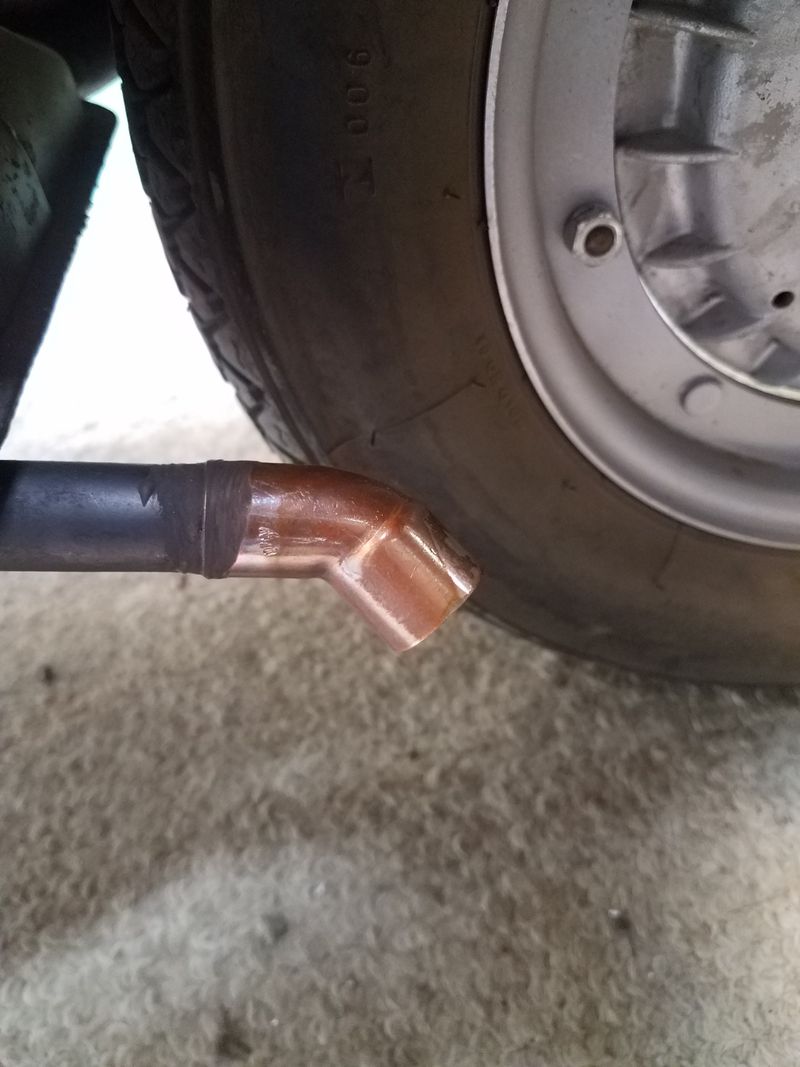
Exhaust deflector
I forgot to post this earlier. I wanted to deflect the exhaust and found a 3/4" copper 45 degree elbow to be the perfect fit. A little JB Weld, and it's solid. I need to paint it though...
The The elbow is straight 3/4" on one side, and enlarged on the other. The skinny fits perfect over the exhaust output.
@frank_n_stein avatar
UTC

Molto Verboso
Jet 200, P200E (x2), T5
Joined: UTC
Posts: 1401
Location: Paris & Los Angeles
 
Molto Verboso
@frank_n_stein avatar
Jet 200, P200E (x2), T5
Joined: UTC
Posts: 1401
Location: Paris & Los Angeles
UTC quote
Maybe try it before you get used to it: steel and copper have very different dilatation coefficients, and it might not hold when the pipe heats up.
OP
@qascooter avatar
UTC

Veni, Vidi, Posti
79 P200E (Ruby), 62 Allstate (B-62), 63 VBB (Storm)
Joined: UTC
Posts: 5299
Location: Florence, OR
 
Veni, Vidi, Posti
@qascooter avatar
79 P200E (Ruby), 62 Allstate (B-62), 63 VBB (Storm)
Joined: UTC
Posts: 5299
Location: Florence, OR
UTC quote
Frank N. Stein wrote:
Maybe try it before you get used to it: steel and copper have very different dilatation coefficients, and it might not hold when the pipe heats up.
Thanks for the info Frank. So far it's holding well. Time will tell....
OP
@qascooter avatar
UTC

Veni, Vidi, Posti
79 P200E (Ruby), 62 Allstate (B-62), 63 VBB (Storm)
Joined: UTC
Posts: 5299
Location: Florence, OR
 
Veni, Vidi, Posti
@qascooter avatar
79 P200E (Ruby), 62 Allstate (B-62), 63 VBB (Storm)
Joined: UTC
Posts: 5299
Location: Florence, OR
UTC quote
Philos wrote:
Maybe a couple of bits of thick electricians tape could serve the purpose.?
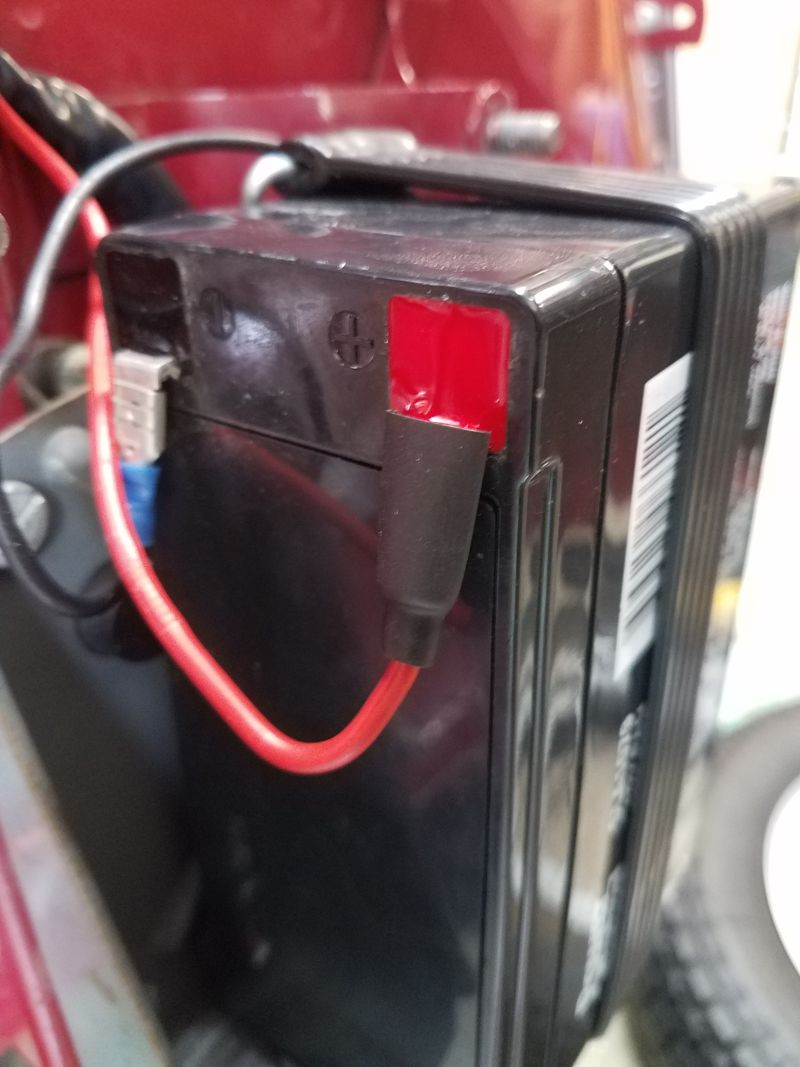
So I ended up using a piece of heat shrink tubing. Thanks again for pointing this out Philos!
Used heat shrink tubing to protect the positive connector, but just shrank the part on the connector so I can still remove it from the battery.
@lango avatar
UTC

Hooked
62 VBB 64 GL Rally 200s 74s-76-77 P200s 79-82
Joined: UTC
Posts: 128
Location: Tucson
 
Hooked
@lango avatar
62 VBB 64 GL Rally 200s 74s-76-77 P200s 79-82
Joined: UTC
Posts: 128
Location: Tucson
UTC quote
You are a motivational expert! I really like the copper on the exhaust & heat shrink on the battery!
OP
@qascooter avatar
UTC

Veni, Vidi, Posti
79 P200E (Ruby), 62 Allstate (B-62), 63 VBB (Storm)
Joined: UTC
Posts: 5299
Location: Florence, OR
 
Veni, Vidi, Posti
@qascooter avatar
79 P200E (Ruby), 62 Allstate (B-62), 63 VBB (Storm)
Joined: UTC
Posts: 5299
Location: Florence, OR
UTC quote
Lango wrote:
You are a motivational expert! I really like the copper on the exhaust & heat shrink on the battery!
Yes, my evil plan for scooter domination! Get everyone fired up to dial in their scooters, and the world will be a better place!

The copper bend has stayed on for over 100 miles, so I think it's on for good, and it does a good job of blowing the exhaust out and away from the spare.

So I would LOVE to see pics of your Rallys Lango, and of your P200s, but moreso of the Rallys! Nerd emoticon
@v_oodoo avatar
UTC

Style Maven
'74 50s x3 '87 PK125XL '92 PK50XL2 Plurimatic - & - '58 AllState '68 Sprint '66(?) 125 Super '72 DanMotor 150 Super and '04 Bajaj LML hybrid
Joined: UTC
Posts: 10136
Location: seattle/athens
 
Style Maven
@v_oodoo avatar
'74 50s x3 '87 PK125XL '92 PK50XL2 Plurimatic - & - '58 AllState '68 Sprint '66(?) 125 Super '72 DanMotor 150 Super and '04 Bajaj LML hybrid
Joined: UTC
Posts: 10136
Location: seattle/athens
UTC quote
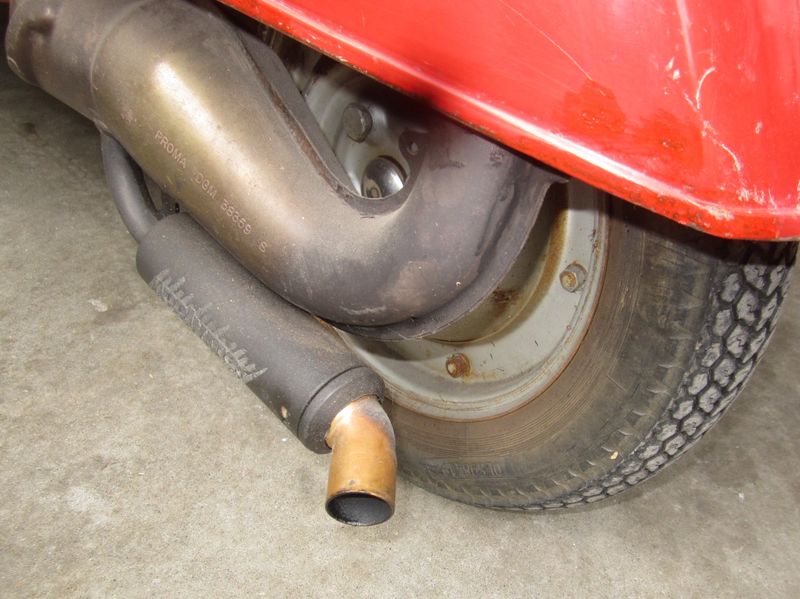
This scooter just keeps getting better, I never saw a guy so good at adding things to the bottom of his list as he crosses them off the top .The exhaust deflector is a nice touch and the copper looks good to me, a bit different. Here's another 45 degree ell on a smallie and turned out a bit more to avoid ever again having to clean nasty black splooge off the back tire :
The black doughnut around it is hi temp rubber and had a smaller rubber 45 degree outlet that tore off
This elbow slips over the outlet pipe & is secured by a screw out of sight behind the doughnut.
The black doughnut around it is hi temp rubber and had a smaller rubber 45 degree outlet that tore off This elbow slips over the outlet pipe & is secured by a screw out of sight behind the doughnut.
@lango avatar
UTC

Hooked
62 VBB 64 GL Rally 200s 74s-76-77 P200s 79-82
Joined: UTC
Posts: 128
Location: Tucson
 
Hooked
@lango avatar
62 VBB 64 GL Rally 200s 74s-76-77 P200s 79-82
Joined: UTC
Posts: 128
Location: Tucson
UTC quote
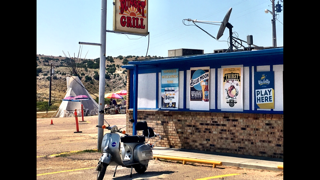
76 Rally in Casper for the Solar Eclipse. Sorry, terrible image. The 74 Rally White is still at my friends shop. https://modernvespa.com/forum/post2266030#2266030

I have put a few images onto the Soft Seize post. The last P is still in the Twin Cities hiding in a garage. I used it on the Land of 10 Scoots. We visit family there often and I have not decided where that will live yet. But here is a photo of that as well. One day I may get all of them together. But like that will never happen as I know one is always going to be in a shop or friends garage. I'm afraid if I have all of them together I'll realize how insane I am.
Forum member supplied image with no explanatory text
OP
@qascooter avatar
UTC

Veni, Vidi, Posti
79 P200E (Ruby), 62 Allstate (B-62), 63 VBB (Storm)
Joined: UTC
Posts: 5299
Location: Florence, OR
 
Veni, Vidi, Posti
@qascooter avatar
79 P200E (Ruby), 62 Allstate (B-62), 63 VBB (Storm)
Joined: UTC
Posts: 5299
Location: Florence, OR
UTC quote
Lango wrote:
One day I may get all of them together. But like that will never happen as I know one is always going to be in a shop or friends garage. I'm afraid if I have all of them together I'll realize how insane I am.
Nice Lango - thanks for the pictures, and the links. Smart to stash them in garages wherever you visit. That way you can ride where you are. And insane, maybe, but some of the coolest people I know are a little touched. Look at Voodoo.
OP
@qascooter avatar
UTC

Veni, Vidi, Posti
79 P200E (Ruby), 62 Allstate (B-62), 63 VBB (Storm)
Joined: UTC
Posts: 5299
Location: Florence, OR
 
Veni, Vidi, Posti
@qascooter avatar
79 P200E (Ruby), 62 Allstate (B-62), 63 VBB (Storm)
Joined: UTC
Posts: 5299
Location: Florence, OR
UTC quote
V oodoo wrote:
This scooter just keeps getting better, I never saw a guy so good at adding things to the bottom of his list as he crosses them off the top .The exhaust deflector is a nice touch and the copper looks good to me, a bit different. Here's another 45 degree ell on a smallie and turned out a bit more to avoid ever again having to clean nasty black splooge off the back tire :
Thanks Voodoo - Wait until you see what I'll be working on next week! It's a surprise. I did the copper bend for the same reason, to keep the possibility of any crap coming out of the exhaust away from the scooter. I think it's doing the job. And at some point I want to paint it black.

Back in 2004, I took a drill to the inside of my Bajaj exhaust through the output hole. I cut off the end and JBWelded a 45 copper pipe and painted it. Couldn't even tell. BTW, the holing of the baffles didn't do anything except make the bike sound better....
@philos avatar
UTC

Banned
2001 LML 150 2t
Joined: UTC
Posts: 382
Location: Queensland, Aus
 
Banned
@philos avatar
2001 LML 150 2t
Joined: UTC
Posts: 382
Location: Queensland, Aus
UTC quote
qascooter wrote:
Philos wrote:
Maybe a couple of bits of thick electricians tape could serve the purpose.?
So I ended up using a piece of heat shrink tubing. Thanks again for pointing this out Philos!
Nice job there. Perfecto!

Like others have mentioned.. I've never met anyone either who can tick off jobs so quickly. It's inspiring stuff.
@lango avatar
UTC

Hooked
62 VBB 64 GL Rally 200s 74s-76-77 P200s 79-82
Joined: UTC
Posts: 128
Location: Tucson
 
Hooked
@lango avatar
62 VBB 64 GL Rally 200s 74s-76-77 P200s 79-82
Joined: UTC
Posts: 128
Location: Tucson
UTC quote
You know whats going to happen, Qascooter is going to wake up one morning and there are going to be various bikes with Benjamins taped onto the headsets with wish lists parked in front of his garage.
Forum member supplied image with no explanatory text
OP
@qascooter avatar
UTC

Veni, Vidi, Posti
79 P200E (Ruby), 62 Allstate (B-62), 63 VBB (Storm)
Joined: UTC
Posts: 5299
Location: Florence, OR
 
Veni, Vidi, Posti
@qascooter avatar
79 P200E (Ruby), 62 Allstate (B-62), 63 VBB (Storm)
Joined: UTC
Posts: 5299
Location: Florence, OR
UTC quote
Philos wrote:
Nice job there. Perfecto!

Like others have mentioned.. I've never met anyone either who can tick off jobs so quickly. It's inspiring stuff.
Thanks Philos for the kind words. But I've got everyone fooled. When I have a chance to work on the scooter, I'll do two or three things on it and take a bunch of pictures. Then. I'll post over a series of days and it looks like I've been doing all kinds of stuff that took a bunch of time, when in reality its only been a half hour! Laughing emoticon
OP
@qascooter avatar
UTC

Veni, Vidi, Posti
79 P200E (Ruby), 62 Allstate (B-62), 63 VBB (Storm)
Joined: UTC
Posts: 5299
Location: Florence, OR
 
Veni, Vidi, Posti
@qascooter avatar
79 P200E (Ruby), 62 Allstate (B-62), 63 VBB (Storm)
Joined: UTC
Posts: 5299
Location: Florence, OR
UTC quote
Lango wrote:
You know whats going to happen, Qascooter is going to wake up one morning and there are going to be various bikes with Benjamins taped onto the headsets with wish lists parked in front of his garage.
Oh man, what are my neighbors gonna think?!? Razz emoticon Secretly I think this would be awesome, but don't tell anyone...
OP
@qascooter avatar
UTC

Veni, Vidi, Posti
79 P200E (Ruby), 62 Allstate (B-62), 63 VBB (Storm)
Joined: UTC
Posts: 5299
Location: Florence, OR
 
Veni, Vidi, Posti
@qascooter avatar
79 P200E (Ruby), 62 Allstate (B-62), 63 VBB (Storm)
Joined: UTC
Posts: 5299
Location: Florence, OR
UTC quote
Blink...blink.....blink
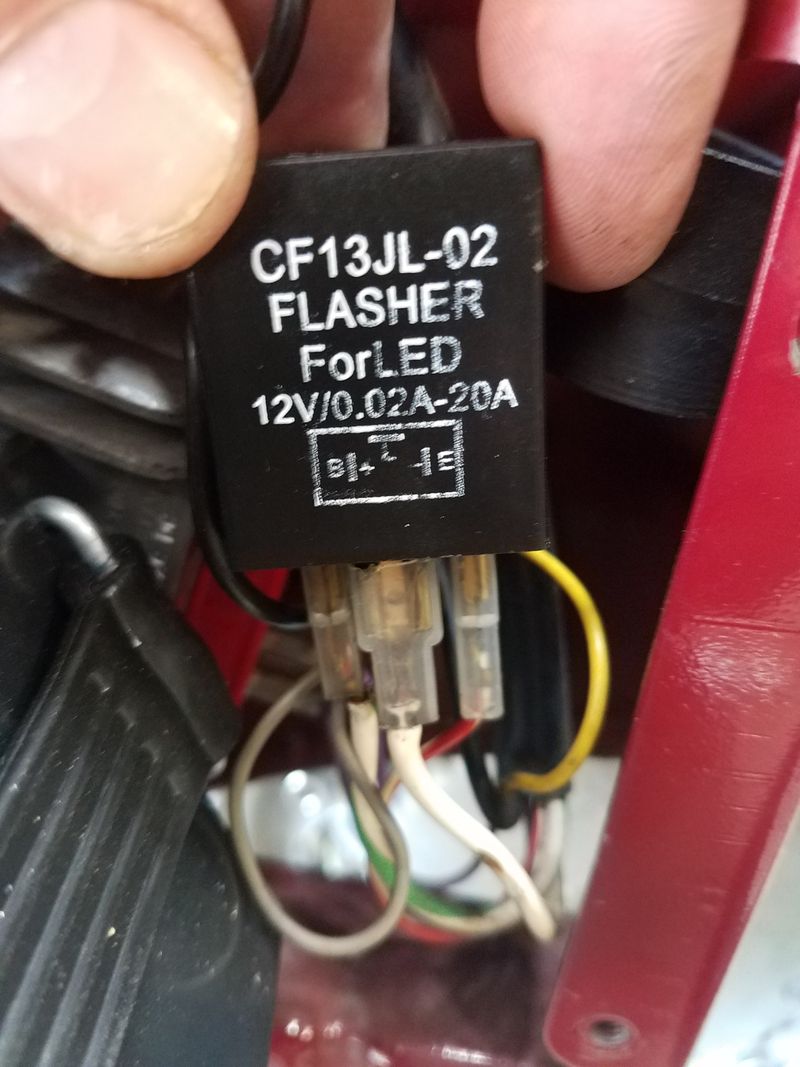
LED blinkers. Since FatBear5 sent me four LED bulbs (Thanks FB!), I've been trying to get all four of them to work, which means LED relay. Two work OK, but the LED bulbs flash fast, and the indicator light on the dash doesn't work in conjunction with this. I know, I know, picky, picky, picky.

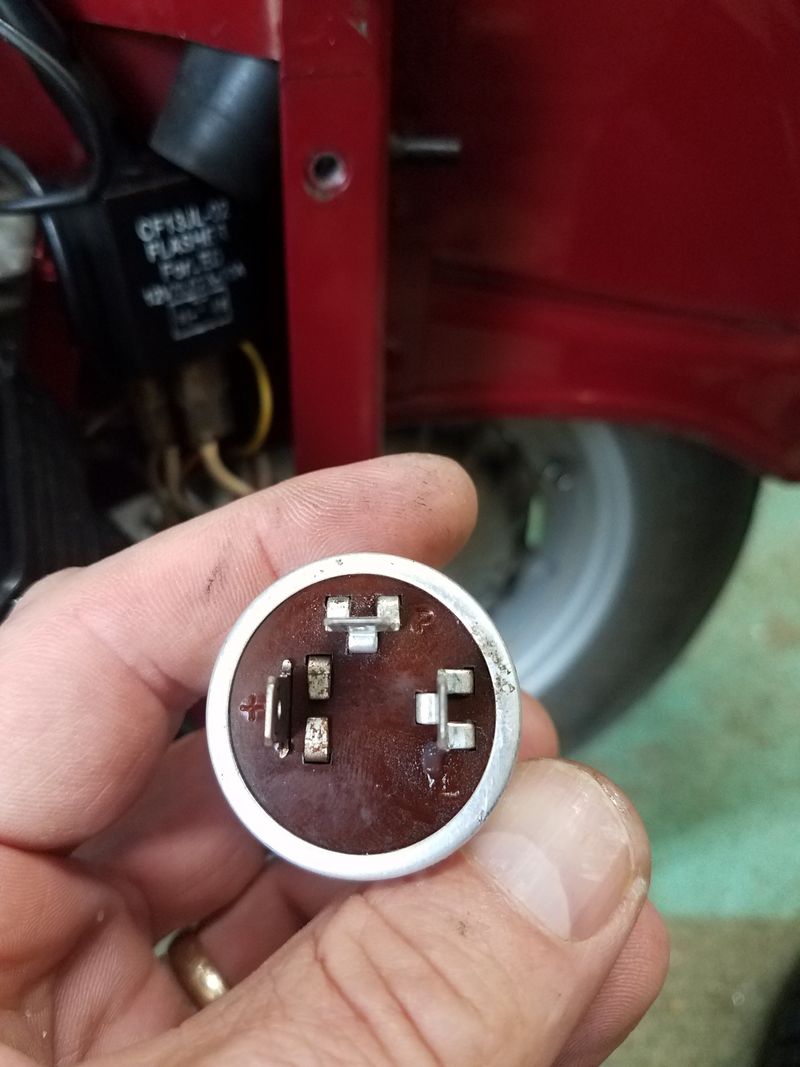
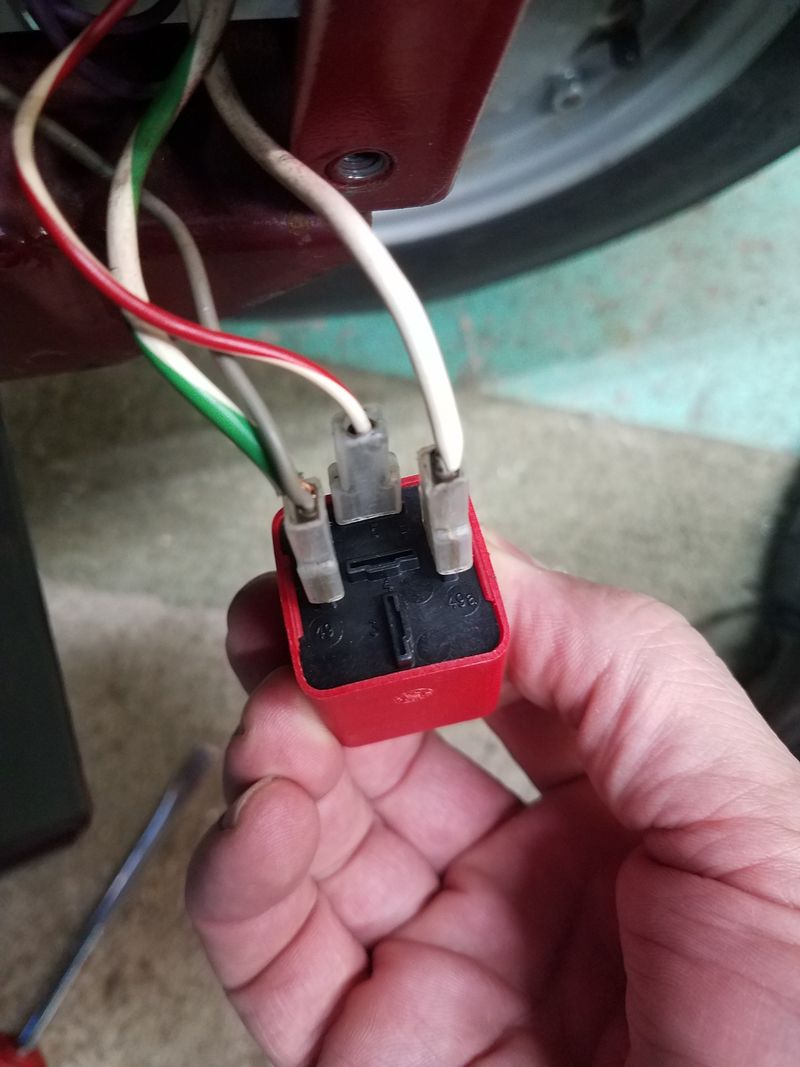
Let's fix this, shall we? So I bought an LED relay (3 pin) thinking it'd work. It does, sort of. It rhythmically runs the LED bulbs, but not the dash light. Upon further examination, the relay I bought just has a +, - and L. The original is +, P and L. By now you've got to surmise I don't have a clue what I'm doing! Razz emoticon

Back to Amazon and the internet, and I got another LED relay, this one with a +, P and L. I'm assuming the P is for pilot light. So I install this relay - and - It works, sort of. The pilot light flashes properly, but now stays on ever so slightly, and it doesn't run all four LEDs. It only works in conjunction with a regular bulb! Say whaaaaaaatttt?

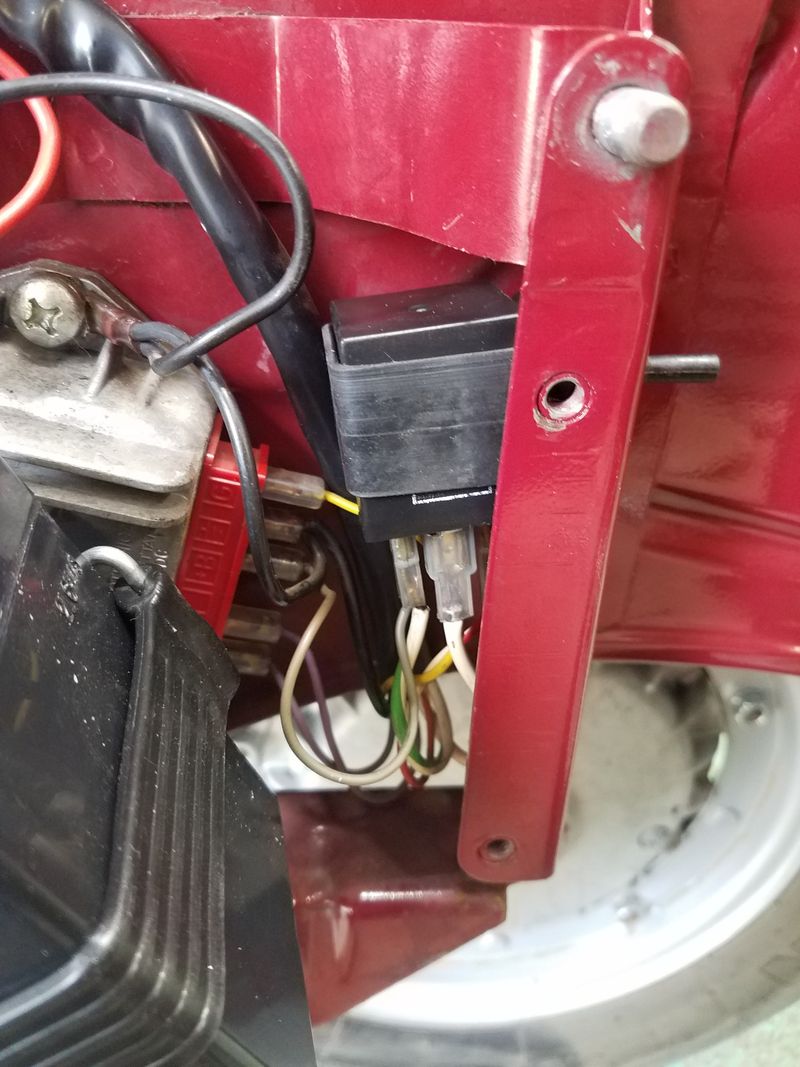
So where I'm at is this: I put the square LED relay without an indicator light on the dash. At least it powers all the LEDs correctly, so that's something! Not perfect, but close enough for now.

SuperBrightLEDs has a relay with a P tab so that is the next relay I'm going to try. Amazon is just so easy on the returns though! But in the meantime, at least the LED lights are flashing appropriately!

So if anybody knows of the exact 3 pin LED relay, the info would be greatly appreciated!

On with the pictures!
Original relay - notice the +, P, and L
Temporary fix - Notice the +, - and L. At least all the LEDs are flashing, just no dash indicator
Square peg in a round hole-der. Nice thing about rubber, it conforms...
@exmayor avatar
UTC

Hooked
64 V90 survivor '65 Allstate survivor. '75 V90 SOLD. '77 P200 SOLD
Joined: UTC
Posts: 482
Location: Madison WI
 
Hooked
@exmayor avatar
64 V90 survivor '65 Allstate survivor. '75 V90 SOLD. '77 P200 SOLD
Joined: UTC
Posts: 482
Location: Madison WI
UTC quote
qascooter
I had a similar problem with a '72 Honda 125 build I did a couple of years ago.
Blinker indicator in speedo was doing all kind of weird things. I used this diode from superbrite and it totally resolved the problem. Might be the solution for you.

https://www.superbrightleds.com/moreinfo/flashers-load-resistors/metric-bike-diode-kit/1190/2805/

Hope this helps
OP
@qascooter avatar
UTC

Veni, Vidi, Posti
79 P200E (Ruby), 62 Allstate (B-62), 63 VBB (Storm)
Joined: UTC
Posts: 5299
Location: Florence, OR
 
Veni, Vidi, Posti
@qascooter avatar
79 P200E (Ruby), 62 Allstate (B-62), 63 VBB (Storm)
Joined: UTC
Posts: 5299
Location: Florence, OR
UTC quote
exmayor wrote:
qascooter
I had a similar problem with a '72 Honda 125 build I did a couple of years ago.
Blinker indicator in speedo was doing all kind of weird things. I used this diode from superbrite and it totally resolved the problem. Might be the solution for you.

https://www.superbrightleds.com/moreinfo/flashers-load-resistors/metric-bike-diode-kit/1190/2805/

Hope this helps
Thanks exmayor. I'm hoping to just find a replacement relay that'll work for LEDs. I'm going to check it out regardless. Thanks again!
OP
@qascooter avatar
UTC

Veni, Vidi, Posti
79 P200E (Ruby), 62 Allstate (B-62), 63 VBB (Storm)
Joined: UTC
Posts: 5299
Location: Florence, OR
 
Veni, Vidi, Posti
@qascooter avatar
79 P200E (Ruby), 62 Allstate (B-62), 63 VBB (Storm)
Joined: UTC
Posts: 5299
Location: Florence, OR
UTC quote
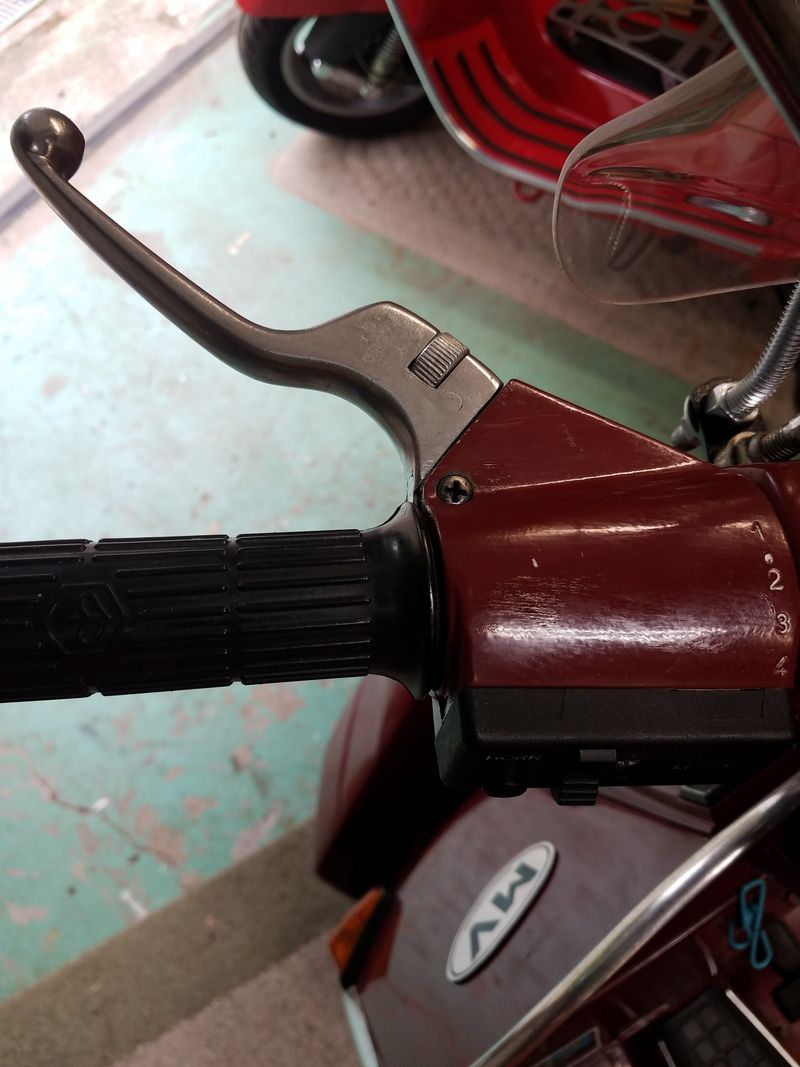
Adjustable levers
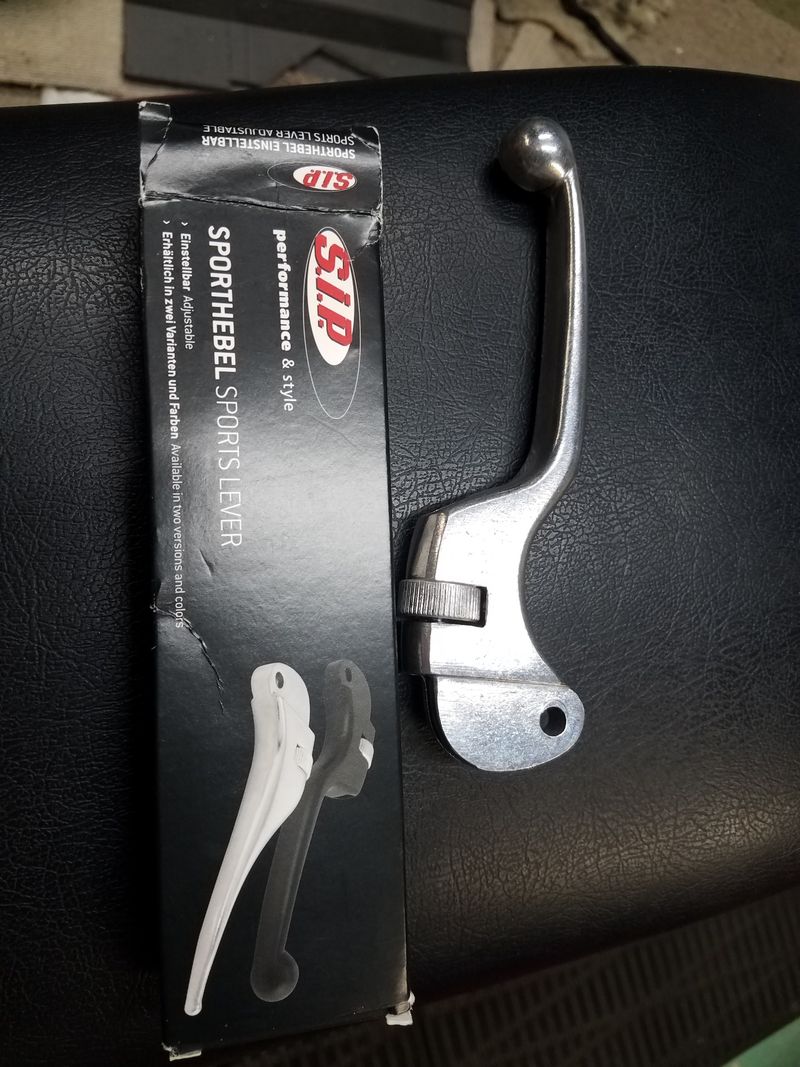
I needed to adjust the clutch cable so decided to finally install the adjustable levers I got a while back. Easy 1/2 hour right? WRONG!!!!!!!

First off, I remove the old lever and the layers of dried grease on the washers that fit in there, then the pinch bolt at the clutch lever. The thing is mangled, but I just figured it wasn't a 6mm - the boneheadness is starting - so I grab my second tool of choice - needle nose vice grips.

Got the old cable out and put the new cable through the adjustable lever, and through the cable housing. So far so good. Then I was lazy and didn't bother to get the new pinch bolt and just used the old one. - 2nd boneheaded maneuver - finally got it installed and adjusted.

So I open the package for the 2nd adjustable lever for the brake and fiddle with it. It works great - wait a minute - I don't remember the lever I just installed working this well, as in, I don't think it was working at all!

Oh hell, so I proceed to remove the just installed lever and replace it with the lever that the adjuster seems to work properly. I cannot reinsert the new cable because I mangled it with the old pinchbolt - 3rd boneheaded maneuver, or was that 4th? At this point, I lost count.

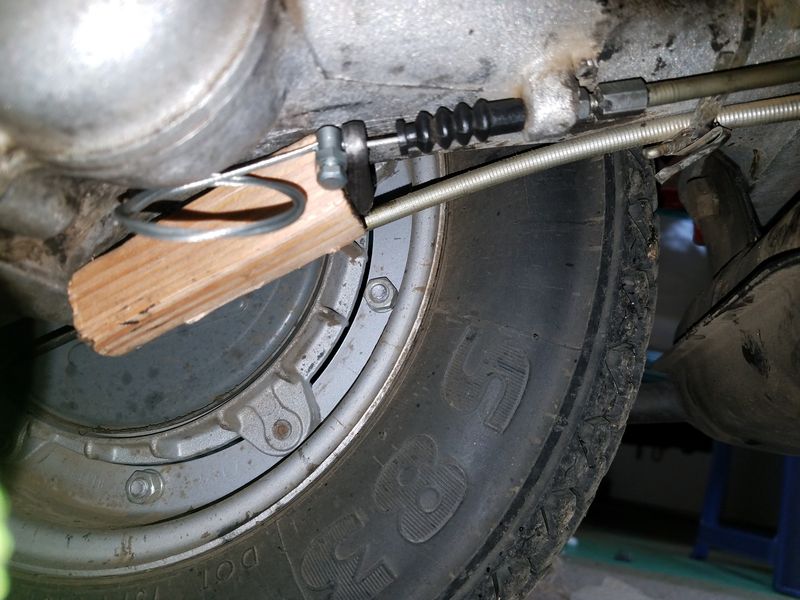
I install the working adjustable lever for the clutch, new backup to the backup cable (I'm out now), and new pinch bolt. Takes me 5 minutes with the proper wrenches, and the little block holding the clutch arm.

Phew - I got it done, but it took an hour! and lots of mistakes. I ASSUMED the adjustable lever adjusted properly, when in reality, it was not working out of the box. I did put an adjustable wrench to the adjustment wheel and managed to get it to move, just barely. I'll call Dave and get it sorted.

On the plus side - the clutch is adjusted, and it'll be super easy to do later when the cable stretches out! So I don't get to cross it off my list because I only did one lever!
The adjustable lever - one of them didn't work properly out of the box....
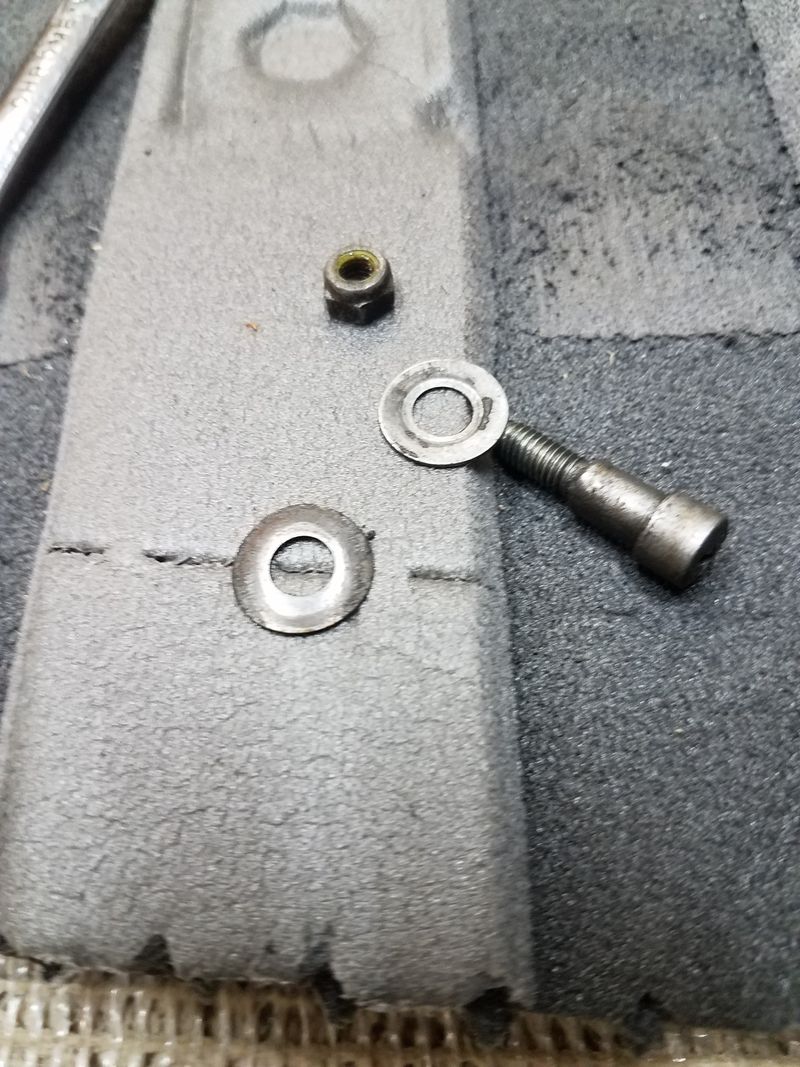
Washers and bolt for the lever.
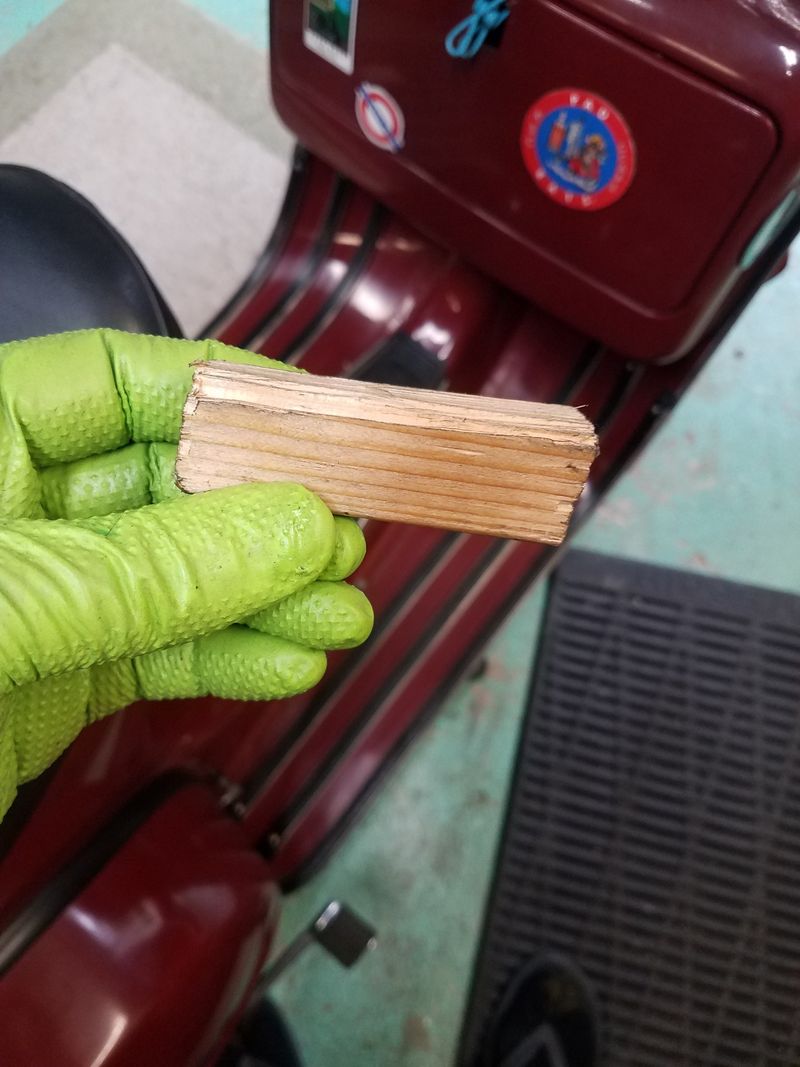
This little chunk of wood sure saved some time!
The block in action.
Check it out - I can adjust the clutch without laying on my side! :P
OP
@qascooter avatar
UTC

Veni, Vidi, Posti
79 P200E (Ruby), 62 Allstate (B-62), 63 VBB (Storm)
Joined: UTC
Posts: 5299
Location: Florence, OR
 
Veni, Vidi, Posti
@qascooter avatar
79 P200E (Ruby), 62 Allstate (B-62), 63 VBB (Storm)
Joined: UTC
Posts: 5299
Location: Florence, OR
UTC quote
Rack
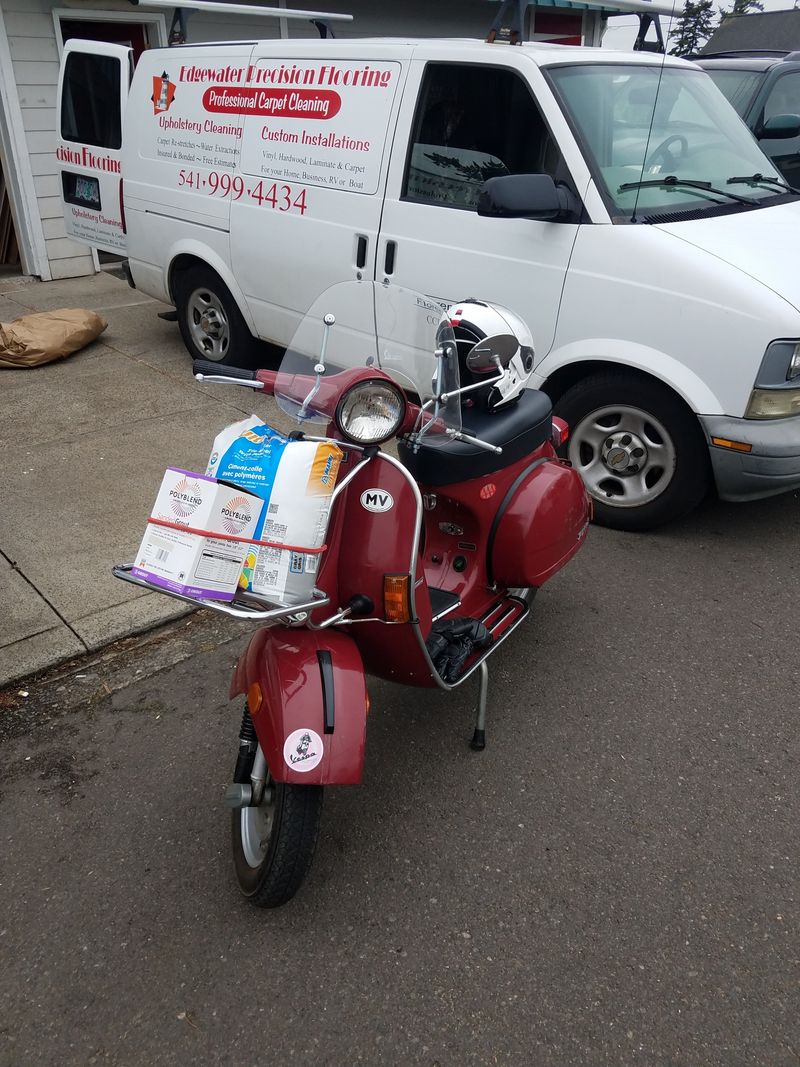
So the rack works fantastic! I carried this opened bag of thinset to a friend of mine while I was out on a different errand. That's about 50lbs of weight. Could barely notice. Rack went on the scooter in less than a minute, and off in the same amount of time. I Love it!

I want to find a collapsible crate that I can store with the rack so when the kitchen cabinets are bare and the fridge is empty, the rack and crate can haul the goods.
Hauling machine!
Hauling machine!
@kimono32 avatar
UTC

Molto Verboso
'66 Super 150
Joined: UTC
Posts: 1005
Location: MN
 
Molto Verboso
@kimono32 avatar
'66 Super 150
Joined: UTC
Posts: 1005
Location: MN
UTC quote
Ooooh, I like it!! Especially the quick on/off feature. Gonna keep my eyes peeled for something similar. Good work.
@v_oodoo avatar
UTC

Style Maven
'74 50s x3 '87 PK125XL '92 PK50XL2 Plurimatic - & - '58 AllState '68 Sprint '66(?) 125 Super '72 DanMotor 150 Super and '04 Bajaj LML hybrid
Joined: UTC
Posts: 10136
Location: seattle/athens
 
Style Maven
@v_oodoo avatar
'74 50s x3 '87 PK125XL '92 PK50XL2 Plurimatic - & - '58 AllState '68 Sprint '66(?) 125 Super '72 DanMotor 150 Super and '04 Bajaj LML hybrid
Joined: UTC
Posts: 10136
Location: seattle/athens
UTC quote
OK, looks pretty nice and it is so practical, but when loaded doesn't that make it harder to pop the front wheel off the ground?
OP
@qascooter avatar
UTC

Veni, Vidi, Posti
79 P200E (Ruby), 62 Allstate (B-62), 63 VBB (Storm)
Joined: UTC
Posts: 5299
Location: Florence, OR
 
Veni, Vidi, Posti
@qascooter avatar
79 P200E (Ruby), 62 Allstate (B-62), 63 VBB (Storm)
Joined: UTC
Posts: 5299
Location: Florence, OR
UTC quote
V oodoo wrote:
OK, looks pretty nice and it is so practical, but when loaded doesn't that make it harder to pop the front wheel off the ground?
Amazingly, not by much! Razz emoticon It only came off the ground a little bit. This scooter is awesome! Scooter emoticon
OP
@qascooter avatar
UTC

Veni, Vidi, Posti
79 P200E (Ruby), 62 Allstate (B-62), 63 VBB (Storm)
Joined: UTC
Posts: 5299
Location: Florence, OR
 
Veni, Vidi, Posti
@qascooter avatar
79 P200E (Ruby), 62 Allstate (B-62), 63 VBB (Storm)
Joined: UTC
Posts: 5299
Location: Florence, OR
UTC quote
LED blinkers - Sorted!
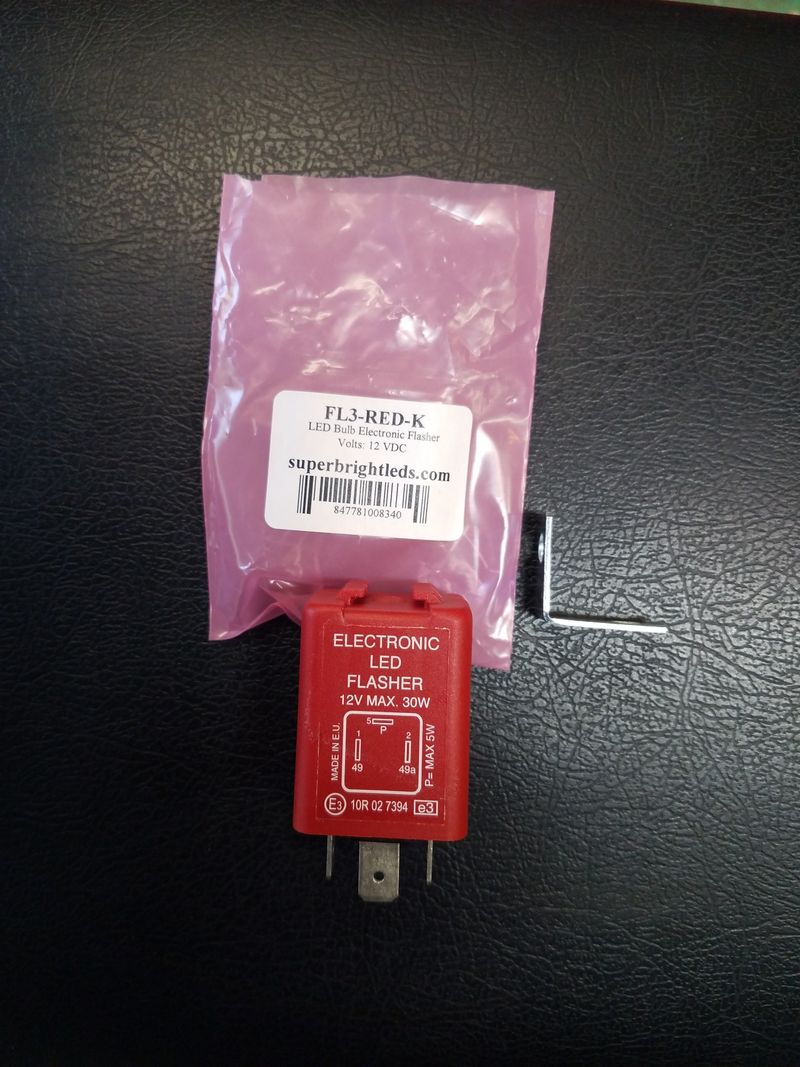
I bought a 3rd LED flasher relay, this time from SuperBrightLEDs.com, and it works! Woohooo!!!
It has the 3 pin +,L,P configuration and works the way it should. Mix LED and Incandescent bulbs, no problem! All LEDs - no problem. The relay doesn't make a sound and was less than $15 including shipping.

I made a .mp4 of it working but cannot add it in here, so you'll just have to take my word for it!
This is the relay that works from SuperBrightLEDs
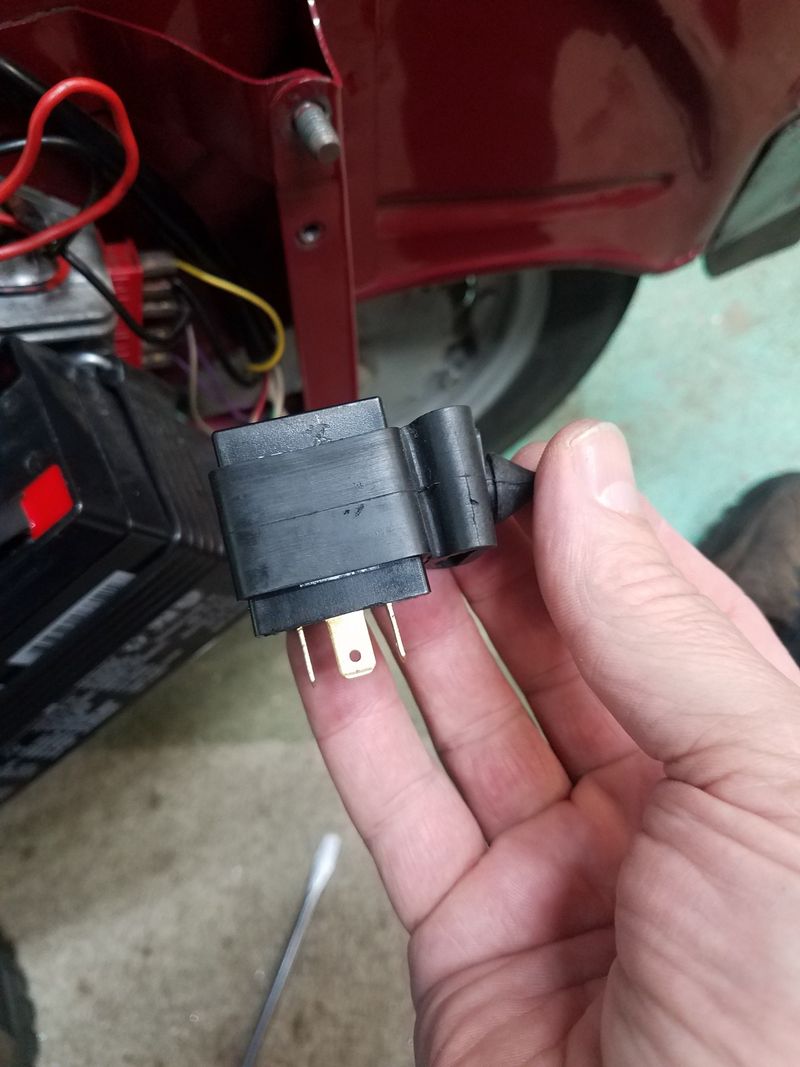
This is the temporary LED relay (doesn't drive the dash light). I have it in the original rubber holder, and it's easier to remover the relay and holder together.
Relay wired up. From left to right, Power (2 wires), Pilot (or dash), Blinkers (L)
OP
@qascooter avatar
UTC

Veni, Vidi, Posti
79 P200E (Ruby), 62 Allstate (B-62), 63 VBB (Storm)
Joined: UTC
Posts: 5299
Location: Florence, OR
 
Veni, Vidi, Posti
@qascooter avatar
79 P200E (Ruby), 62 Allstate (B-62), 63 VBB (Storm)
Joined: UTC
Posts: 5299
Location: Florence, OR
UTC quote
Blink vid
I think I found a way to link a vid without a Vimeo account. Let's see: https://drive.google.com/open?id=11EEULSrXMxNL73mCEcl2ToN1QIz8p3_D
OP
@qascooter avatar
UTC

Veni, Vidi, Posti
79 P200E (Ruby), 62 Allstate (B-62), 63 VBB (Storm)
Joined: UTC
Posts: 5299
Location: Florence, OR
 
Veni, Vidi, Posti
@qascooter avatar
79 P200E (Ruby), 62 Allstate (B-62), 63 VBB (Storm)
Joined: UTC
Posts: 5299
Location: Florence, OR
UTC quote
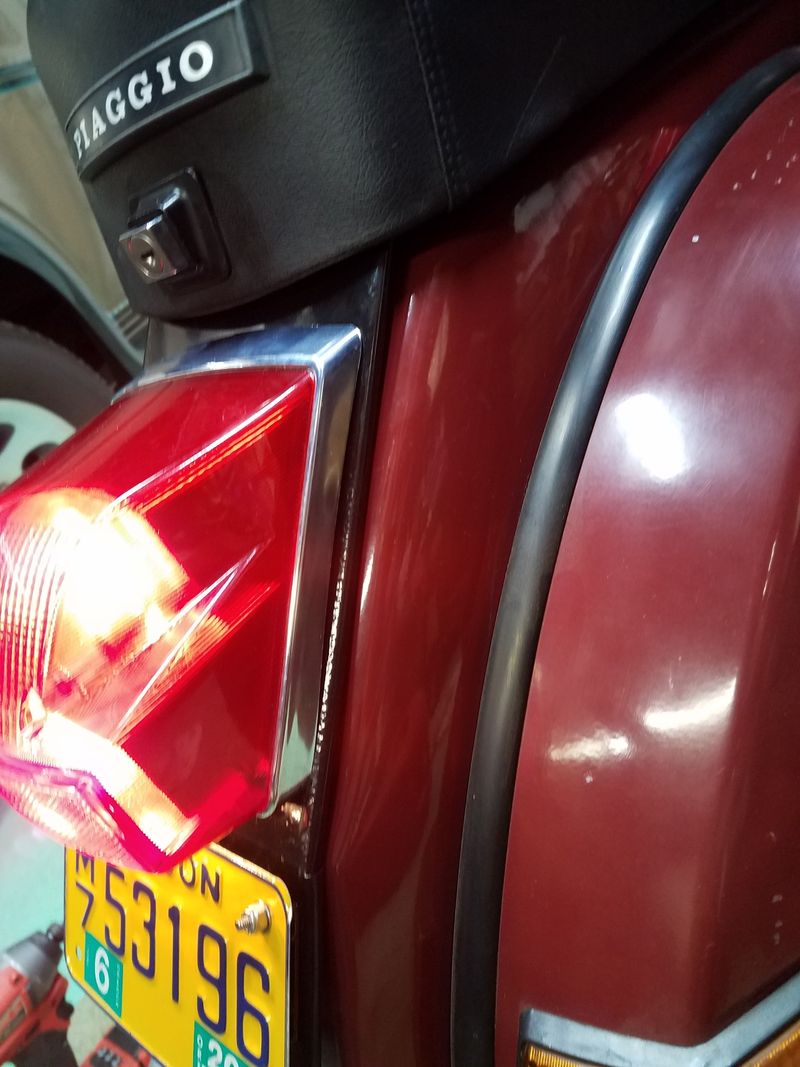
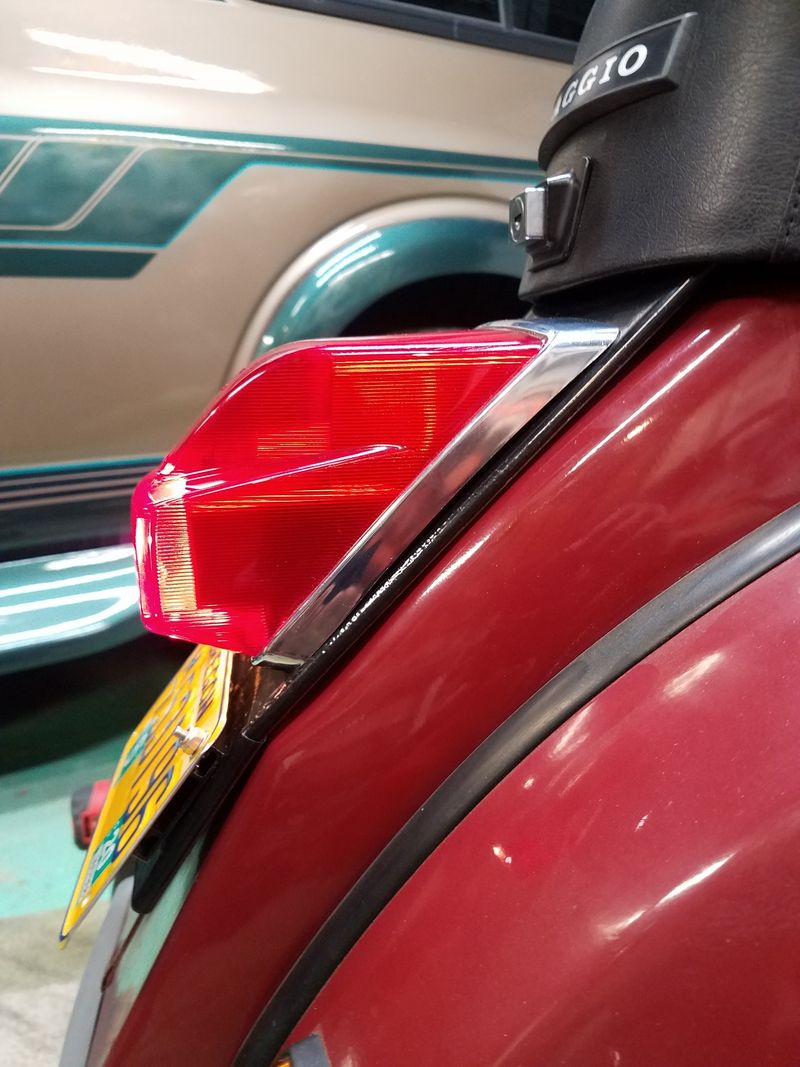
Euro taillight - no holes
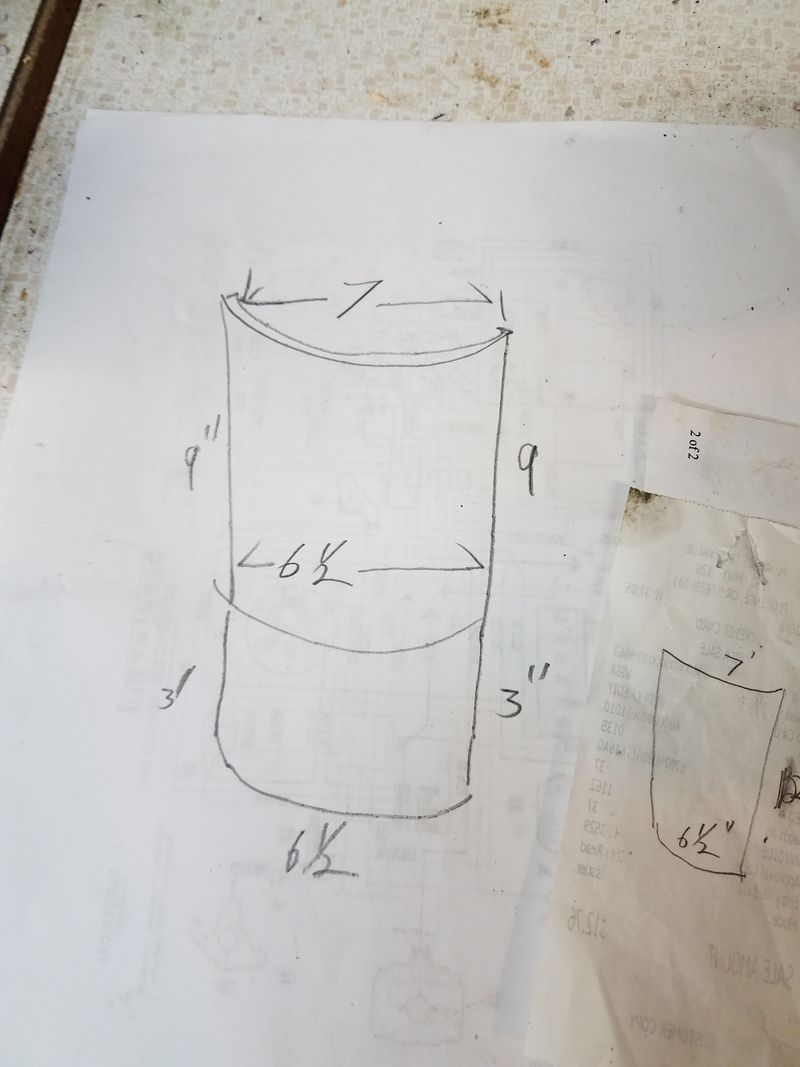
It all starts with an idea, then it percolates, then a drawing is made, then after a bunch of tries, the idea comes to fruition.

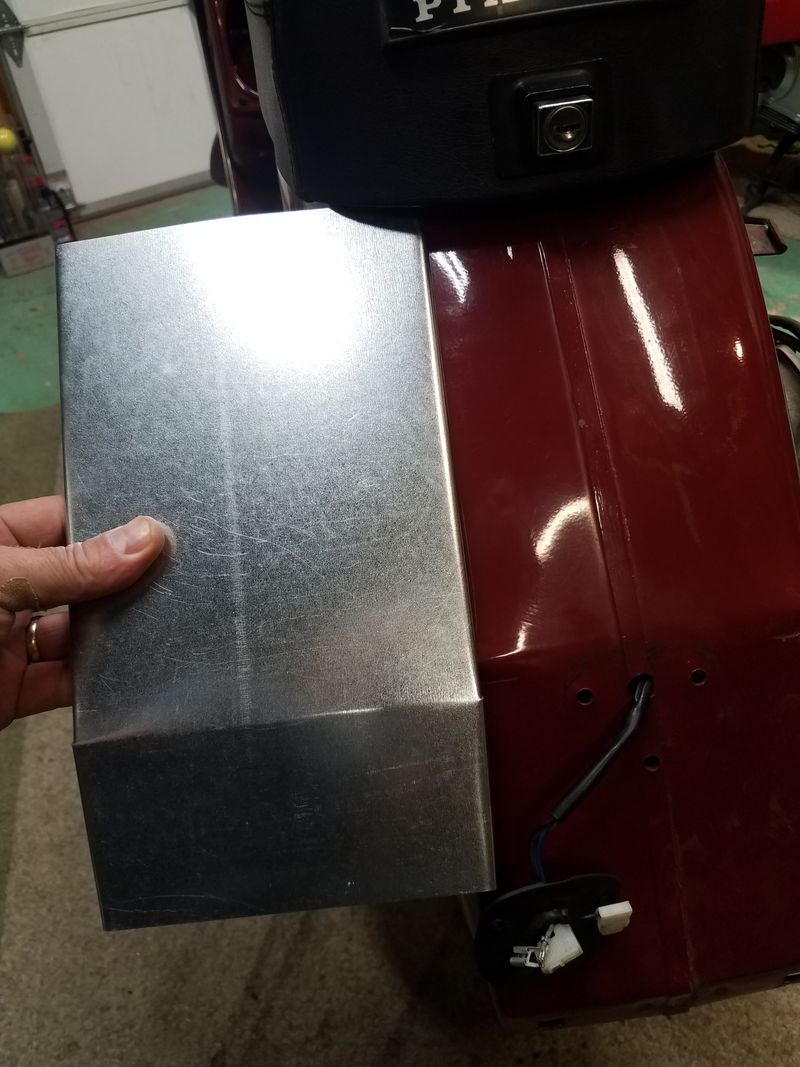
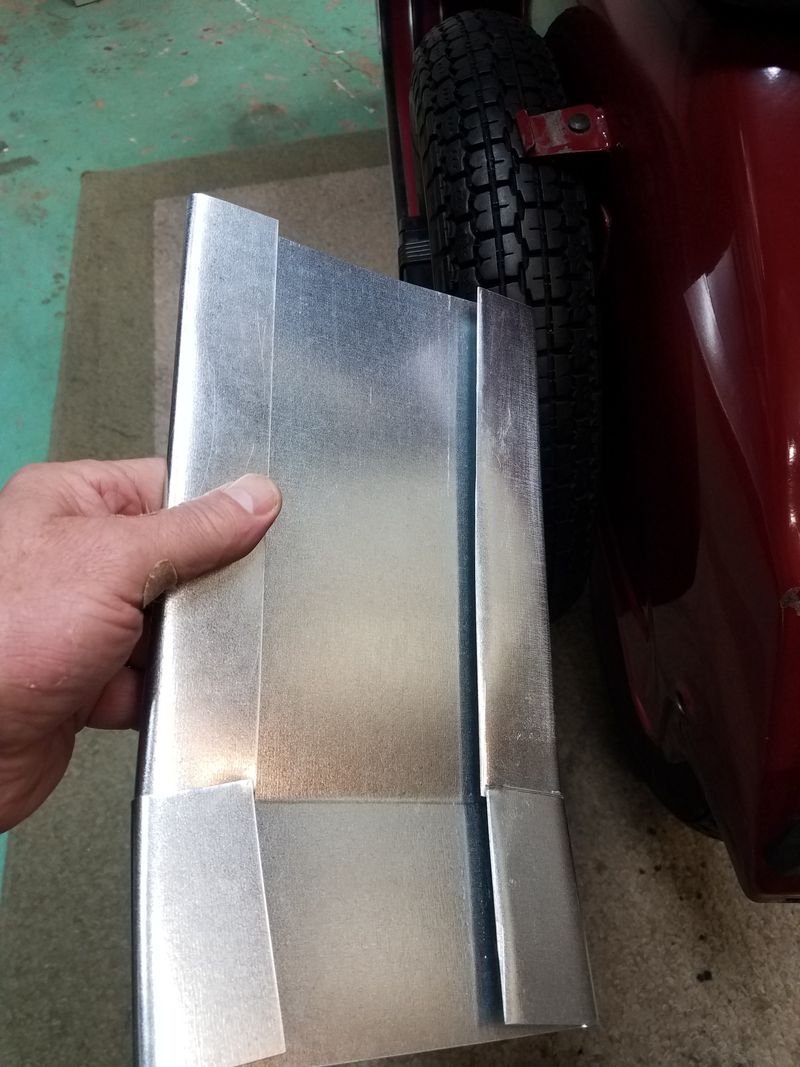
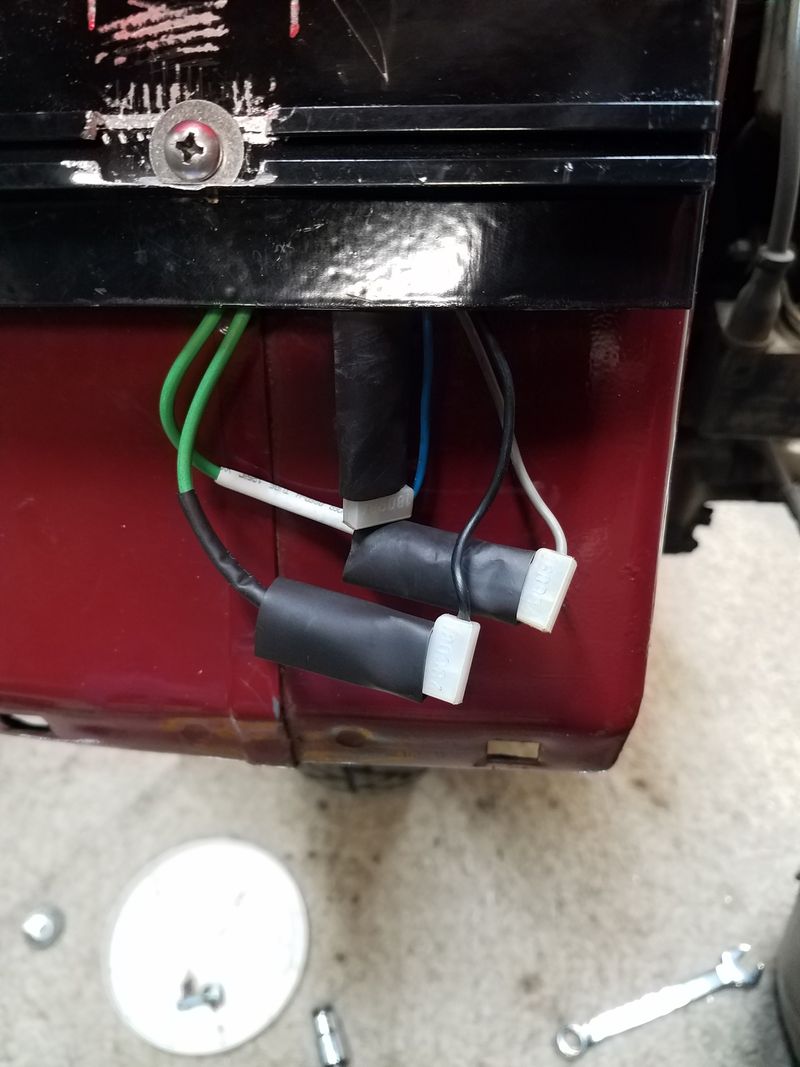
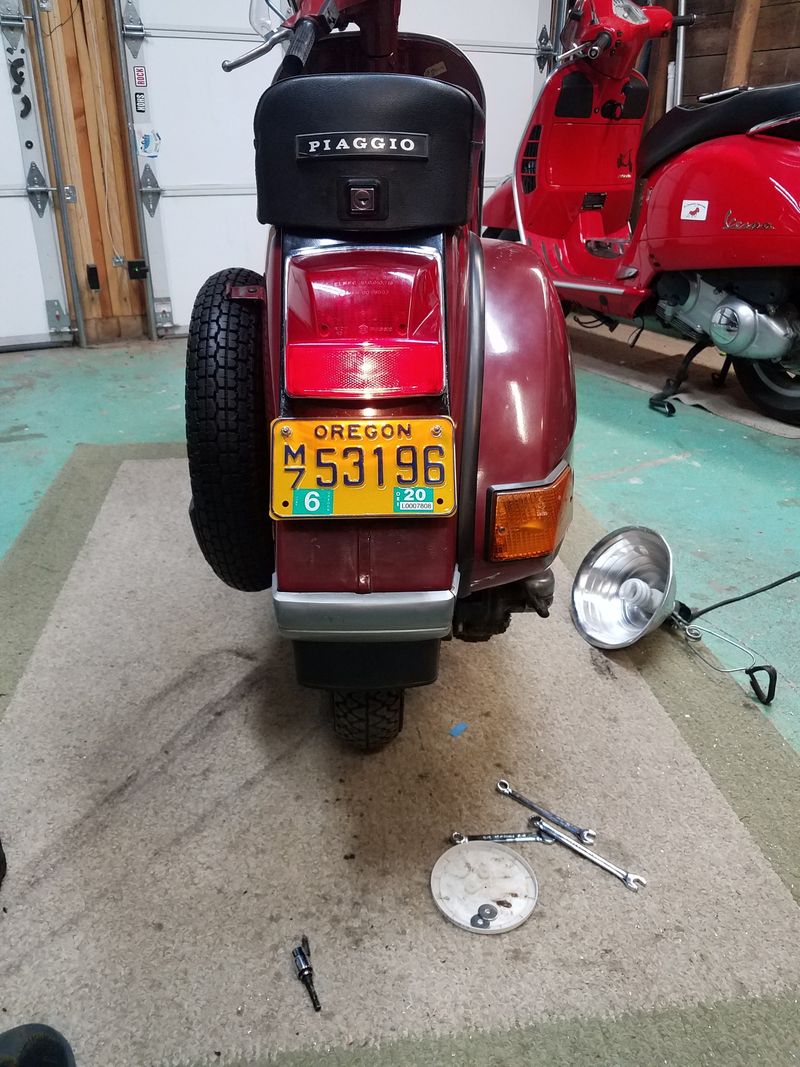
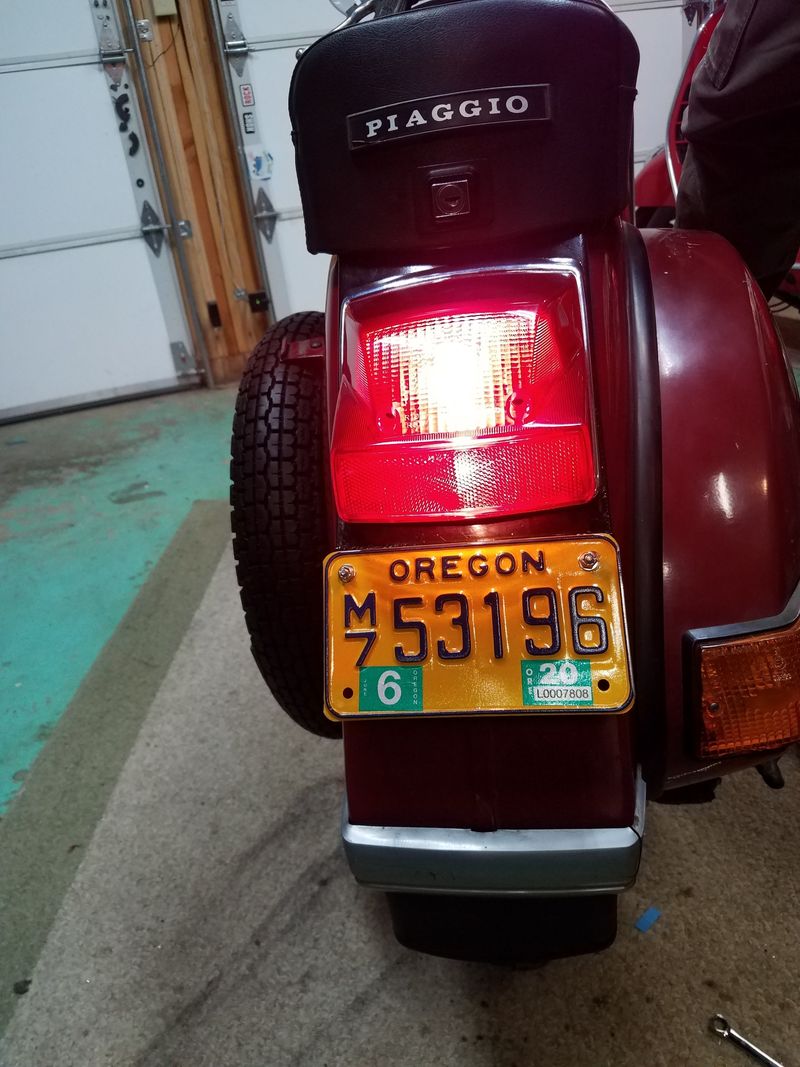
I have managed to install a Euro taillight without modifying the existing tractor wiring or drilling holes in the fender. Here's how: I made a sleeve or offset to bolt the Euro light to, and for the wires to be in, and bolt on with existing tractor holes and shoe goo. Pictures will help.
The drawing...
The drawing...
The bent up piece of sheet metal to match the drawing.
Here is the back side of the sheet metal.
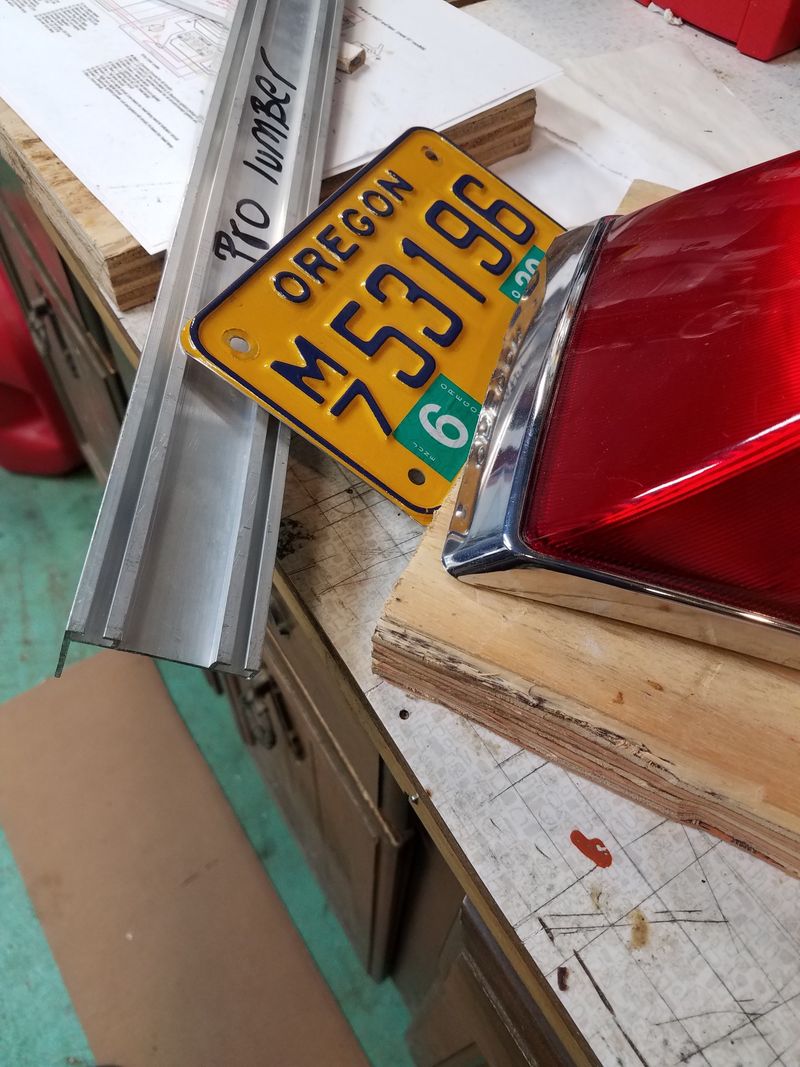
This is some leftover aluminum garage door base that just happens to have channels that are exactly the spacing of the three holes of the tractor light mounting. Should work nicely to mount the license plate.
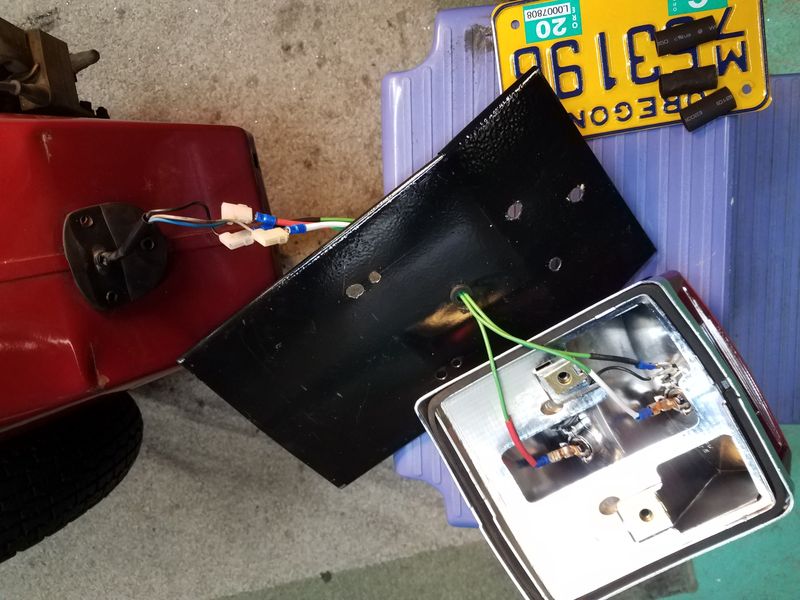
Painted mounting chase with extension wires. I made three wire extensions to go from the original wiring to the new light. I didn't want to cut the ends of the wires and they wouldn't fit through the rubber grommet.
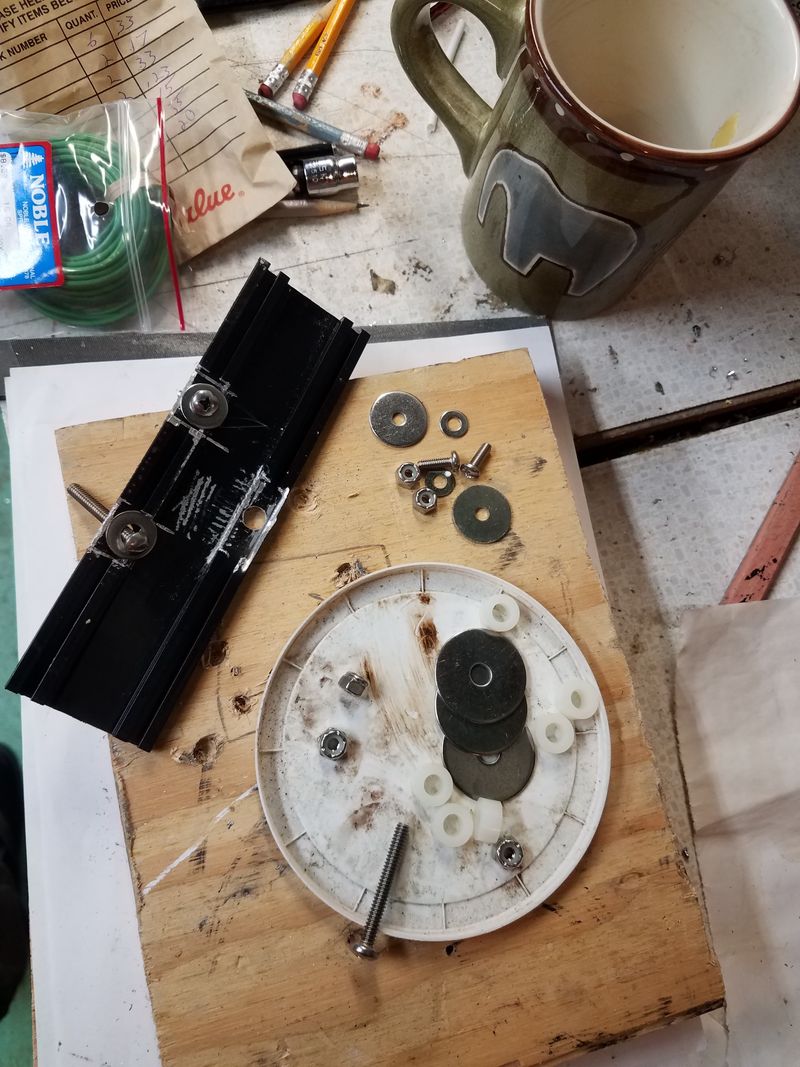
Nuts and bolts, and the piece of threshold that'll be used to attach the mounting chase and license plate. The original rubber seal for the 3 holes is still installed.
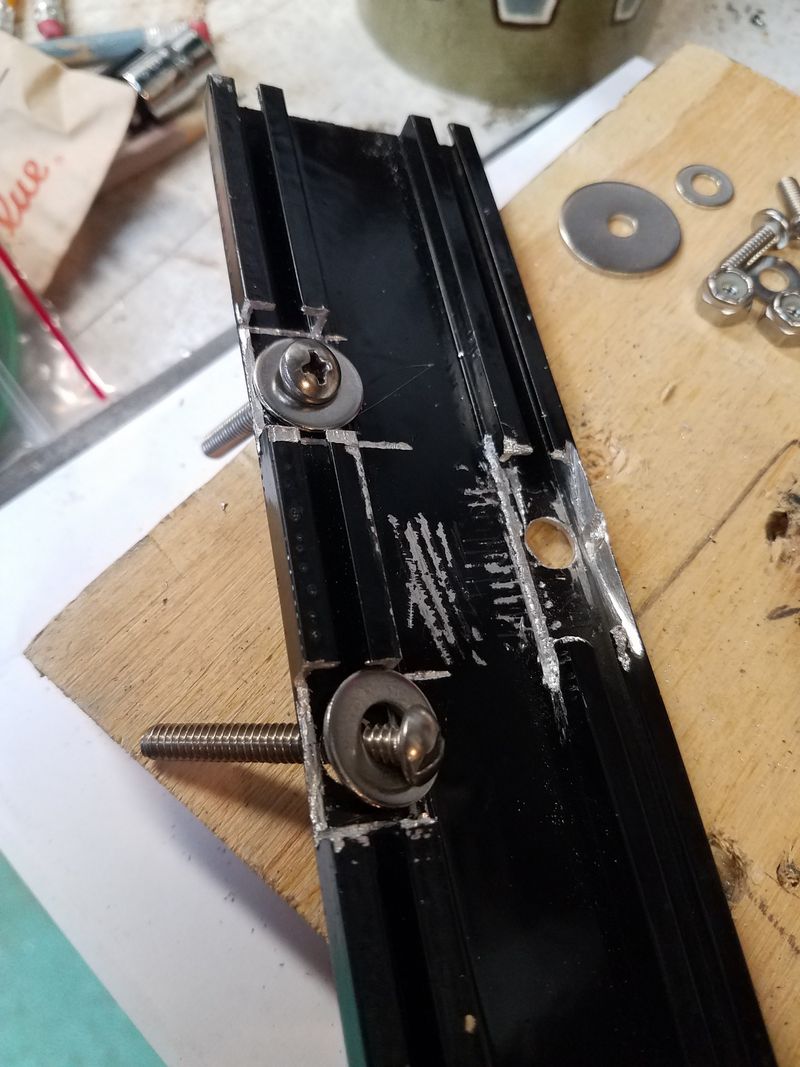
This is the license plate mount with the SS bolts
Wires dangling - they tuck up underneath nicely!
Running Light
Running Light
Brake Light.
Brake Light.
Side closeup
Side closeup
Another side closeup
OP
@qascooter avatar
UTC

Veni, Vidi, Posti
79 P200E (Ruby), 62 Allstate (B-62), 63 VBB (Storm)
Joined: UTC
Posts: 5299
Location: Florence, OR
 
Veni, Vidi, Posti
@qascooter avatar
79 P200E (Ruby), 62 Allstate (B-62), 63 VBB (Storm)
Joined: UTC
Posts: 5299
Location: Florence, OR
UTC quote
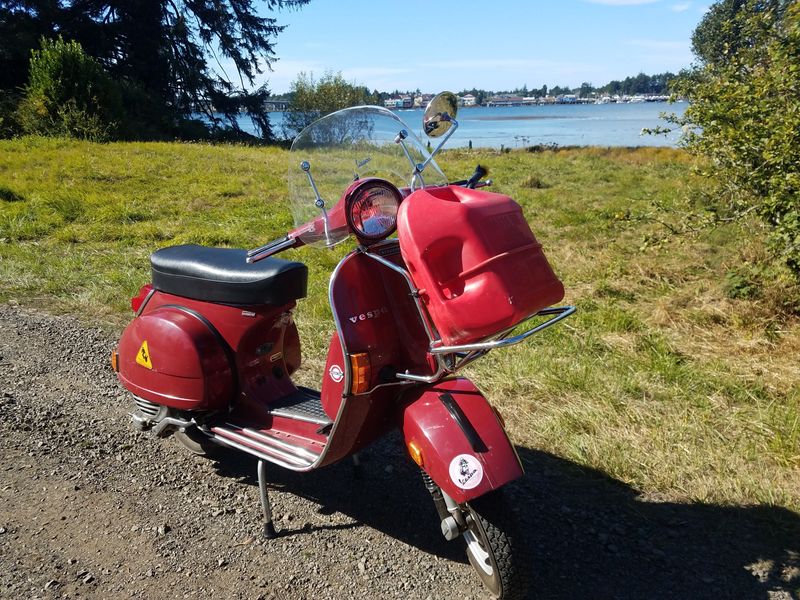
Haulin Gass
The gas station attendant (here in Oregon they are required to pump your gas, but always let motorcycles fill their own), says: "so how many miles can you go with that setup - 500?". What a crack up.

He had a few stories for me about riding a Lambretta when he was a kid and said it was cool to see that she's not a "hanger queen" and being used. Most definitely!
This rack is AWESOME! Gotta find that folding crate for grocery store runs...
@mjrally avatar
UTC

Veni, Vidi, Posti
73 Rally, 76 ET3, 80 P200, 61 Ser 2, 65 Silver Special
Joined: UTC
Posts: 5363
Location: Oceanside, CA
 
Veni, Vidi, Posti
@mjrally avatar
73 Rally, 76 ET3, 80 P200, 61 Ser 2, 65 Silver Special
Joined: UTC
Posts: 5363
Location: Oceanside, CA
UTC quote
Nice work so far! My only regret using a front rack is the circular black buffers ate into my paint on the legshield. You might look into some clear vinyl stickers/wrap in the spots the rubber sits. Shame to ruin some pretty original paint.
OP
@qascooter avatar
UTC

Veni, Vidi, Posti
79 P200E (Ruby), 62 Allstate (B-62), 63 VBB (Storm)
Joined: UTC
Posts: 5299
Location: Florence, OR
 
Veni, Vidi, Posti
@qascooter avatar
79 P200E (Ruby), 62 Allstate (B-62), 63 VBB (Storm)
Joined: UTC
Posts: 5299
Location: Florence, OR
UTC quote
MJRally wrote:
Nice work so far! My only regret using a front rack is the circular black buffers ate into my paint on the legshield. You might look into some clear vinyl stickers/wrap in the spots the rubber sits. Shame to ruin some pretty original paint.
Thanks for the heads up! I'll stop by the local sign shop and see what they've got.
OP
@qascooter avatar
UTC

Veni, Vidi, Posti
79 P200E (Ruby), 62 Allstate (B-62), 63 VBB (Storm)
Joined: UTC
Posts: 5299
Location: Florence, OR
 
Veni, Vidi, Posti
@qascooter avatar
79 P200E (Ruby), 62 Allstate (B-62), 63 VBB (Storm)
Joined: UTC
Posts: 5299
Location: Florence, OR
UTC quote
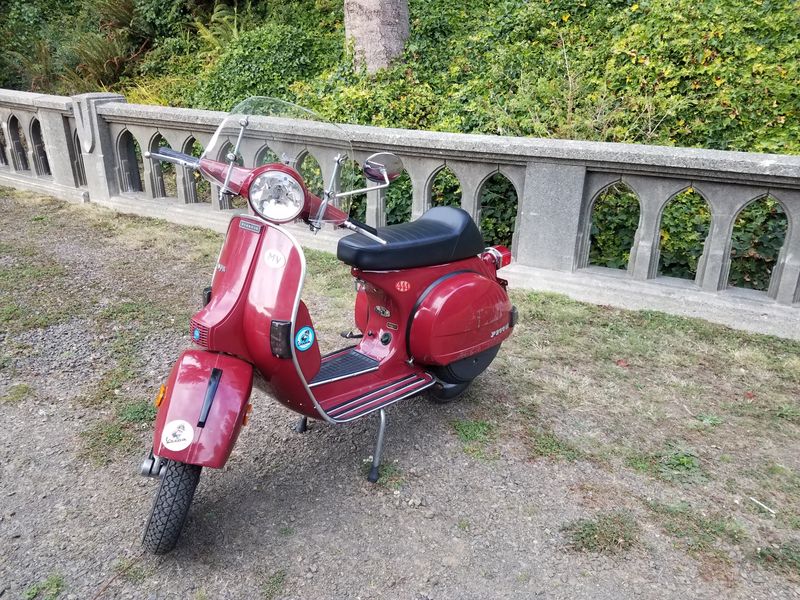
The latest
I've done a few things lately on the scooter. In no particular order:
Installed smoke blinker lenses,
installed an adjustable front brake lever (to match the adjustable clutch lever),
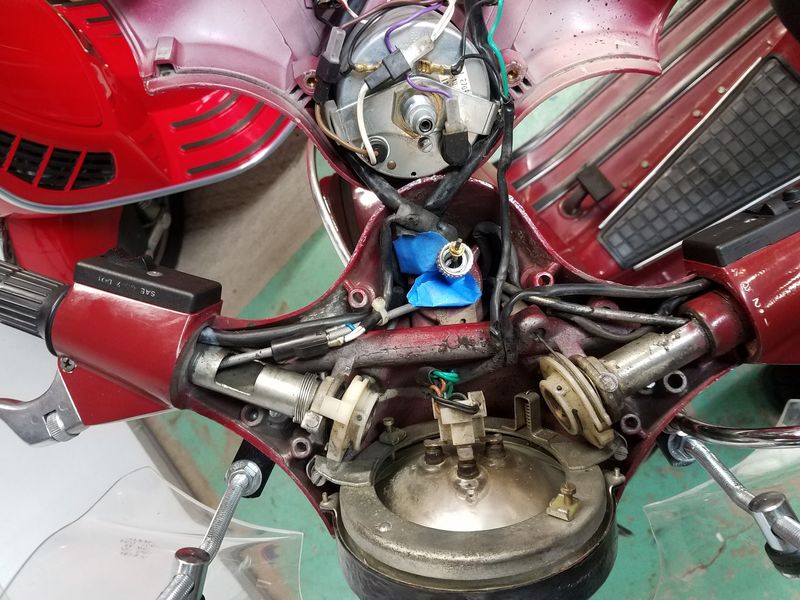
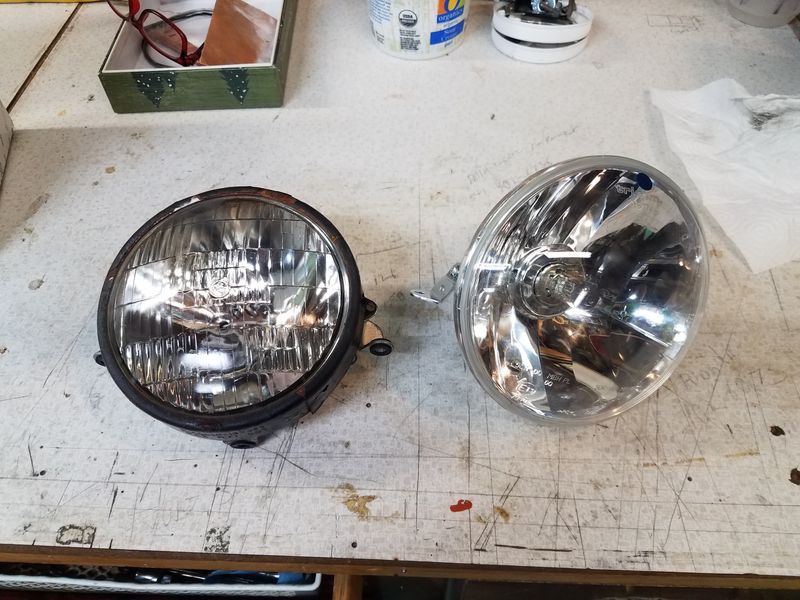
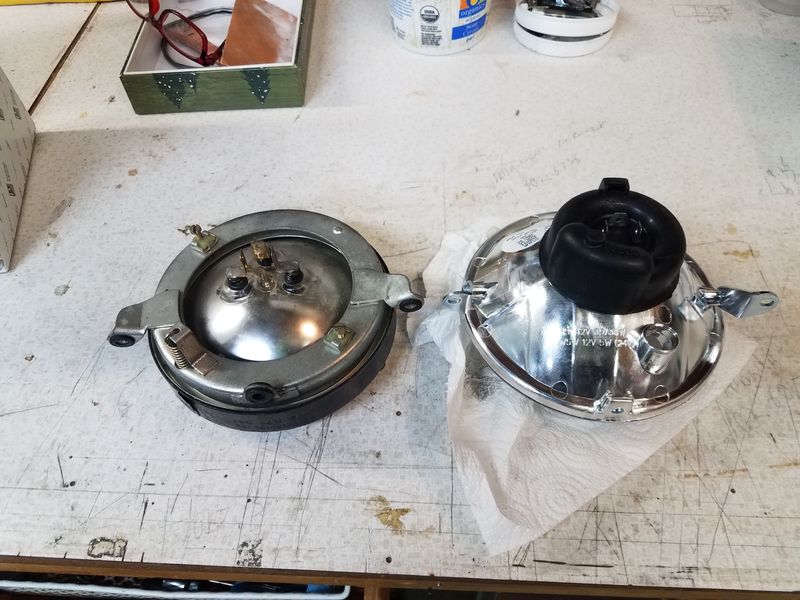
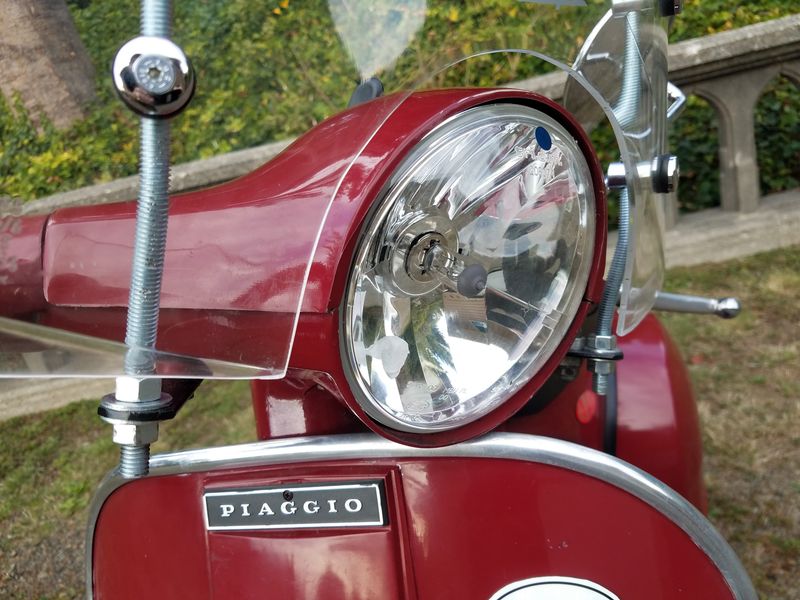
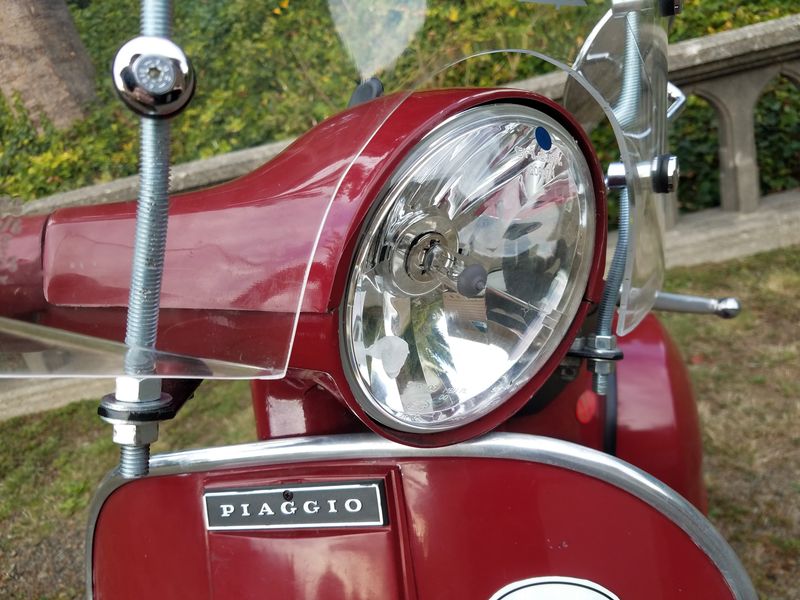
installed a new headlight housing and halogen bulb,
put on an Ancillotti Sport seat,
Reinstalled the tractor taillight,
Inadvertently got the front brake to make the brake light come on - bonus!

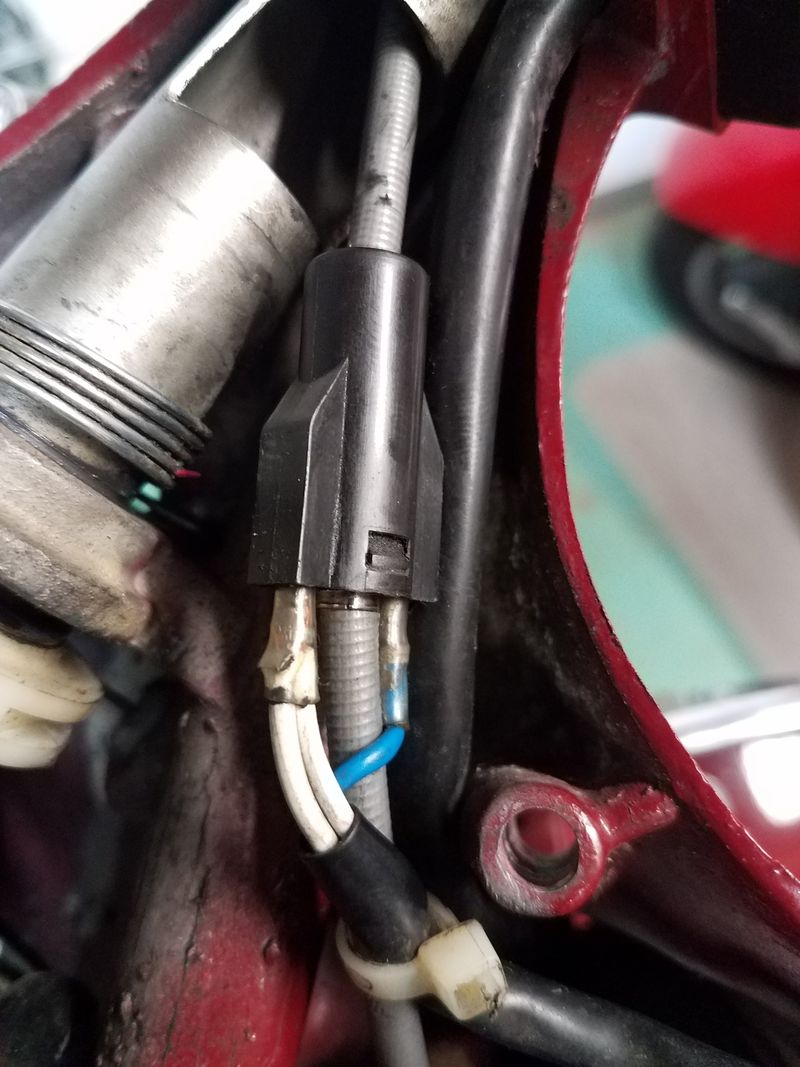
So when I replaced the front brake lever, I had to open up the headset to feed the cable and found the cable runs through a plastic doohickey that had a couple of wires plugged into it - hmmm, one of the wires wasn't seated properly and that fixed the brake light!

And the new headlight housing has a few less moving parts, but I was able to fill a hole in the headset with an excess bolt, washers and nut. I'll get a rubber plug when I'm at the hardware store.

Let's see, anything else? - yes, tweaked the windscreen brackets so the windscreen is angled a bit better. I like it where it is now.

And the Ancillotti seat? It's a solid foam pad on a ridged pan. I'm diggin it, but probably only because I only ride up to the most 20 minutes a go, and I like feeling the road. It was actually a bit disconcerting when I first rode the P200 with the springy seat. I didn't know if the shocks were shot, or I was just springing around on the seat. Well now I know!
Plastic doohickey that runs the brake light.
The speedo cable disconnected and the headset splayed open - gruesome! Ha! BTW, I disconnected the cable at the wheel to give some play at the speedometer.
Old vs New Front
Old vs New Front
Old Vs New Backside
Old Vs New Backside
The new headlight
The new headlight
Right blinker on...
Right blinker on...
Last shot!
Last shot!
OP
@qascooter avatar
UTC

Veni, Vidi, Posti
79 P200E (Ruby), 62 Allstate (B-62), 63 VBB (Storm)
Joined: UTC
Posts: 5299
Location: Florence, OR
 
Veni, Vidi, Posti
@qascooter avatar
79 P200E (Ruby), 62 Allstate (B-62), 63 VBB (Storm)
Joined: UTC
Posts: 5299
Location: Florence, OR
UTC quote
Carb
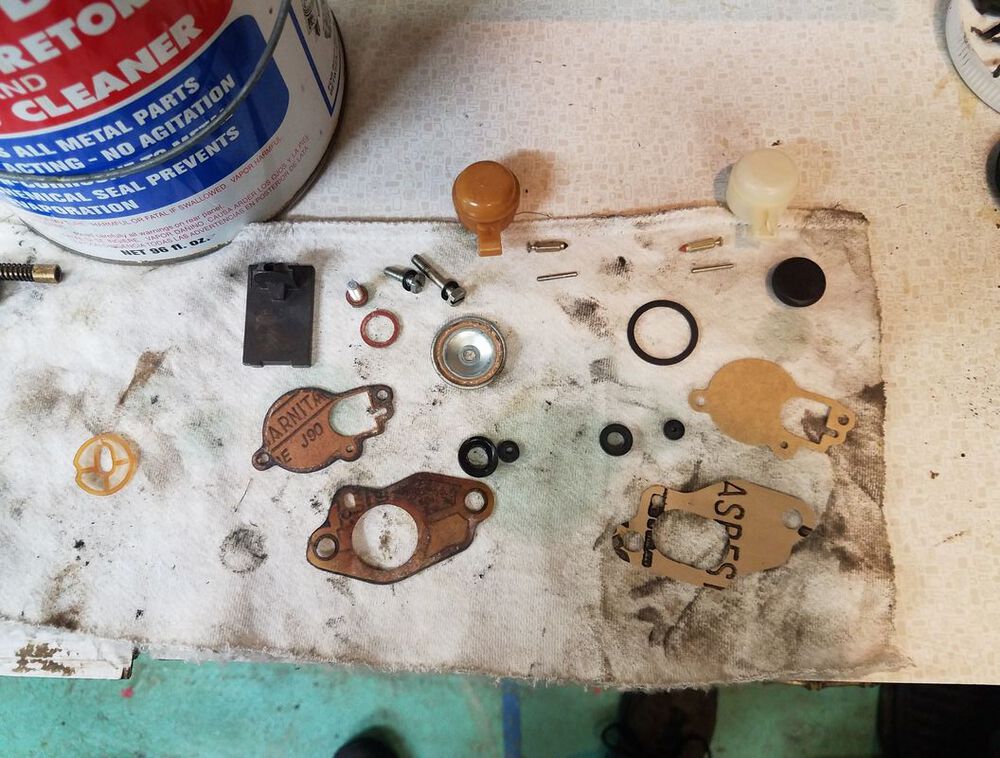
It's been a while since I've done anything on Ruby, and after working on LuckyBear's Flo, I got inspired to clean the carb on Ruby. And it needed it! I just happen to have an almost complete gasket kit, complete with float, from past scooter cleanings, and GogoGordy's care package. The only thing missing are the fuel banjo washers. The ones there are iffy, but still working.

So since the carb is all clean, I'm going to put in the more aggressive jetting and dial it in, while I'm dialing in Flo's. Might as do both at once.

What else have I done, oh yea - I tweaked the home made windshield rods to get the windscreen right where I like it. And I bought a Trailtech CHT, but it wasn't the stick-on mount, so I sent it back. I'll get one eventually.

So here is what's left on the list:

1) Change the jetting to be more for power/torque vs fuel efficiency - working on this one!
2) Install adjustable levers - they are sitting on the bench waiting
3) Make a bracket and install the euro taillight
4) install LED lights (Thanks Fatbear5!)
5) Rig up a way to install a modern flyscreen
6) Clean up and install a quickly removable front rack (Thanks Voodoo!)
7) Put together a good toolkit
8) Buy and install a CHT sensor
9) Replace the rear brake shoes
10) Replace crappy VW fuse with modern fuse.
11) Replace battery with sealed one from an old power wheelchair
12) Ride it all the time!
13) Replace headlamp with Halogen setup (Lowbeam is burnt out so I'm running on highbeam)

14) Maybe down the road upgrade exhaust and jetting.
Old carb vs new carb gaskets. notice the old black tip float bowl needle. The carb and metal bits are in the chem dip.
Final positioning of the windscreen. I think I bent those rods a half dozen times to get it to this position.
OP
@qascooter avatar
UTC

Veni, Vidi, Posti
79 P200E (Ruby), 62 Allstate (B-62), 63 VBB (Storm)
Joined: UTC
Posts: 5299
Location: Florence, OR
 
Veni, Vidi, Posti
@qascooter avatar
79 P200E (Ruby), 62 Allstate (B-62), 63 VBB (Storm)
Joined: UTC
Posts: 5299
Location: Florence, OR
UTC quote
Jetting
So I finally got around to playing with the jets. The scooter came with:

50/120 Pilot
120/BE4/109 main stack

So I tried:
48/140 Pilot
160/BE3/116 main stack

I couldn't get the 0 to 1/4 throttle working - constantly bogged. So I just changed the pilot to:
55/160 Pilot
160/BE3/116 Main Stack

Wow, what a difference - I could adjust the Air/Fuel mixture screw to 1 5/8 turns out and it's good down low - a slight gurgling (4 stroking?) if I run it at 1/8 throttle, and the top end is a little slower. It just feels like the throttle body isn't opening up all the way, so I'm also going to check it against LuckyBear's scooter, since it's in my garage.

I haven't checked the plug but will today. I also have a 118 main that I might install and see if the top end is any faster.
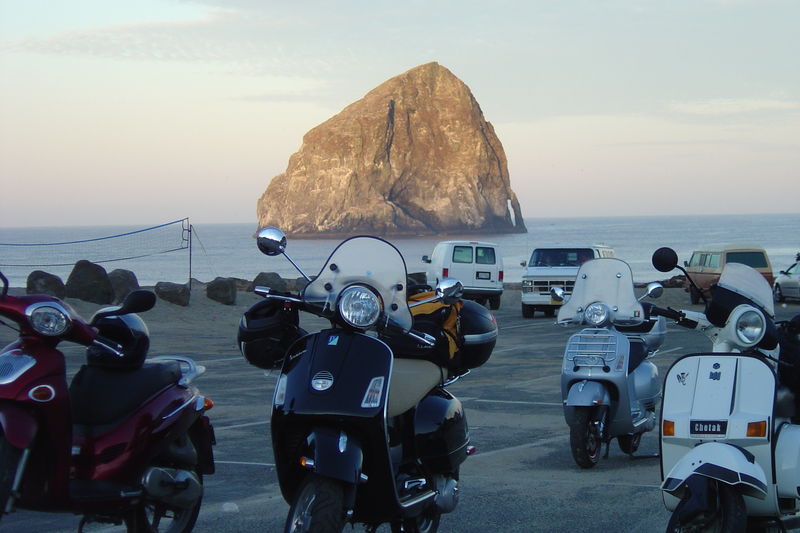
Random pic of the Cannonball 2006 from Pacific City. I didn't run it but saw them off. My Bajaj is in the pic.
@jet_peddler avatar
UTC

Veni, Vidi, Posti
'07 LX150 (Sold), '17 GTS300, '16 BV350, '15 EN650, '09 FXDF (sold). '15 FLSTN
Joined: UTC
Posts: 5666
Location: Home of the Alamo
 
Veni, Vidi, Posti
@jet_peddler avatar
'07 LX150 (Sold), '17 GTS300, '16 BV350, '15 EN650, '09 FXDF (sold). '15 FLSTN
Joined: UTC
Posts: 5666
Location: Home of the Alamo
UTC quote
Scott, what's the name of the rock in the background?
OP
@qascooter avatar
UTC

Veni, Vidi, Posti
79 P200E (Ruby), 62 Allstate (B-62), 63 VBB (Storm)
Joined: UTC
Posts: 5299
Location: Florence, OR
 
Veni, Vidi, Posti
@qascooter avatar
79 P200E (Ruby), 62 Allstate (B-62), 63 VBB (Storm)
Joined: UTC
Posts: 5299
Location: Florence, OR
UTC quote
Jet Peddler wrote:
Scott, what's the name of the rock in the background?
Hey Jet - That'd be Haystack Rock, outside of Pacific City, Oregon. There are a number of those seastacks called Haystack Rock. Back in days of old they used to shoot cannons at it...
UTC

Ossessionato
Vespas 1964 GS160, 1965 SS180, 1977 V9A1T, 1983 PX150E
Joined: UTC
Posts: 2563
Location: Siam
 
Ossessionato
Vespas 1964 GS160, 1965 SS180, 1977 V9A1T, 1983 PX150E
Joined: UTC
Posts: 2563
Location: Siam
UTC quote
Re: Adjustable levers
qascooter wrote:
Takes me 5 minutes with the proper wrenches, and the little block holding the clutch arm.
That block of wood is a good idea. I just replaced a worn out lever (ovalized pivot hole) on my PX. I did something similar. The objective is to unbolt the lever and replace it without disconnecting the pinch bolt at the clutch cable arm. I taped the existing lever closed against the grip and then wrapped a piece of baling wire around the clutch arm and rear brake cable housing. Then I took the tape off the lever. Without any cable tension, it's a simple unbolt and swap out of the old lever and replace with the new lever. Remove the wire and it snaps back into place.
UTC

Jet Eye Master
PX221 MHR heavily tuned, PX200 O tuned, PX181 M1XL tuned, PX166 tuned a quite bit and some motorbikes
Joined: UTC
Posts: 5463
Location: London UK
 
Jet Eye Master
PX221 MHR heavily tuned, PX200 O tuned, PX181 M1XL tuned, PX166 tuned a quite bit and some motorbikes
Joined: UTC
Posts: 5463
Location: London UK
UTC quote
Re: Jetting
qascooter wrote:
So I finally got around to playing with the jets. The scooter came with:

50/120 Pilot
120/BE4/109 main stack

So I tried:
48/140 Pilot
160/BE3/116 main stack

I couldn't get the 0 to 1/4 throttle working - constantly bogged. So I just changed the pilot to:
55/160 Pilot
160/BE3/116 Main Stack

Wow, what a difference - I could adjust the Air/Fuel mixture screw to 1 5/8 turns out and it's good down low - a slight gurgling (4 stroking?) if I run it at 1/8 throttle, and the top end is a little slower. It just feels like the throttle body isn't opening up all the way, so I'm also going to check it against LuckyBear's scooter, since it's in my garage.

I haven't checked the plug but will today. I also have a 118 main that I might install and see if the top end is any faster.
The 1/8 issue is because the 55/160 is too big for some, even though it is the stock jet. When you up the main jet to try the 118 put the 48/160 back in again. Might need 2 turns out for the bog to go away but could work.

Need to check the plug after a long wide open run. Any other plug chop isn't really checking the main jet.

Modern Vespa is the premier site for modern Vespa and Piaggio scooters. Vespa GTS300, GTS250, GTV, GT200, LX150, LXS, ET4, ET2, MP3, Fuoco, Elettrica and more.

Modern Vespa is made possible by our generous supporters.

Buy Me A Coffee
 

Shop on Amazon with Modern Vespa

Modern Vespa is a participant in the Amazon Services LLC Associates Program, an affiliate advertising program designed to provide a means for sites to earn advertising fees by advertising and linking to amazon.com


All Content Copyright 2005-2026 by Modern Vespa.
All Rights Reserved.


[ Time: 0.0223s ][ Queries: 4 (0.0144s) ][ live ][ 343 ][ ThingOne ]