OP
@chatis avatar
UTC

Hooked
1963 Vespa VBB, 1965 Allstate Cruisaire, 1974 Vespa Super, 1980 Vespa P200, 2003 Stella 2T, 2008 Steall 2T, 2022 Royal Alloy 150 GT
Joined: UTC
Posts: 386
Location: Kansas City
 
Hooked
@chatis avatar
1963 Vespa VBB, 1965 Allstate Cruisaire, 1974 Vespa Super, 1980 Vespa P200, 2003 Stella 2T, 2008 Steall 2T, 2022 Royal Alloy 150 GT
Joined: UTC
Posts: 386
Location: Kansas City
UTC quote
Goldilocks and The Three Bears

There is not a lot of information on how to remove the needle and roller bearings from the front hub online. Lots on how to install new ones with special tools or sockets.

Some desperation turned to some ingenuity. In involves a punch (Goldilocks) and three thick washers (the three bears).

The small washer goes through the needle bearing on the front axle and fits the inner race on the roller bearing perfectly. The middle washer fits the front axle needle bearing perfectly. And the large washer fits the spindle needle bearing perfectly.

These are just standard imperial thick washers. Hope this helps someone one day.
Forum member supplied image with no explanatory text
@charlieman22 avatar
UTC

Nedminder
62 VBB1T Round Tail W/ leaner sidecar
Joined: UTC
Posts: 4924
Location: california
 
Nedminder
@charlieman22 avatar
62 VBB1T Round Tail W/ leaner sidecar
Joined: UTC
Posts: 4924
Location: california
UTC quote
I don't think the cases being ported changes anything.

If you want to go the low cost way, my list is probably still a good roadmap.

Couple good suggestions above.
1. Muriatic acid outside. Clean up the CYLINDER. Not sure it should be used for the piston. Socal can clarify for you.
2. A box exhaust would be a very reasonable investment to make it grungier if you would like a bit more oomph.
@chandlerman avatar
UTC

Innovator
63 GL, 62 VBB, 05 Stella, 66 Smallstate, 66 Lammy S3, 63 Lammy S3 Riverside
Joined: UTC
Posts: 13224
Location: Nashville

365 Days Since Last Explosion
 
Innovator
@chandlerman avatar
63 GL, 62 VBB, 05 Stella, 66 Smallstate, 66 Lammy S3, 63 Lammy S3 Riverside
Joined: UTC
Posts: 13224
Location: Nashville

365 Days Since Last Explosion
UTC quote
Chatis wrote:
Goldilocks and The Three Bears

There is not a lot of information on how to remove the needle and roller bearings from the front hub online. Lots on how to install new ones with special tools or sockets.
Nice improvisation! I do similar stuff, but always replace the bearings with modern (and sealed where an option) equivalents.

And as to instructions, the Haynes manual clearly specified, "Inspect bearings for wear. Refresh if necessary." How much more instruction did you need? Razz emoticon
OP
@chatis avatar
UTC

Hooked
1963 Vespa VBB, 1965 Allstate Cruisaire, 1974 Vespa Super, 1980 Vespa P200, 2003 Stella 2T, 2008 Steall 2T, 2022 Royal Alloy 150 GT
Joined: UTC
Posts: 386
Location: Kansas City
 
Hooked
@chatis avatar
1963 Vespa VBB, 1965 Allstate Cruisaire, 1974 Vespa Super, 1980 Vespa P200, 2003 Stella 2T, 2008 Steall 2T, 2022 Royal Alloy 150 GT
Joined: UTC
Posts: 386
Location: Kansas City
UTC quote
chandlerman wrote:
And as to instructions, the Haynes manual clearly specified, "Inspect bearings for wear. Refresh if necessary." How much more instruction did you need? Razz emoticon
Well, I don't have a Haynes manual! Dang! No, I am planning on blasting and either powder coating or painting so thought removing and replacing would be a good idea.

On your suggestion of replacement bearings for sealed modern bearings, does someone have a list of the modern equivalents? Do the kits the shops and part suppliers sell include the modern equivalents.

And as I think is there a spec on the best wire to use to make a harness and the gauge of the wire for the different circuits. Seems harnesses are in short supply together with RH headset switches!
@chandlerman avatar
UTC

Innovator
63 GL, 62 VBB, 05 Stella, 66 Smallstate, 66 Lammy S3, 63 Lammy S3 Riverside
Joined: UTC
Posts: 13224
Location: Nashville

365 Days Since Last Explosion
 
Innovator
@chandlerman avatar
63 GL, 62 VBB, 05 Stella, 66 Smallstate, 66 Lammy S3, 63 Lammy S3 Riverside
Joined: UTC
Posts: 13224
Location: Nashville

365 Days Since Last Explosion
UTC quote
I measure the bearing spec's, then order by dimensions. Some of them you can find on Mercato, SIP, etc. Others, you're looking at Grainger or the like. I've even gotten some low-risk bearings (e.g. to replace the bushings in the swingarm pivot) off Amazon.

A good pair of calipers are your friend int his case.
OP
@chatis avatar
UTC

Hooked
1963 Vespa VBB, 1965 Allstate Cruisaire, 1974 Vespa Super, 1980 Vespa P200, 2003 Stella 2T, 2008 Steall 2T, 2022 Royal Alloy 150 GT
Joined: UTC
Posts: 386
Location: Kansas City
 
Hooked
@chatis avatar
1963 Vespa VBB, 1965 Allstate Cruisaire, 1974 Vespa Super, 1980 Vespa P200, 2003 Stella 2T, 2008 Steall 2T, 2022 Royal Alloy 150 GT
Joined: UTC
Posts: 386
Location: Kansas City
UTC quote
This scoot is consuming me. It's a good consumption. I am enjoying learning and discovering. Everything has be done. The scoot is now completely stripped for blasting and all the little bits are also disassembled. I am going to have that all blasted hopefully next week.

I have been thinking about the engine a lot. The inlet porting on the cases has me thinking what head was on there? Today I did some coloring in. I sorta mapped the porting on the case to the cylinder. I have seen that a fun modification to a stock 200 jug is to add porting (https://www.youtube.com/watch?v=-B3E4pX_p40 - starting around 3:27) so I wanted to see how close the porting on the case was to this upgrade. There is no resemblance. So if I were to do this I would fill the existing porting with epoxy and cut new ports in the case and the cylinder.

So, still use standard cylinder and standard piston but with a small porting upgrade. By the way, the case porting looks like its for a Malossi 210.

Pics below...

Thoughts?
Case Template
Case Template
Only matching port - original obviously
Where the one internal port is
Where the other internal port is
Red - where ports needed.  Blue where ports need to be filled in.
Red - where ports needed. Blue where ports need to be filled in.
Approximate cutout for the cylinder ports.  One each side.
Approximate cutout for the cylinder ports. One each side.
OP
@chatis avatar
UTC

Hooked
1963 Vespa VBB, 1965 Allstate Cruisaire, 1974 Vespa Super, 1980 Vespa P200, 2003 Stella 2T, 2008 Steall 2T, 2022 Royal Alloy 150 GT
Joined: UTC
Posts: 386
Location: Kansas City
 
Hooked
@chatis avatar
1963 Vespa VBB, 1965 Allstate Cruisaire, 1974 Vespa Super, 1980 Vespa P200, 2003 Stella 2T, 2008 Steall 2T, 2022 Royal Alloy 150 GT
Joined: UTC
Posts: 386
Location: Kansas City
UTC quote
Thoughts on restoring versus purchasing new.

Yesterday I spent the best part of three hours trying to get the tire off the rims. Managed to get three of the cruddy rusted half rims off, the fourth is still stubbornly adhered. Mixed in with the frustration, busted knuckles, abuse and wild swearing comes the thought – is it worth it? I have spent a huge amount of time just getting them off. Then the cost of blasting them, prepping them for paint or powder coat, treating them and then they are finished. From an economic standpoint I can get two new black rims for $50. There are so many parts that this relates to. Too many to mention but clutches, hubs, handlebar levers, brake parts, etc.

There is a cost to restoring; and sometimes more that replacing. Is the quality of the original worth it? Where do you draw the line??
@hec_in_omaha avatar
UTC

Addicted
1980 P125X US Spec
Joined: UTC
Posts: 865
Location: Beaver Lake, Nebraska USA
 
Addicted
@hec_in_omaha avatar
1980 P125X US Spec
Joined: UTC
Posts: 865
Location: Beaver Lake, Nebraska USA
UTC quote
Sounds familiar! I had a couple of rims that I easily split but struggled to get the tires free. I ended up spraying the rims with WD-40 and let it soak overnight. The next day I smacked the tires a couple of times with a rubber mallet and wha-La the tires came free. What an ordeal! I figured it would take 20 mins per tire to get everything apart! Wrong!

Hec
@socalguy avatar
UTC

bodgemaster
63 GL, 76 Super (x2), 74 Primavera (x2), 79 P200, 06 Fly 150
Joined: UTC
Posts: 7961
Location: So Cal
 
bodgemaster
@socalguy avatar
63 GL, 76 Super (x2), 74 Primavera (x2), 79 P200, 06 Fly 150
Joined: UTC
Posts: 7961
Location: So Cal
UTC quote
Unless you're a glutton for punishment, have lots of time to kill, or on a really tight budget, replace the rims. Not worth the hassle.
@greasy125 avatar
UTC

Sergeant at Arms
Weird 80's Vespas & Cool Vintage Lambrettas
Joined: UTC
Posts: 15123
Location: The state of insanity, SoCal
 
Sergeant at Arms
@greasy125 avatar
Weird 80's Vespas & Cool Vintage Lambrettas
Joined: UTC
Posts: 15123
Location: The state of insanity, SoCal
UTC quote
yo. picking it up late to the party, but it seems you've got a stock cylinder on a set of cases that were ported for a malossi 210

what's the crank? might be worth a Hail Mary... depending. check the stroke and rod length and timing. if it's stock, it's trash.

head has been reprofiled, which is cool and the gang. you can run that on pretty much anything. I mean, I'd double check it on the build but I wouldn't bin it for sure.

that top end ain't shit man. it's bone stock. you have a 4-corner on it, so it's probably runnable. scuff it down. hit the barrel, check the ring gap and ship it. with that head it should be a decent runner.

if you want the zoom-zooms save the pipe. otherwise peddle that for other rebuild parts. but it doesn't play nice with stock carb and cylinders. it wants ALL the big carb and exhaust timing.
OP
@chatis avatar
UTC

Hooked
1963 Vespa VBB, 1965 Allstate Cruisaire, 1974 Vespa Super, 1980 Vespa P200, 2003 Stella 2T, 2008 Steall 2T, 2022 Royal Alloy 150 GT
Joined: UTC
Posts: 386
Location: Kansas City
 
Hooked
@chatis avatar
1963 Vespa VBB, 1965 Allstate Cruisaire, 1974 Vespa Super, 1980 Vespa P200, 2003 Stella 2T, 2008 Steall 2T, 2022 Royal Alloy 150 GT
Joined: UTC
Posts: 386
Location: Kansas City
UTC quote
This is where I am at the moment....
greasy125 wrote:
what's the crank?
I am ordering a 60mm Mazzi crank.
greasy125 wrote:
head has been reprofiled, which is cool and the gang. you can run that on pretty much anything.
How do you see this - education please.
greasy125 wrote:
you have a 4-corner on it, so it's probably runnable. scuff it down. hit the barrel, check the ring gap and ship it. with that head it should be a decent runner.
I am going to add two ports to the cylinder per the post above. Then I am going to match the case to the new ports and epoxy up the unused porting.
greasy125 wrote:
if you want the zoom-zooms save the pipe. but it doesn't play nice with stock carb and cylinders. it wants ALL the big carb and exhaust timing.
I want to use that pipe . With the additional ports and some jetting I am hoping to make it a reliable runner with a little more than the stock P200.
@christopher_55934 avatar
UTC

Ossessionato
2007 Stella 225
Joined: UTC
Posts: 3547
Location: Rochester, Minnesota
 
Ossessionato
@christopher_55934 avatar
2007 Stella 225
Joined: UTC
Posts: 3547
Location: Rochester, Minnesota
UTC quote
Chatis wrote:
This scoot is consuming me. It's a good consumption. I am enjoying learning and discovering. Everything has be done. The scoot is now completely stripped for blasting and all the little bits are also disassembled. I am going to have that all blasted hopefully next week.

I have been thinking about the engine a lot. The inlet porting on the cases has me thinking what head was on there? Today I did some coloring in. I sorta mapped the porting on the case to the cylinder. I have seen that a fun modification to a stock 200 jug is to add porting (https://www.youtube.com/watch?v=-B3E4pX_p40 - starting around 3:27) so I wanted to see how close the porting on the case was to this upgrade. There is no resemblance. So if I were to do this I would fill the existing porting with epoxy and cut new ports in the case and the cylinder.

So, still use standard cylinder and standard piston but with a small porting upgrade. By the way, the case porting looks like its for a Malossi 210.

Pics below...

Thoughts?
Not sure you even need to fill extra port area, What's they going to hurt?
OP
@chatis avatar
UTC

Hooked
1963 Vespa VBB, 1965 Allstate Cruisaire, 1974 Vespa Super, 1980 Vespa P200, 2003 Stella 2T, 2008 Steall 2T, 2022 Royal Alloy 150 GT
Joined: UTC
Posts: 386
Location: Kansas City
 
Hooked
@chatis avatar
1963 Vespa VBB, 1965 Allstate Cruisaire, 1974 Vespa Super, 1980 Vespa P200, 2003 Stella 2T, 2008 Steall 2T, 2022 Royal Alloy 150 GT
Joined: UTC
Posts: 386
Location: Kansas City
UTC quote
Christopher_55934 wrote:
Not sure you even need to fill extra port area, What's they going to hurt?
I am thinking that there will be more area for the gasket to seat on. Without filling there will only be a thin rim between the case and cylinder. But that is my thought, not sure if it is valid.
OP
@chatis avatar
UTC

Hooked
1963 Vespa VBB, 1965 Allstate Cruisaire, 1974 Vespa Super, 1980 Vespa P200, 2003 Stella 2T, 2008 Steall 2T, 2022 Royal Alloy 150 GT
Joined: UTC
Posts: 386
Location: Kansas City
 
Hooked
@chatis avatar
1963 Vespa VBB, 1965 Allstate Cruisaire, 1974 Vespa Super, 1980 Vespa P200, 2003 Stella 2T, 2008 Steall 2T, 2022 Royal Alloy 150 GT
Joined: UTC
Posts: 386
Location: Kansas City
UTC quote
Monday the frame and parts will be blasted. Spent the morning prepping the parts to protect sensitive areas. Pics show what I did with the hope that it helps someone else who needs to do the same thing.

Am I missing anything????
All the "other parts"
Front axle.  Painting tape, duct tape and inner tube with zip ties.  Finally, a use for all the inner tubes I have.
Front axle. Painting tape, duct tape and inner tube with zip ties. Finally, a use for all the inner tubes I have.
Front fork and left shifter.  Same protection.
Front fork and left shifter. Same protection.
Hubs.  My collection of washers coming handy.  Rubber wrapped around sensitive areas.
Hubs. My collection of washers coming handy. Rubber wrapped around sensitive areas.
Forum member supplied image with no explanatory text
Heat shrink on threads.
Forum member supplied image with no explanatory text
How do these two things get removed without fubar'ing them.
@hec_in_omaha avatar
UTC

Addicted
1980 P125X US Spec
Joined: UTC
Posts: 865
Location: Beaver Lake, Nebraska USA
 
Addicted
@hec_in_omaha avatar
1980 P125X US Spec
Joined: UTC
Posts: 865
Location: Beaver Lake, Nebraska USA
UTC quote
I gently tapped them out on my 1980 P125X. I put the square end of a deep socket so the wire terminal fit in the square drive hole and lightly tapped on the socket with a small hammer. I believe I used a 10mm deep socket.

Hec
@orwell84 avatar
UTC

Ossessionato
Joined: UTC
Posts: 4102
Location: northern New York
 
Ossessionato
@orwell84 avatar
Joined: UTC
Posts: 4102
Location: northern New York
UTC quote
I fiddled them around a little first, just to get them moving and put a little lube on them…WD40 or dish soap, just to ease them out a little better.
@greasy125 avatar
UTC

Sergeant at Arms
Weird 80's Vespas & Cool Vintage Lambrettas
Joined: UTC
Posts: 15123
Location: The state of insanity, SoCal
 
Sergeant at Arms
@greasy125 avatar
Weird 80's Vespas & Cool Vintage Lambrettas
Joined: UTC
Posts: 15123
Location: The state of insanity, SoCal
UTC quote
Chatis wrote:
This is where I am at the moment....


I am ordering a 60mm Mazzi crank.

How do you see this - education please.

I am going to add two ports to the cylinder per the post above. Then I am going to match the case to the new ports and epoxy up the unused porting.

I want to use that pipe . With the additional ports and some jetting I am hoping to make it a reliable runner with a little more than the stock P200.
apologies for the late reply...

60 crank is bueno.

head has been reprofiled or skimmed due to the lack of ridge on the mating lip, the pattern on the surface and that it has less of a "jockey cap" look. appears to be a good job, especially for an early 210 set up.

personally, I wouldn't epoxy up anything as long as all of your sealing surfaces, like, sealed. there's really not much of a benefit tbh and the risk of that coming apart negates any benefit you may get.

it looks like somebody had at it on that stock piston a little. photos might be misleading, so without having it in my hands or accurate measurements I can't really say. but that barrel looks untouched. with that head, it may come correct, but with the new crank, you're gonna be doing some measuring. so keep that in mind that you're probably not plug and play.

it sounds like you wanna do an O-tune. so anything you can do to make it breathe better would be great, especially with that pipe. but really a GS piston and getting after with the Dremel would make it sing. otherwise it's gonna be a chore to ride and the pick would be a big box.

however, you could just snap on a malossi and roll. sell that top end and crank for a hundy to offset the cost and you'd be in high cotton coming and going. pipe would match too. or if you want something more mellow adios the pipe so you can add that to the offset and grab something more mellow.

it really comes down to expectations and riding style.
OP
@chatis avatar
UTC

Hooked
1963 Vespa VBB, 1965 Allstate Cruisaire, 1974 Vespa Super, 1980 Vespa P200, 2003 Stella 2T, 2008 Steall 2T, 2022 Royal Alloy 150 GT
Joined: UTC
Posts: 386
Location: Kansas City
 
Hooked
@chatis avatar
1963 Vespa VBB, 1965 Allstate Cruisaire, 1974 Vespa Super, 1980 Vespa P200, 2003 Stella 2T, 2008 Steall 2T, 2022 Royal Alloy 150 GT
Joined: UTC
Posts: 386
Location: Kansas City
UTC quote
Blasting and getting ready for Epoxy Primer...

Pics speak for themselves. Very little damage to this scooter. Body looks really great. Few cracks and some little welds. Two issues...

Right cowl will need some bodywork and light filler. There are ripples and deep gouges.

I think the steering lock piece has broken off. Going to have to fab some sort of replacement.
Forum member supplied image with no explanatory text
Treated with Eastwood After Blast.  That stuff is fricken nasty!!!!
Treated with Eastwood After Blast. That stuff is fricken nasty!!!!
I think the stop is broken off.  Will need to fabricate something for this!!!
I think the stop is broken off. Will need to fabricate something for this!!!
Few areas that will need some attention marked with masking tape.
@chandlerman avatar
UTC

Innovator
63 GL, 62 VBB, 05 Stella, 66 Smallstate, 66 Lammy S3, 63 Lammy S3 Riverside
Joined: UTC
Posts: 13224
Location: Nashville

365 Days Since Last Explosion
 
Innovator
@chandlerman avatar
63 GL, 62 VBB, 05 Stella, 66 Smallstate, 66 Lammy S3, 63 Lammy S3 Riverside
Joined: UTC
Posts: 13224
Location: Nashville

365 Days Since Last Explosion
UTC quote
Seeing paint and bodywork happening makes me happy.
@safis avatar
UTC

Veni, Vidi, Posti
1979 P150X, 1983 P200E, 1987 PK125XL Elestart, 1988 T5, 1995 PX200E, 2024 GTS 300
Joined: UTC
Posts: 5537
Location: Veria, Greece
 
Veni, Vidi, Posti
@safis avatar
1979 P150X, 1983 P200E, 1987 PK125XL Elestart, 1988 T5, 1995 PX200E, 2024 GTS 300
Joined: UTC
Posts: 5537
Location: Veria, Greece
UTC quote
Doing great!!

About the fork, probably a casting flaw, I wouldn't care. Nothing to do with stops (see circled in pic)...
Forum member supplied image with no explanatory text
OP
@chatis avatar
UTC

Hooked
1963 Vespa VBB, 1965 Allstate Cruisaire, 1974 Vespa Super, 1980 Vespa P200, 2003 Stella 2T, 2008 Steall 2T, 2022 Royal Alloy 150 GT
Joined: UTC
Posts: 386
Location: Kansas City
 
Hooked
@chatis avatar
1963 Vespa VBB, 1965 Allstate Cruisaire, 1974 Vespa Super, 1980 Vespa P200, 2003 Stella 2T, 2008 Steall 2T, 2022 Royal Alloy 150 GT
Joined: UTC
Posts: 386
Location: Kansas City
UTC quote
Removing Grips

Anyone have a proven method of removing grips without damage or is this a cut off and replace thing?
@v_oodoo avatar
UTC

Style Maven
'74 50s x3 '87 PK125XL '92 PK50XL2 Plurimatic - & - '58 AllState '68 Sprint '66(?) 125 Super '72 DanMotor 150 Super and '04 Bajaj LML hybrid
Joined: UTC
Posts: 10137
Location: seattle/athens
 
Style Maven
@v_oodoo avatar
'74 50s x3 '87 PK125XL '92 PK50XL2 Plurimatic - & - '58 AllState '68 Sprint '66(?) 125 Super '72 DanMotor 150 Super and '04 Bajaj LML hybrid
Joined: UTC
Posts: 10137
Location: seattle/athens
UTC quote
Wrap in steaming hot wet rag and pry a small gap at the opening. Blow air in there and any glue should pop free. Push them off at the flange as required, don't try to pull.

Not destroying old usable grips: I totally approve! Clap emoticon
OP
@chatis avatar
UTC

Hooked
1963 Vespa VBB, 1965 Allstate Cruisaire, 1974 Vespa Super, 1980 Vespa P200, 2003 Stella 2T, 2008 Steall 2T, 2022 Royal Alloy 150 GT
Joined: UTC
Posts: 386
Location: Kansas City
 
Hooked
@chatis avatar
1963 Vespa VBB, 1965 Allstate Cruisaire, 1974 Vespa Super, 1980 Vespa P200, 2003 Stella 2T, 2008 Steall 2T, 2022 Royal Alloy 150 GT
Joined: UTC
Posts: 386
Location: Kansas City
UTC quote
Clap emoticon Clap emoticon Clap emoticon Clap emoticon Clap emoticon
V oodoo wrote:
Blow air in there and any glue should pop free. Push them off at the flange as required, don't try to pull.
Worked like a charm. Sorta inflated and then pulled off a little with each blast. Perfect! Thank you.
OP
@chatis avatar
UTC

Hooked
1963 Vespa VBB, 1965 Allstate Cruisaire, 1974 Vespa Super, 1980 Vespa P200, 2003 Stella 2T, 2008 Steall 2T, 2022 Royal Alloy 150 GT
Joined: UTC
Posts: 386
Location: Kansas City
 
Hooked
@chatis avatar
1963 Vespa VBB, 1965 Allstate Cruisaire, 1974 Vespa Super, 1980 Vespa P200, 2003 Stella 2T, 2008 Steall 2T, 2022 Royal Alloy 150 GT
Joined: UTC
Posts: 386
Location: Kansas City
UTC quote
Repairs and bodywork continue....
Straightening bent body sections and leg shields
Steve welding up cracks
Making sure that all is symmetrical
That tunnel - Soo sweet
Been knocking down the blasting with sanding.  I hate sanding.  Best tools I have found for this are the oscillating tool (gets into tight places and seams) and the Sandnet.  Did I say I do not like sanding?  Hope to shoot primer next weekend.
Been knocking down the blasting with sanding. I hate sanding. Best tools I have found for this are the oscillating tool (gets into tight places and seams) and the Sandnet. Did I say I do not like sanding? Hope to shoot primer next weekend.
OP
@chatis avatar
UTC

Hooked
1963 Vespa VBB, 1965 Allstate Cruisaire, 1974 Vespa Super, 1980 Vespa P200, 2003 Stella 2T, 2008 Steall 2T, 2022 Royal Alloy 150 GT
Joined: UTC
Posts: 386
Location: Kansas City
 
Hooked
@chatis avatar
1963 Vespa VBB, 1965 Allstate Cruisaire, 1974 Vespa Super, 1980 Vespa P200, 2003 Stella 2T, 2008 Steall 2T, 2022 Royal Alloy 150 GT
Joined: UTC
Posts: 386
Location: Kansas City
UTC quote
First of many boxes arrived.... Many more to come I am sure.
Forum member supplied image with no explanatory text
OP
@chatis avatar
UTC

Hooked
1963 Vespa VBB, 1965 Allstate Cruisaire, 1974 Vespa Super, 1980 Vespa P200, 2003 Stella 2T, 2008 Steall 2T, 2022 Royal Alloy 150 GT
Joined: UTC
Posts: 386
Location: Kansas City
 
Hooked
@chatis avatar
1963 Vespa VBB, 1965 Allstate Cruisaire, 1974 Vespa Super, 1980 Vespa P200, 2003 Stella 2T, 2008 Steall 2T, 2022 Royal Alloy 150 GT
Joined: UTC
Posts: 386
Location: Kansas City
UTC quote
PX Hardware Kit

I got a bag of hardware with the scooter. The bag says PX Hardware and inside are bags labeled LML 1 through 21, sealed. Bag 2, 3, 7, 10, and 19 missing.

Does anyone have any idea where these came from and what the missing bags were? I can see that some of the bags (1 through 5 for example) are all engine hardware including case bolts and circlips. Bag 9 and 11 are front and rear brake. Bag 20 has every spring on the scooter. There is a bag with stand hardware, headset hardware and wheel nuts. Some bags I cannot identify the hardware. All bolts have "PAS" on the heads.

Is this decent hardware? Going to use original as much as possible but this is all clean and shiny!
Forum member supplied image with no explanatory text
OP
@chatis avatar
UTC

Hooked
1963 Vespa VBB, 1965 Allstate Cruisaire, 1974 Vespa Super, 1980 Vespa P200, 2003 Stella 2T, 2008 Steall 2T, 2022 Royal Alloy 150 GT
Joined: UTC
Posts: 386
Location: Kansas City
 
Hooked
@chatis avatar
1963 Vespa VBB, 1965 Allstate Cruisaire, 1974 Vespa Super, 1980 Vespa P200, 2003 Stella 2T, 2008 Steall 2T, 2022 Royal Alloy 150 GT
Joined: UTC
Posts: 386
Location: Kansas City
UTC quote
In primer!! That stand worked fantastically. Thanks Hec!

Next is some body work. Not a lot mind you. But I am not making this concourse. I would rather have a little depression than a 1/4" of body filler - not that anywhere on this scoot needs that.

Enjoy!
Thats Steve in our popup tent wrapped in plastic spray booth.  In the last few years we have painted a MG Midget, an Austin Healey Sprite and a Morris Minor Pickup.  There are more curves and contours in a little vespa than all of those combined!
Thats Steve in our popup tent wrapped in plastic spray booth. In the last few years we have painted a MG Midget, an Austin Healey Sprite and a Morris Minor Pickup. There are more curves and contours in a little vespa than all of those combined!
Forum member supplied image with no explanatory text
Left hanging.  At the back is a Morris Minor Van Box.  These are very rare in the US.
Left hanging. At the back is a Morris Minor Van Box. These are very rare in the US.
@chandlerman avatar
UTC

Innovator
63 GL, 62 VBB, 05 Stella, 66 Smallstate, 66 Lammy S3, 63 Lammy S3 Riverside
Joined: UTC
Posts: 13224
Location: Nashville

365 Days Since Last Explosion
 
Innovator
@chandlerman avatar
63 GL, 62 VBB, 05 Stella, 66 Smallstate, 66 Lammy S3, 63 Lammy S3 Riverside
Joined: UTC
Posts: 13224
Location: Nashville

365 Days Since Last Explosion
UTC quote
I'm definitely making one of those stands before I do my next paint job. That thing looks phenomenally functional!
@v_oodoo avatar
UTC

Style Maven
'74 50s x3 '87 PK125XL '92 PK50XL2 Plurimatic - & - '58 AllState '68 Sprint '66(?) 125 Super '72 DanMotor 150 Super and '04 Bajaj LML hybrid
Joined: UTC
Posts: 10137
Location: seattle/athens
 
Style Maven
@v_oodoo avatar
'74 50s x3 '87 PK125XL '92 PK50XL2 Plurimatic - & - '58 AllState '68 Sprint '66(?) 125 Super '72 DanMotor 150 Super and '04 Bajaj LML hybrid
Joined: UTC
Posts: 10137
Location: seattle/athens
UTC quote
Yep, we know that painting is 90% prep work, but ANY job goes so much better with a good set up before you start doing the work! And your painting setup shows that you've thought this all through, probably done this before and now you will get good results. That clever universal paint stand looks to be well worth it and not too hard to gin up! Clap emoticon
@v_oodoo avatar
UTC

Style Maven
'74 50s x3 '87 PK125XL '92 PK50XL2 Plurimatic - & - '58 AllState '68 Sprint '66(?) 125 Super '72 DanMotor 150 Super and '04 Bajaj LML hybrid
Joined: UTC
Posts: 10137
Location: seattle/athens
 
Style Maven
@v_oodoo avatar
'74 50s x3 '87 PK125XL '92 PK50XL2 Plurimatic - & - '58 AllState '68 Sprint '66(?) 125 Super '72 DanMotor 150 Super and '04 Bajaj LML hybrid
Joined: UTC
Posts: 10137
Location: seattle/athens
UTC quote
External inline image provided by member with no explanatory text

Looks like this is where they gated the casting, the place the molten metal gets into the mold. Most times this is ground flush, but outa sight here so why bother, waste the time and money?
@hec_in_omaha avatar
UTC

Addicted
1980 P125X US Spec
Joined: UTC
Posts: 865
Location: Beaver Lake, Nebraska USA
 
Addicted
@hec_in_omaha avatar
1980 P125X US Spec
Joined: UTC
Posts: 865
Location: Beaver Lake, Nebraska USA
UTC quote
Chatis wrote:
In primer!! That stand worked fantastically. Thanks Hec!
Chatis

You're welcome! I'm glad the stand is working for ya! I've been following your build and it's coming along nicely. Can't wait to see it all painted!😎

Hec
OP
@chatis avatar
UTC

Hooked
1963 Vespa VBB, 1965 Allstate Cruisaire, 1974 Vespa Super, 1980 Vespa P200, 2003 Stella 2T, 2008 Steall 2T, 2022 Royal Alloy 150 GT
Joined: UTC
Posts: 386
Location: Kansas City
 
Hooked
@chatis avatar
1963 Vespa VBB, 1965 Allstate Cruisaire, 1974 Vespa Super, 1980 Vespa P200, 2003 Stella 2T, 2008 Steall 2T, 2022 Royal Alloy 150 GT
Joined: UTC
Posts: 386
Location: Kansas City
UTC quote
I haven't given up on this..... Work continues. Progress below with some questions. Wisdom appreciated.

I have sent the engine out for a rebuild. Going full hog on this. Its only money.

On money, painting only one color. I cannot believe the price of paint. Need to wait for the temp to get below 85 to paint. But most of the bodywork is done. Still need to do the frame.

Pics below.

Stay Tuned.
Engine packaged!
Engine packaged!
Rails polished
Rails polished
Closer view.  Not going perfect and cannot get the deep gouges out.  But looks good.
Closer view. Not going perfect and cannot get the deep gouges out. But looks good.
The cost of new ones doesn't justify the time to clean and polish, but there is the satisfaction thing.
Working on the cowls...
Ready for next primer and final coat.  I am learning so not perfect.
Ready for next primer and final coat. I am learning so not perfect.
Should I use filler on these or leave them.  Factory left them!
Should I use filler on these or leave them. Factory left them!
Exhaust cleaned and polished.
Where did these come from and where do I find them?  Per label in the headset somewhere.
Where did these come from and where do I find them? Per label in the headset somewhere.
Any idea where I can get the headlight bucket gasket (it split), and the grommets.  The grommets have a steel sleeve.
Any idea where I can get the headlight bucket gasket (it split), and the grommets. The grommets have a steel sleeve.
⬆️    About 1 month elapsed    ⬇️
OP
@chatis avatar
UTC

Hooked
1963 Vespa VBB, 1965 Allstate Cruisaire, 1974 Vespa Super, 1980 Vespa P200, 2003 Stella 2T, 2008 Steall 2T, 2022 Royal Alloy 150 GT
Joined: UTC
Posts: 386
Location: Kansas City
 
Hooked
@chatis avatar
1963 Vespa VBB, 1965 Allstate Cruisaire, 1974 Vespa Super, 1980 Vespa P200, 2003 Stella 2T, 2008 Steall 2T, 2022 Royal Alloy 150 GT
Joined: UTC
Posts: 386
Location: Kansas City
UTC quote
Update.

Still progressing. Powder coating is done. All bodywork is done. Paint color selected. Waiting for a suitable day to paint (less than 85 degrees and less than 50% humidity) since I don't have a booth!

Complication with the engine case. Its cracked. So figuring out final build.

Pictures for entertainment.
Masking for seam sealer.
Came out well.  Improved as the sealer shrunk.
Came out well. Improved as the sealer shrunk.
Forum member supplied image with no explanatory text
High build primer for final sand.
Forum member supplied image with no explanatory text
UTC

Ossessionato
Vespas 1964 GS160, 1965 SS180, 1977 V9A1T, 1983 PX150E
Joined: UTC
Posts: 2563
Location: Siam
 
Ossessionato
Vespas 1964 GS160, 1965 SS180, 1977 V9A1T, 1983 PX150E
Joined: UTC
Posts: 2563
Location: Siam
UTC quote
Chatis wrote:
Monday the frame and parts will be blasted. Spent the morning prepping the parts to protect sensitive areas. Pics show what I did with the hope that it helps someone else who needs to do the same thing.

Am I missing anything????
Dude, are those little people condoms? That's brilliant.

Awesome job overall!
OP
@chatis avatar
UTC

Hooked
1963 Vespa VBB, 1965 Allstate Cruisaire, 1974 Vespa Super, 1980 Vespa P200, 2003 Stella 2T, 2008 Steall 2T, 2022 Royal Alloy 150 GT
Joined: UTC
Posts: 386
Location: Kansas City
 
Hooked
@chatis avatar
1963 Vespa VBB, 1965 Allstate Cruisaire, 1974 Vespa Super, 1980 Vespa P200, 2003 Stella 2T, 2008 Steall 2T, 2022 Royal Alloy 150 GT
Joined: UTC
Posts: 386
Location: Kansas City
UTC quote
I mounted the tires to the rims today. Two things:

1. The Michelins I bought are directional. There is an arrow on the side and directions say that the arrow must point in the direction that the scoot goes forward. Genius! Except that the arrow can point forward at the bottom and backwards at the top. Would be great if the directions said arrow must point in the forward direction when it is at the top of rotation. My Royal Alloy also has directional tires and they do indeed point forward at the top of rotation. Mind you, the RA is made in China so maybe not!!! Anyway, studying pictures on the web, because there is no clear direction I could find on this, confirms the arrow must point in the forward direction when it is at the top of rotation. There is also some talk about the front and back should be opposite because the front is for braking and the back is for drive. I did them the same.
2. I use O Ring lube on the rims of the tires to get them on easily, but more importantly to get them off easily in five years. The lube does not dry and is compatible with rubber so I have given it a go - we will see.

Bottom of the scoot will be black except for hardware that will grade 8 cadmium plated.
Forum member supplied image with no explanatory text
@finyoshi avatar
UTC

Addicted
Parmakit Primavera -74, Polini Primavera -68, VR-One 228 150 Touring -59, VMC 177 Bajaj Chetak 125 -95
Joined: UTC
Posts: 793
Location: Finland
 
Addicted
@finyoshi avatar
Parmakit Primavera -74, Polini Primavera -68, VR-One 228 150 Touring -59, VMC 177 Bajaj Chetak 125 -95
Joined: UTC
Posts: 793
Location: Finland
UTC quote
I'd be wary to use any lubes between the rim and tire. You really don't want the tire to rotate on the rim under hard braking or accelerating.

I just took Michelin S1 tires off my rims that I installed 10 years ago. They were tight but working with tire iron loosened them off little by little. Just some soapy water should be used to make the bead pop easier to it's place in my opinion.
OP
@chatis avatar
UTC

Hooked
1963 Vespa VBB, 1965 Allstate Cruisaire, 1974 Vespa Super, 1980 Vespa P200, 2003 Stella 2T, 2008 Steall 2T, 2022 Royal Alloy 150 GT
Joined: UTC
Posts: 386
Location: Kansas City
 
Hooked
@chatis avatar
1963 Vespa VBB, 1965 Allstate Cruisaire, 1974 Vespa Super, 1980 Vespa P200, 2003 Stella 2T, 2008 Steall 2T, 2022 Royal Alloy 150 GT
Joined: UTC
Posts: 386
Location: Kansas City
UTC quote
FINYoshi wrote:
I'd be wary to use any lubes between the rim and tire. You really don't want the tire to rotate on the rim under hard braking or accelerating.
You are correct - I did not think about this. I will mark the tire and the rim to see if there is any movement. Thanks for the input.

Will be months before it's on the road.
@finyoshi avatar
UTC

Addicted
Parmakit Primavera -74, Polini Primavera -68, VR-One 228 150 Touring -59, VMC 177 Bajaj Chetak 125 -95
Joined: UTC
Posts: 793
Location: Finland
 
Addicted
@finyoshi avatar
Parmakit Primavera -74, Polini Primavera -68, VR-One 228 150 Touring -59, VMC 177 Bajaj Chetak 125 -95
Joined: UTC
Posts: 793
Location: Finland
UTC quote
Make some good hard brakings in an controlled environment. If the tire spins on the rim, you will shear the tube valve and lose pressure quite instantly.

On the other hand the bead is quite tight and likely will push the lubes out of the way when popping on the rim. Silicone oils are quite thin though so you will just have to try.
OP
@chatis avatar
UTC

Hooked
1963 Vespa VBB, 1965 Allstate Cruisaire, 1974 Vespa Super, 1980 Vespa P200, 2003 Stella 2T, 2008 Steall 2T, 2022 Royal Alloy 150 GT
Joined: UTC
Posts: 386
Location: Kansas City
 
Hooked
@chatis avatar
1963 Vespa VBB, 1965 Allstate Cruisaire, 1974 Vespa Super, 1980 Vespa P200, 2003 Stella 2T, 2008 Steall 2T, 2022 Royal Alloy 150 GT
Joined: UTC
Posts: 386
Location: Kansas City
UTC quote
Progress Continues...

Front end is done. Going to shrink wrap the brake and speedo cable black. MUCH Easier working on a P200 than a Super, VBB or Allstate.

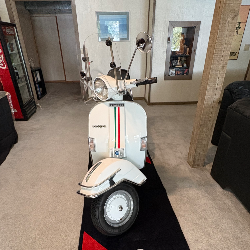
I gave up on the weather and painting it myself. Sent to a shop just to paint. Did a good job.
Now the fun begins....
Forum member supplied image with no explanatory text
There is the color.  Fly yellow.
There is the color. Fly yellow.
@qascooter avatar
UTC

Veni, Vidi, Posti
79 P200E (Ruby), 62 Allstate (B-62), 63 VBB (Storm)
Joined: UTC
Posts: 5305
Location: Florence, OR
 
Veni, Vidi, Posti
@qascooter avatar
79 P200E (Ruby), 62 Allstate (B-62), 63 VBB (Storm)
Joined: UTC
Posts: 5305
Location: Florence, OR
UTC quote
Very nice - very, very nice Clap emoticon Clap emoticon Clap emoticon

Modern Vespa is the premier site for modern Vespa and Piaggio scooters. Vespa GTS300, GTS250, GTV, GT200, LX150, LXS, ET4, ET2, MP3, Fuoco, Elettrica and more.

Modern Vespa is made possible by our generous supporters.

Buy Me A Coffee
 

Shop on Amazon with Modern Vespa

Modern Vespa is a participant in the Amazon Services LLC Associates Program, an affiliate advertising program designed to provide a means for sites to earn advertising fees by advertising and linking to amazon.com


All Content Copyright 2005-2026 by Modern Vespa.
All Rights Reserved.


[ Time: 0.0152s ][ Queries: 4 (0.0074s) ][ live ][ 343 ][ ThingOne ]