@bajarob avatar
UTC

Ossessionato
1961 VS5T, 1981 P200E, 2003 Malaguti F12 Phantom,Rigid Frame Chopper, 2001 Harley FXDXT
Joined: UTC
Posts: 2212
Location: Ventura, CA
 
Ossessionato
@bajarob avatar
1961 VS5T, 1981 P200E, 2003 Malaguti F12 Phantom,Rigid Frame Chopper, 2001 Harley FXDXT
Joined: UTC
Posts: 2212
Location: Ventura, CA
UTC quote
GeekLion wrote:
Sorting and Prepping for the build
Look at that! Way too organized for me 😆. I see your extended breather.
OP
@geeklion avatar
UTC

The Dude
Too Many piles of Junk that need too much work and too much money
Joined: UTC
Posts: 2688
Location: PNW from LBC
 
The Dude
@geeklion avatar
Too Many piles of Junk that need too much work and too much money
Joined: UTC
Posts: 2688
Location: PNW from LBC
UTC quote
BajaRob wrote:
Look at that! Way too organized for me 😆. I see your extended breather.
Yep! I like to have all the goodies clean and sorted before dealing with gasket goop, torque wrenches, and all the little bits. Makes the whole process efficient and smooth. I am this way with any and all things.

Got that extended breather when I ordered the JL pipe. TBH I'm not sure I'll use it unless truly necessary, but wanted to have it on hand, mostly just to see if its worth the moolalala. First impression, well made, but I'd make my own next time around.
OP
@geeklion avatar
UTC

The Dude
Too Many piles of Junk that need too much work and too much money
Joined: UTC
Posts: 2688
Location: PNW from LBC
 
The Dude
@geeklion avatar
Too Many piles of Junk that need too much work and too much money
Joined: UTC
Posts: 2688
Location: PNW from LBC
UTC quote
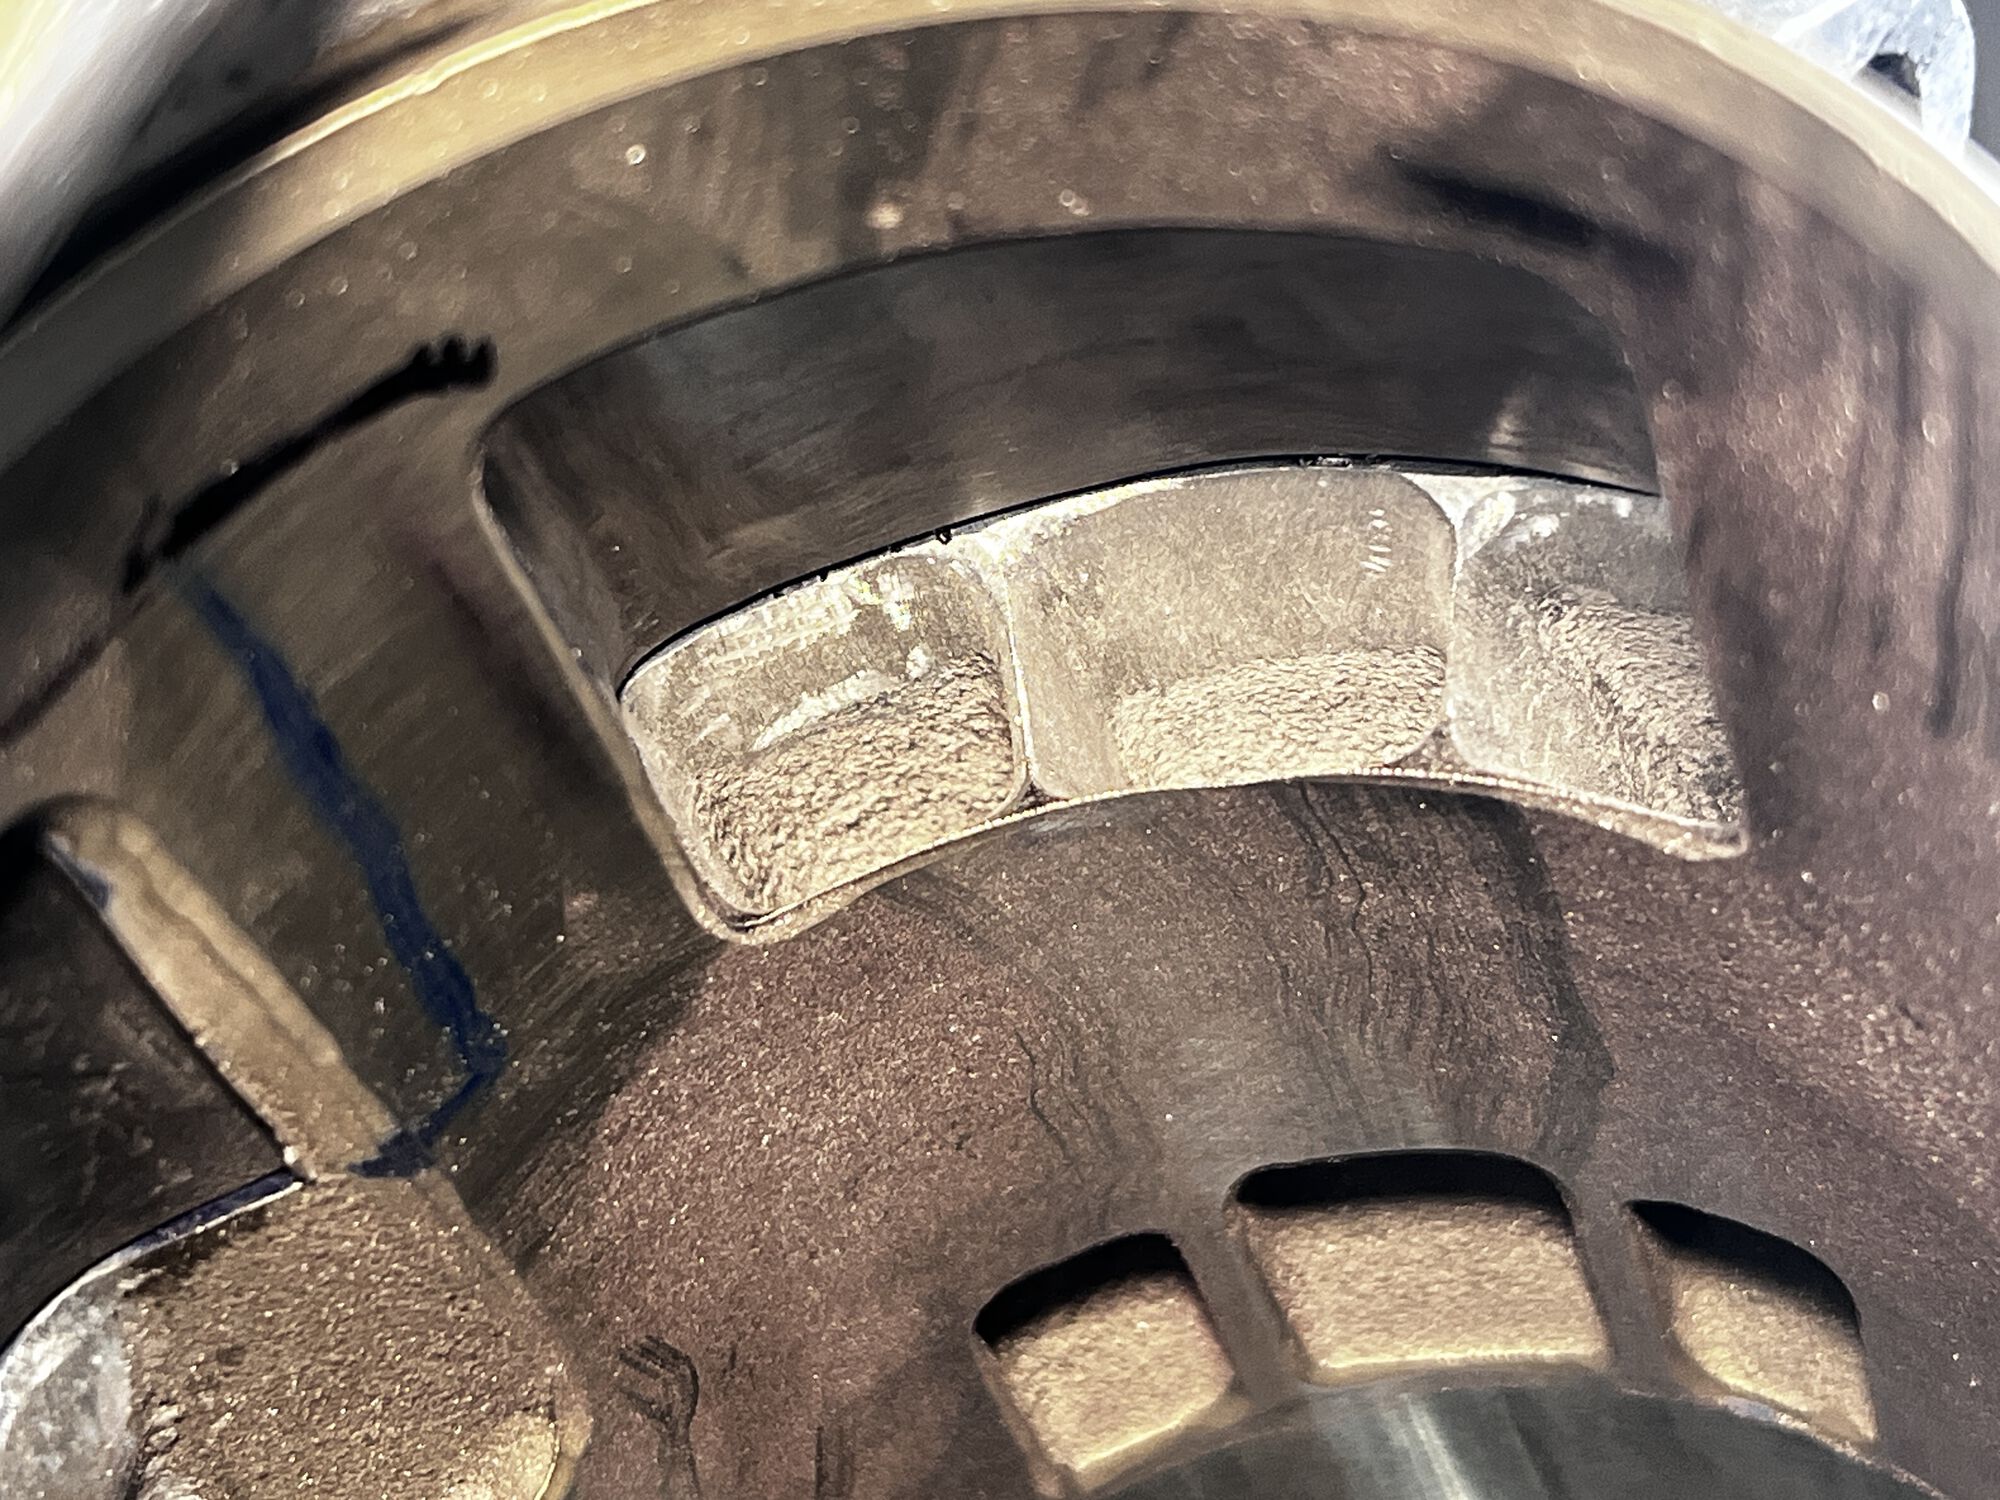
The Past few days I've been working on port matching and fine tuning. There is still a bit of cleanup work to do, but it's 95% done. Not perfect, but not terrible. Here are all the things I've done and a bunch of photos.

For reference, I'll be running a 60mm stroke bell crank with 1.5mm head packer with the Malossi Sport kit. MRP reed intake, genuine yamaha rd350 reed block, MRP reed stuffer

Cases
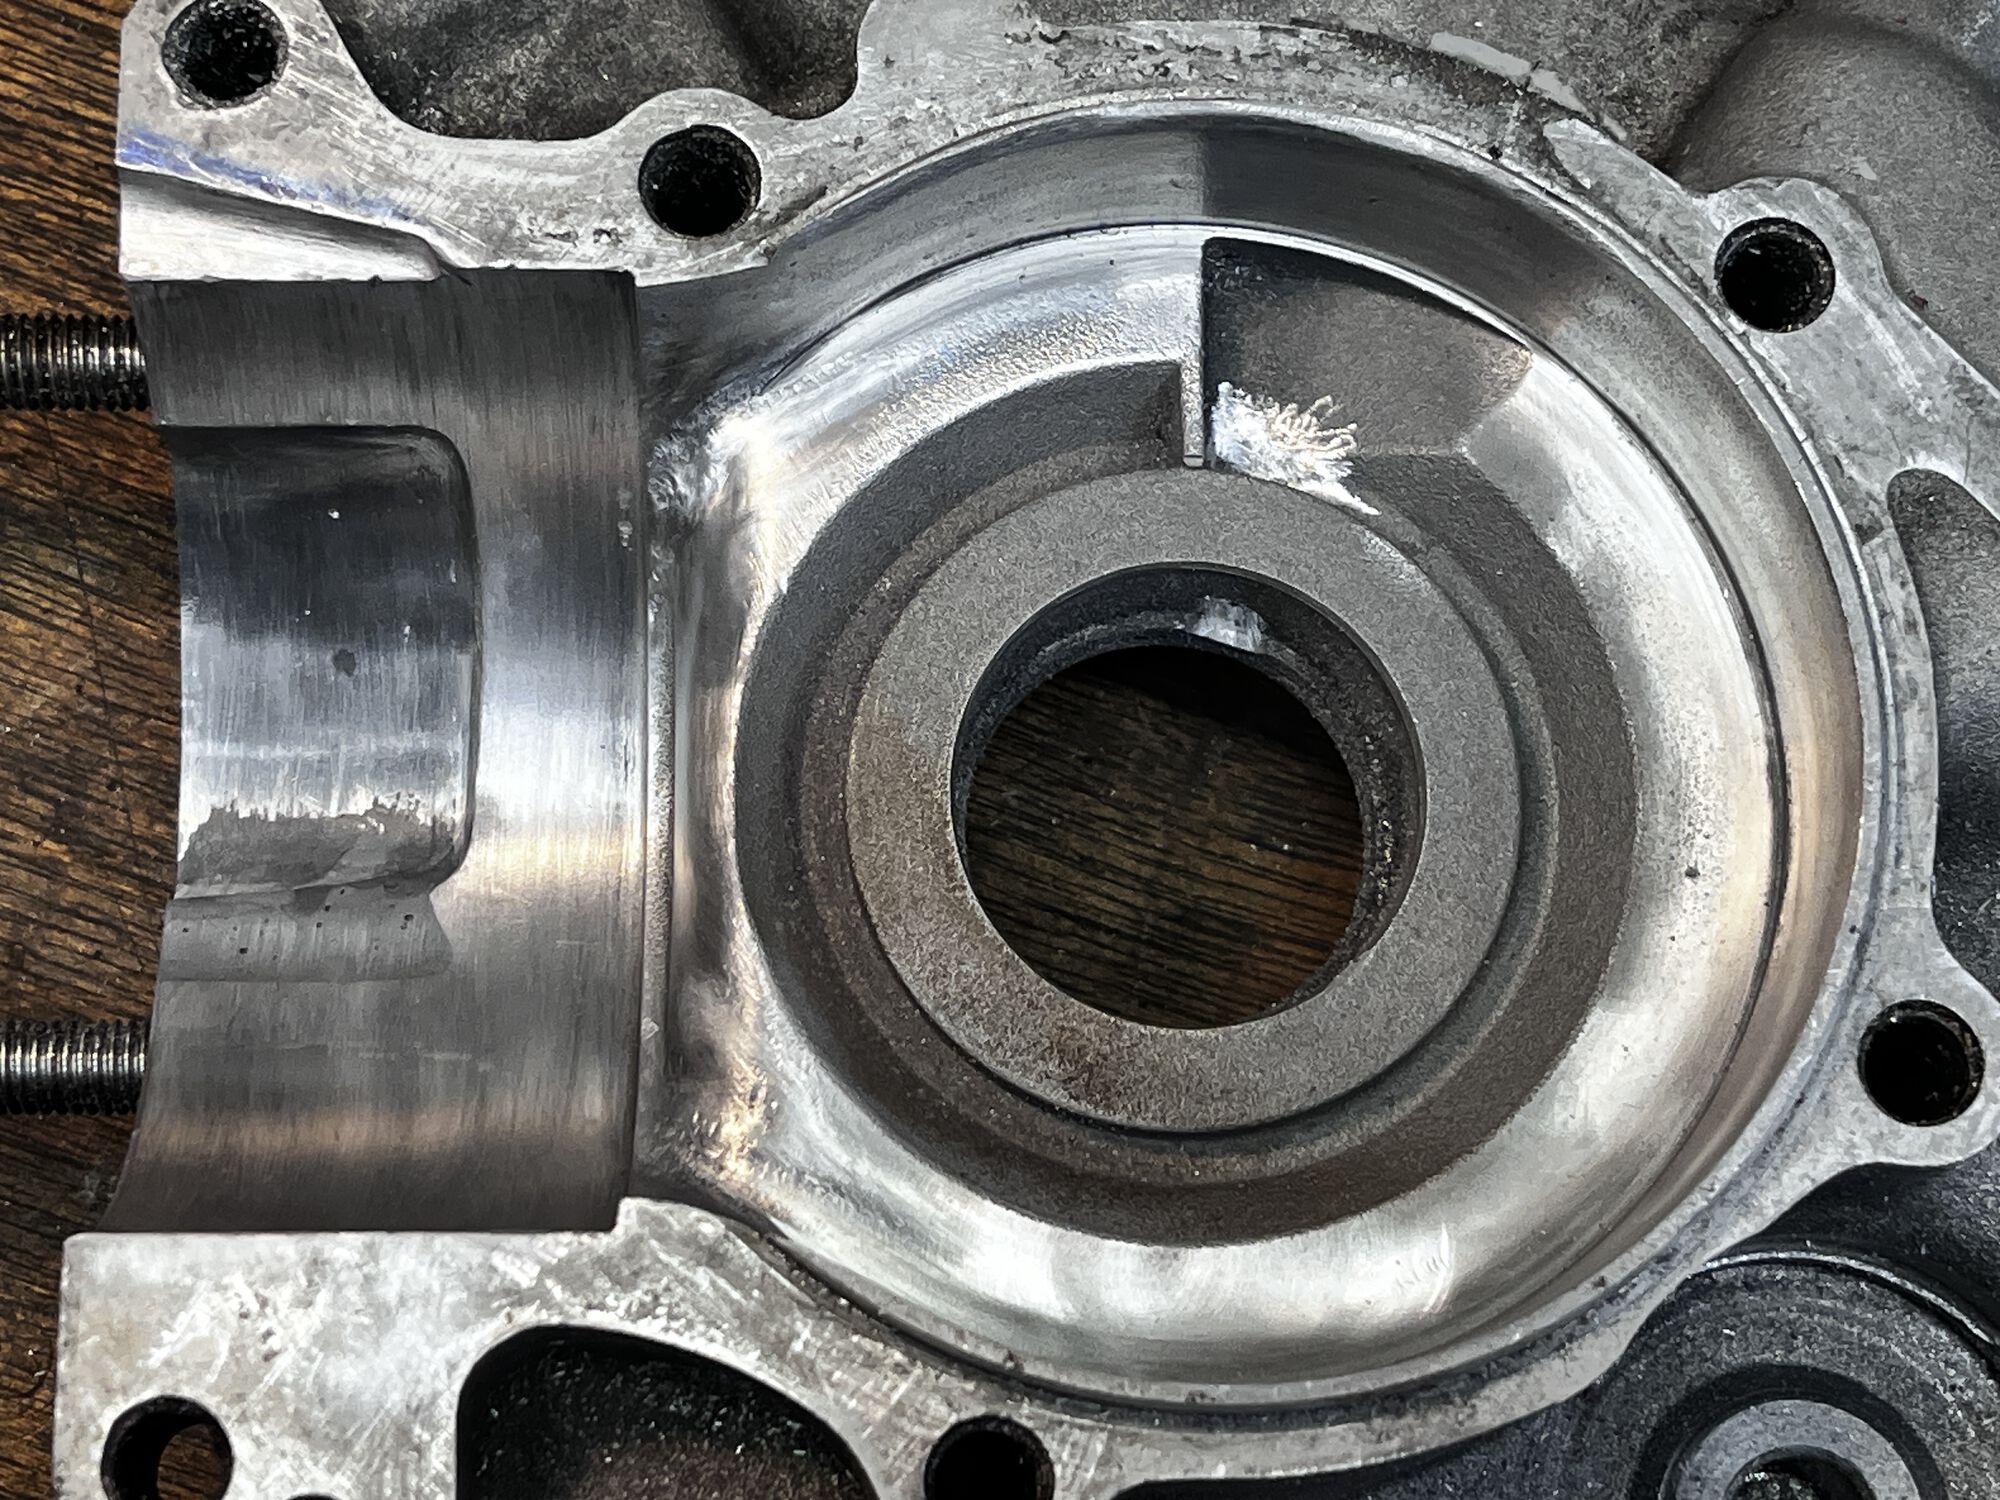
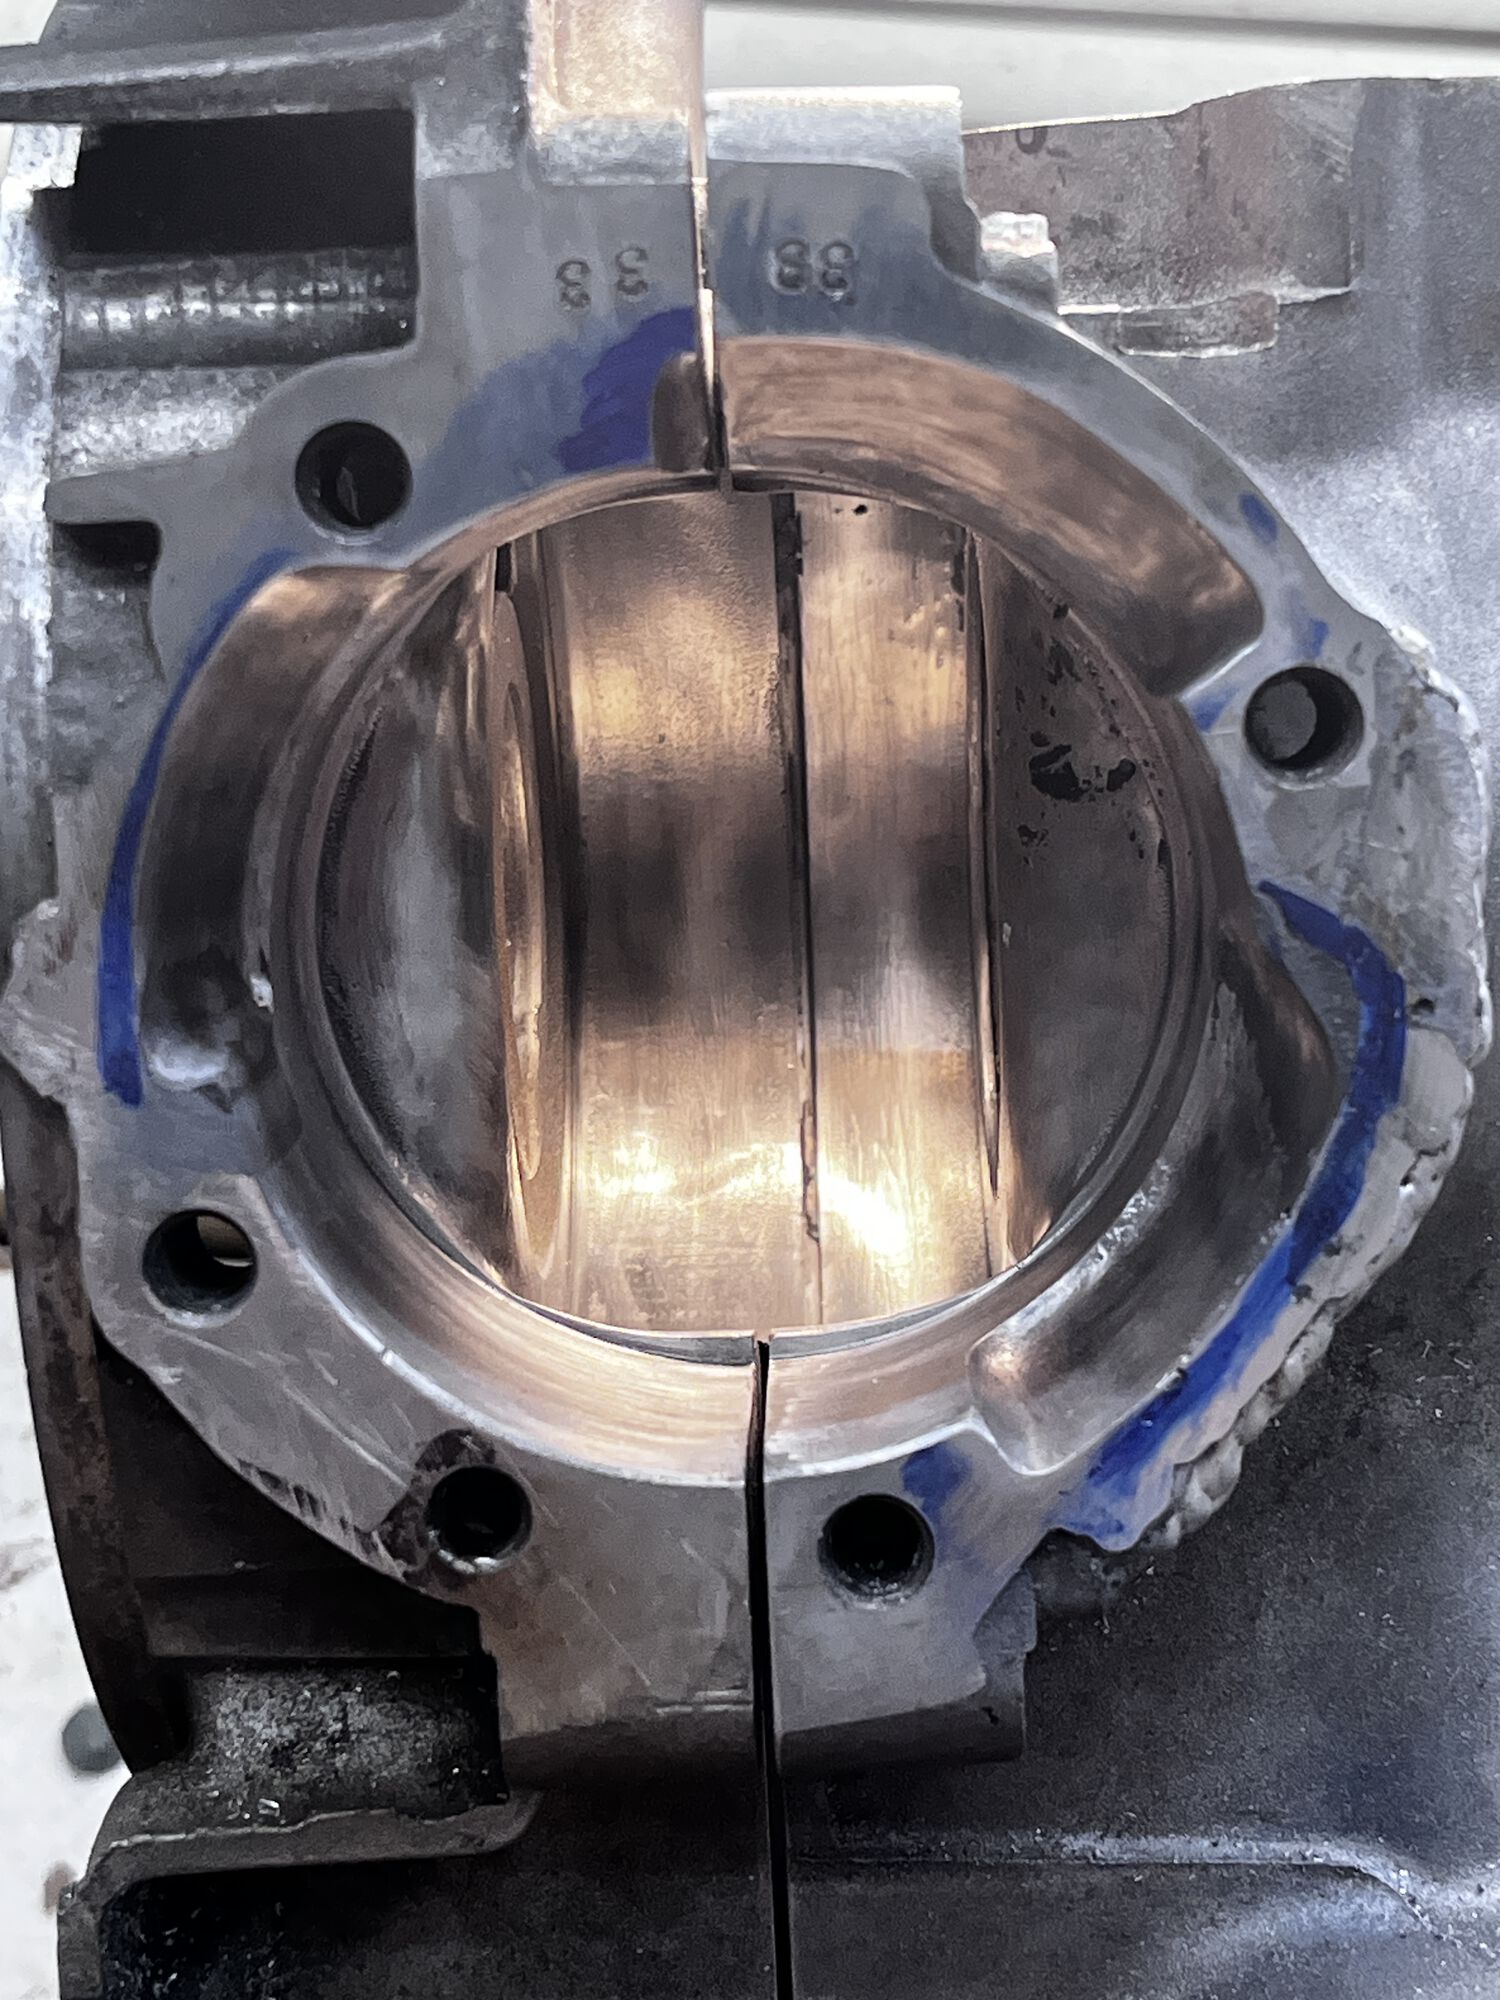
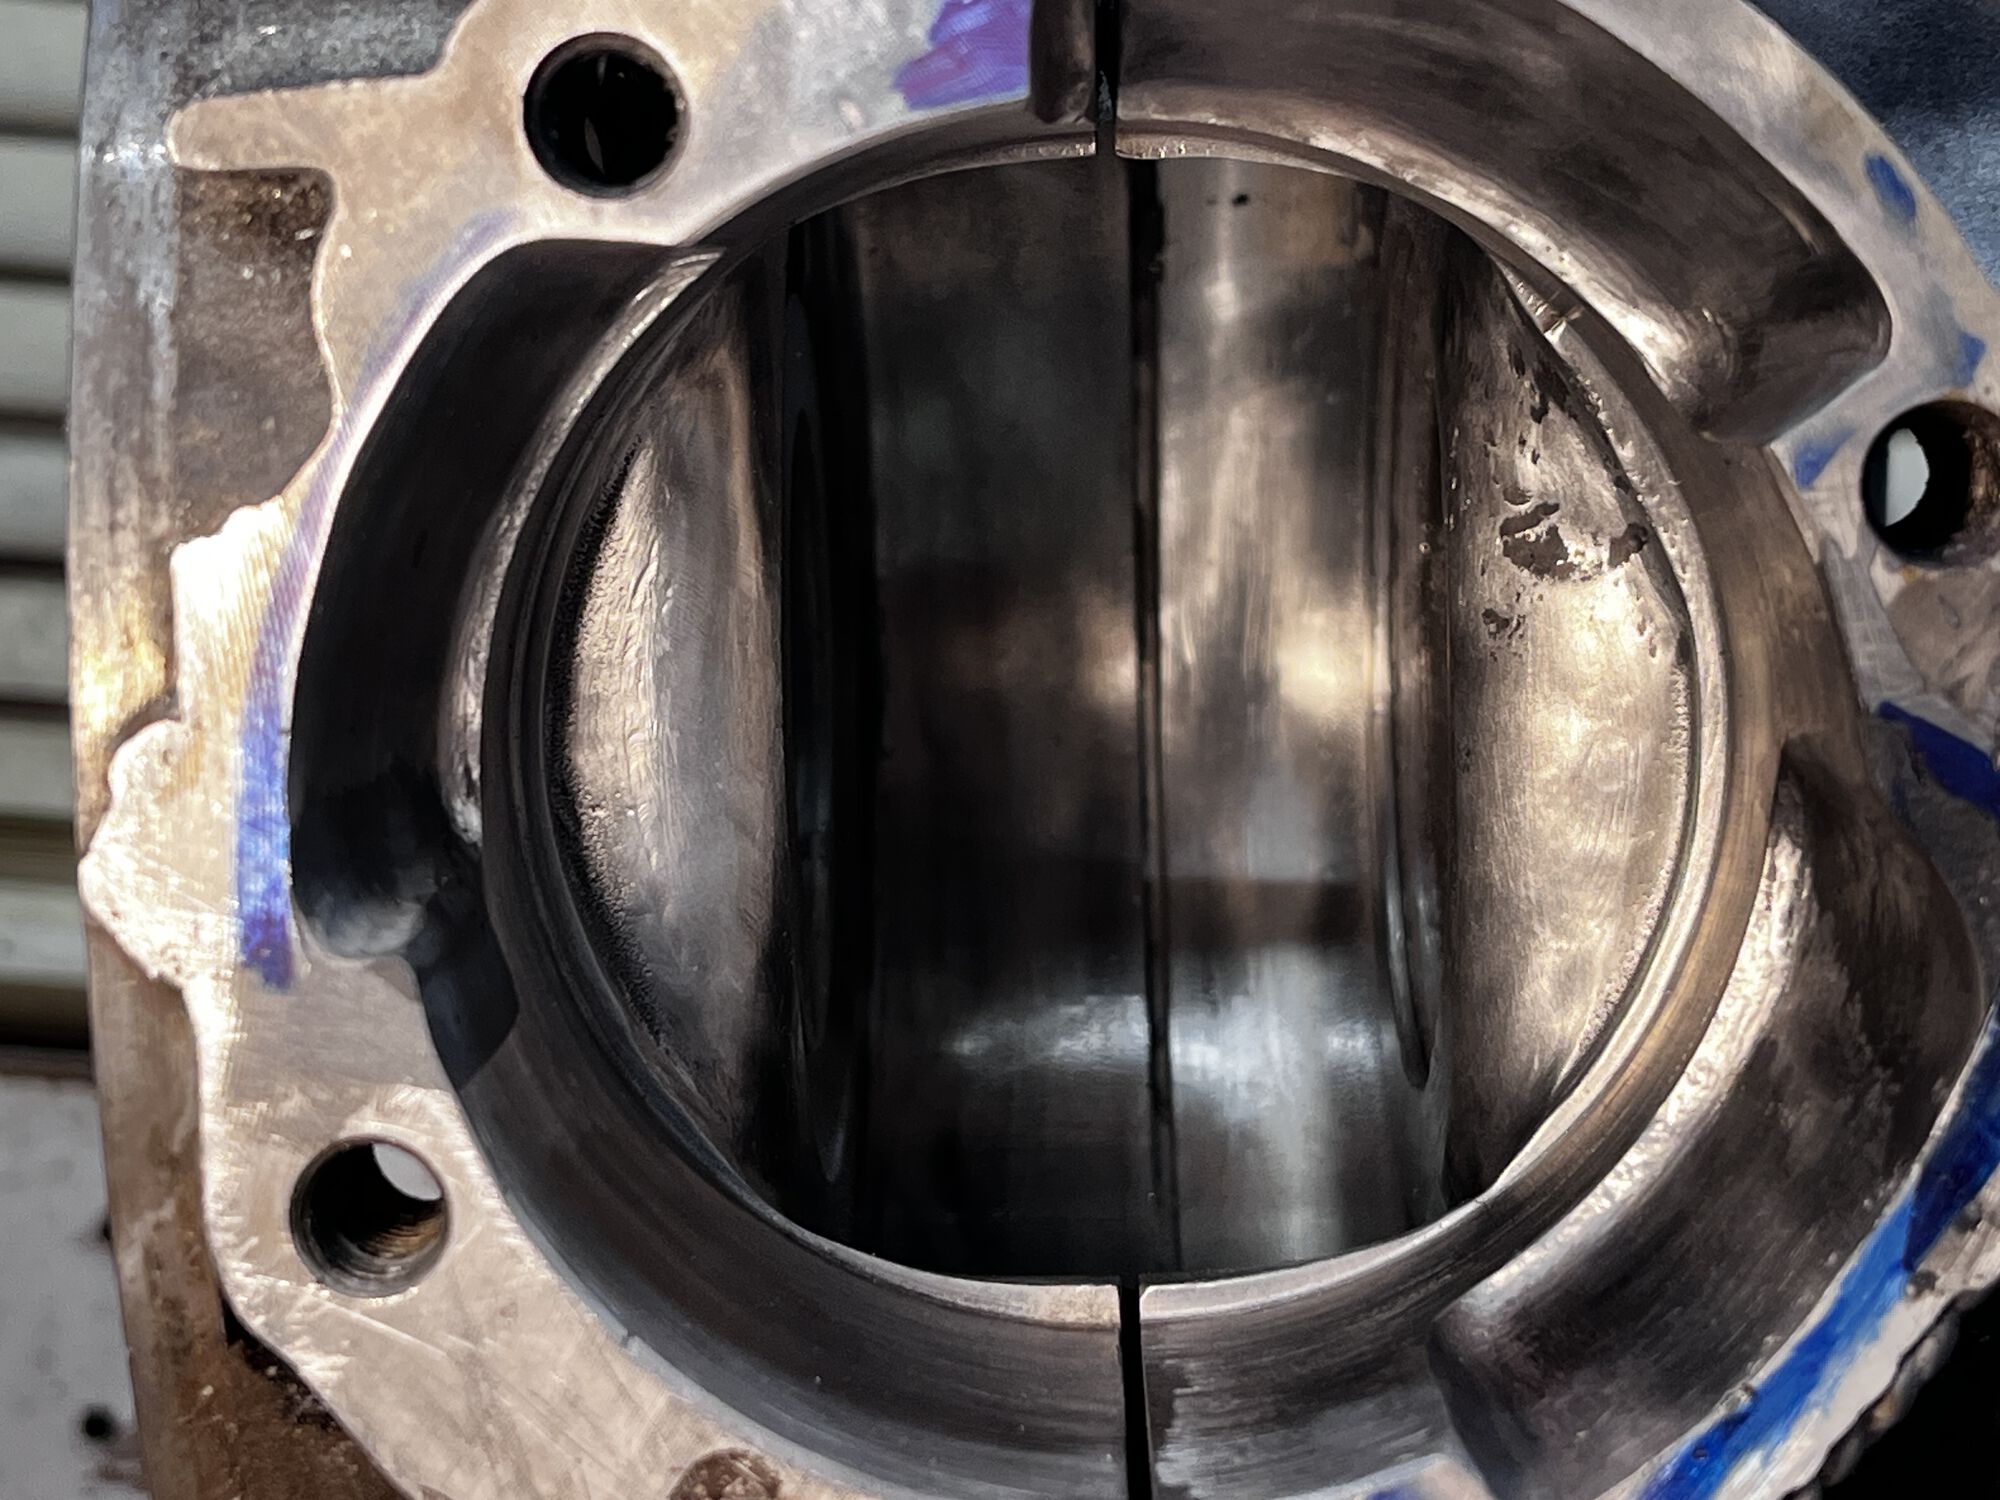
- transfer ports matched to cylinder
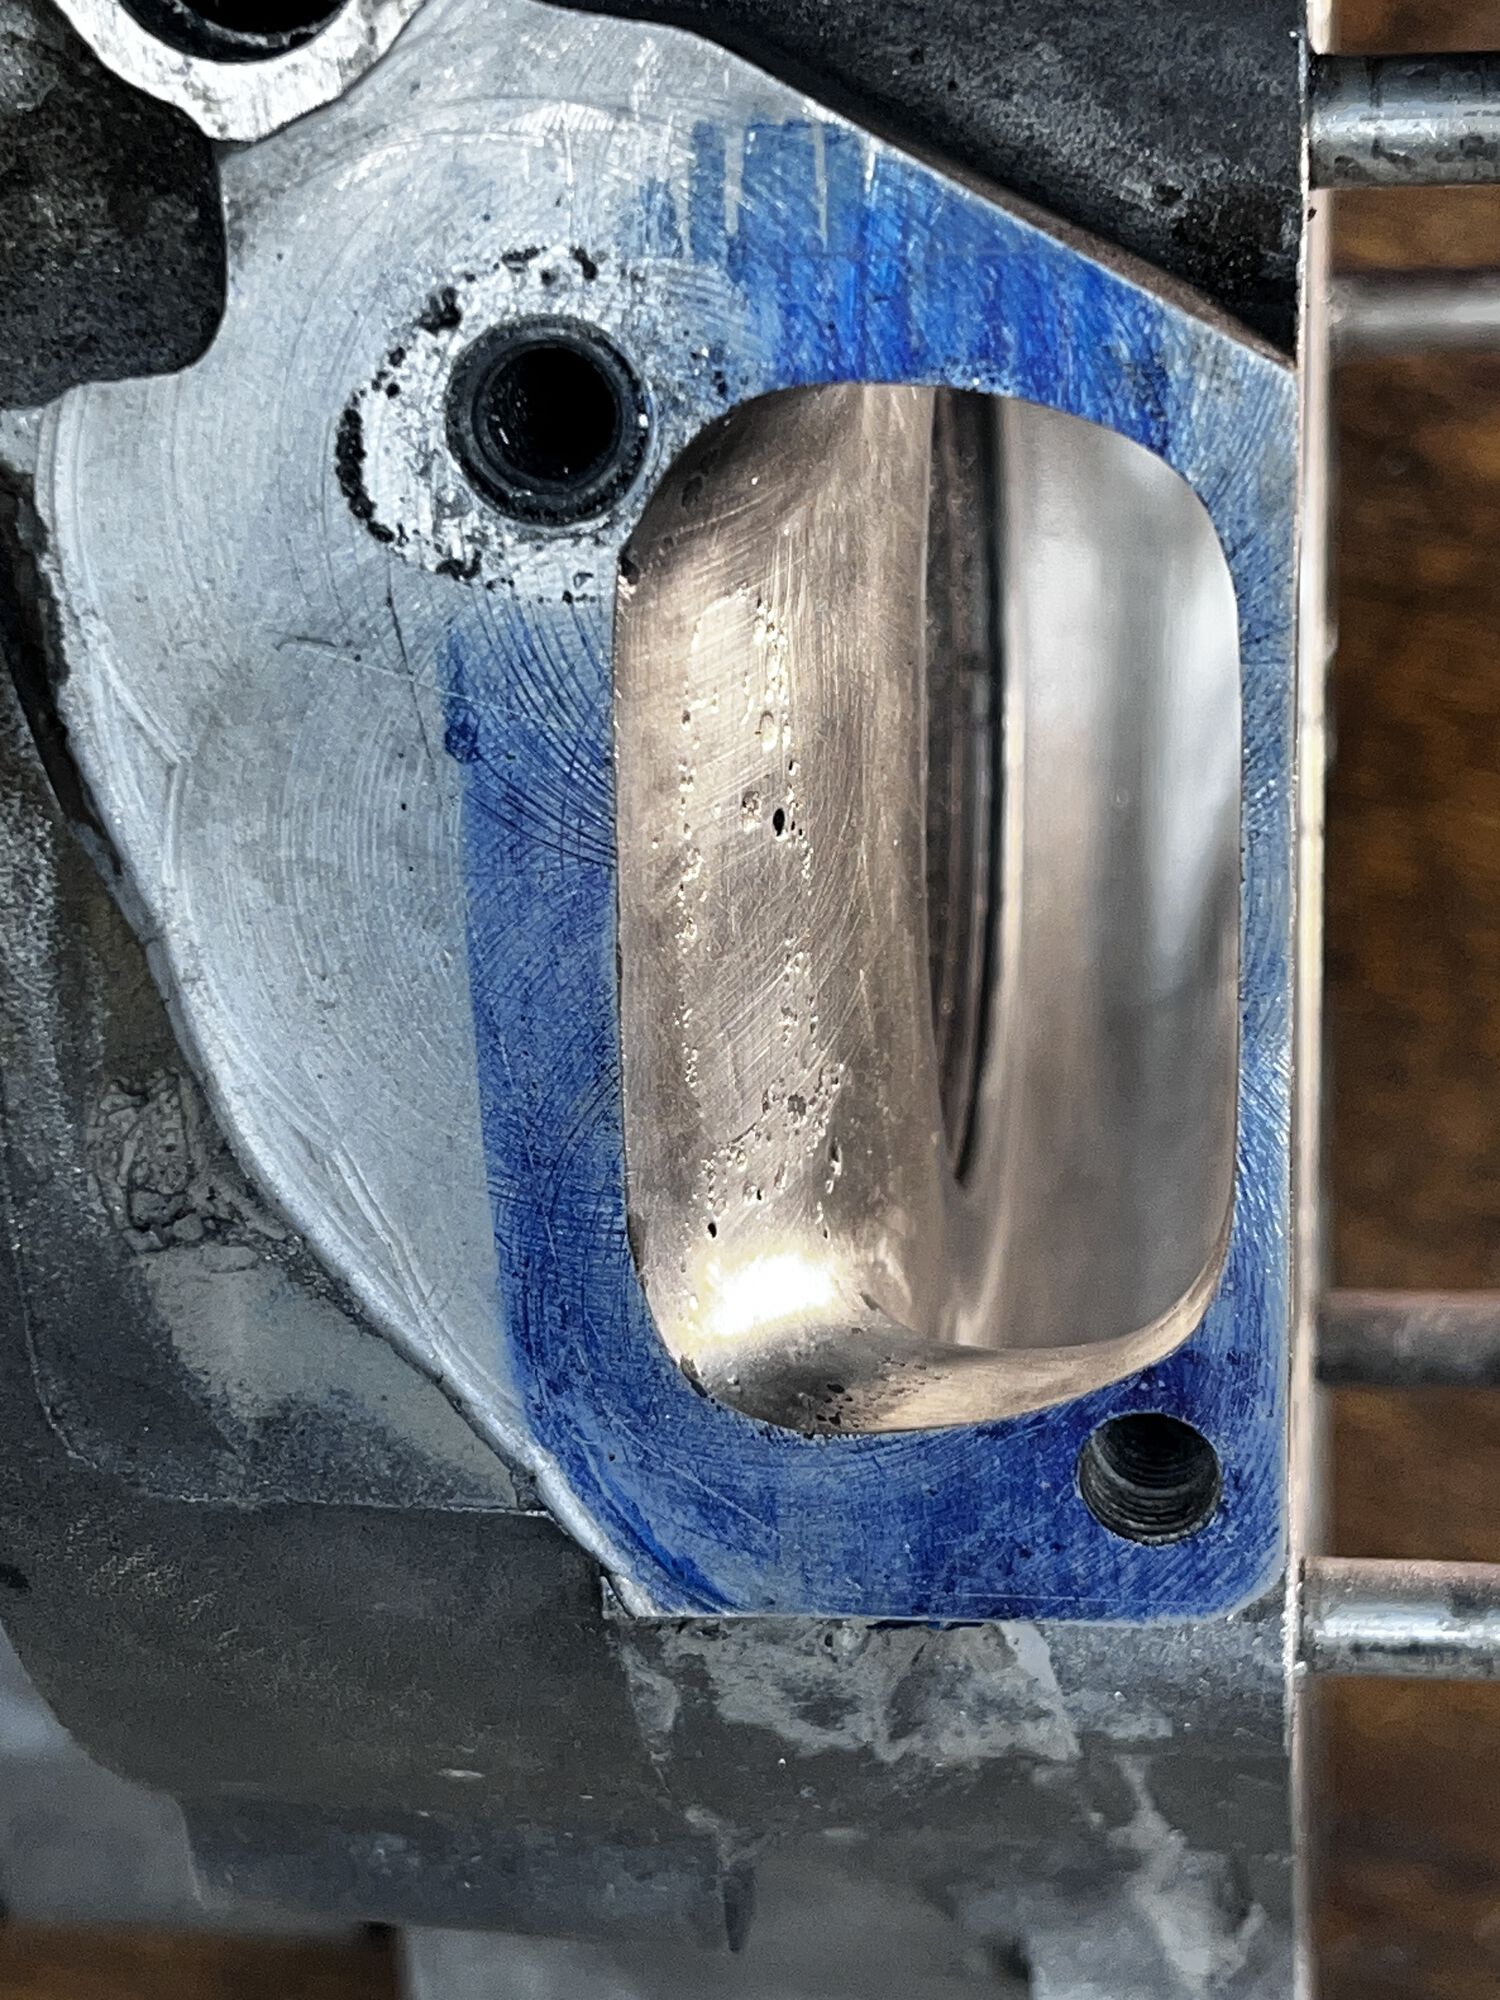
- Inlet opened, matched & flowed
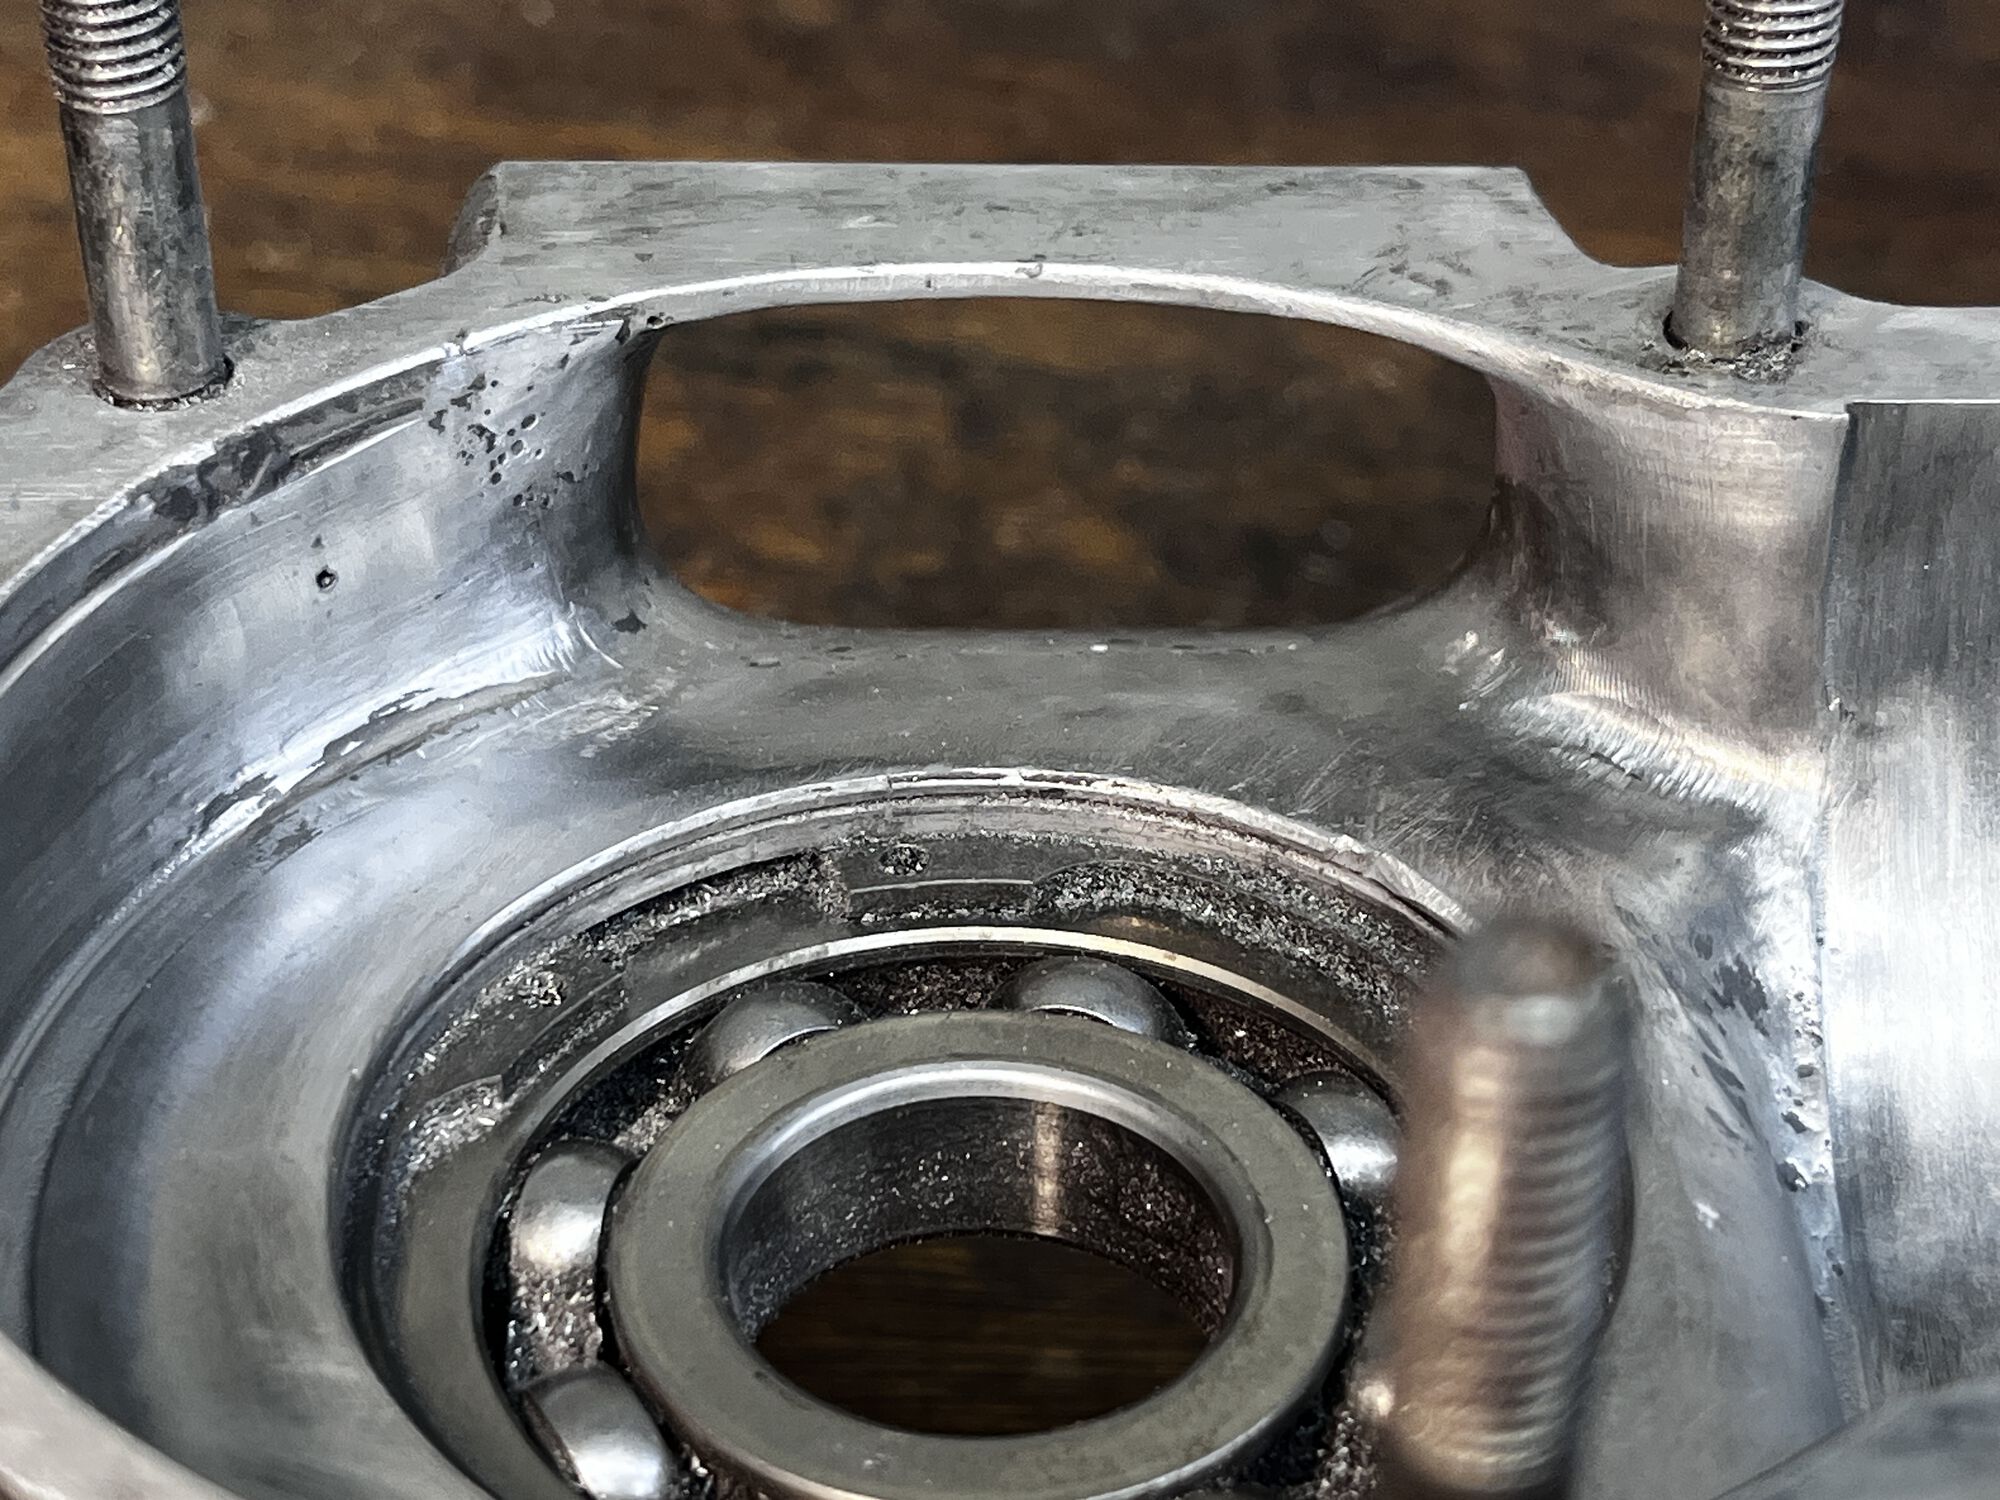
- crank housing clutch side lip chamfered, for less restricted fuel flow
- crank housing forward edge on both halves radiused and flowed
- fly side bearing oil hole opened just a fit, careful not to damage seal seat

Cylinder
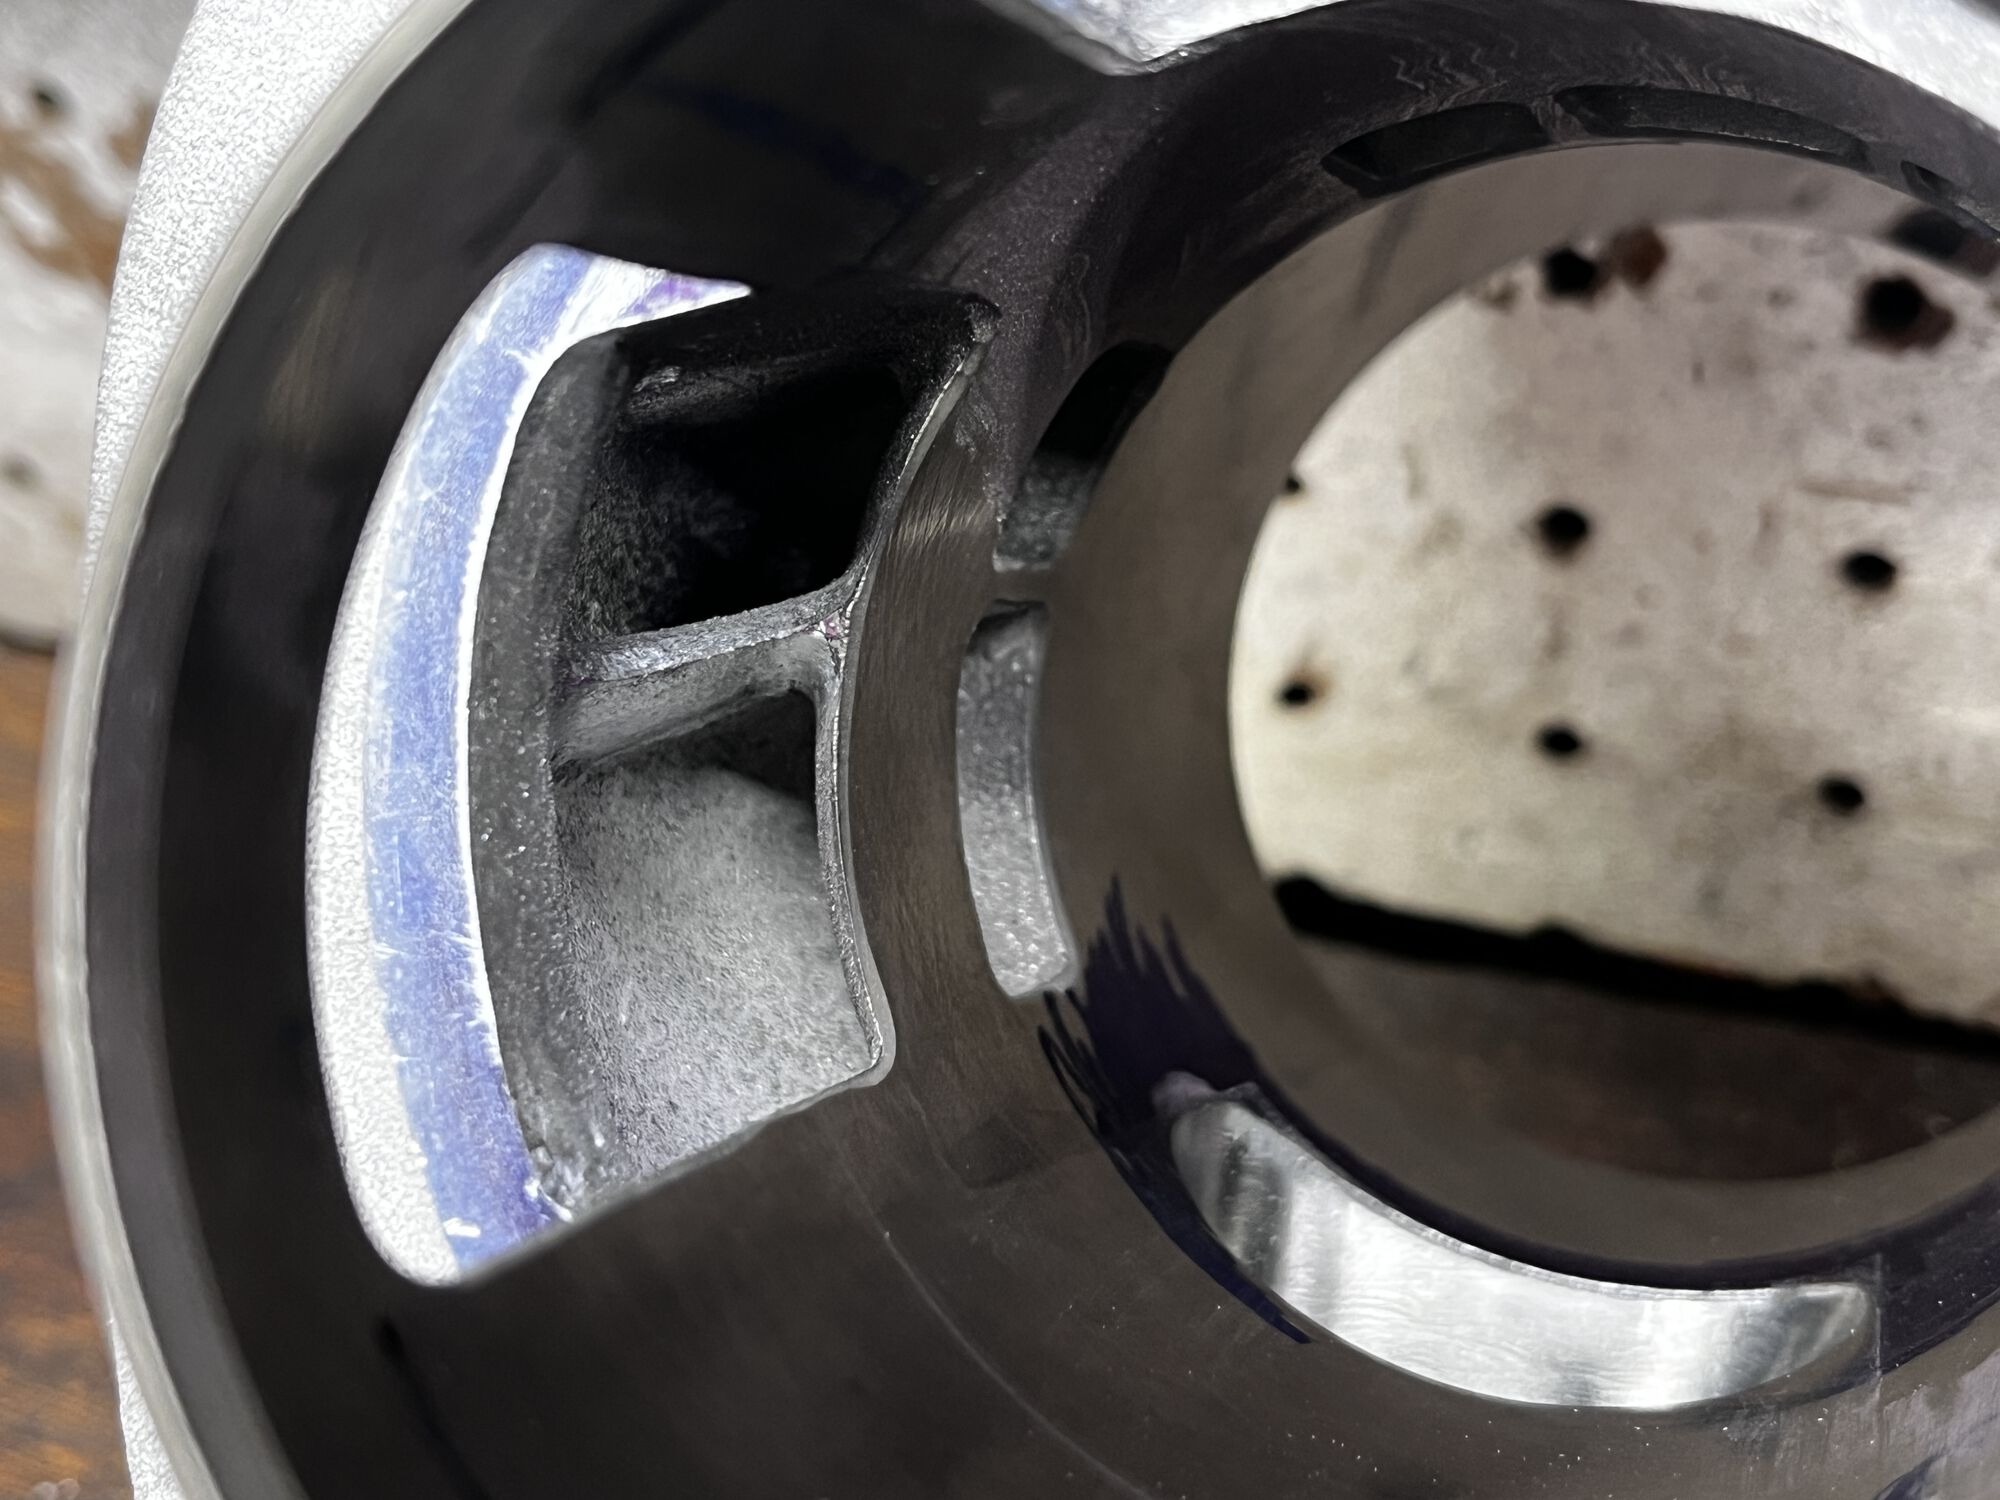
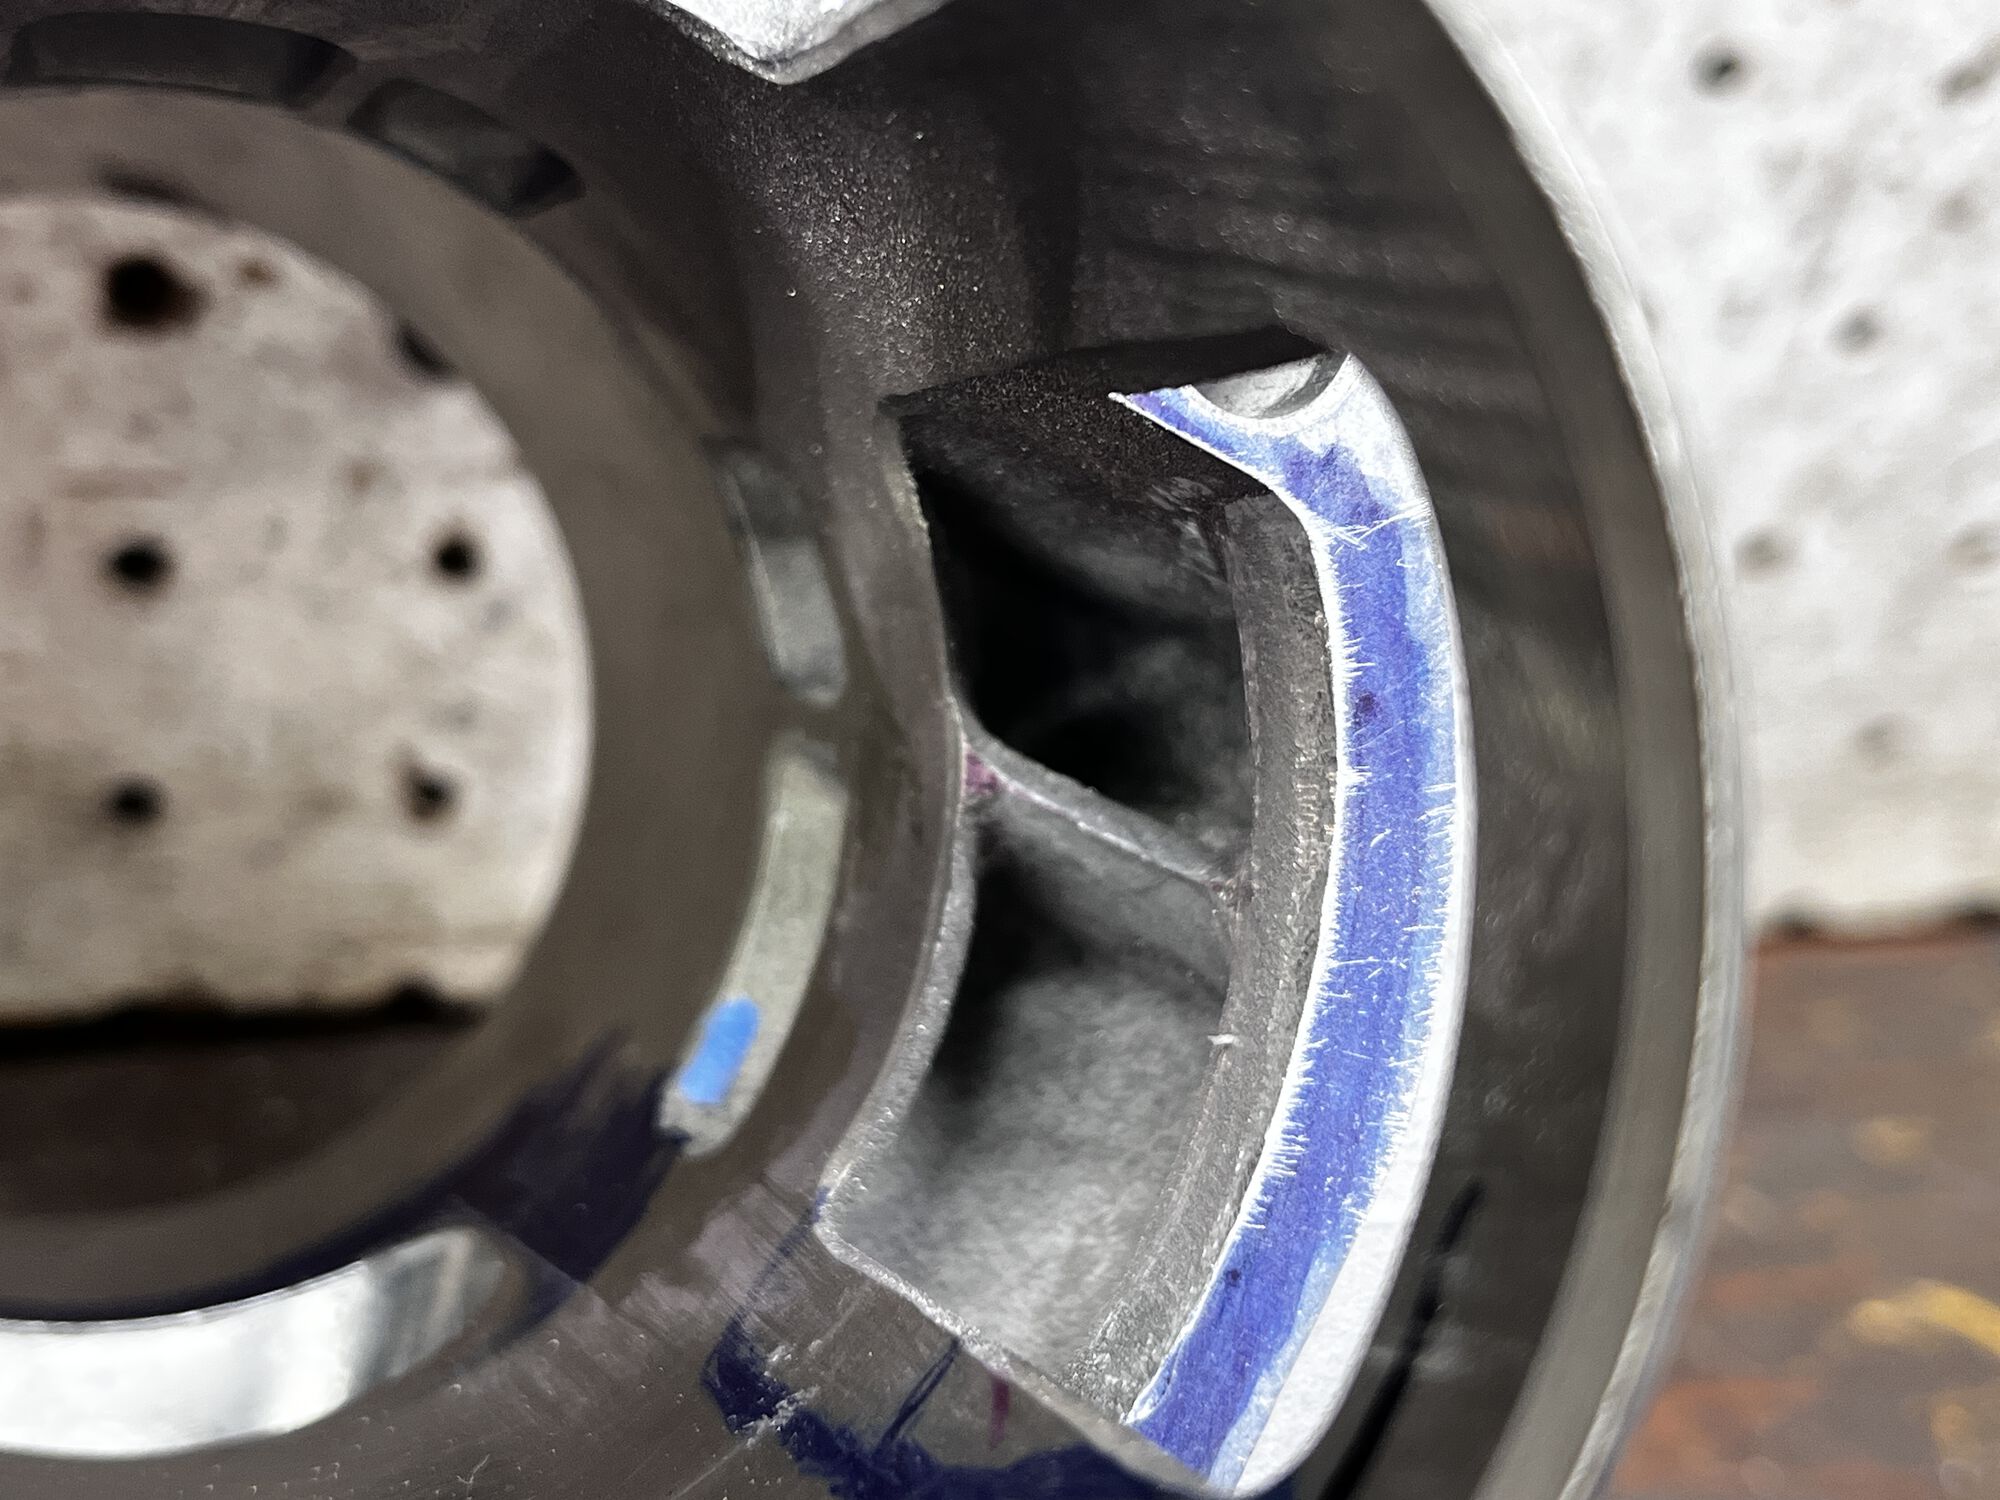
- Boost port opened a bit, dividers knife edged
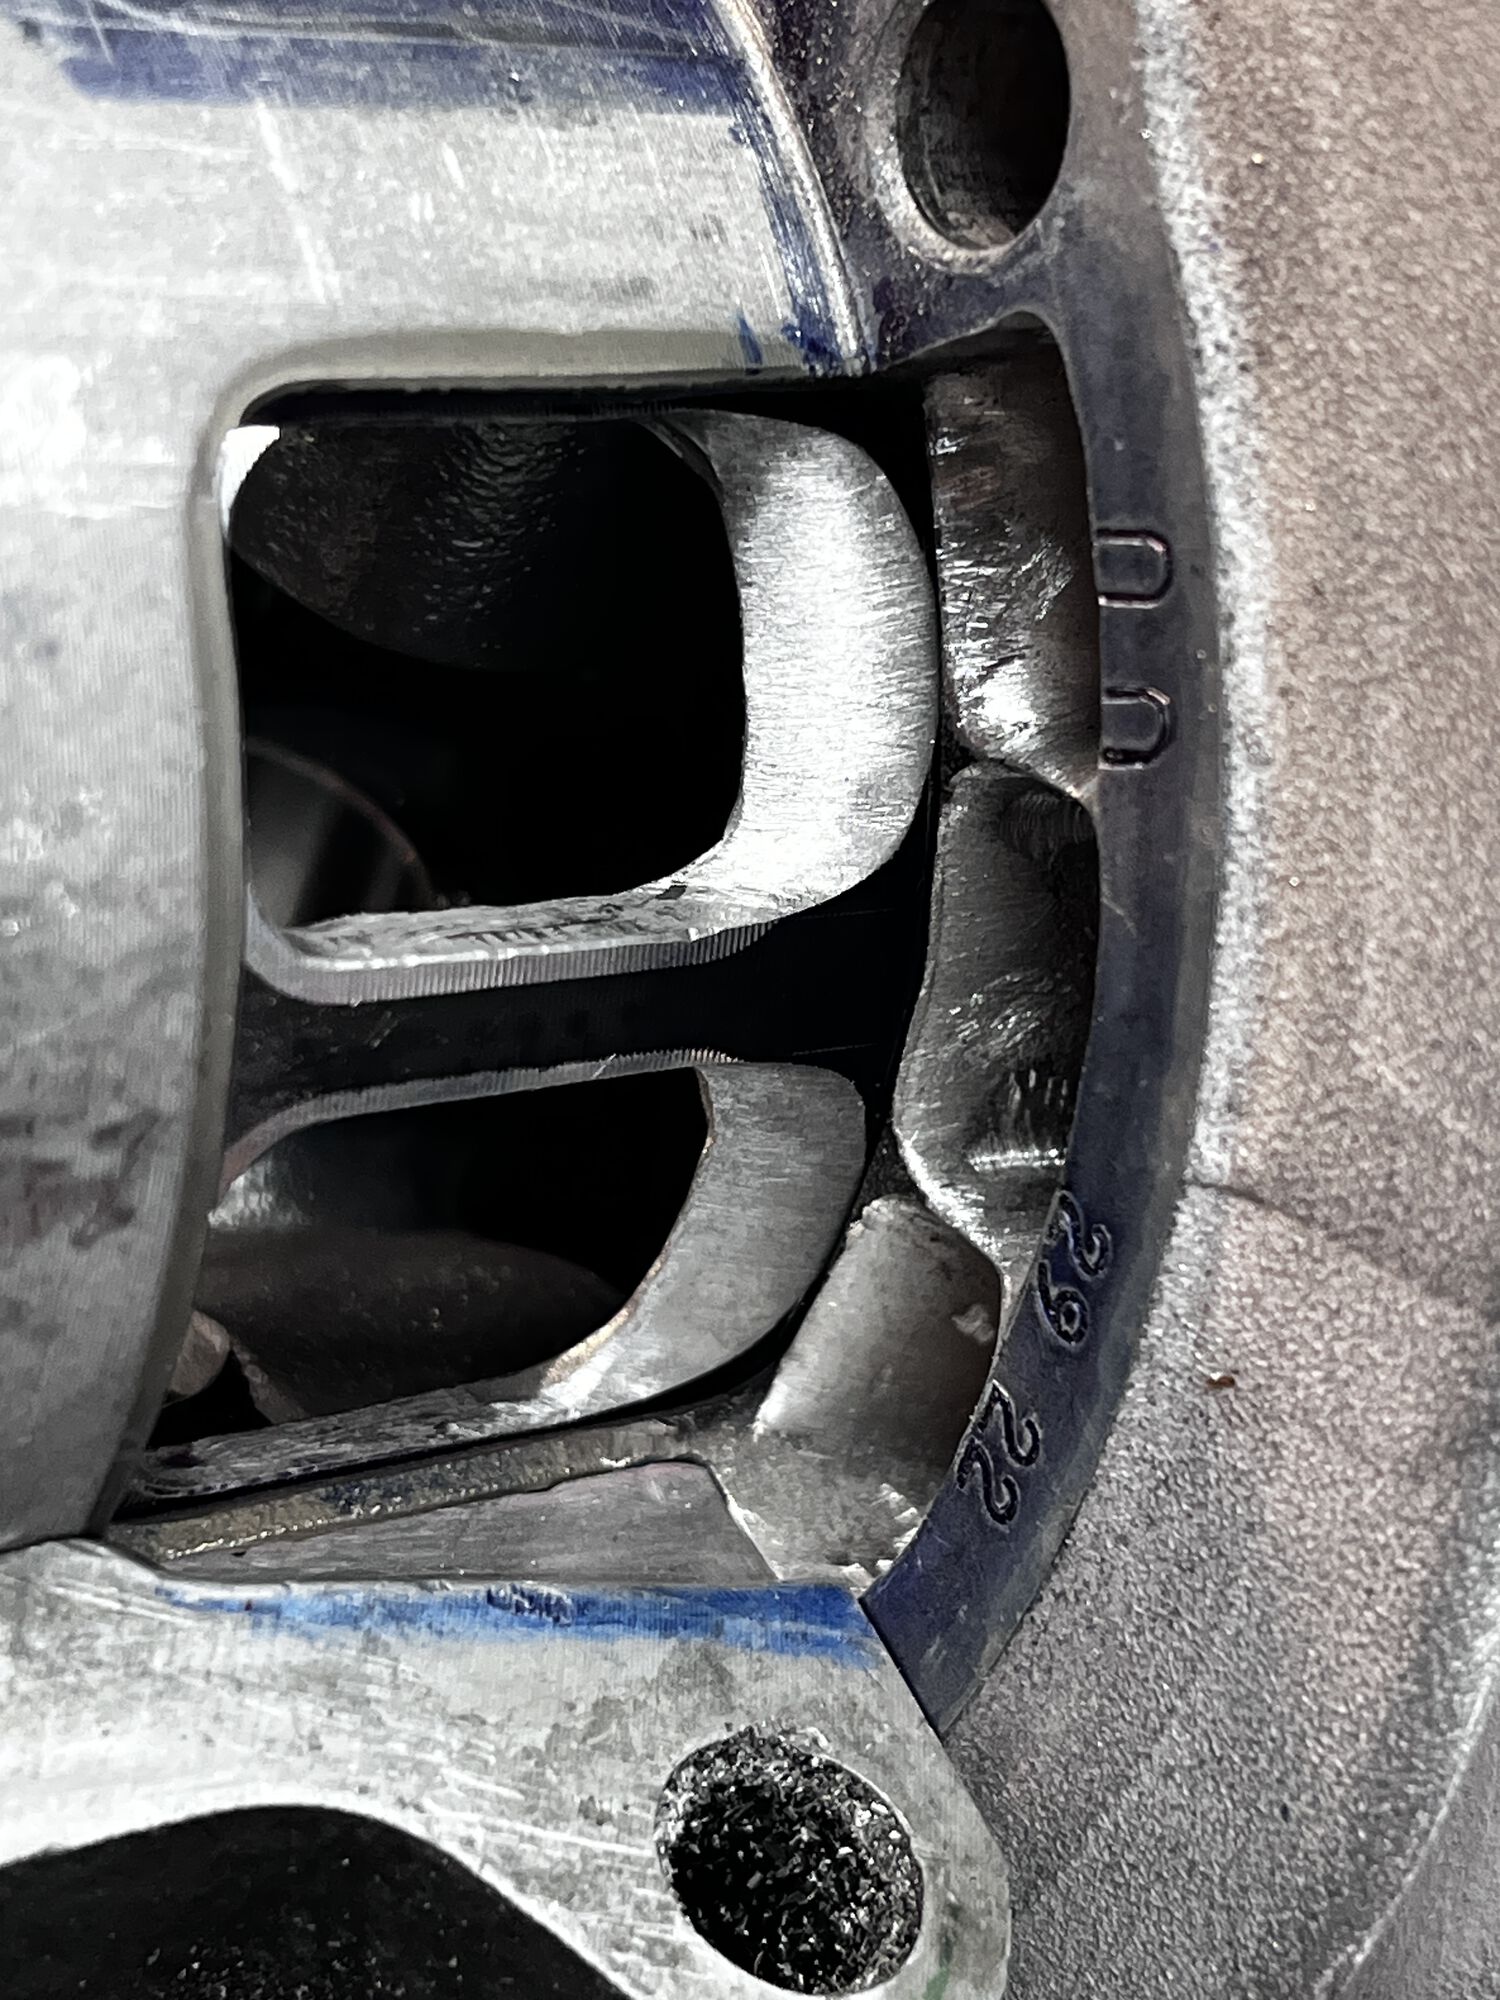
- transfer ports opened a bit, dividers knife edged
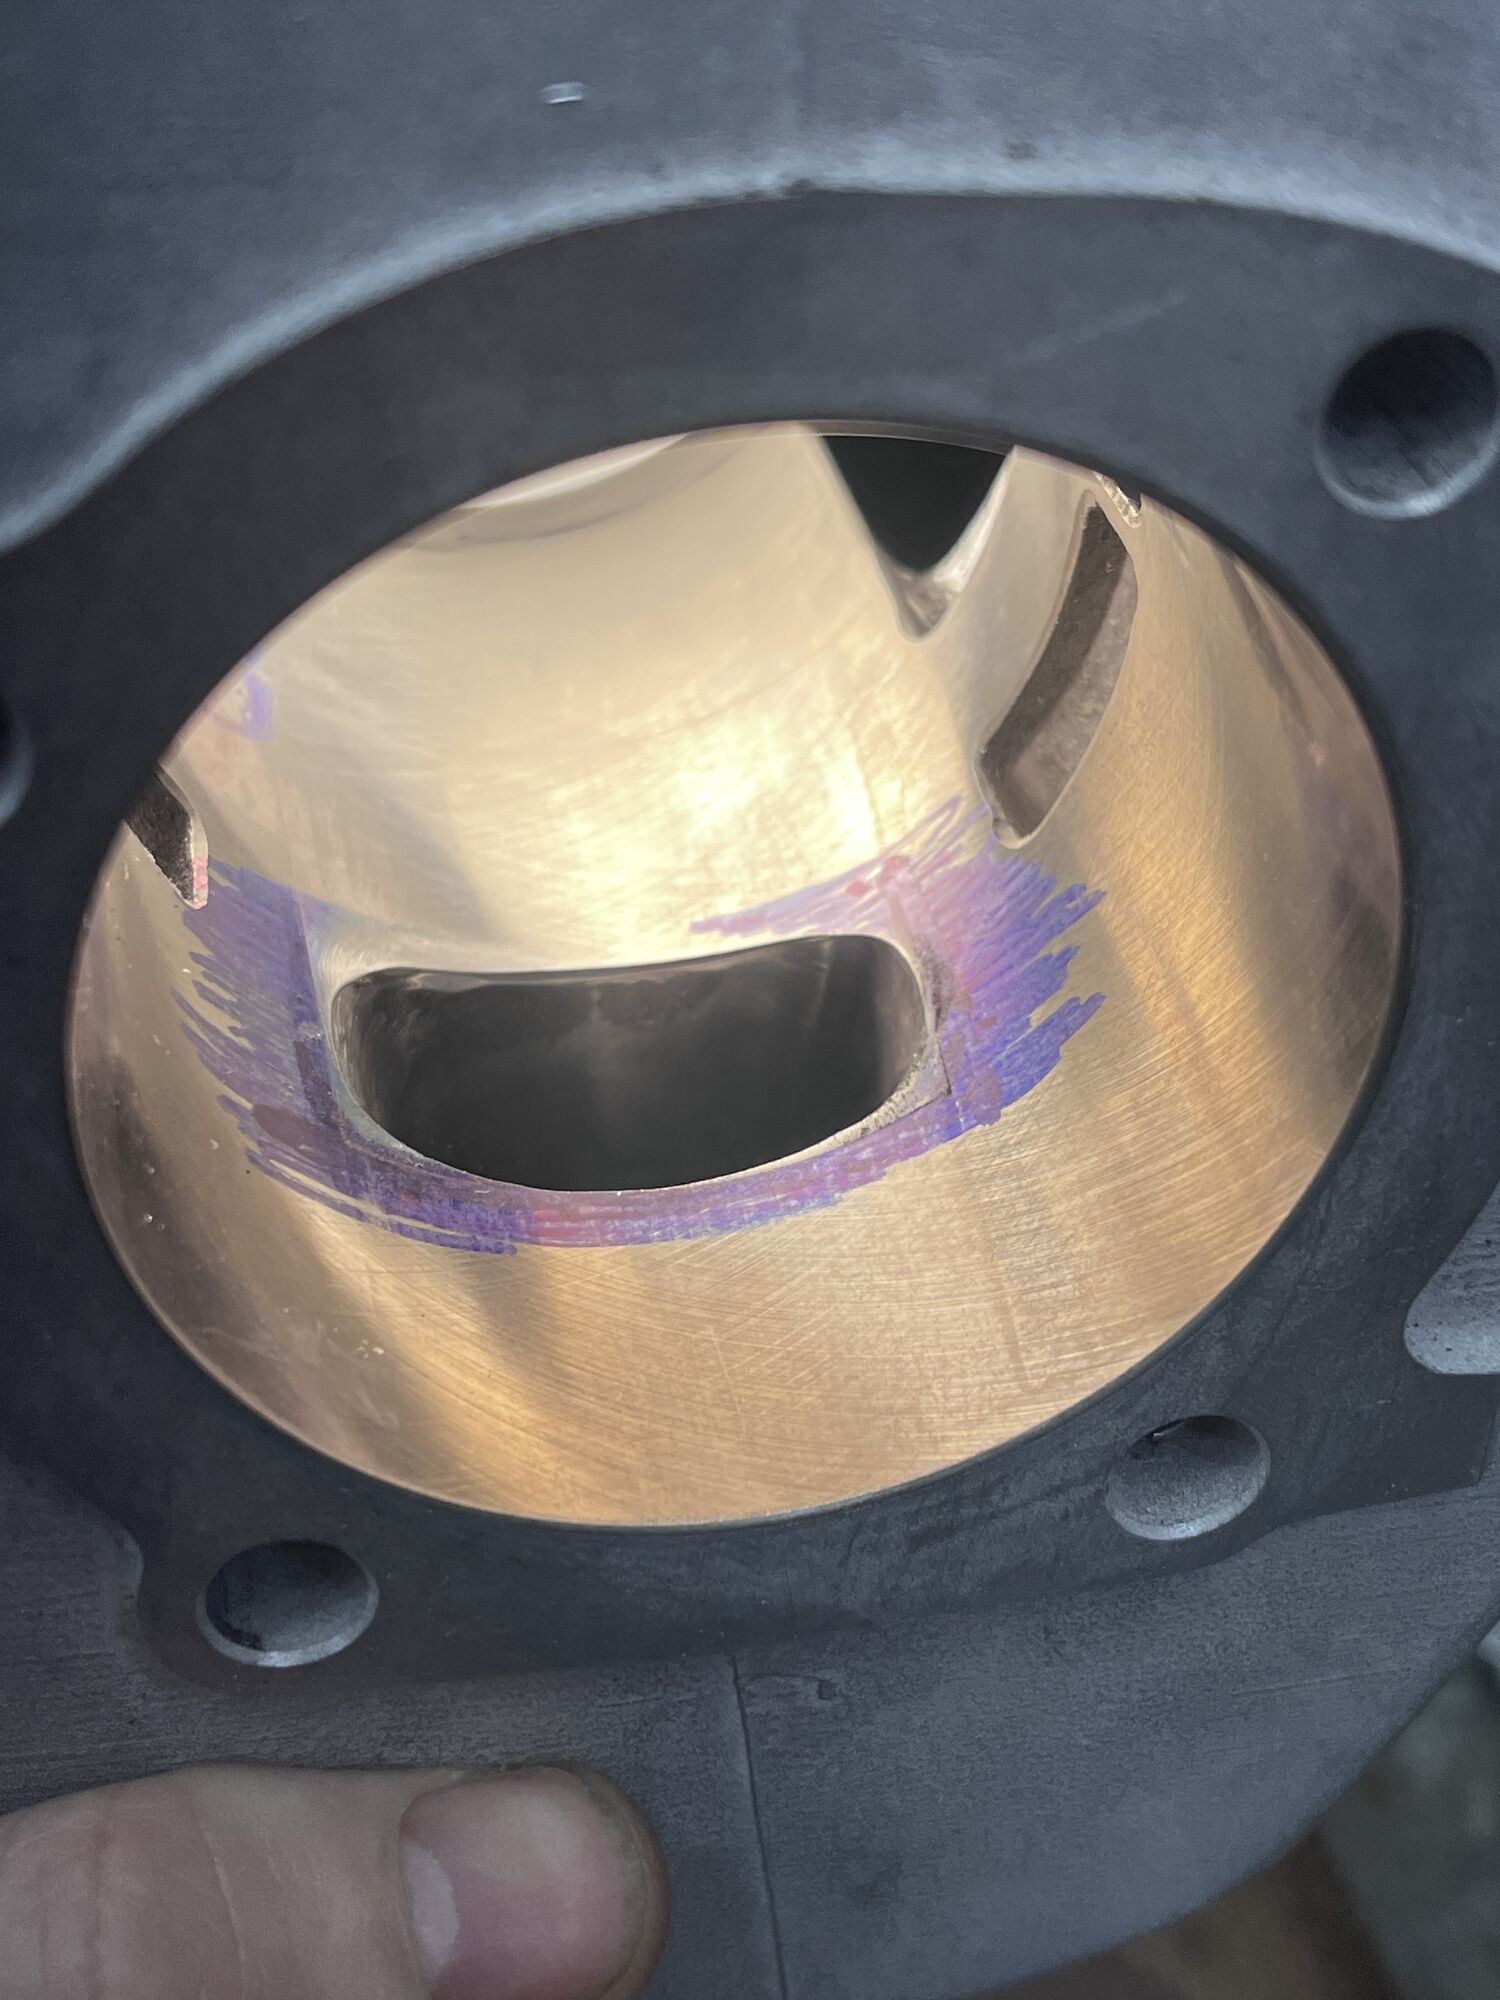
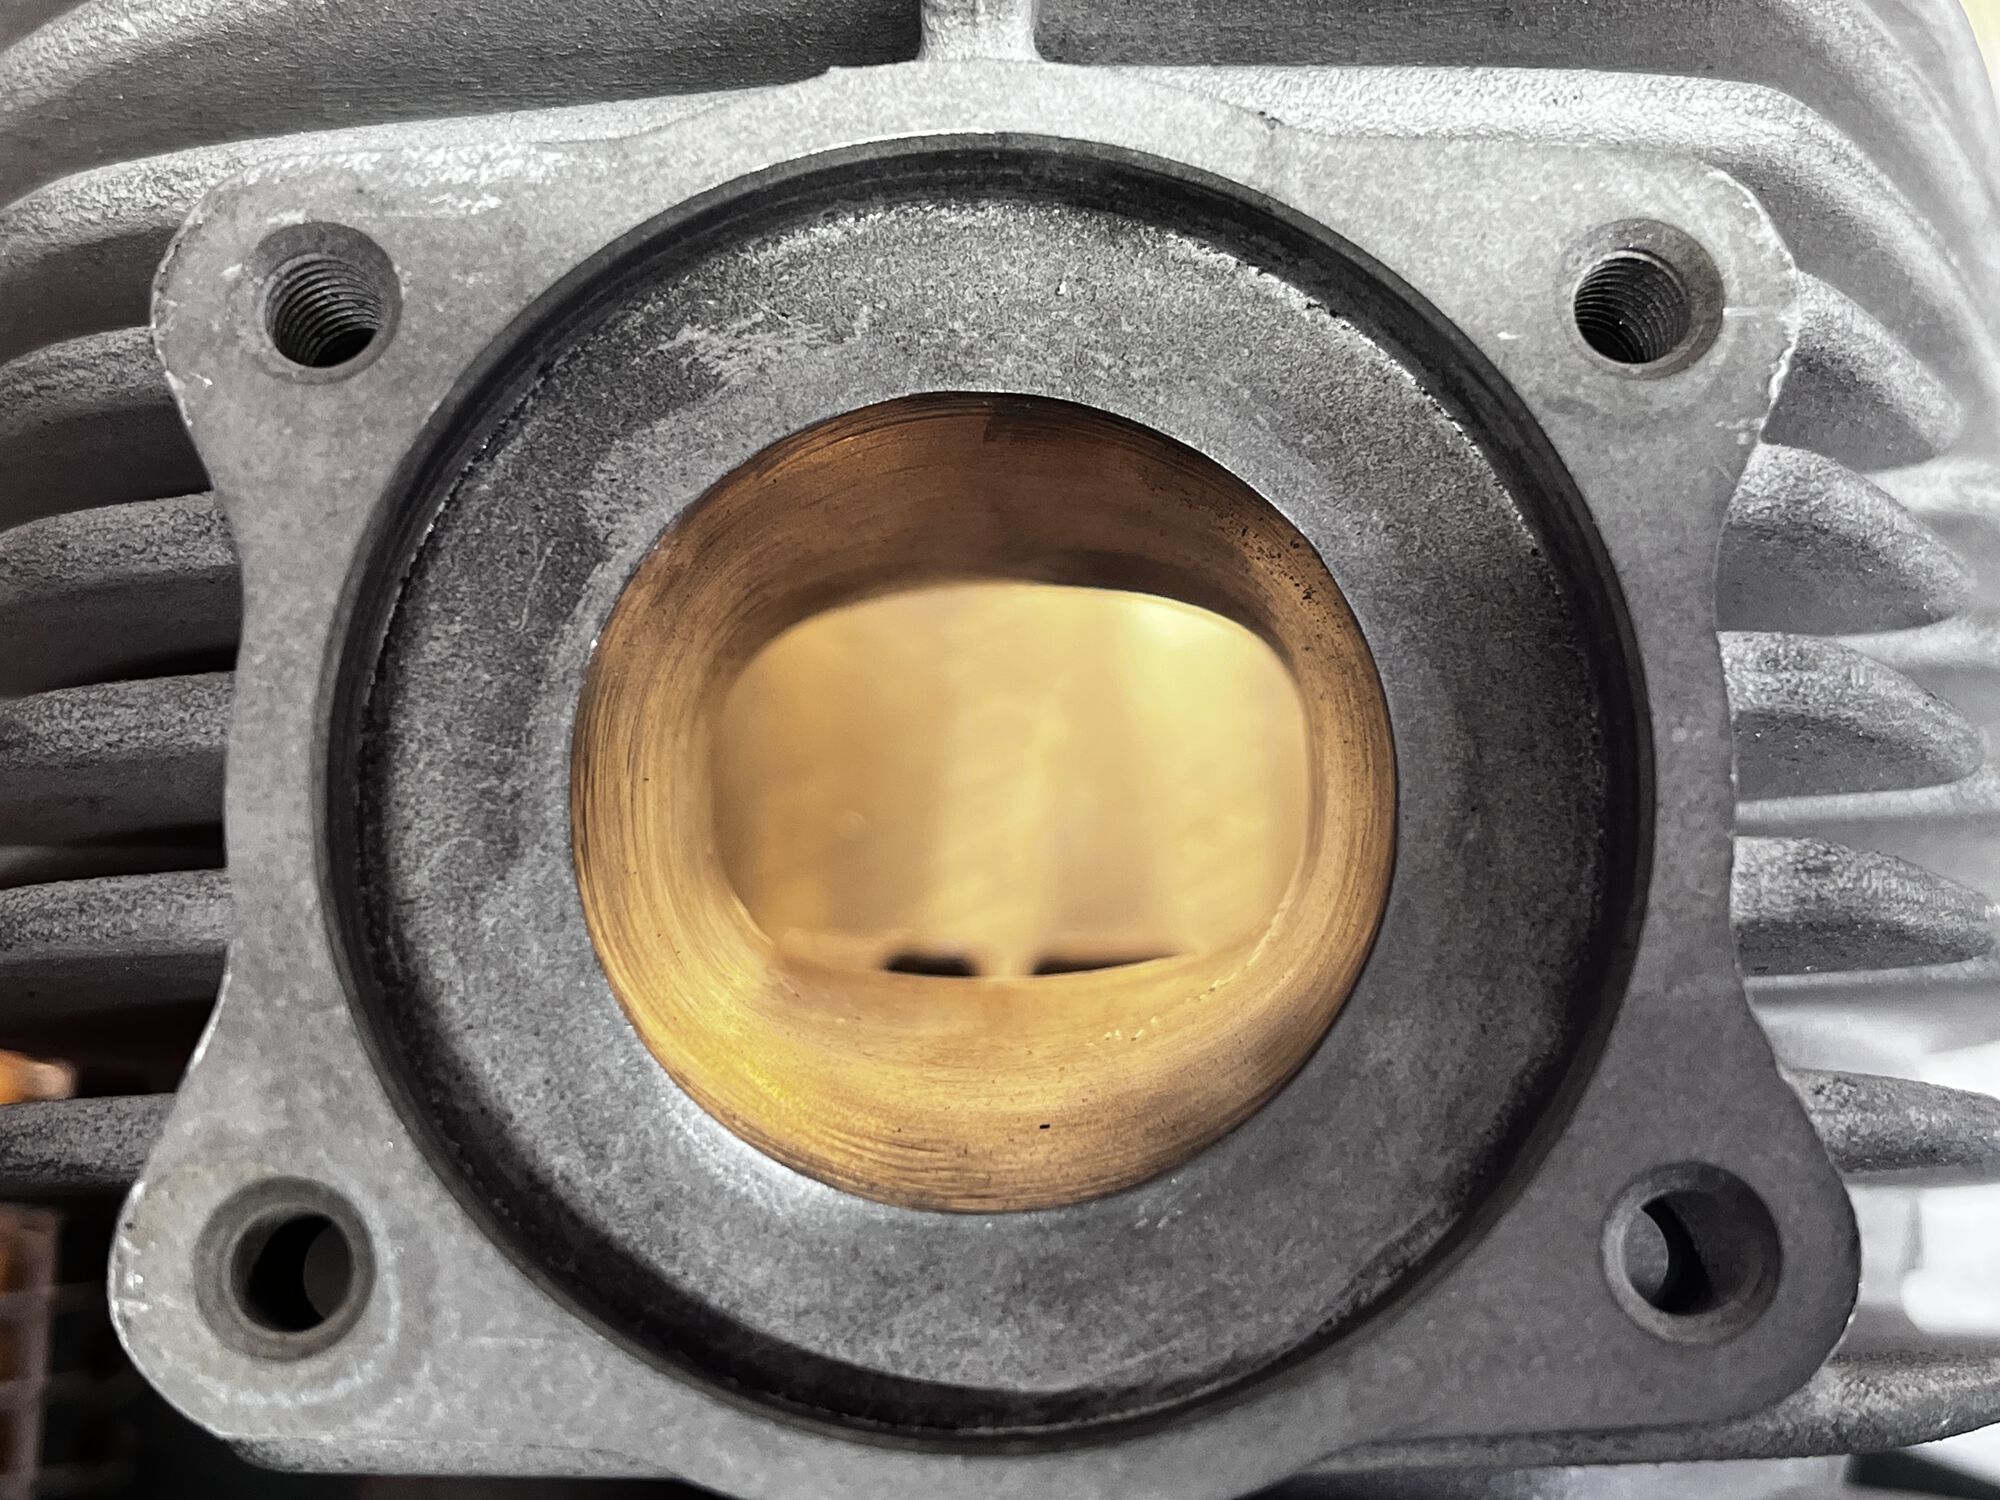
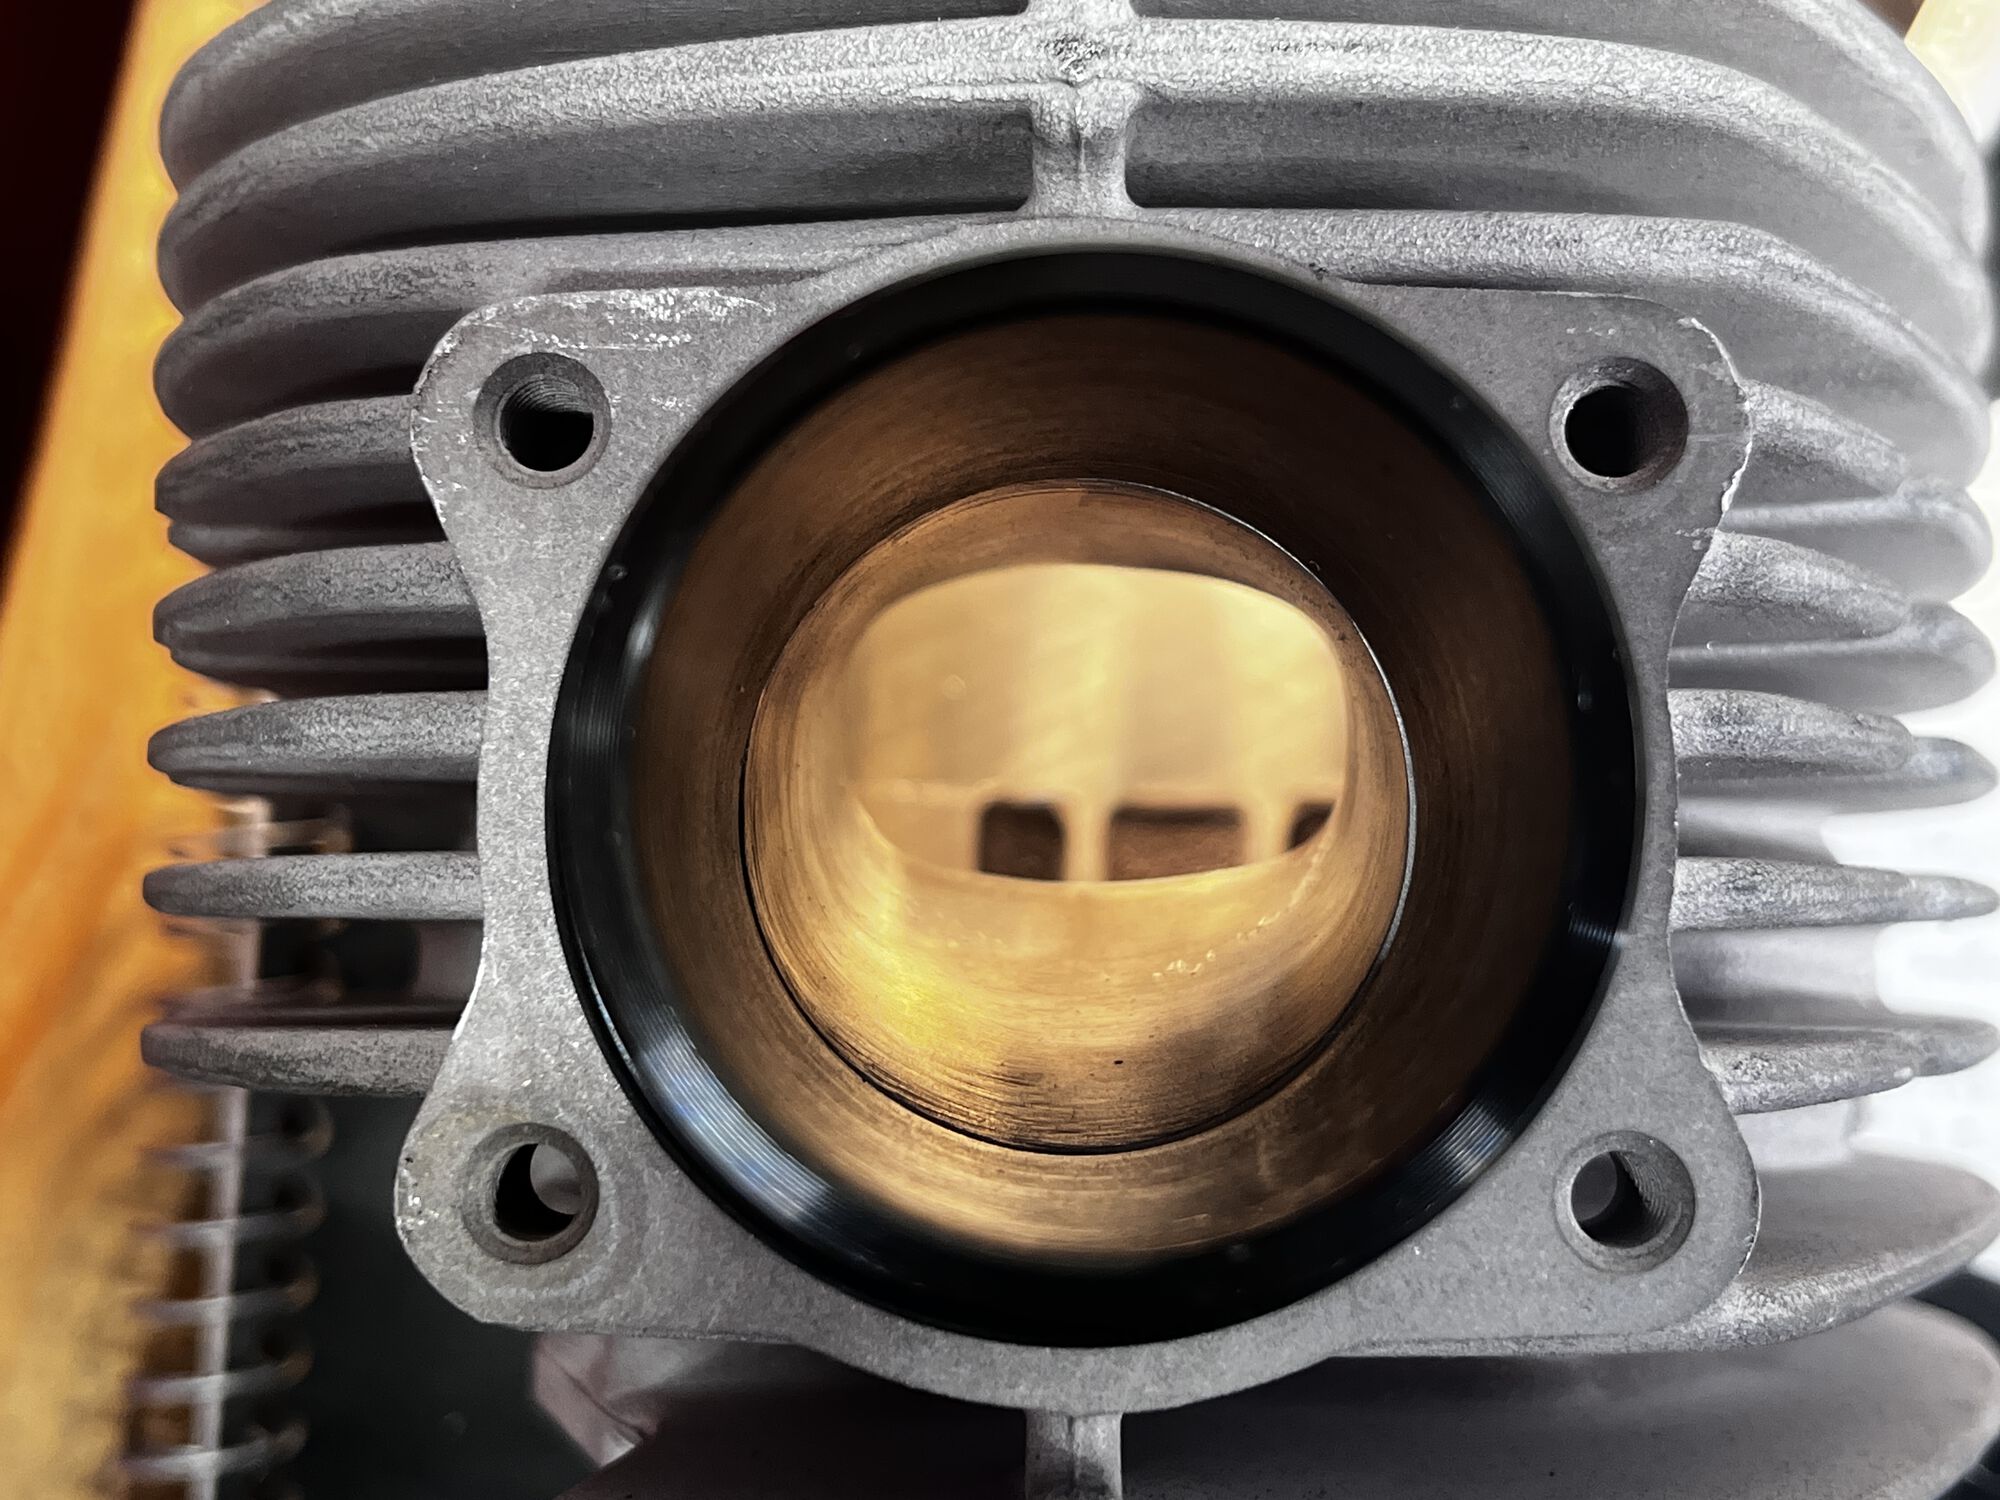
- exhaust port widened 1mm each side
- exhaust port raised 1mm, to achieve 187°/29°bd
- exhaust outlet opened up and matched to the exhaust manifold

Piston
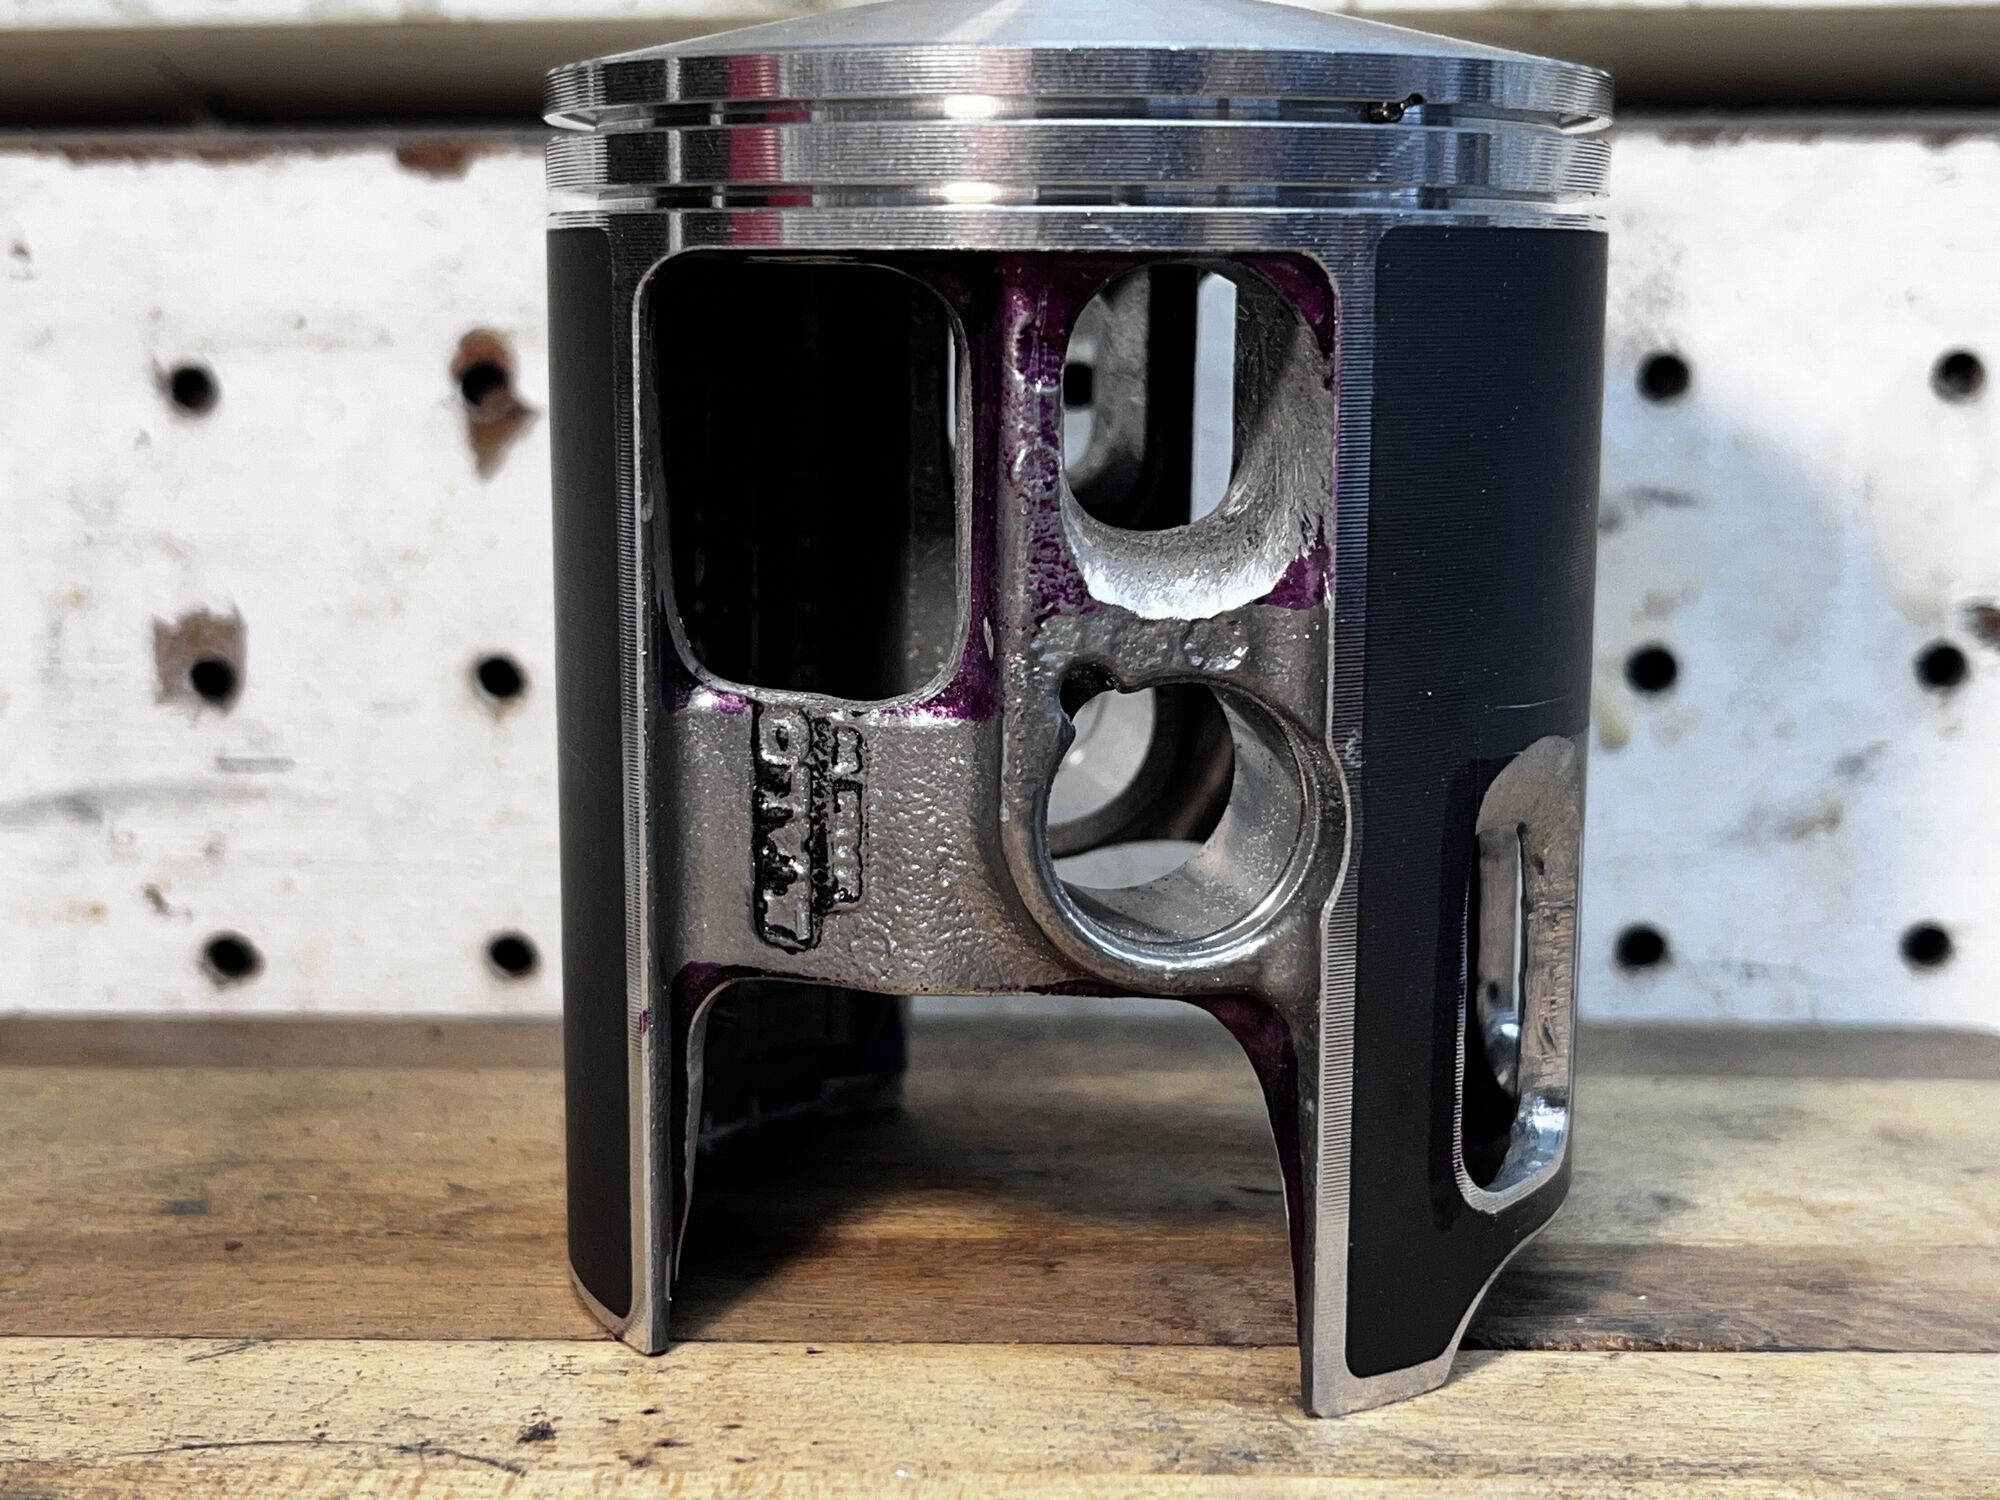
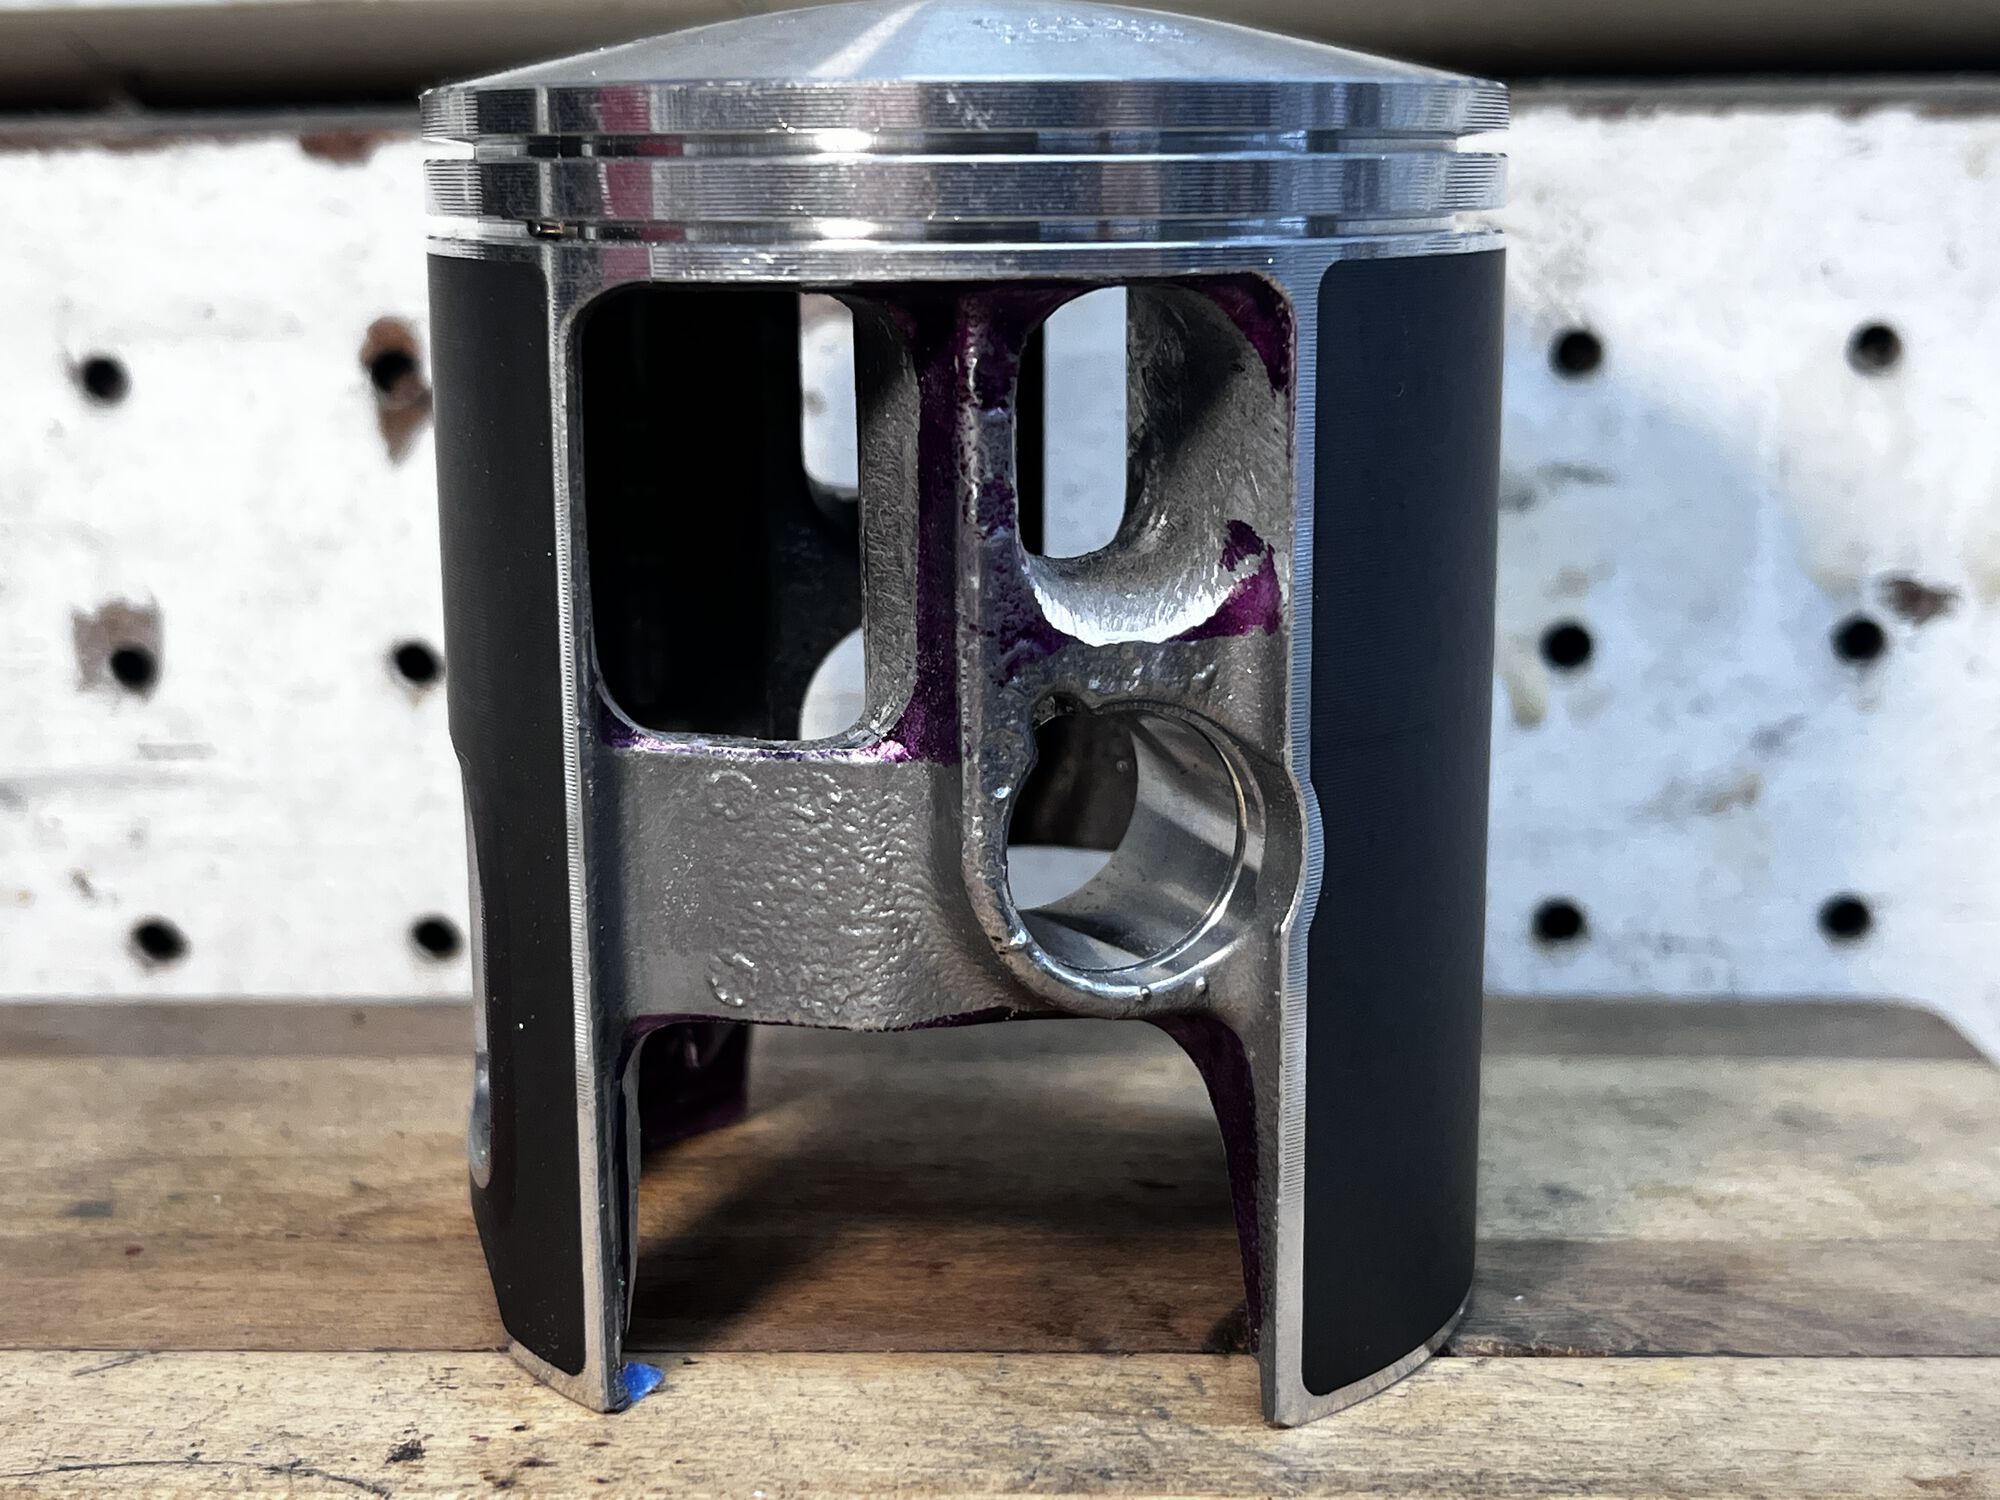
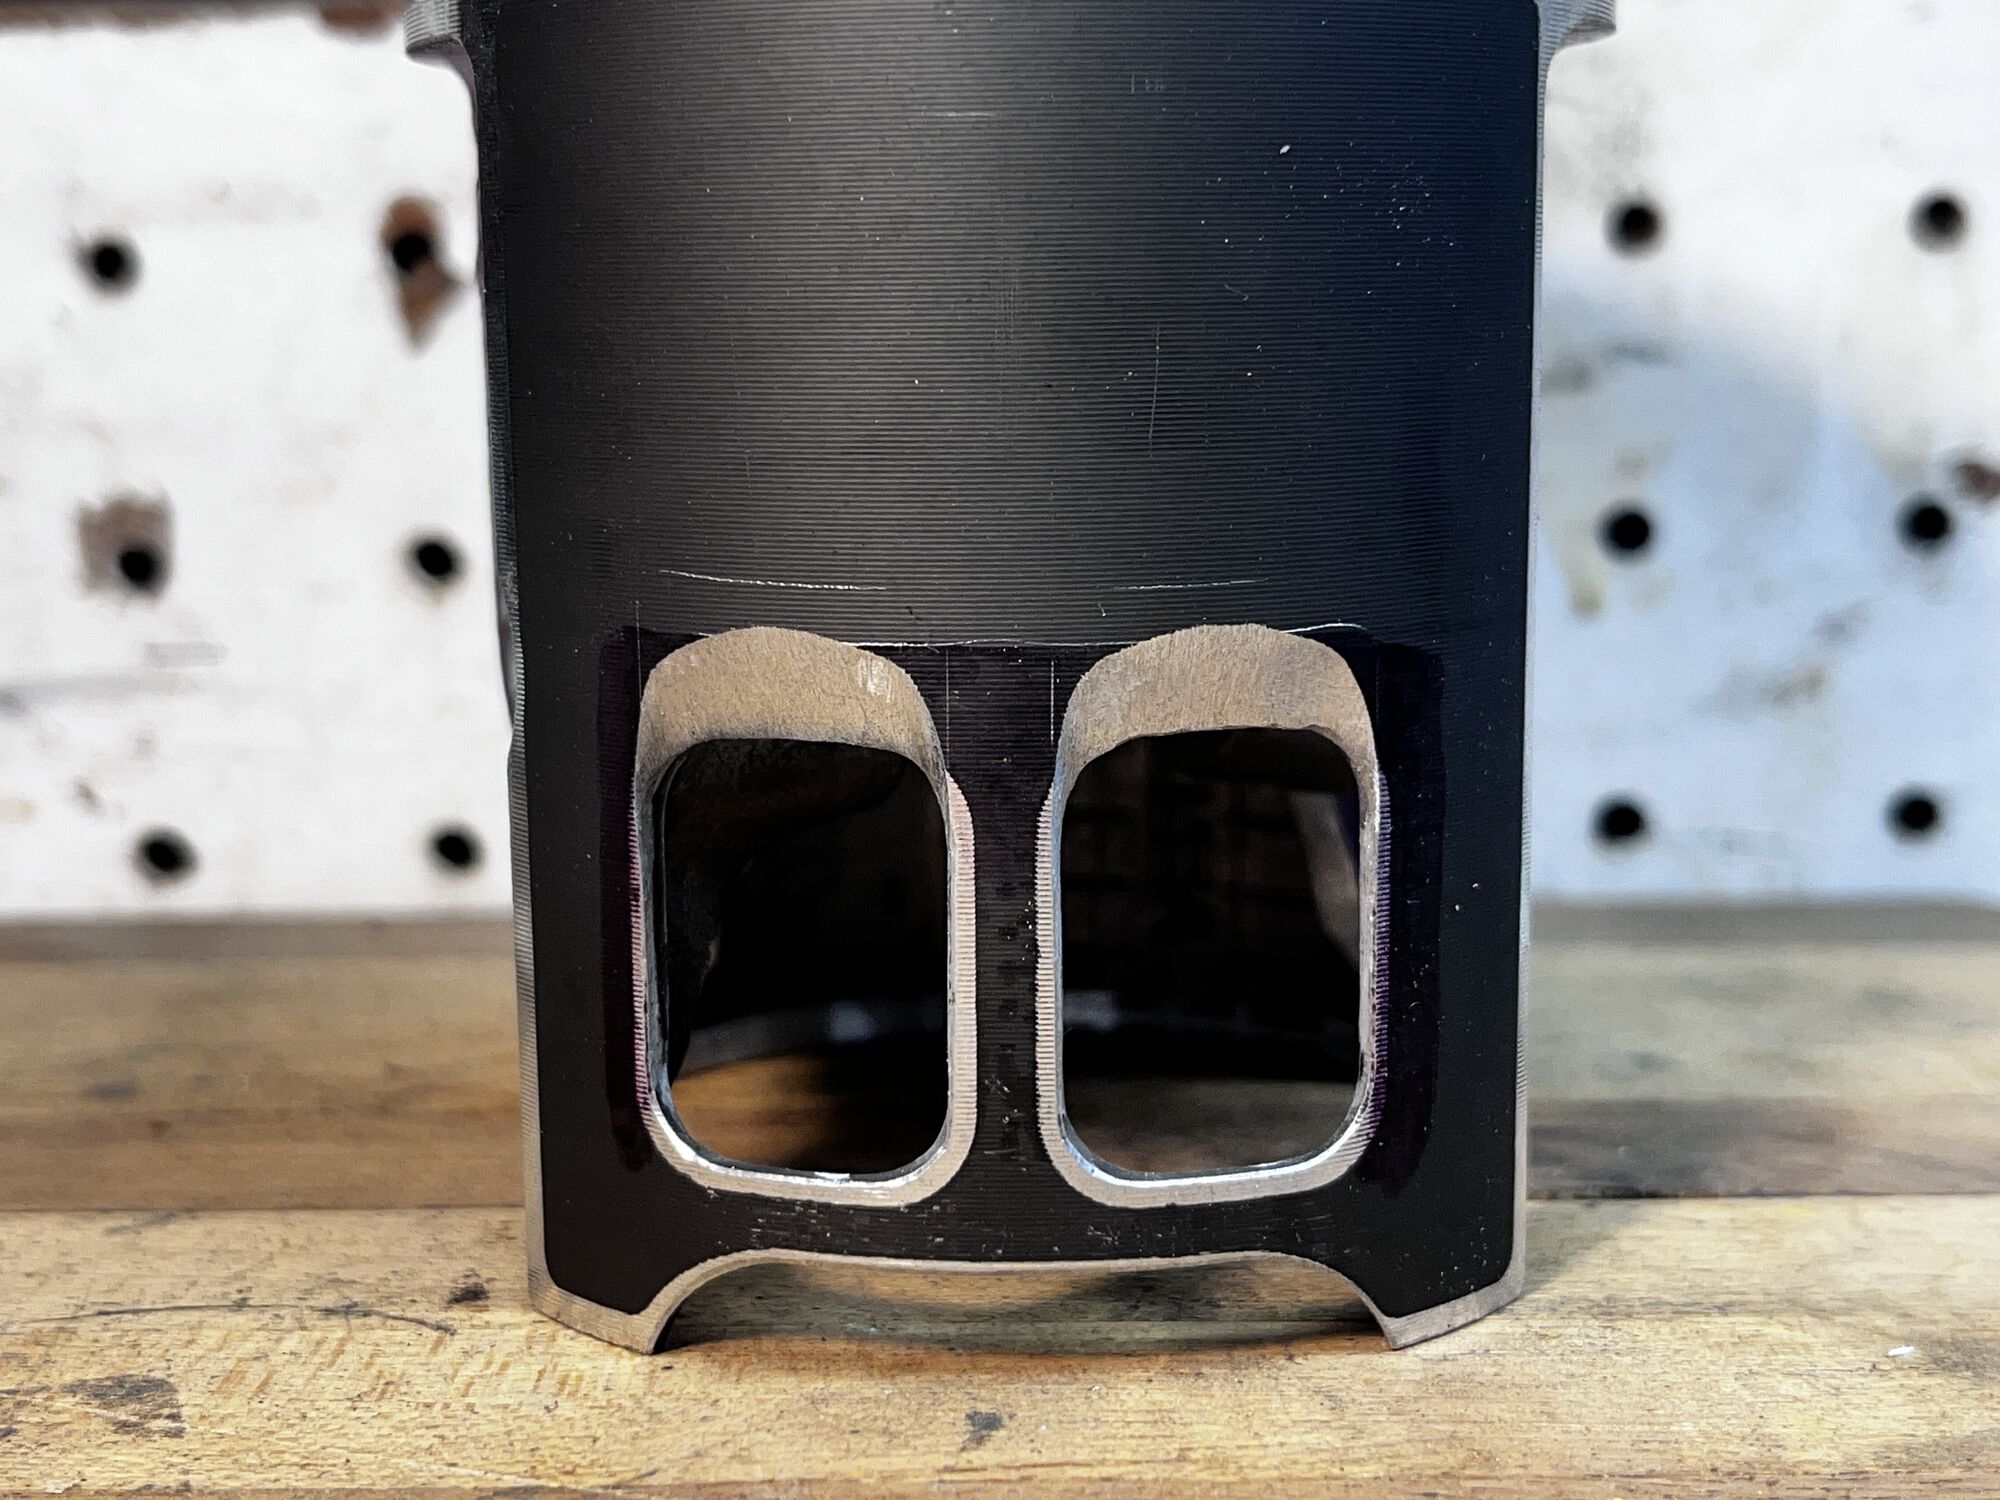
- side transfer ports opened and flowed
- top boost ports knife edged and flowed toward cylinder

Intake
- matched and flowed to the case
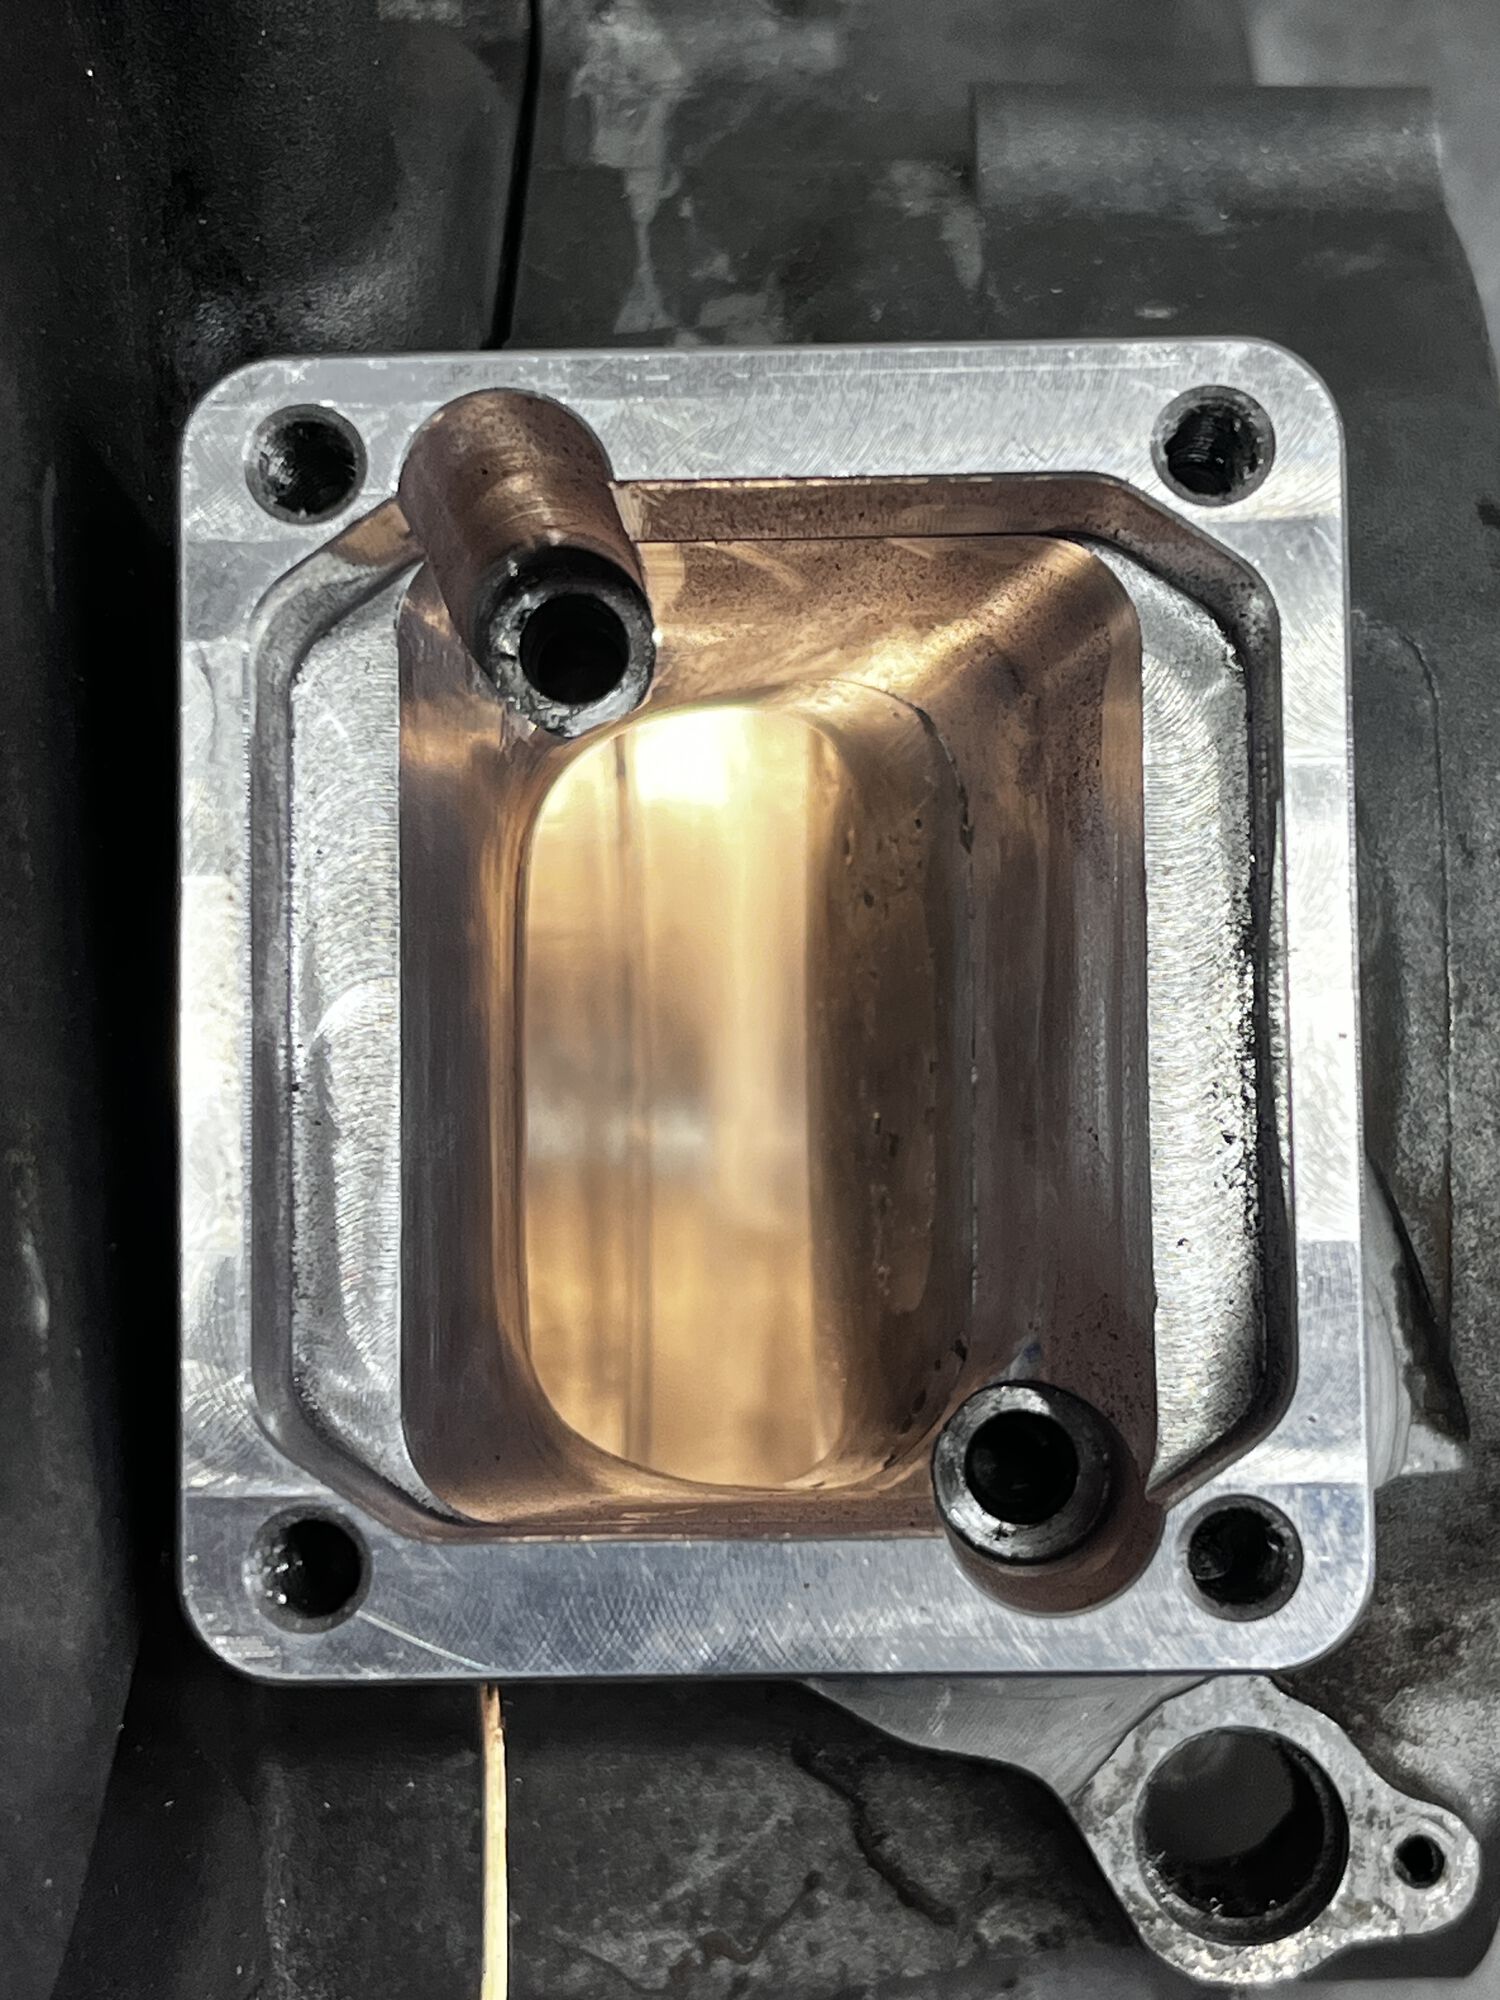
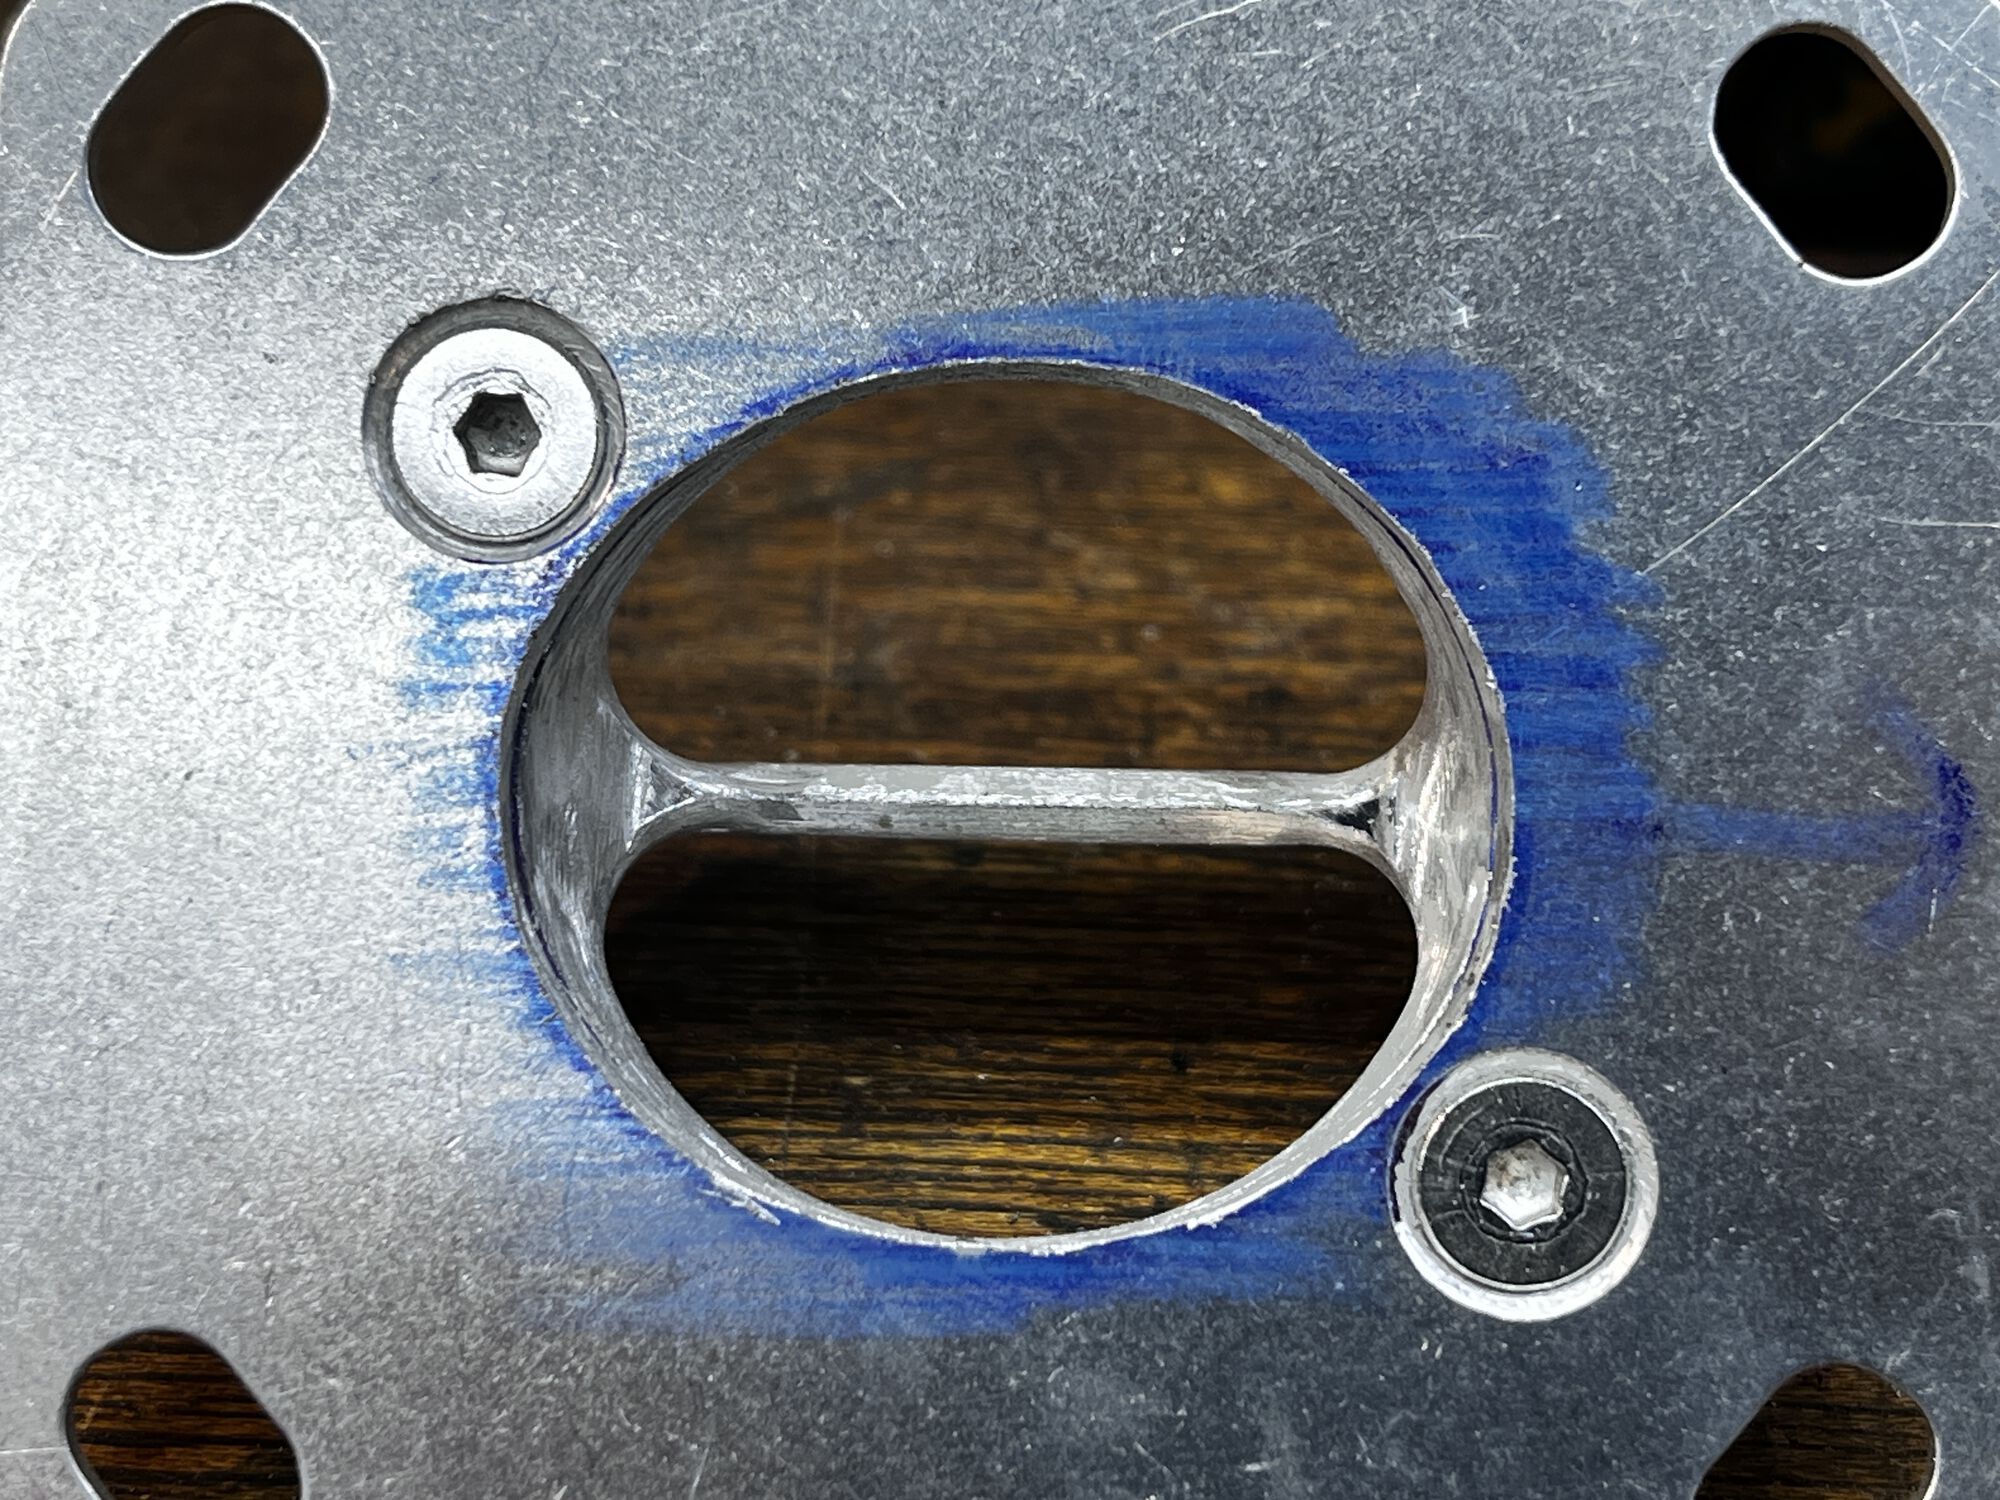
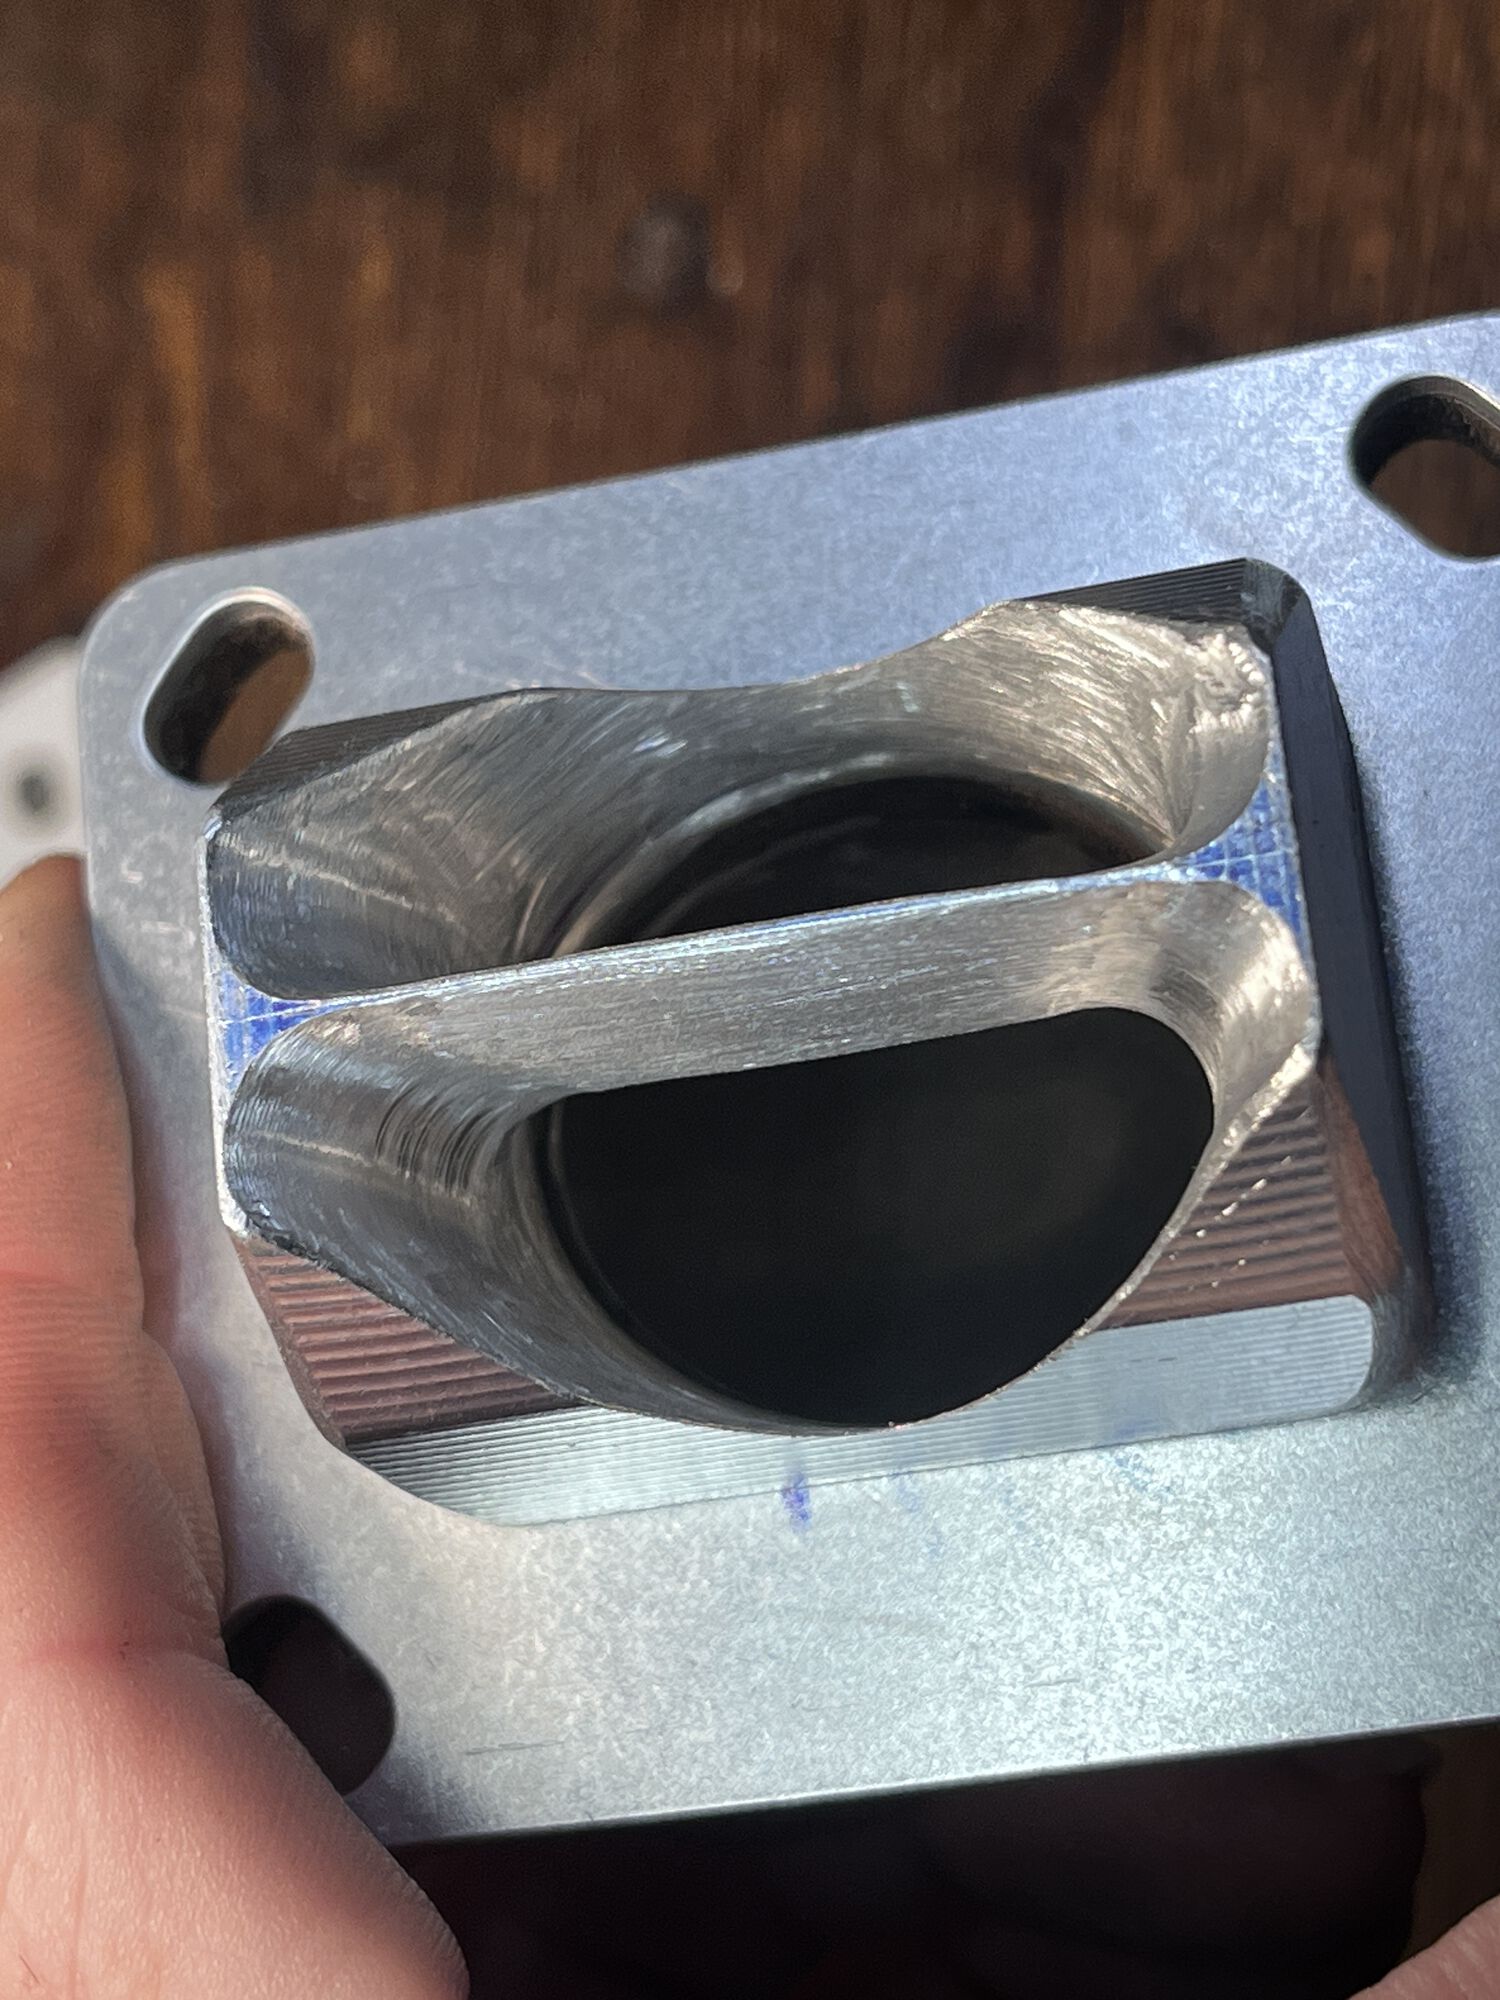
- reed stuffer opening matched to carb mount
- reed stuffer divider knife edged and bottom flowed
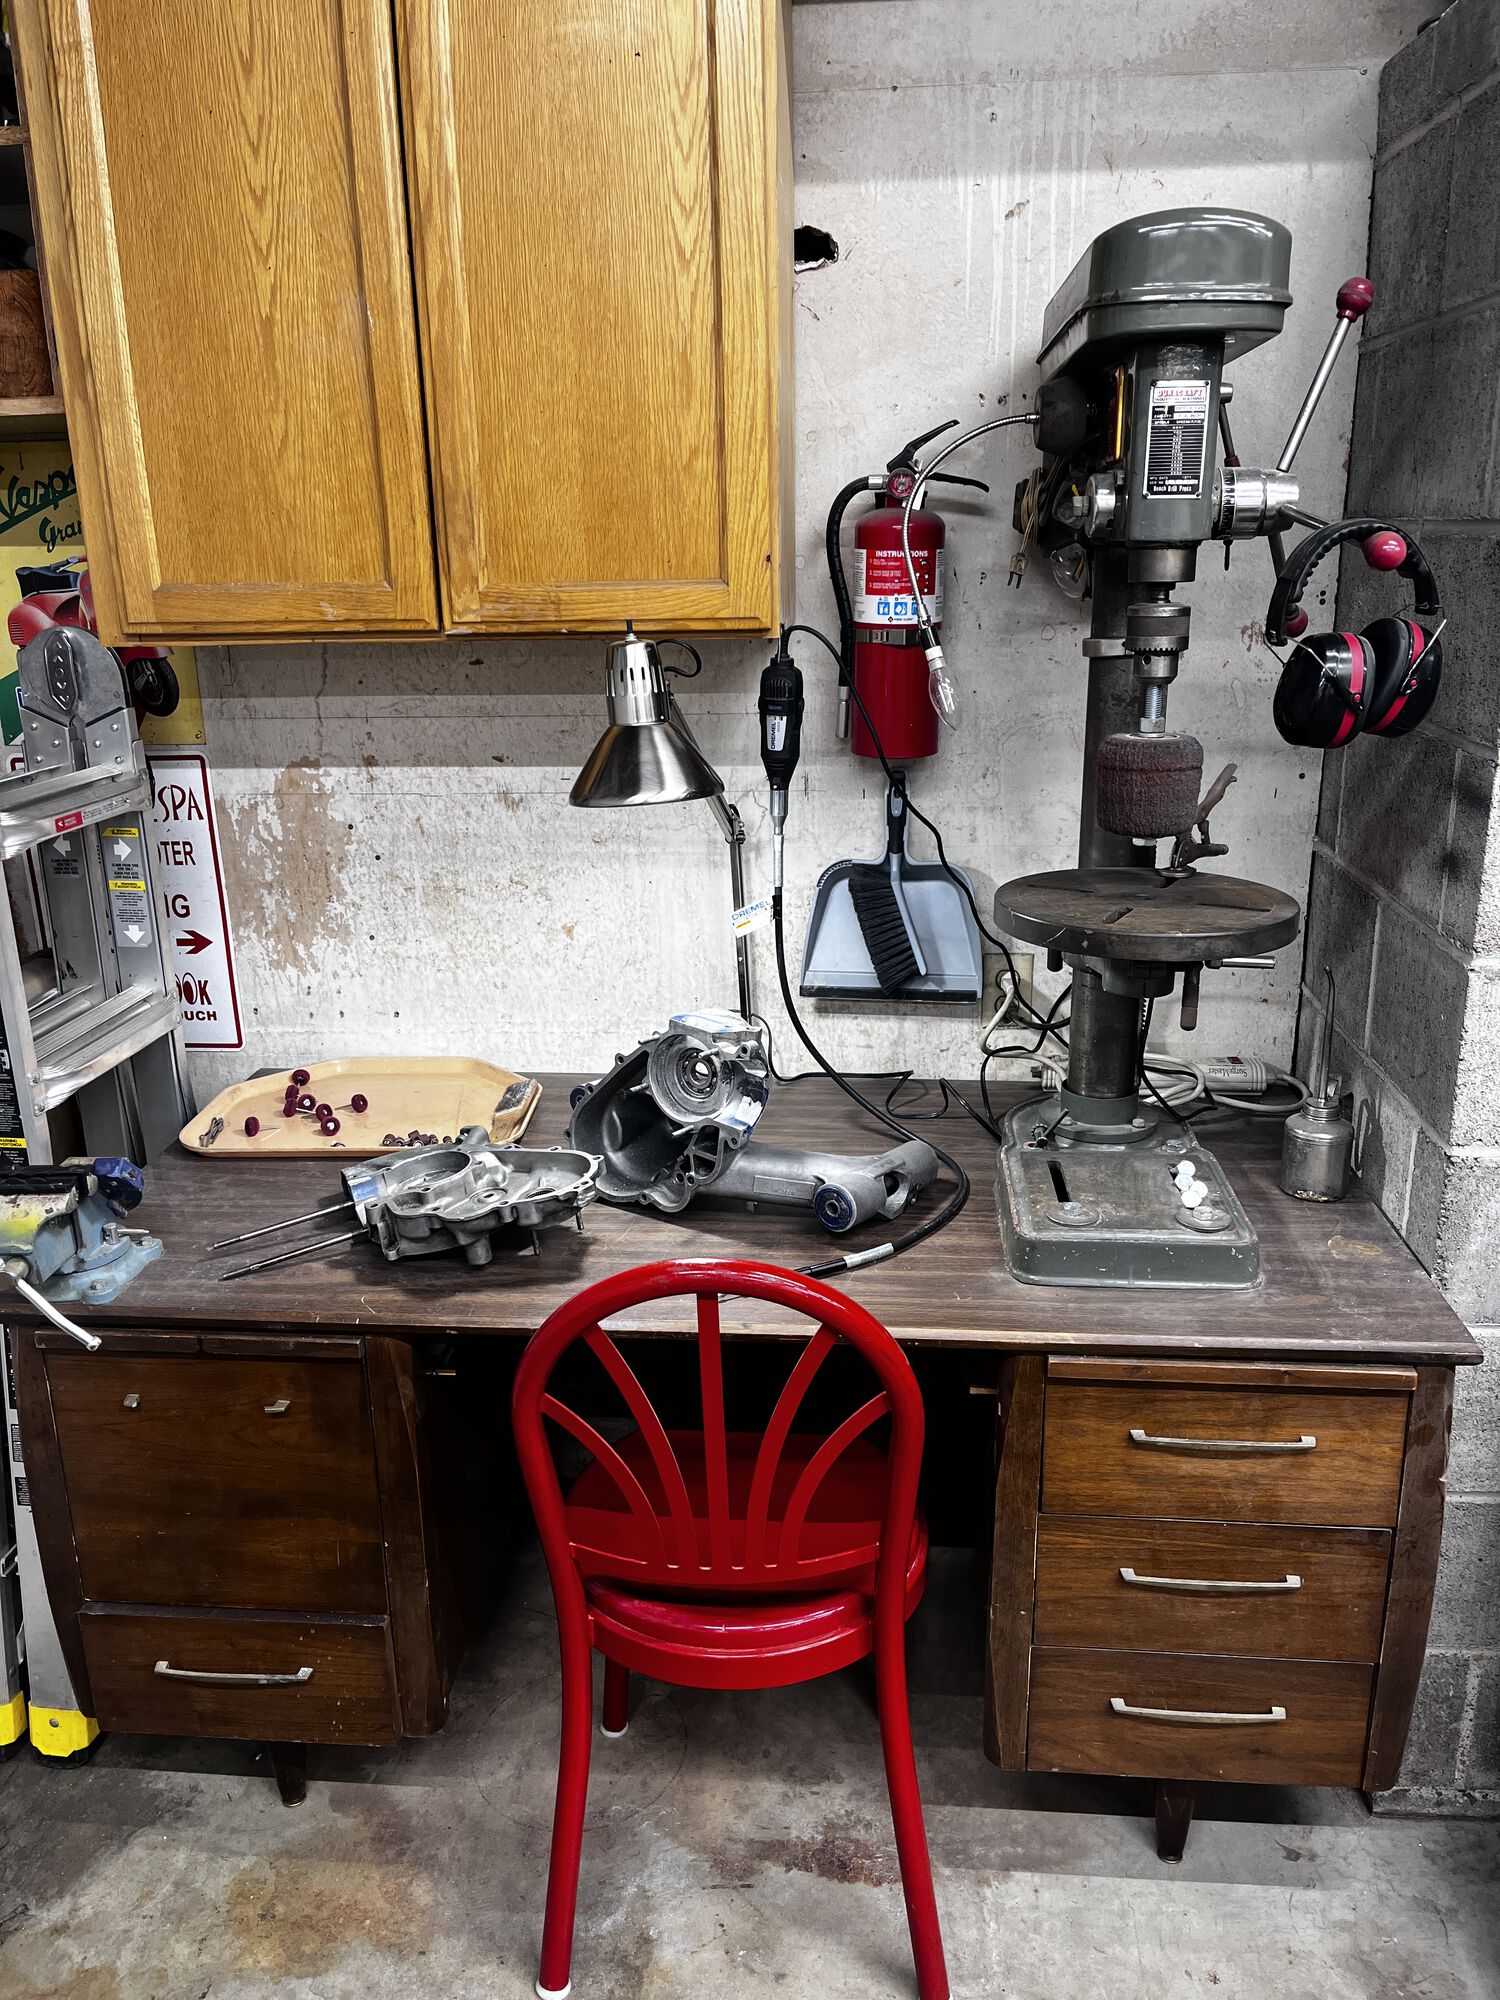
My grinding/drilling/porting/whatever work area.
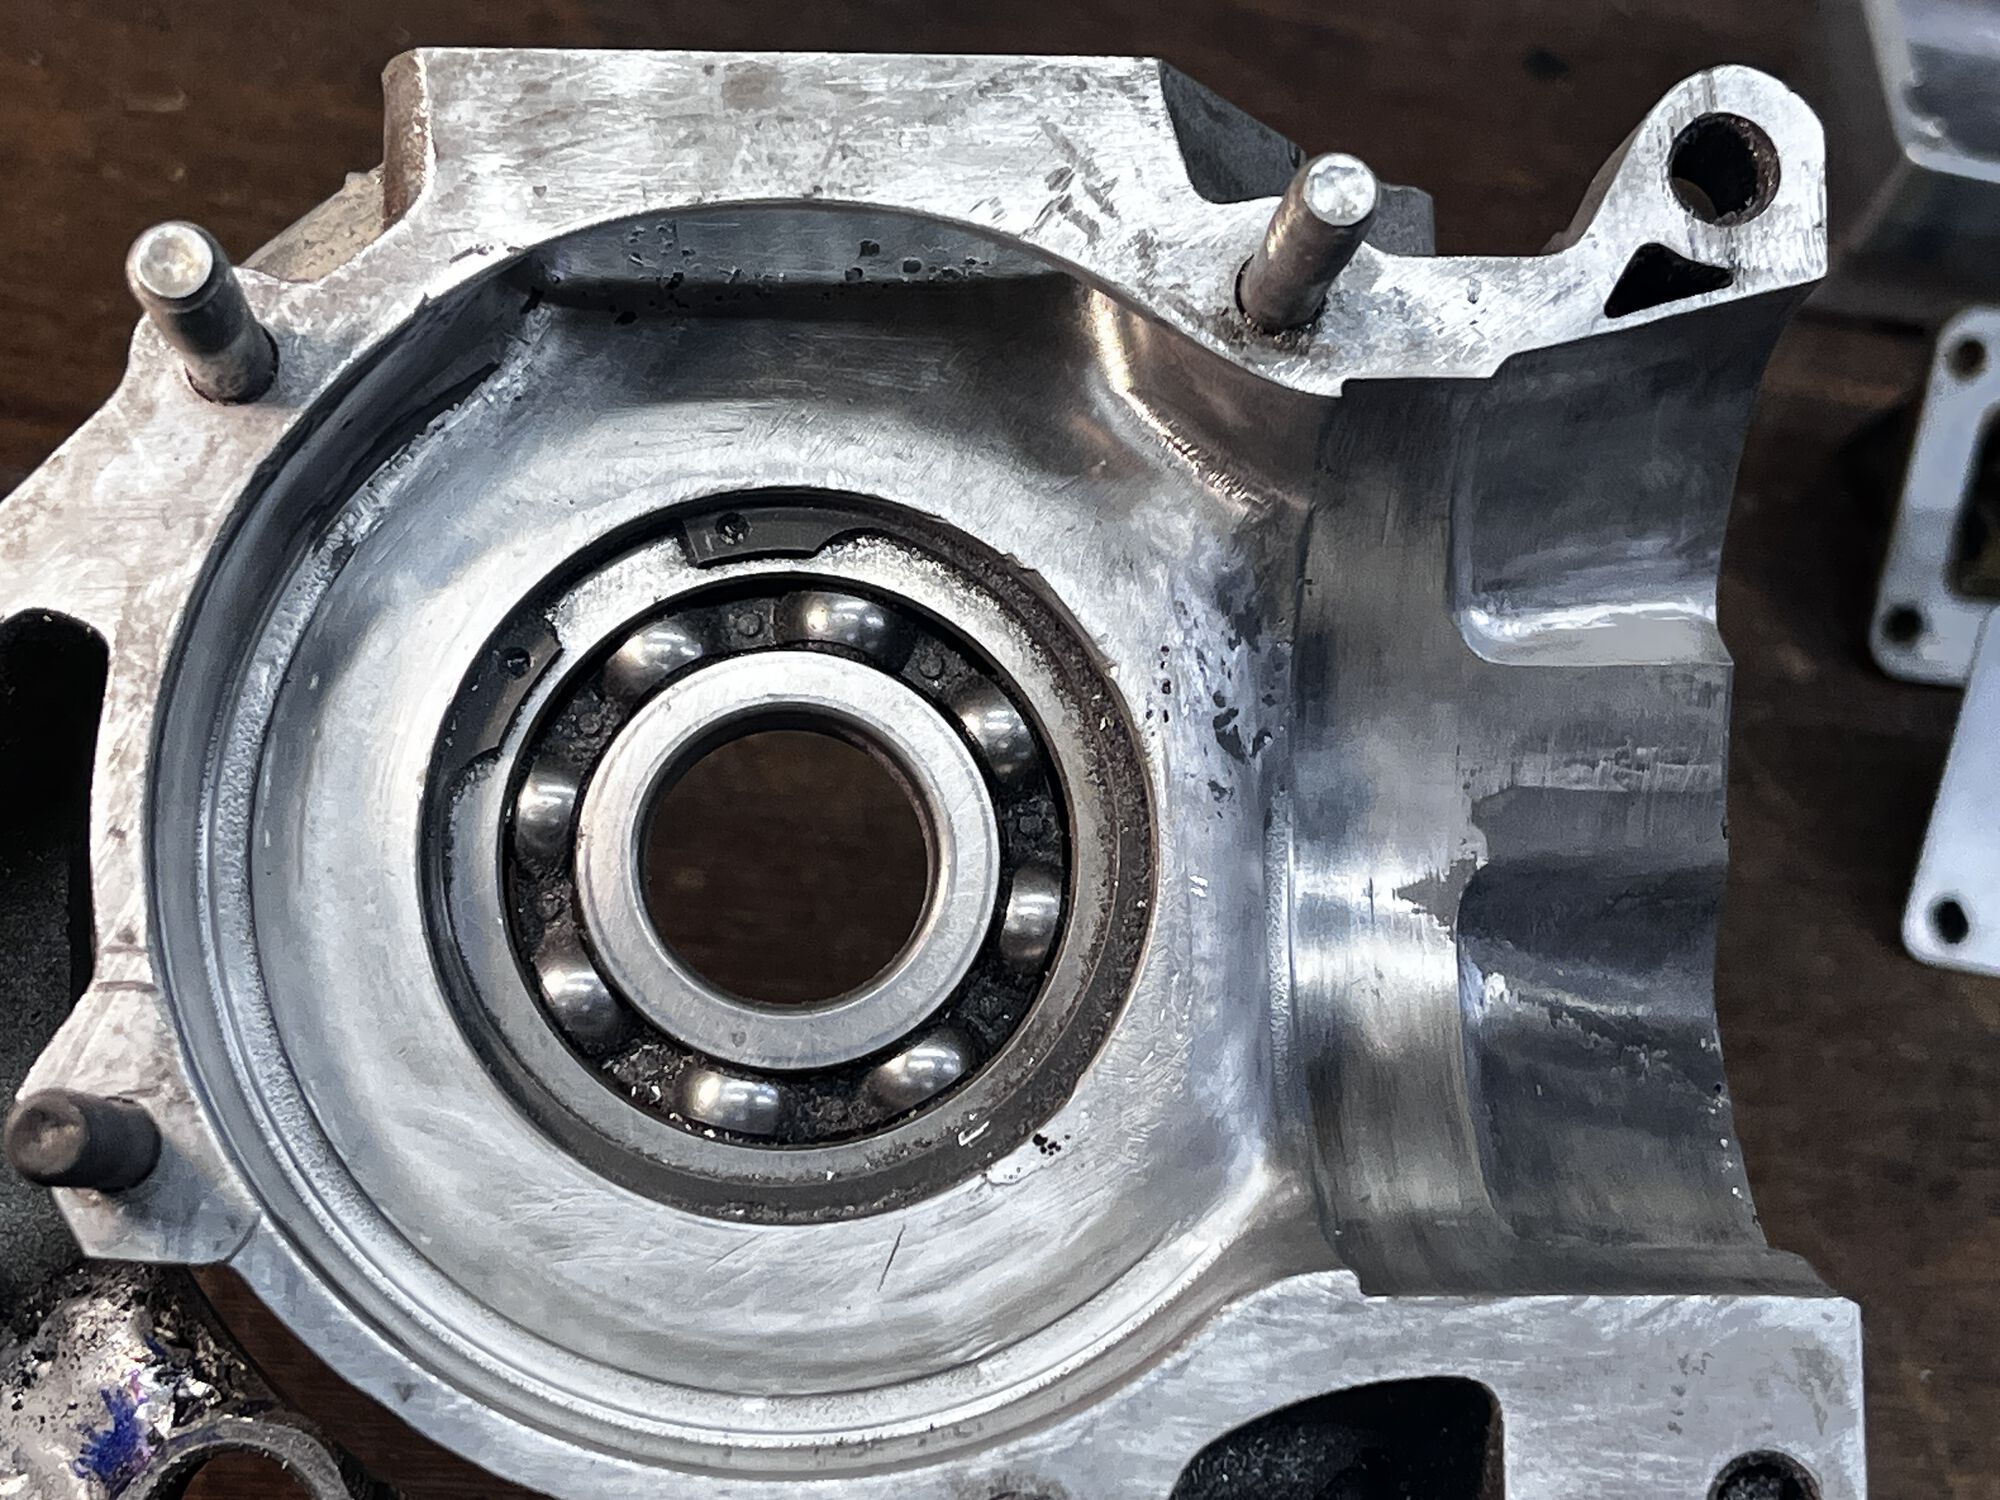
Clutch side case after lots of material moving. Notice a small amount of JB to fill slight mismatch between old port and new
Flywheel side case
Flywheel side case
Case ports matched to the Malossi sport kit
Forward edge of crank housing radiused and flowed. I had the auto lube gear pin welded closed, to be able to smooth this out. Small amount of JB to fill surface pores, not break thru. Mostly for my OCD.
Inlet for reed, opened and flowed about a big as it can go!
OP
@geeklion avatar
UTC

The Dude
Too Many piles of Junk that need too much work and too much money
Joined: UTC
Posts: 2688
Location: PNW from LBC
 
The Dude
@geeklion avatar
Too Many piles of Junk that need too much work and too much money
Joined: UTC
Posts: 2688
Location: PNW from LBC
UTC quote
More pics-
Top boost port opened up a bit, dividers knife edged
Another view of boost port
Boost port matched to the case
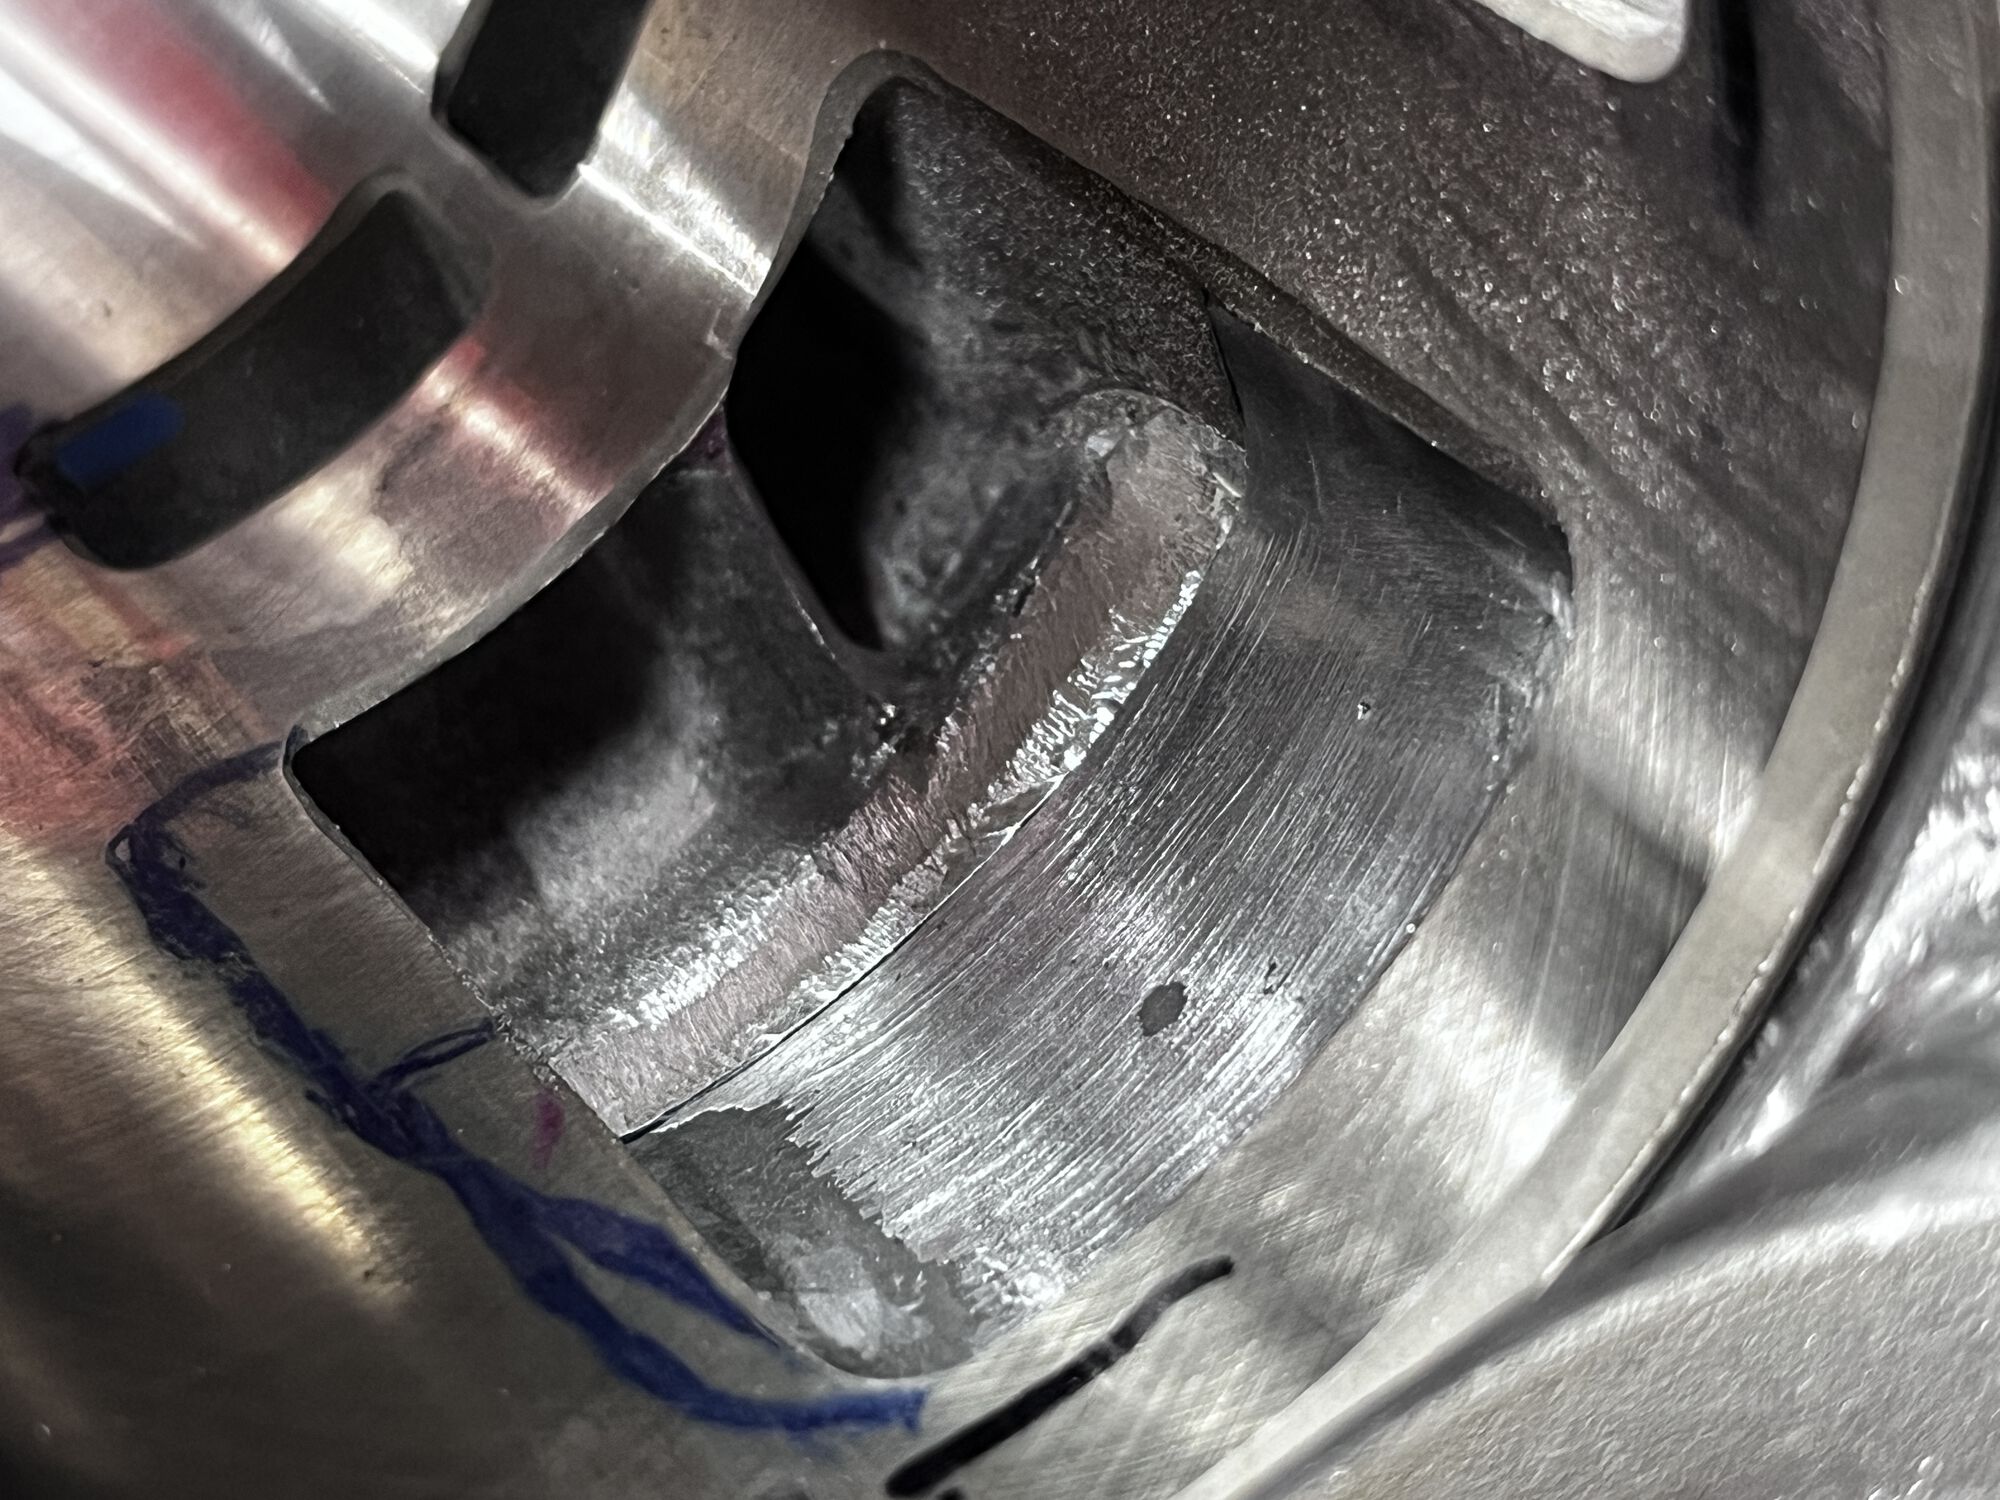
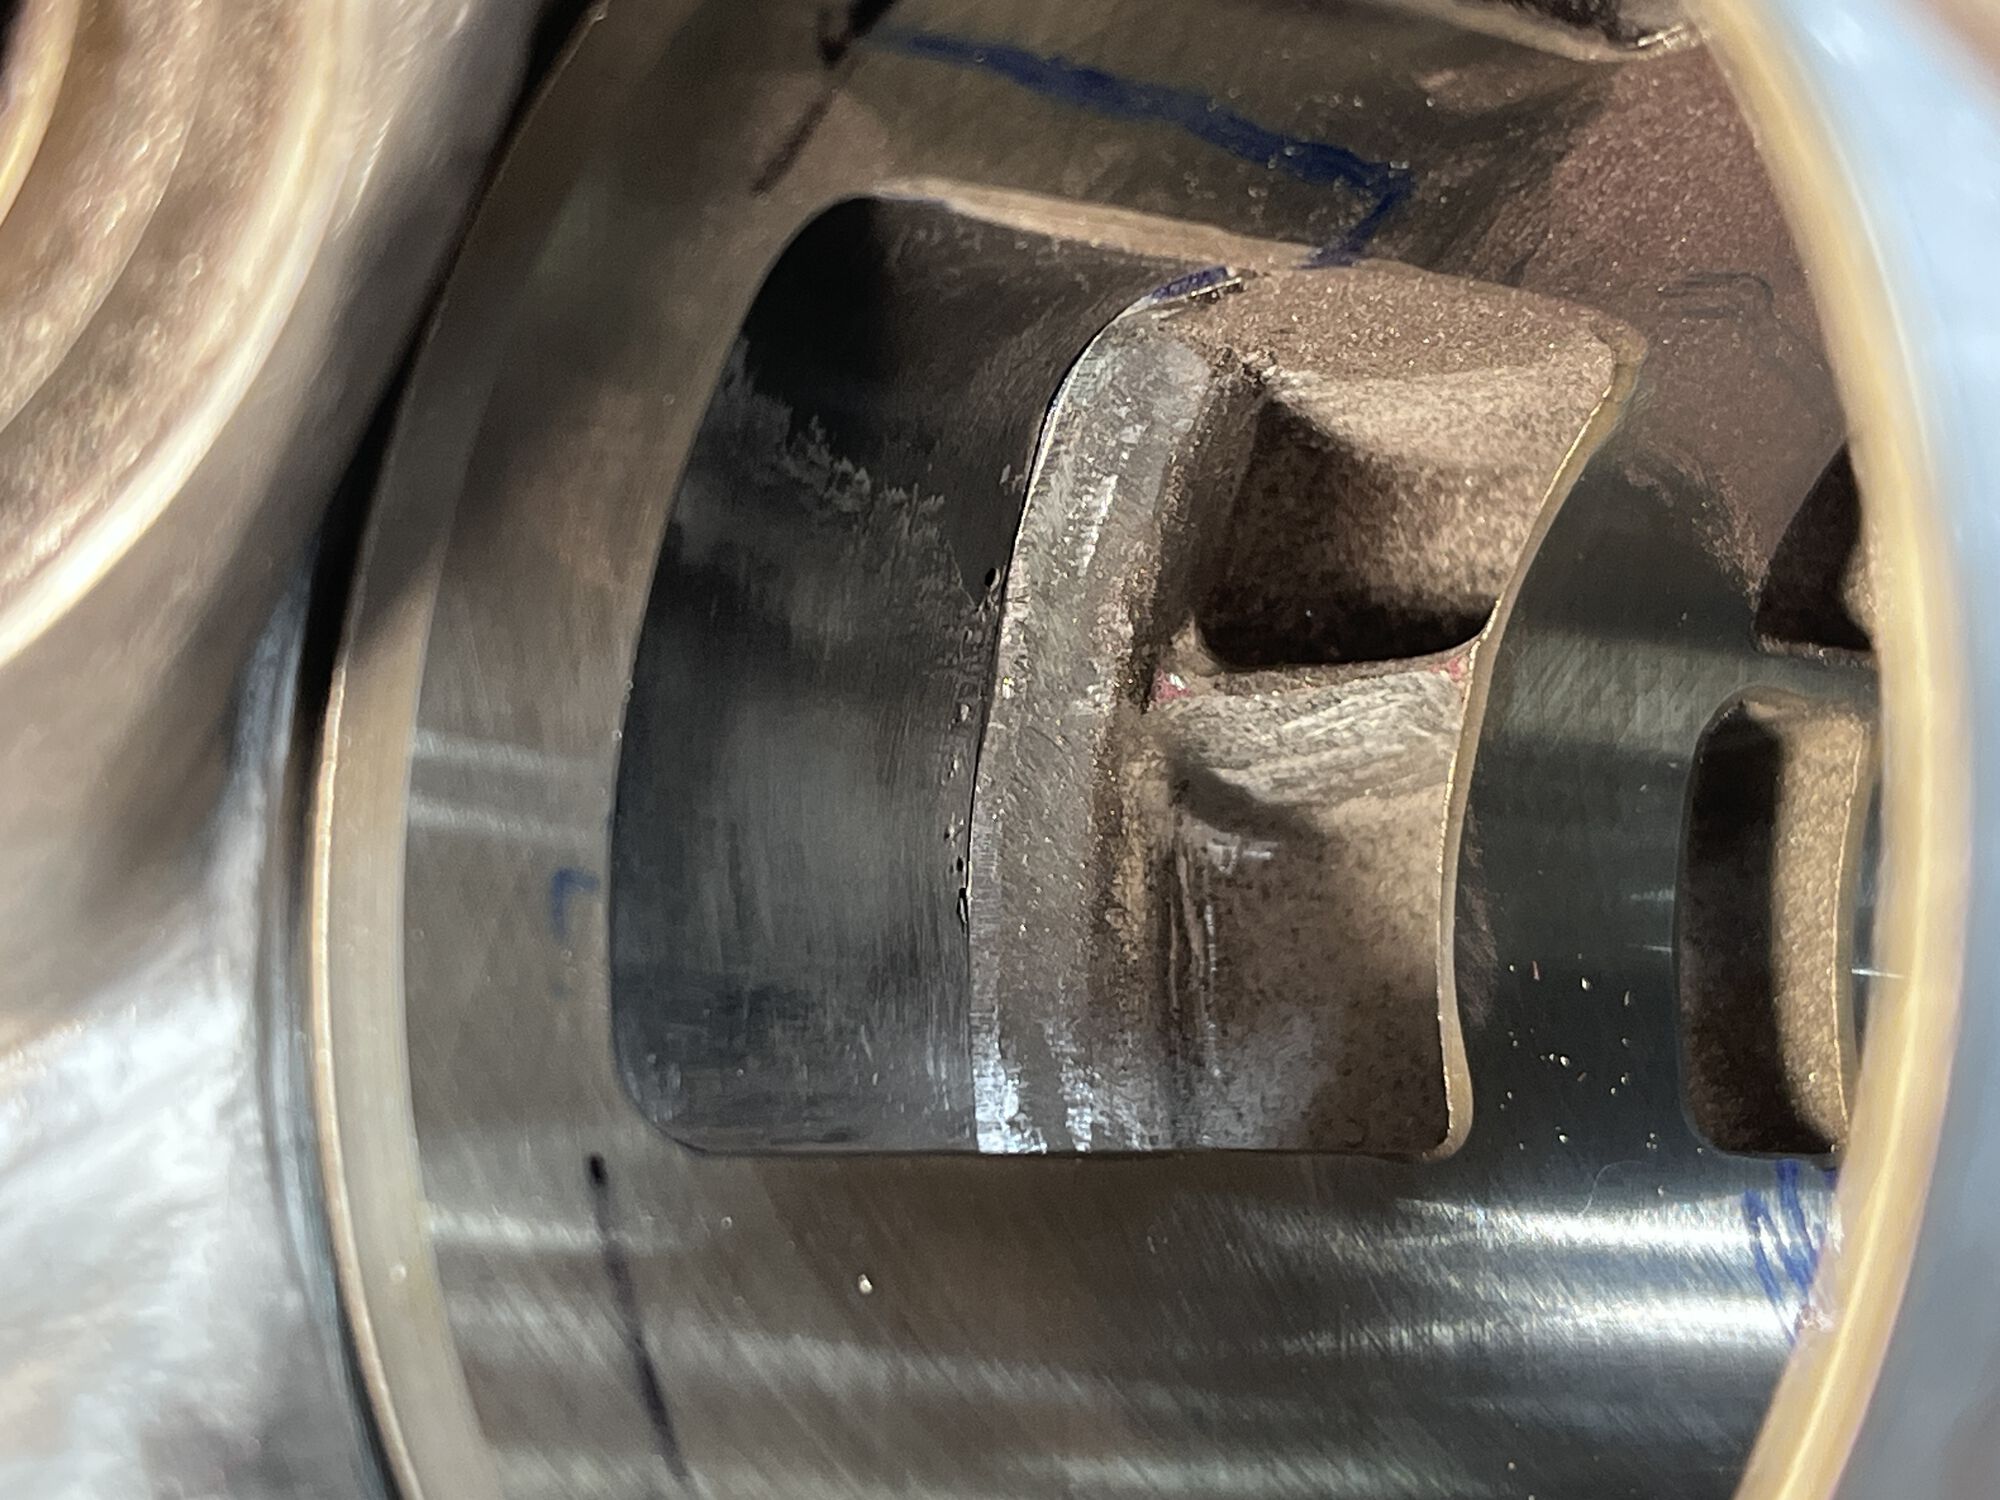
Main transfer clutch side, widened a bit, divider knife edged
Main transfer fly side, same as the other lol
Transfer fly side, matched to case
Transfer clutch side, matched to case
Cylinder exhaust port, widened and raised
Cylinder exhaust outlet, opened to match manifold, and the entire port polished
Exhaust outlet with manifold. The outlet on the cylinder was originally 1mm narrower diameter all around. Now nice and flowed!
OP
@geeklion avatar
UTC

The Dude
Too Many piles of Junk that need too much work and too much money
Joined: UTC
Posts: 2688
Location: PNW from LBC
 
The Dude
@geeklion avatar
Too Many piles of Junk that need too much work and too much money
Joined: UTC
Posts: 2688
Location: PNW from LBC
UTC quote
Even more pics---
Transfer side windows opened and flowed
same on the other side
Edging and flowing the top boost port
smooth and flowey
smooth and flowey
OP
@geeklion avatar
UTC

The Dude
Too Many piles of Junk that need too much work and too much money
Joined: UTC
Posts: 2688
Location: PNW from LBC
 
The Dude
@geeklion avatar
Too Many piles of Junk that need too much work and too much money
Joined: UTC
Posts: 2688
Location: PNW from LBC
UTC quote
Even more more pics-
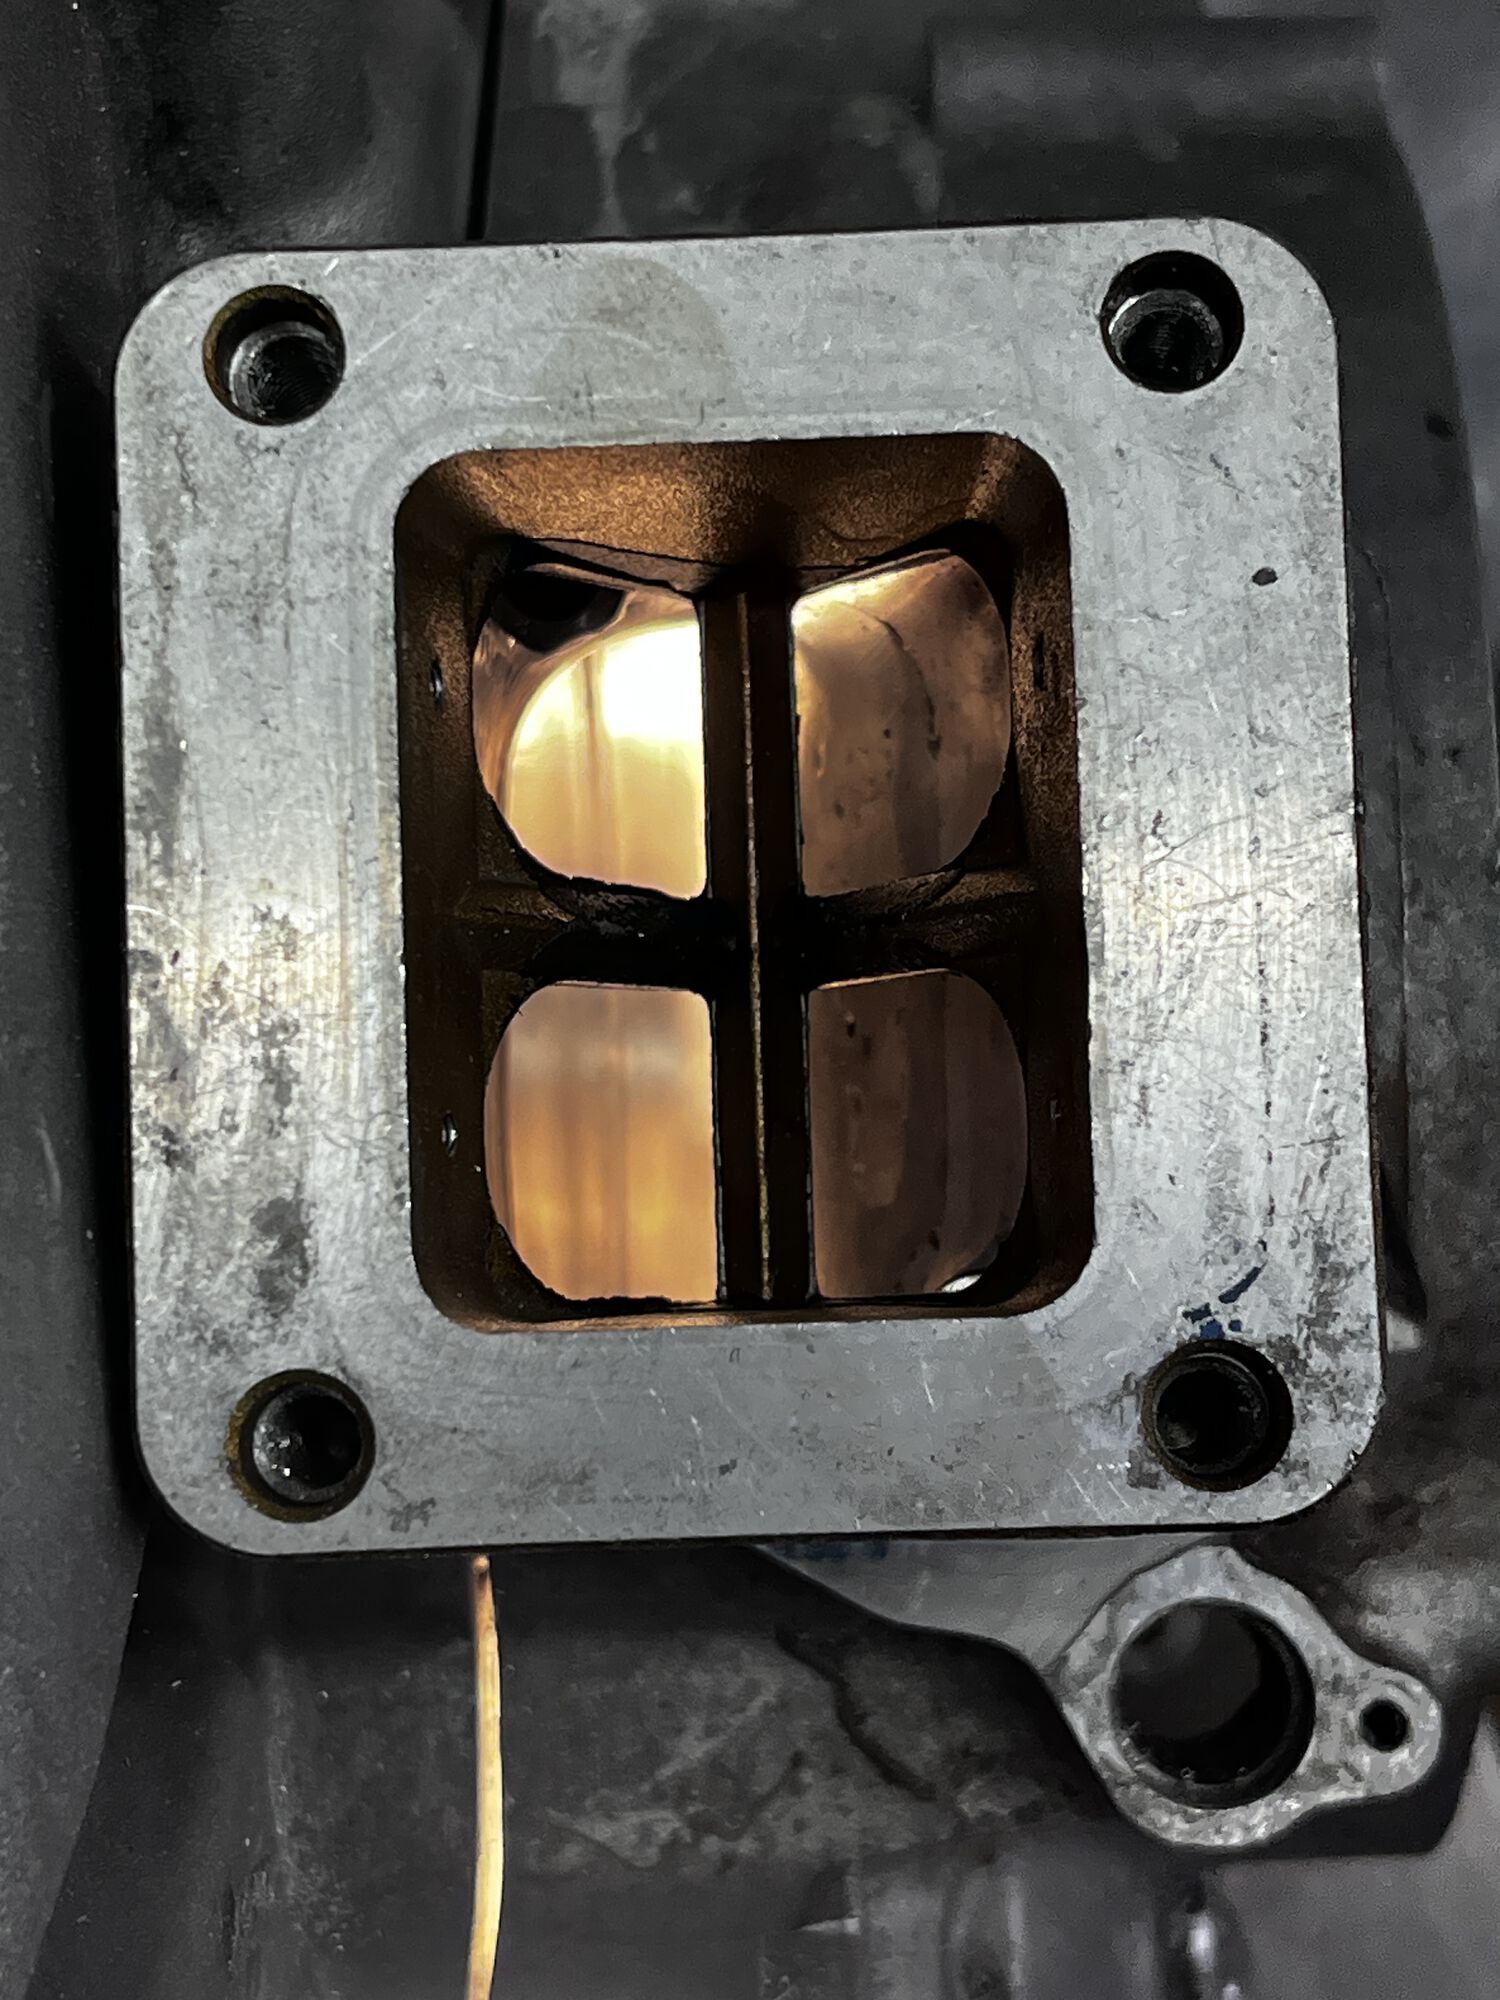
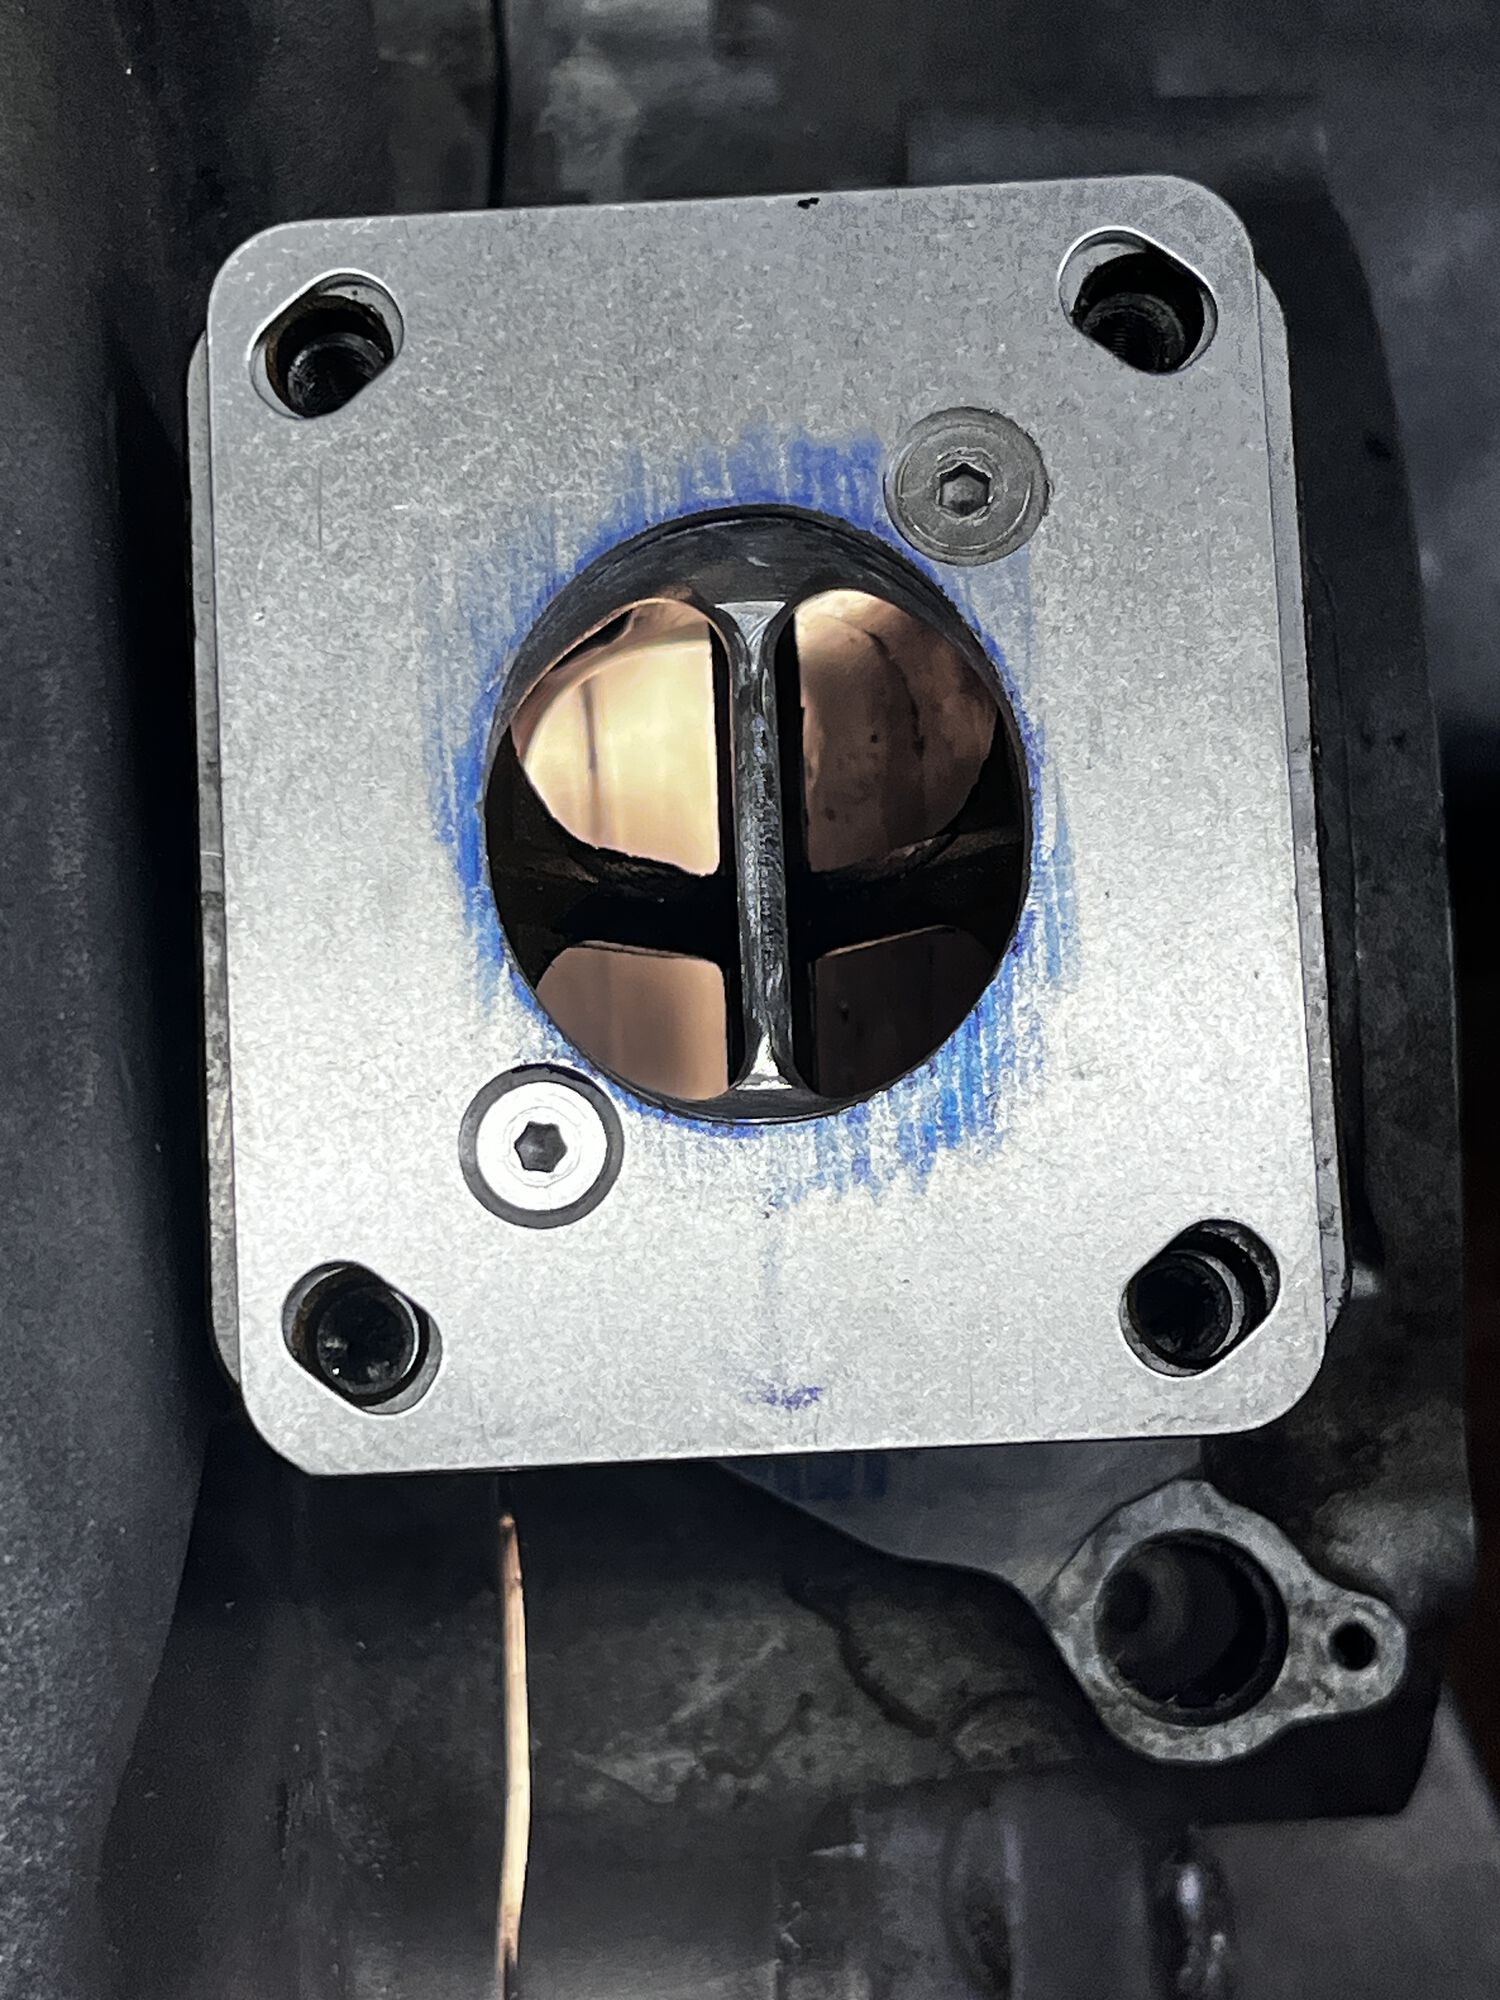
Inlet opening top view
Inlet with matched MRP manifold
RD350 reed block, with reeds removed
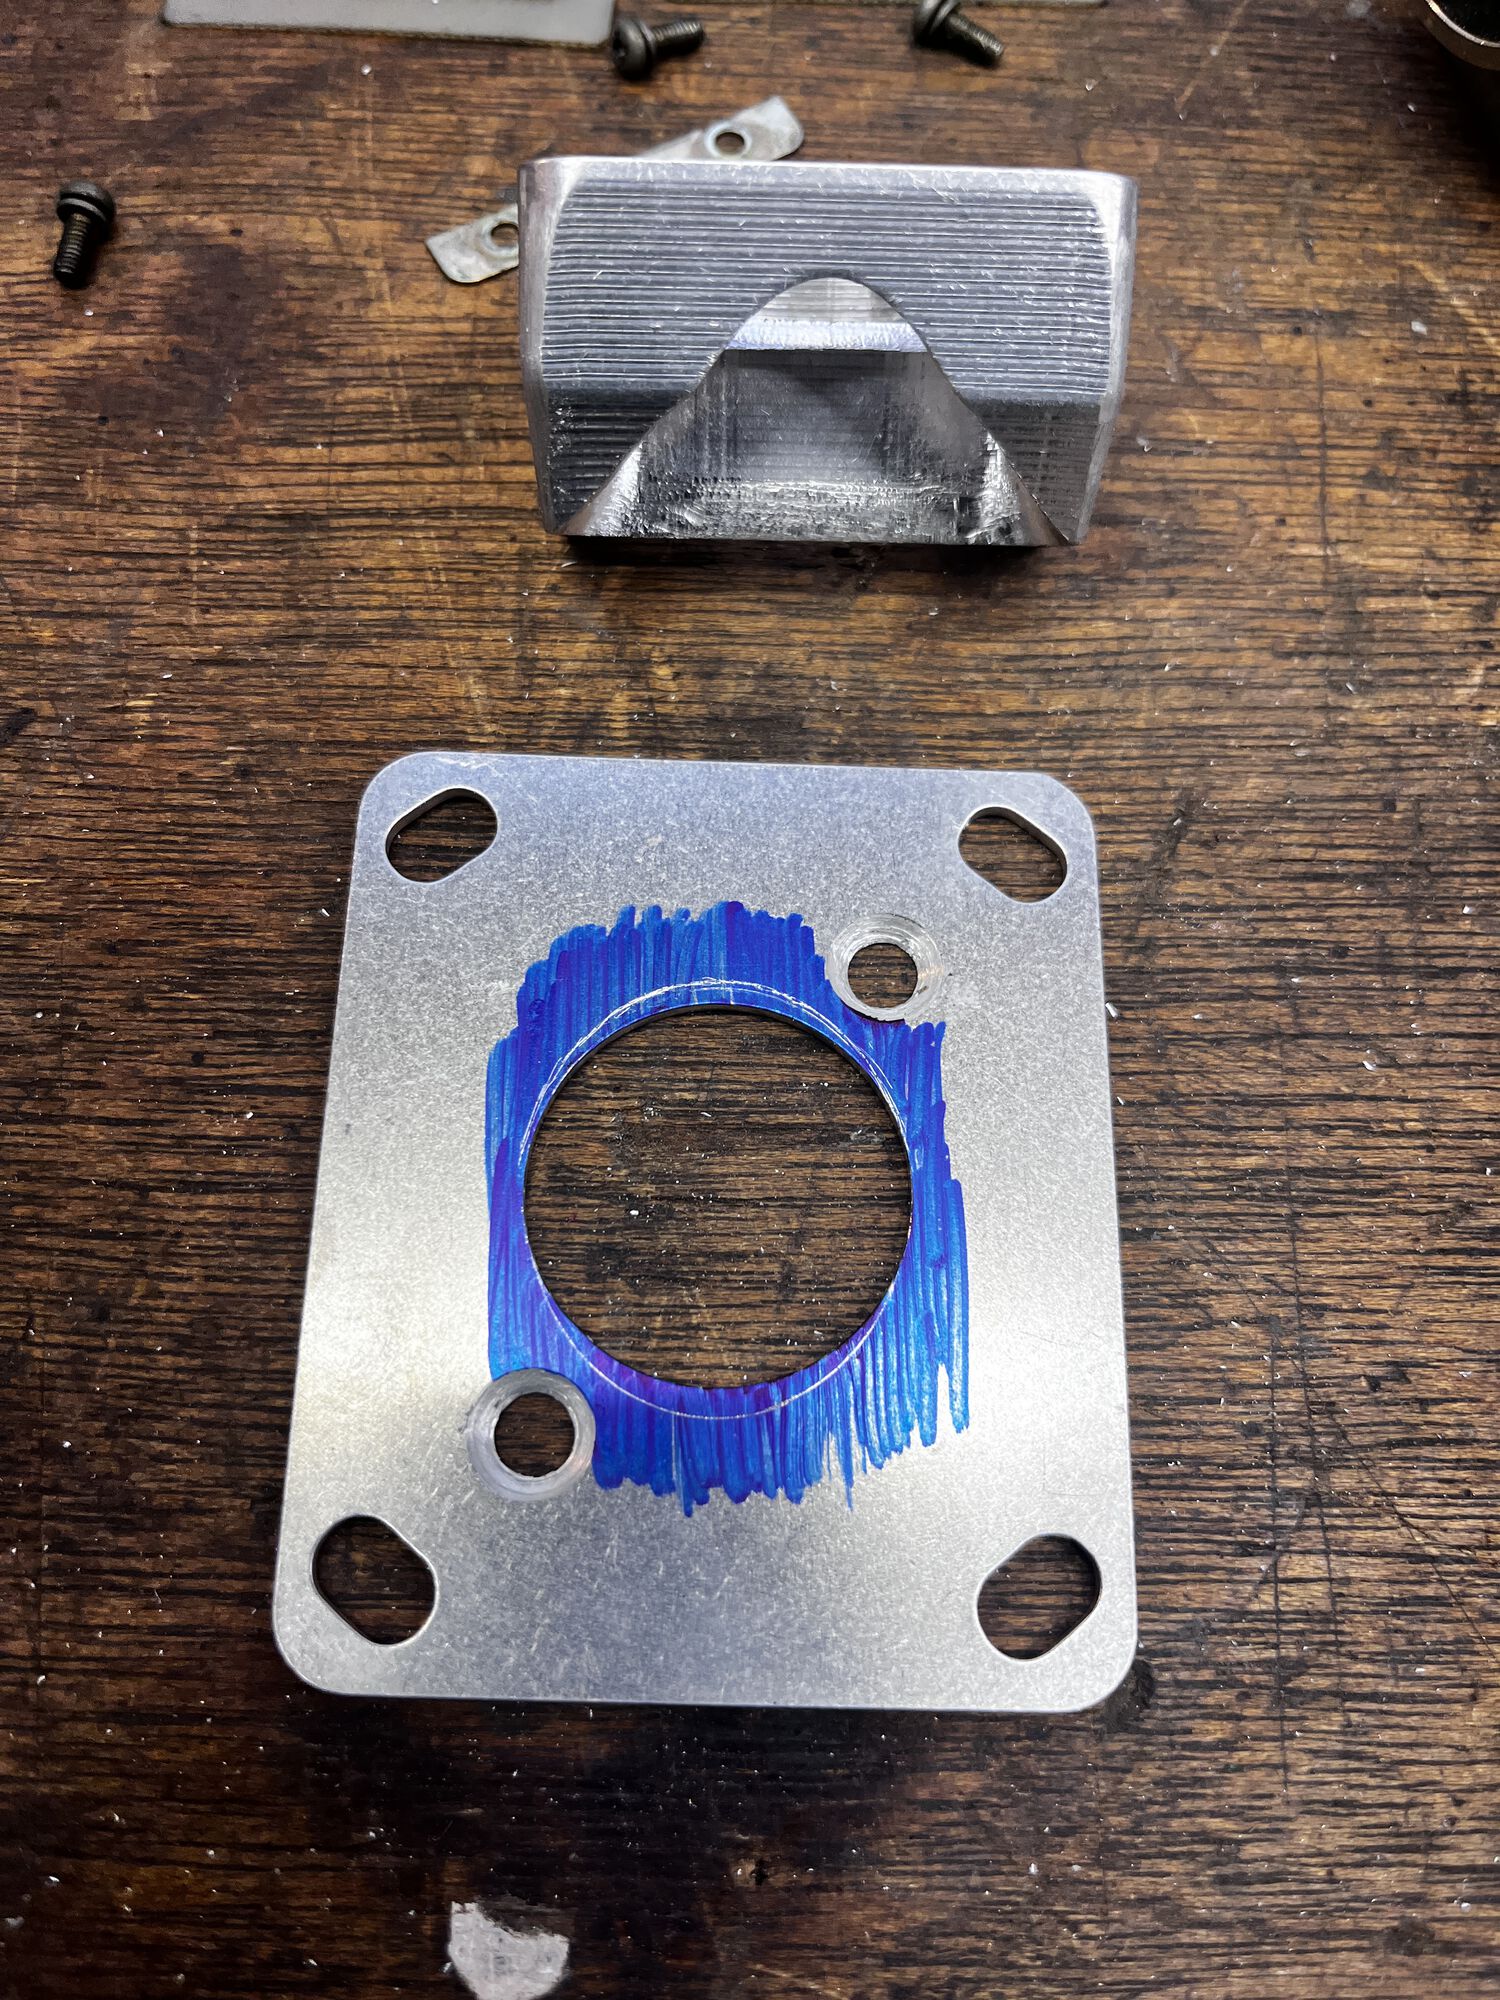
MRP reed stuffer, after matching the inlet side to the upper manifold
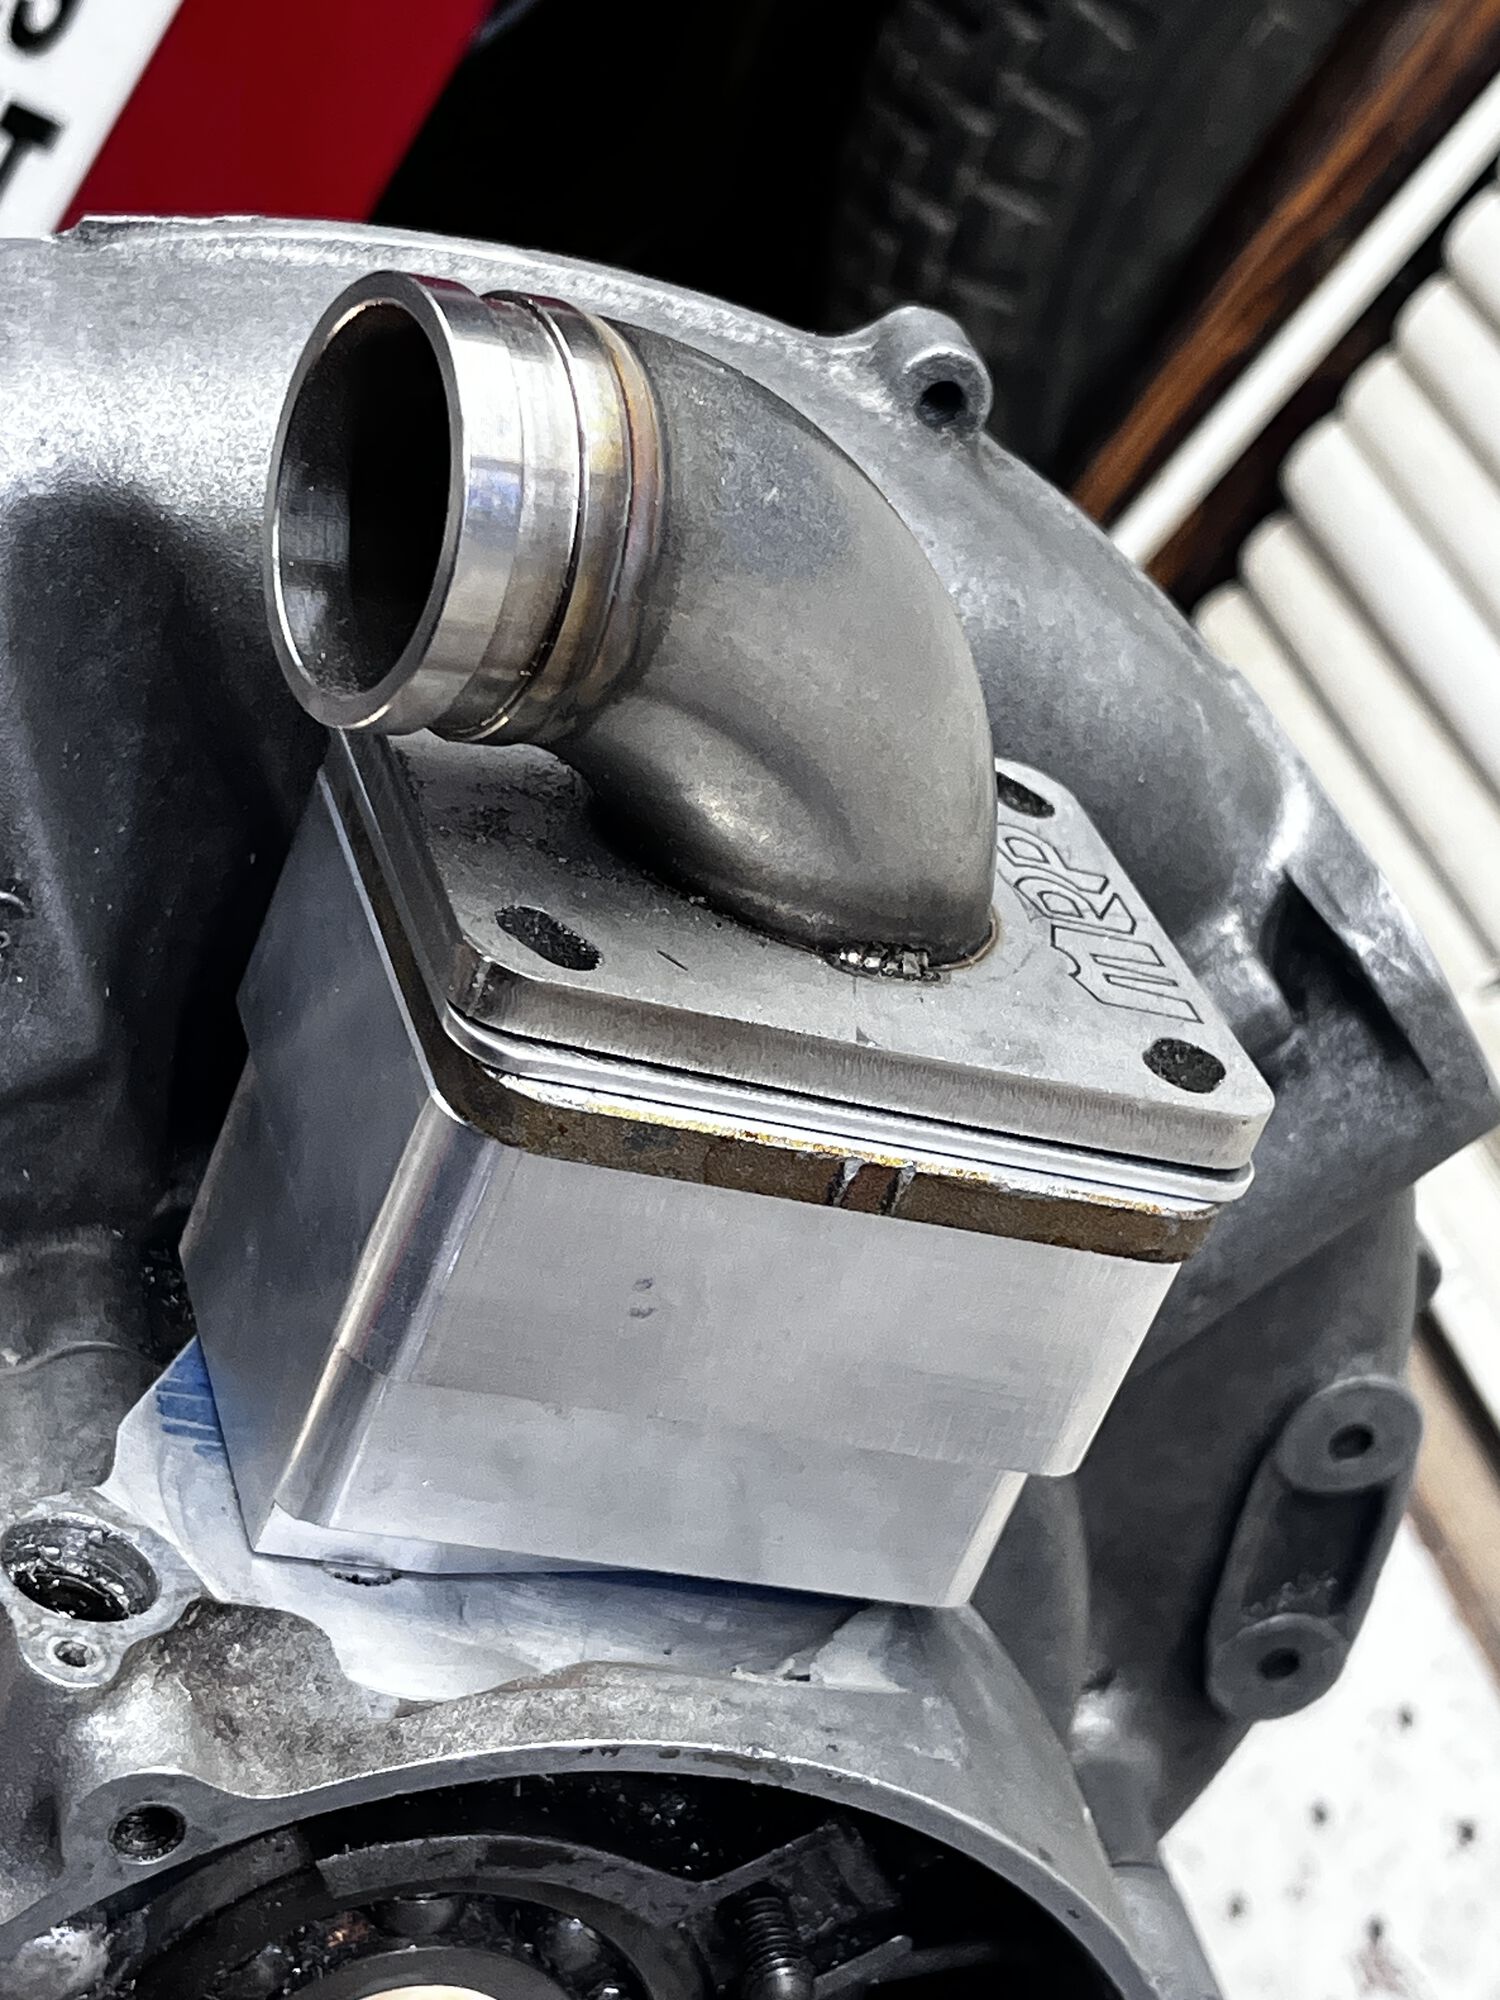
The whole fuel feeding package
MRP reed stuffer, preparing to meet the grinder. It is made of two pieces, a stainless top plate + CNC aluminum stuffer
Inlet matched and flowed
Bottom of stuffer edged and flowed
@qascooter avatar
UTC

Veni, Vidi, Posti
79 P200E (Ruby), 62 Allstate (B-62), 63 VBB (Storm)
Joined: UTC
Posts: 5299
Location: Florence, OR
 
Veni, Vidi, Posti
@qascooter avatar
79 P200E (Ruby), 62 Allstate (B-62), 63 VBB (Storm)
Joined: UTC
Posts: 5299
Location: Florence, OR
UTC quote
WOW! Clap emoticon Clap emoticon Clap emoticon Clap emoticon

That is badass brother!
OP
@geeklion avatar
UTC

The Dude
Too Many piles of Junk that need too much work and too much money
Joined: UTC
Posts: 2688
Location: PNW from LBC
 
The Dude
@geeklion avatar
Too Many piles of Junk that need too much work and too much money
Joined: UTC
Posts: 2688
Location: PNW from LBC
UTC quote
Calculated port timings with the Malossi Sport kit, 60mm stroke crank, 1.5mm head packer. I'll be using a Mazzy bell crank, which has been checked and trued; and the pin welded. The head is a custom machined one, designed to work best with an expansion chamber; made by Al Harpman @ Hot Rod Scooters.

Transfer: 129°
Exhaust: 187°, after raising 1mm
Blowdown: 29°
UTC

parallelogramerist
Joined: UTC
Posts: 6253
 
parallelogramerist
Joined: UTC
Posts: 6253
UTC quote
Those are all nice smooth transitions!
@birdsnest avatar
UTC

Not So Moderator
VNB VSC VSX Li150 09C C125 - (vmb vse v9b)
Joined: UTC
Posts: 10825
Location: Hustletown, TX
 
Not So Moderator
@birdsnest avatar
VNB VSC VSX Li150 09C C125 - (vmb vse v9b)
Joined: UTC
Posts: 10825
Location: Hustletown, TX
UTC quote
Nice.

Remind me what cylinder you went with?
UTC

Jet Eye Master
PX221 MHR heavily tuned, PX200 O tuned, PX181 M1XL tuned, PX166 tuned a quite bit and some motorbikes
Joined: UTC
Posts: 5463
Location: London UK
 
Jet Eye Master
PX221 MHR heavily tuned, PX200 O tuned, PX181 M1XL tuned, PX166 tuned a quite bit and some motorbikes
Joined: UTC
Posts: 5463
Location: London UK
UTC quote
Birdsnest wrote:
Nice.

Remind me what cylinder you went with?
Looks fast already. Those numbers, 60 crank and head 1.5mm, are more similar to an MHR kit. I see it has a 2 ring piston but that doesn't necessarily mean it's a sport kit.
@birdsnest avatar
UTC

Not So Moderator
VNB VSC VSX Li150 09C C125 - (vmb vse v9b)
Joined: UTC
Posts: 10825
Location: Hustletown, TX
 
Not So Moderator
@birdsnest avatar
VNB VSC VSX Li150 09C C125 - (vmb vse v9b)
Joined: UTC
Posts: 10825
Location: Hustletown, TX
UTC quote
GeekLion wrote:
For reference, I'll be running a 60mm stroke bell crank with 1.5mm head packer with the Malossi Sport kit. MRP reed intake, genuine yamaha rd350 reed block, MRP reed stuffer

Ignore me query about what jug...

I just saw the answer above.
OP
@geeklion avatar
UTC

The Dude
Too Many piles of Junk that need too much work and too much money
Joined: UTC
Posts: 2688
Location: PNW from LBC
 
The Dude
@geeklion avatar
Too Many piles of Junk that need too much work and too much money
Joined: UTC
Posts: 2688
Location: PNW from LBC
UTC quote
Jack221 wrote:
Looks fast already. Those numbers, 60 crank and head 1.5mm, are more similar to an MHR kit. I see it has a 2 ring piston but that doesn't necessarily mean it's a sport kit.
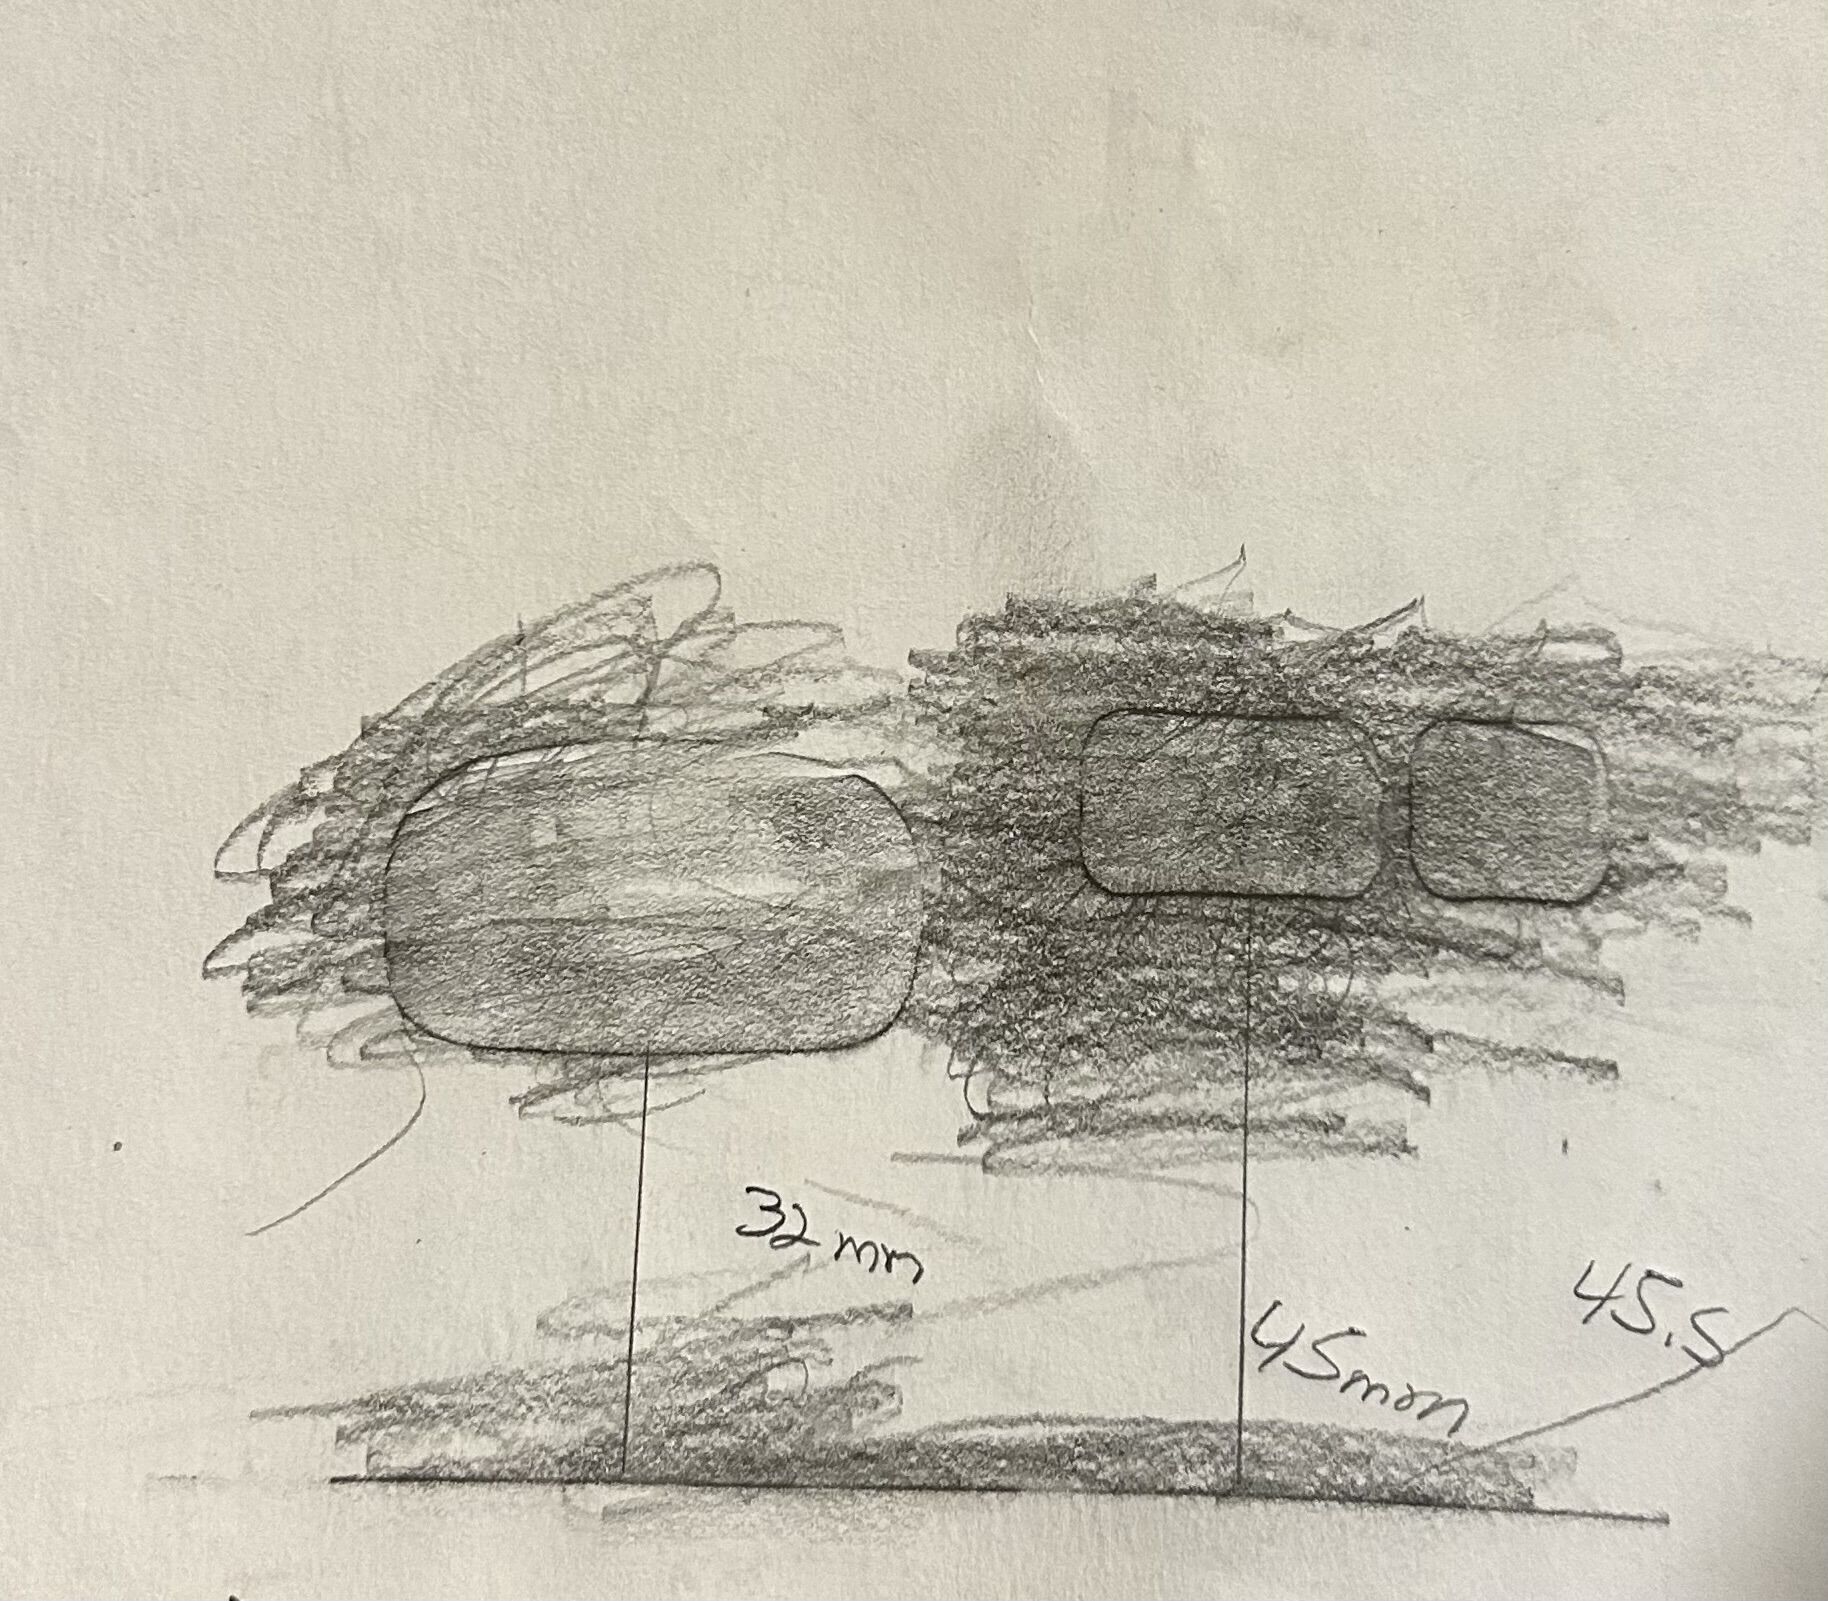
Calculated port timings if this was run with a 57 crank. I'm calculating these for my specific head, which has a 0.9 depression. So Im shooting for -0.3 PBT. I also have a bit of room to play with on the bottom, as the cyl mating surface has been decked with some material removed. Basicly I can fine tune the squish from the bottom and top.

Malossi Sport kit with 57 stroke crank
Transfer: 45mm height = 125°
Exhaust: 32mm height = 183°
Blowdown: 29°
Forum member supplied image with no explanatory text
UTC

Jet Eye Master
PX221 MHR heavily tuned, PX200 O tuned, PX181 M1XL tuned, PX166 tuned a quite bit and some motorbikes
Joined: UTC
Posts: 5463
Location: London UK
 
Jet Eye Master
PX221 MHR heavily tuned, PX200 O tuned, PX181 M1XL tuned, PX166 tuned a quite bit and some motorbikes
Joined: UTC
Posts: 5463
Location: London UK
UTC quote
GeekLion wrote:
Calculated port timings if this was run with a 57 crank. I'm calculating these for my specific head, which has a 0.9 depression. So Im shooting for -0.3 PBT. I also have a bit of room to play with on the bottom, as the cyl mating surface has been decked with some material removed. Basicly I can fine tune the squish from the bottom and top.

Malossi Sport kit with 57 stroke crank
Transfer: 45mm height = 125°
Exhaust: 32mm height = 183°
Blowdown: 29°
These are not the usual transfer numbers for a sport kit. They're more like MHR numbers.
https://www.scooter-center.com/en/cylinder-malossi-210-cc-sport-mk2-2021-vespa-p200-rally200-with-cylinder-head-m3118591
These numbers from SC are more the usual range. Wonder if you got delivered an MHR cylinder in that box.
OP
@geeklion avatar
UTC

The Dude
Too Many piles of Junk that need too much work and too much money
Joined: UTC
Posts: 2688
Location: PNW from LBC
 
The Dude
@geeklion avatar
Too Many piles of Junk that need too much work and too much money
Joined: UTC
Posts: 2688
Location: PNW from LBC
UTC quote
Jack221 wrote:
These are not the usual transfer numbers for a sport kit. They're more like MHR numbers.
https://www.scooter-center.com/en/cylinder-malossi-210-cc-sport-mk2-2021-vespa-p200-rally200-with-cylinder-head-m3118591
These numbers from SC are more the usual range. Wonder if you got delivered an MHR cylinder in that box.
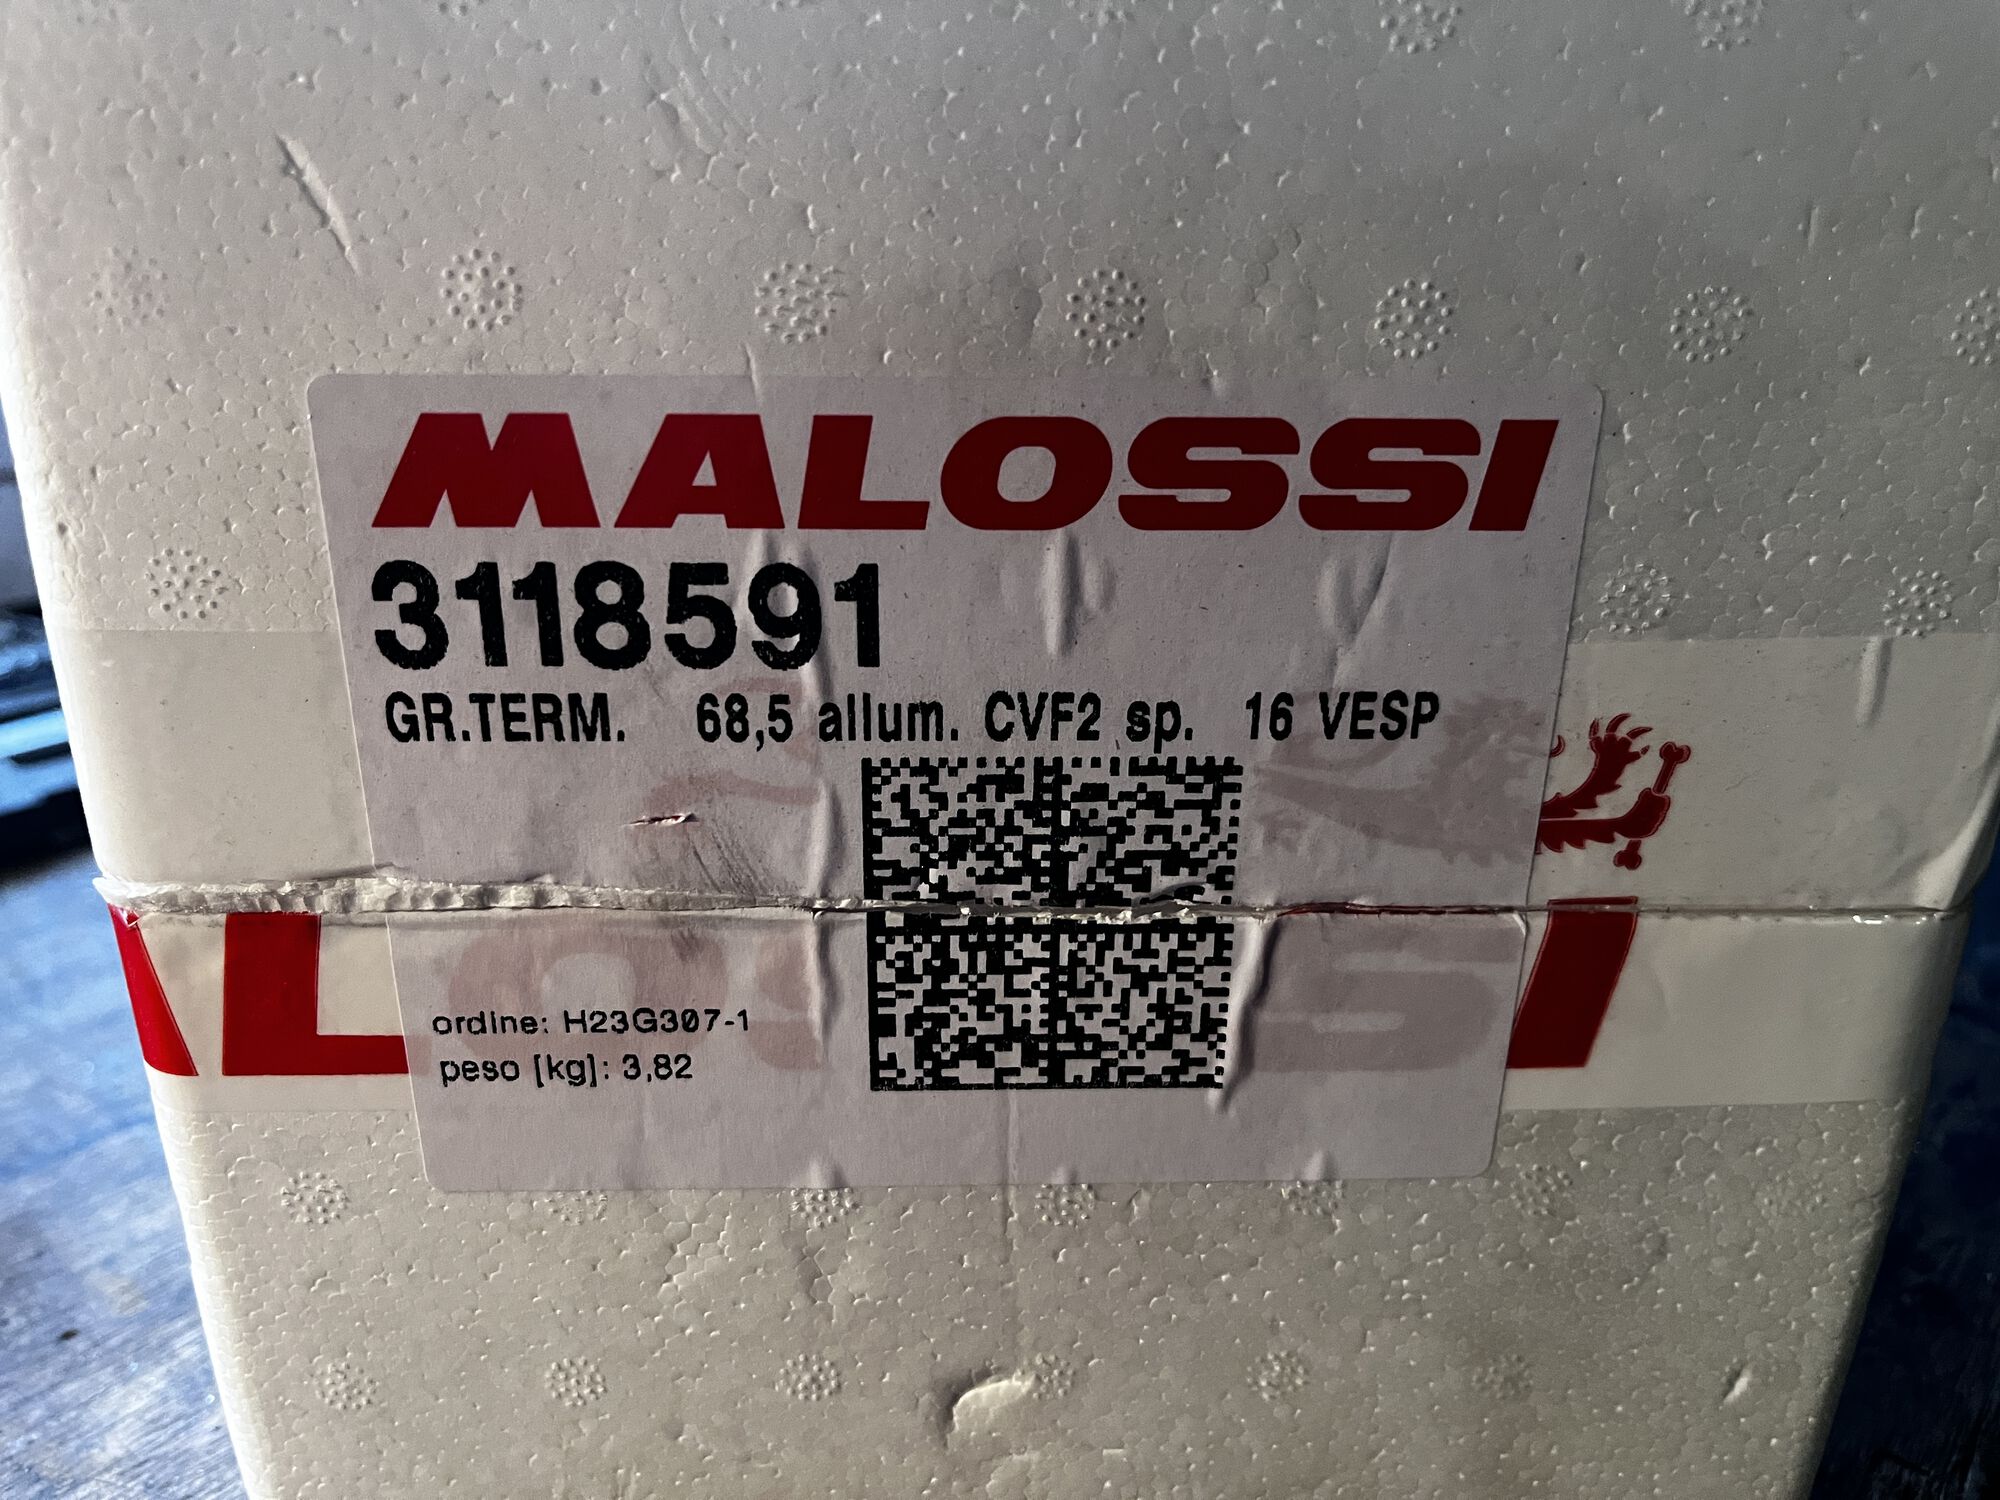
Ok this is interesting indeed...and a bit of a curve ball. MHR usually comes with 1ring piston, and mine has 2. The box was factory sealed on arrival, but based on the SC posted port timings; it very well may be the MHR cyl. I double checked my order, and it was indeed for the Sport kit; not MHR. I guess I never went back and double checked the actual port timing numbers.

Does anyone have a sport &/or MHR kit to measure ports and give me some real world reference. I'm already moving forward, but it would be nice to know for sure what it is I'm working with.

*footnote: why is it so difficult to find actuall port timing & measurement specs for cyliinders? Is it just me or am I missing something....
@v_oodoo avatar
UTC

Style Maven
'74 50s x3 '87 PK125XL '92 PK50XL2 Plurimatic - & - '58 AllState '68 Sprint '66(?) 125 Super '72 DanMotor 150 Super and '04 Bajaj LML hybrid
Joined: UTC
Posts: 10136
Location: seattle/athens
 
Style Maven
@v_oodoo avatar
'74 50s x3 '87 PK125XL '92 PK50XL2 Plurimatic - & - '58 AllState '68 Sprint '66(?) 125 Super '72 DanMotor 150 Super and '04 Bajaj LML hybrid
Joined: UTC
Posts: 10136
Location: seattle/athens
UTC quote
DAY-um! This is getting serious. Wish I could help.

I keep checking in and learning stuff, but most of this is above my pay grade and getting moreso
OP
@geeklion avatar
UTC

The Dude
Too Many piles of Junk that need too much work and too much money
Joined: UTC
Posts: 2688
Location: PNW from LBC
 
The Dude
@geeklion avatar
Too Many piles of Junk that need too much work and too much money
Joined: UTC
Posts: 2688
Location: PNW from LBC
UTC quote
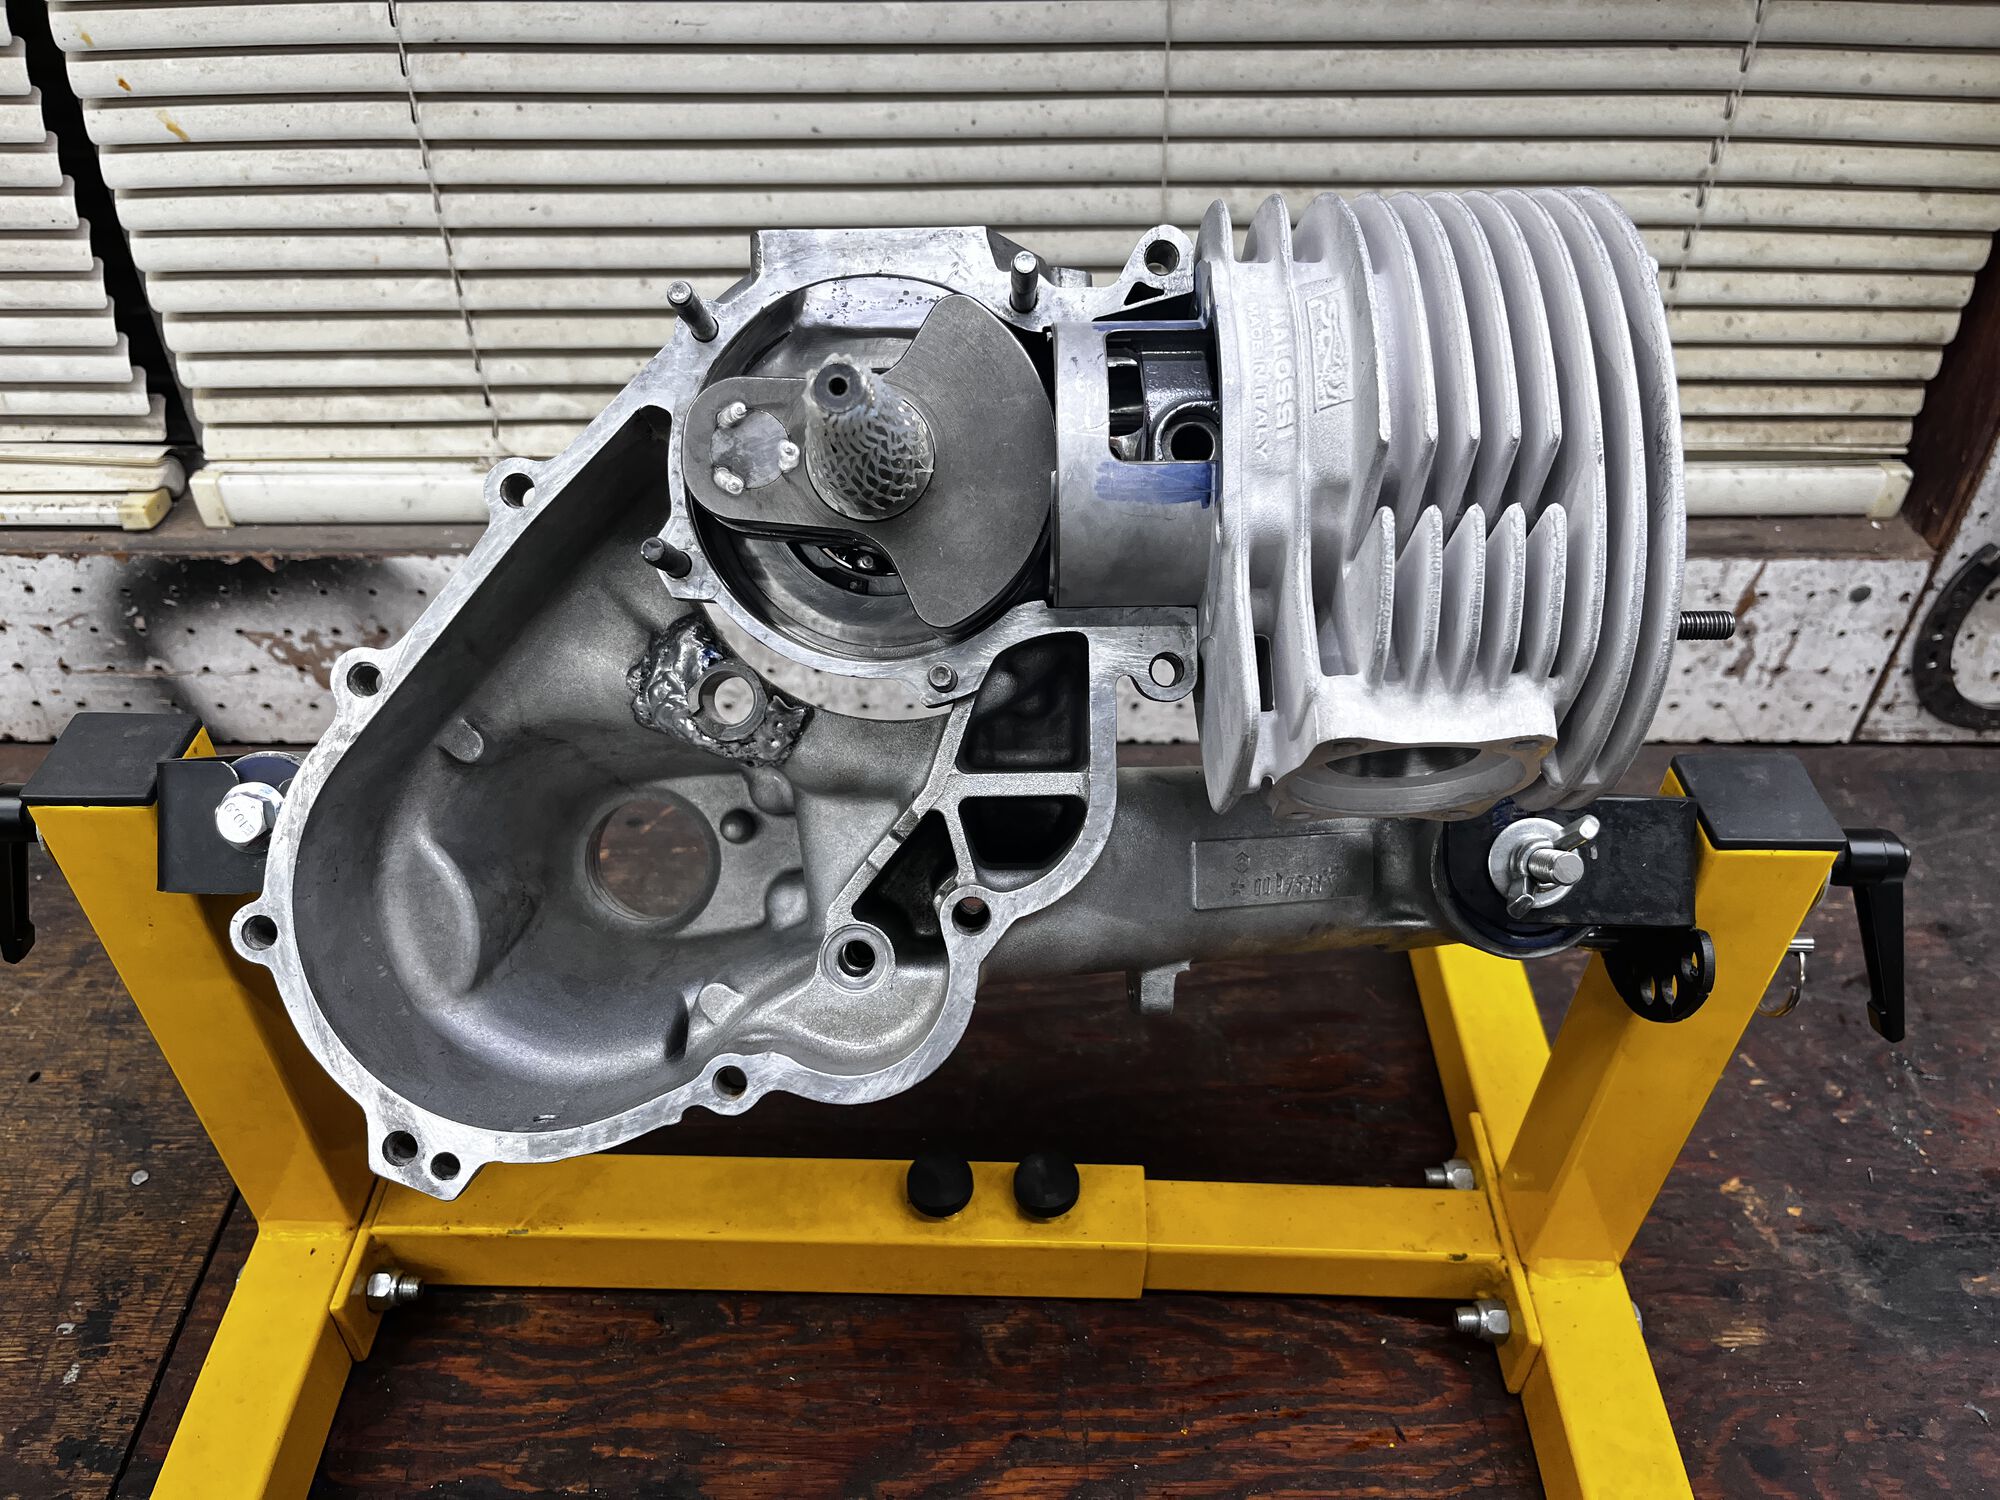
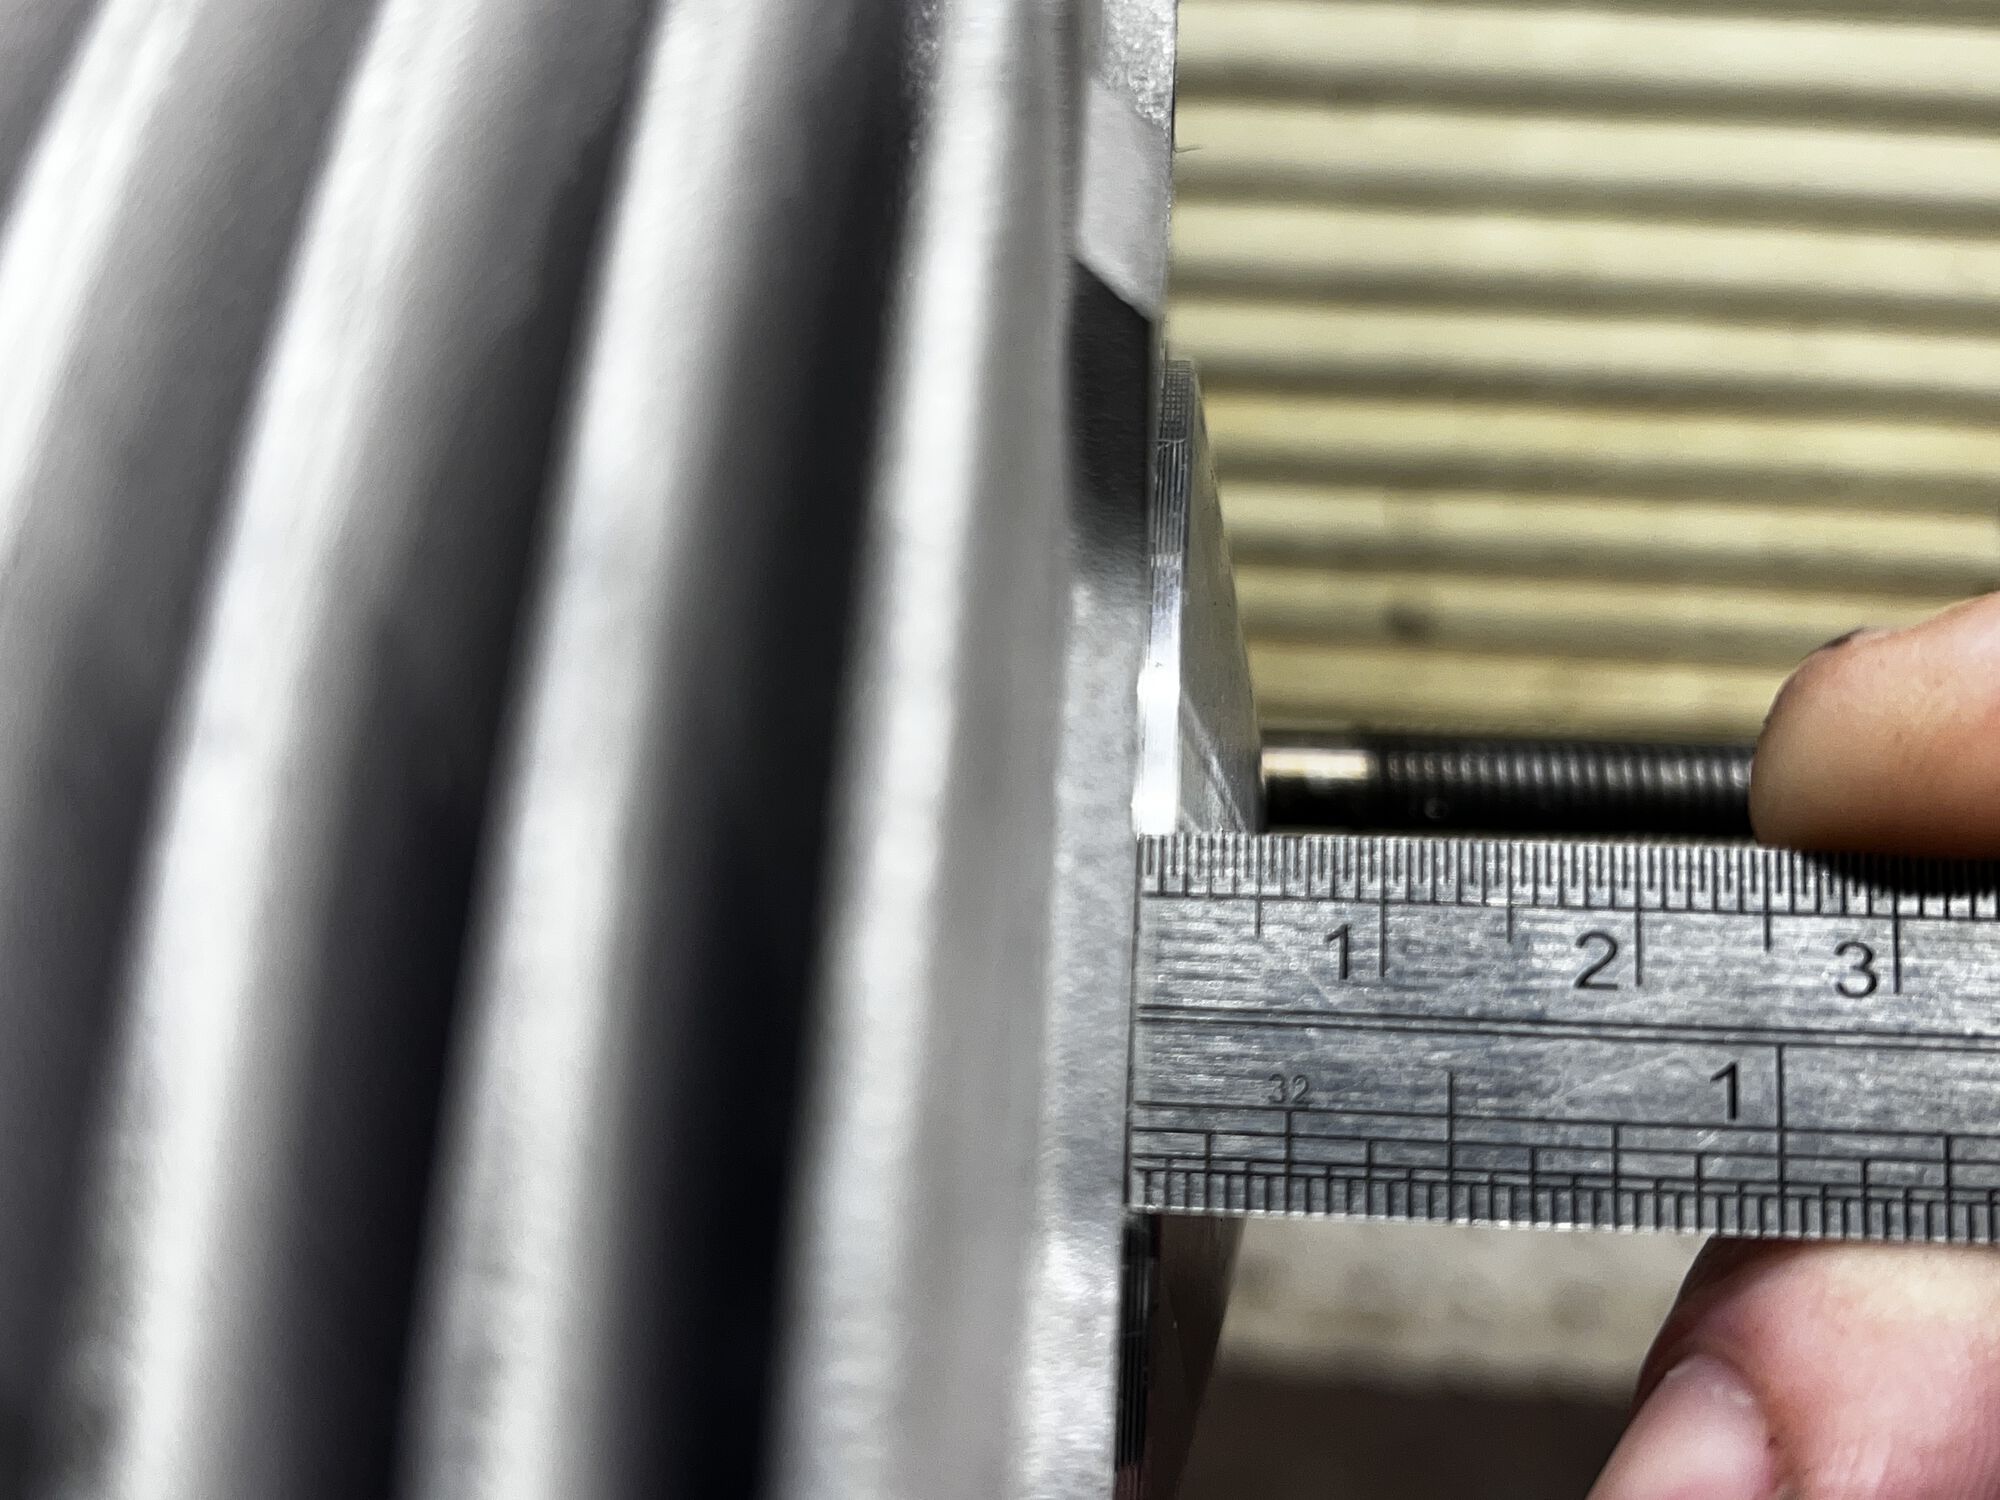
I cleaned up the cases and mocked up the crank, cylinder, and piston. No base gasket to get a benchmark. With the 60mm stroke crank, the piston protrudes above top deck by 1.5mm. Maybe a hair more, but the base of the case has been decked, so that tracks.

So even whatever kit this actually is, it was made for 57. I know the Sport kit is only made for 57, and MHR says its available for both 57 & 60; but I can only find the 60mm version on SCK/SIP/ Malossi websites.

Again…what am I missing here.

My port timing calculations still stand, as I based them off the kit in hand; but I sure would like to know what this actually is. FFR.

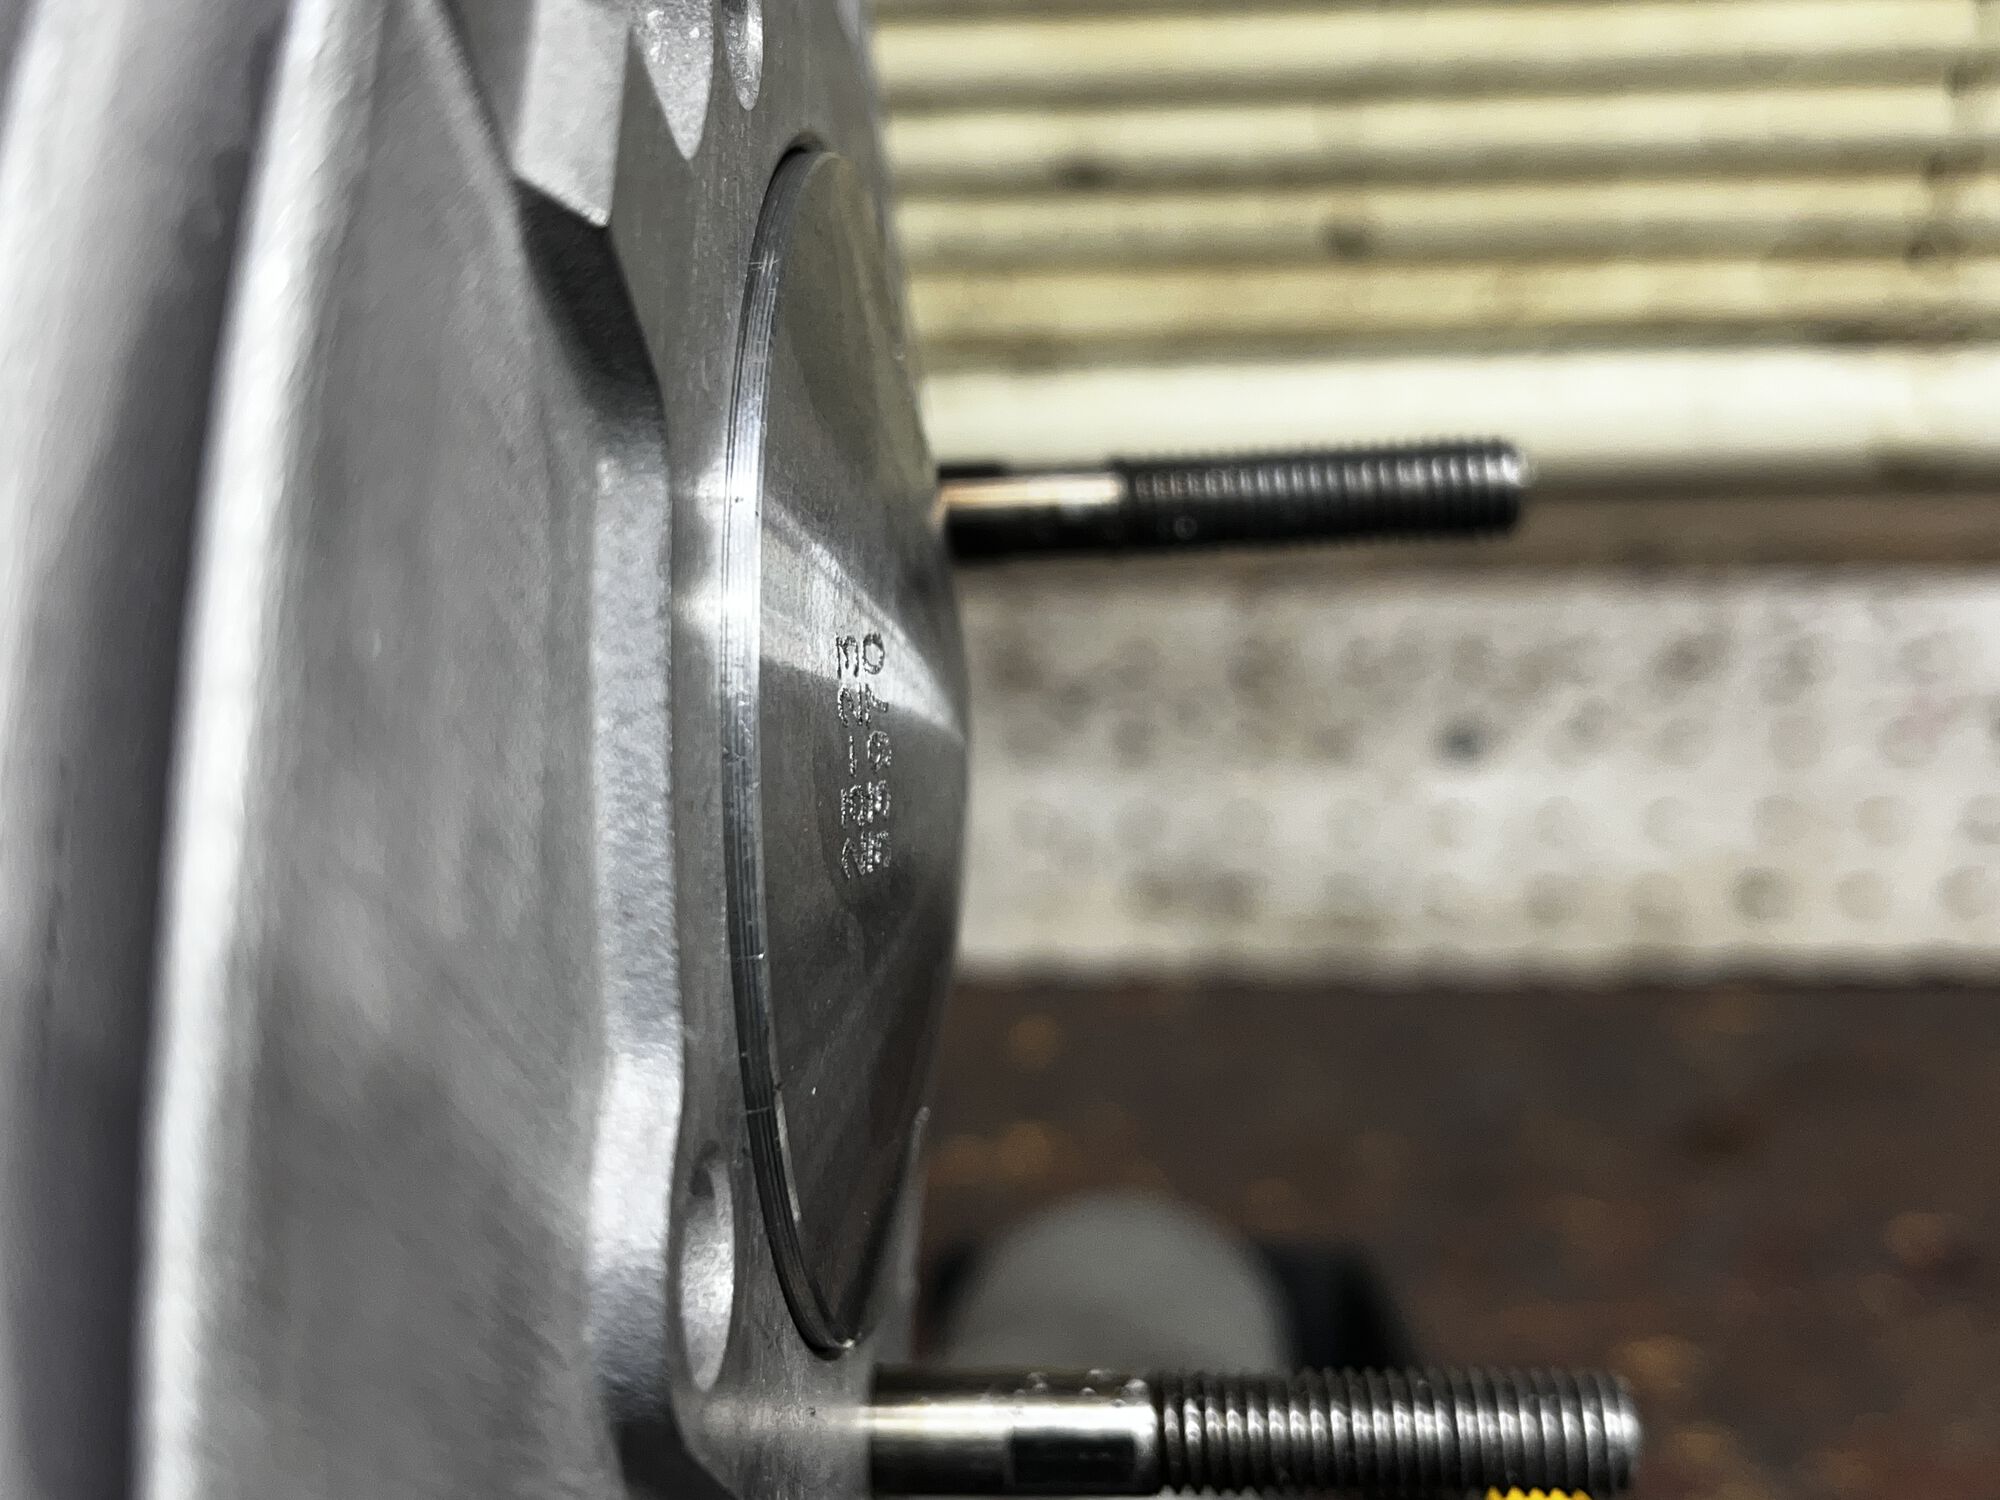
Any tell tale visual differences on the various malossi kits? The number cast into my kit is #18592
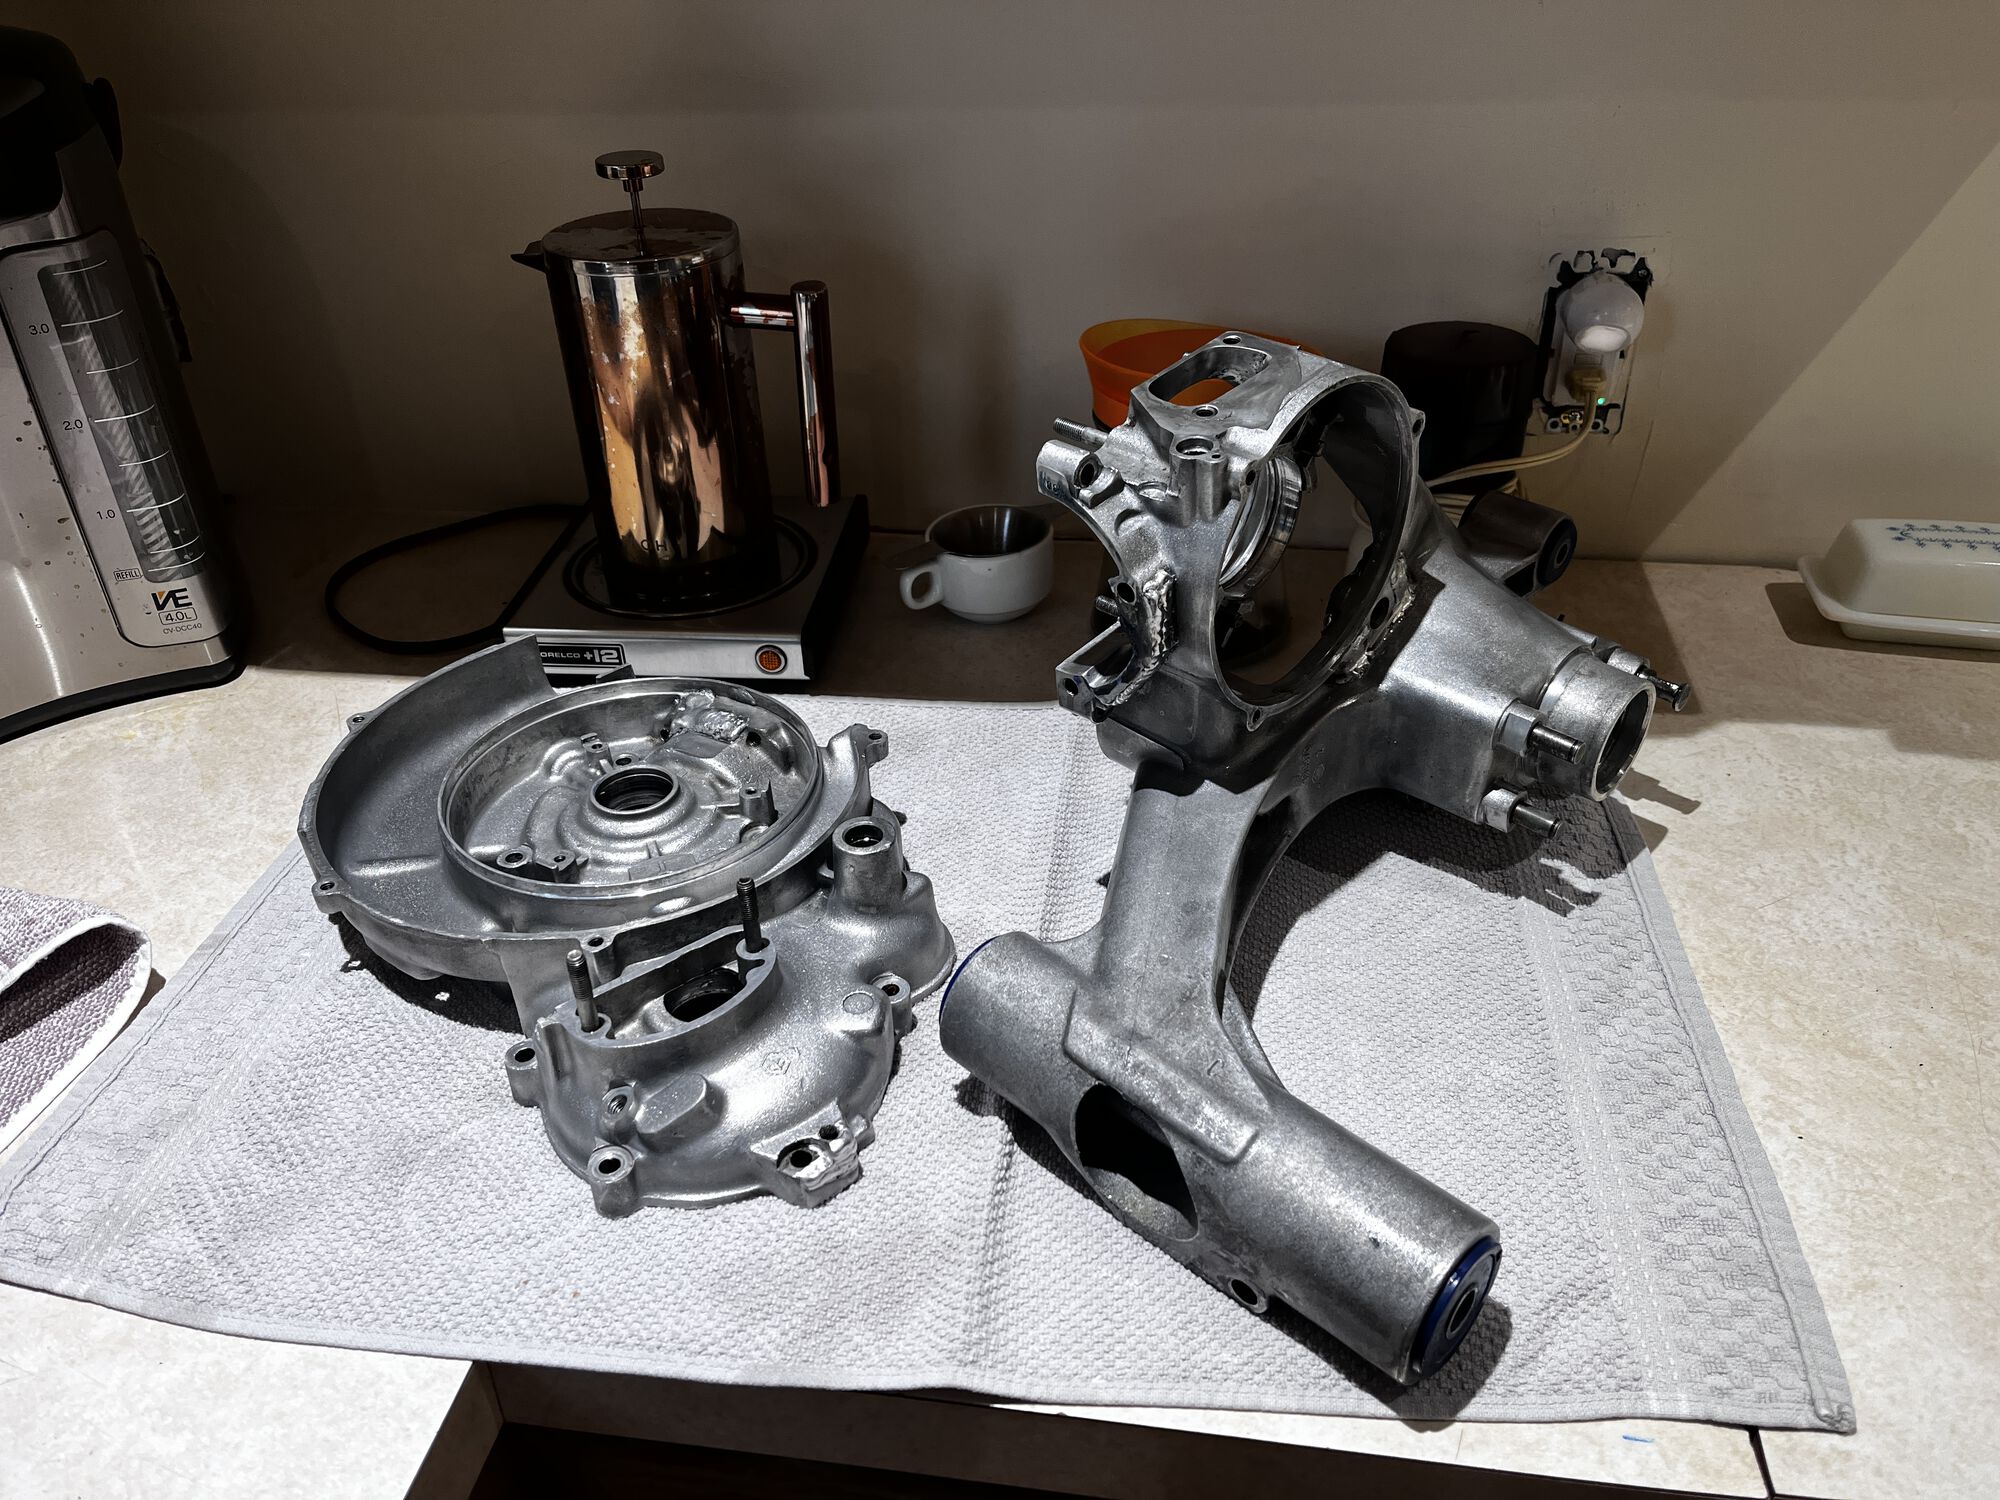
Cases cleaned in the kitchen with coffee
mockup to check port timings
piston above deck 1.5mm
Piston above deck 1.5mm
⚠️ Last edited by GeekLion on UTC; edited 1 time
OP
@geeklion avatar
UTC

The Dude
Too Many piles of Junk that need too much work and too much money
Joined: UTC
Posts: 2688
Location: PNW from LBC
 
The Dude
@geeklion avatar
Too Many piles of Junk that need too much work and too much money
Joined: UTC
Posts: 2688
Location: PNW from LBC
UTC quote
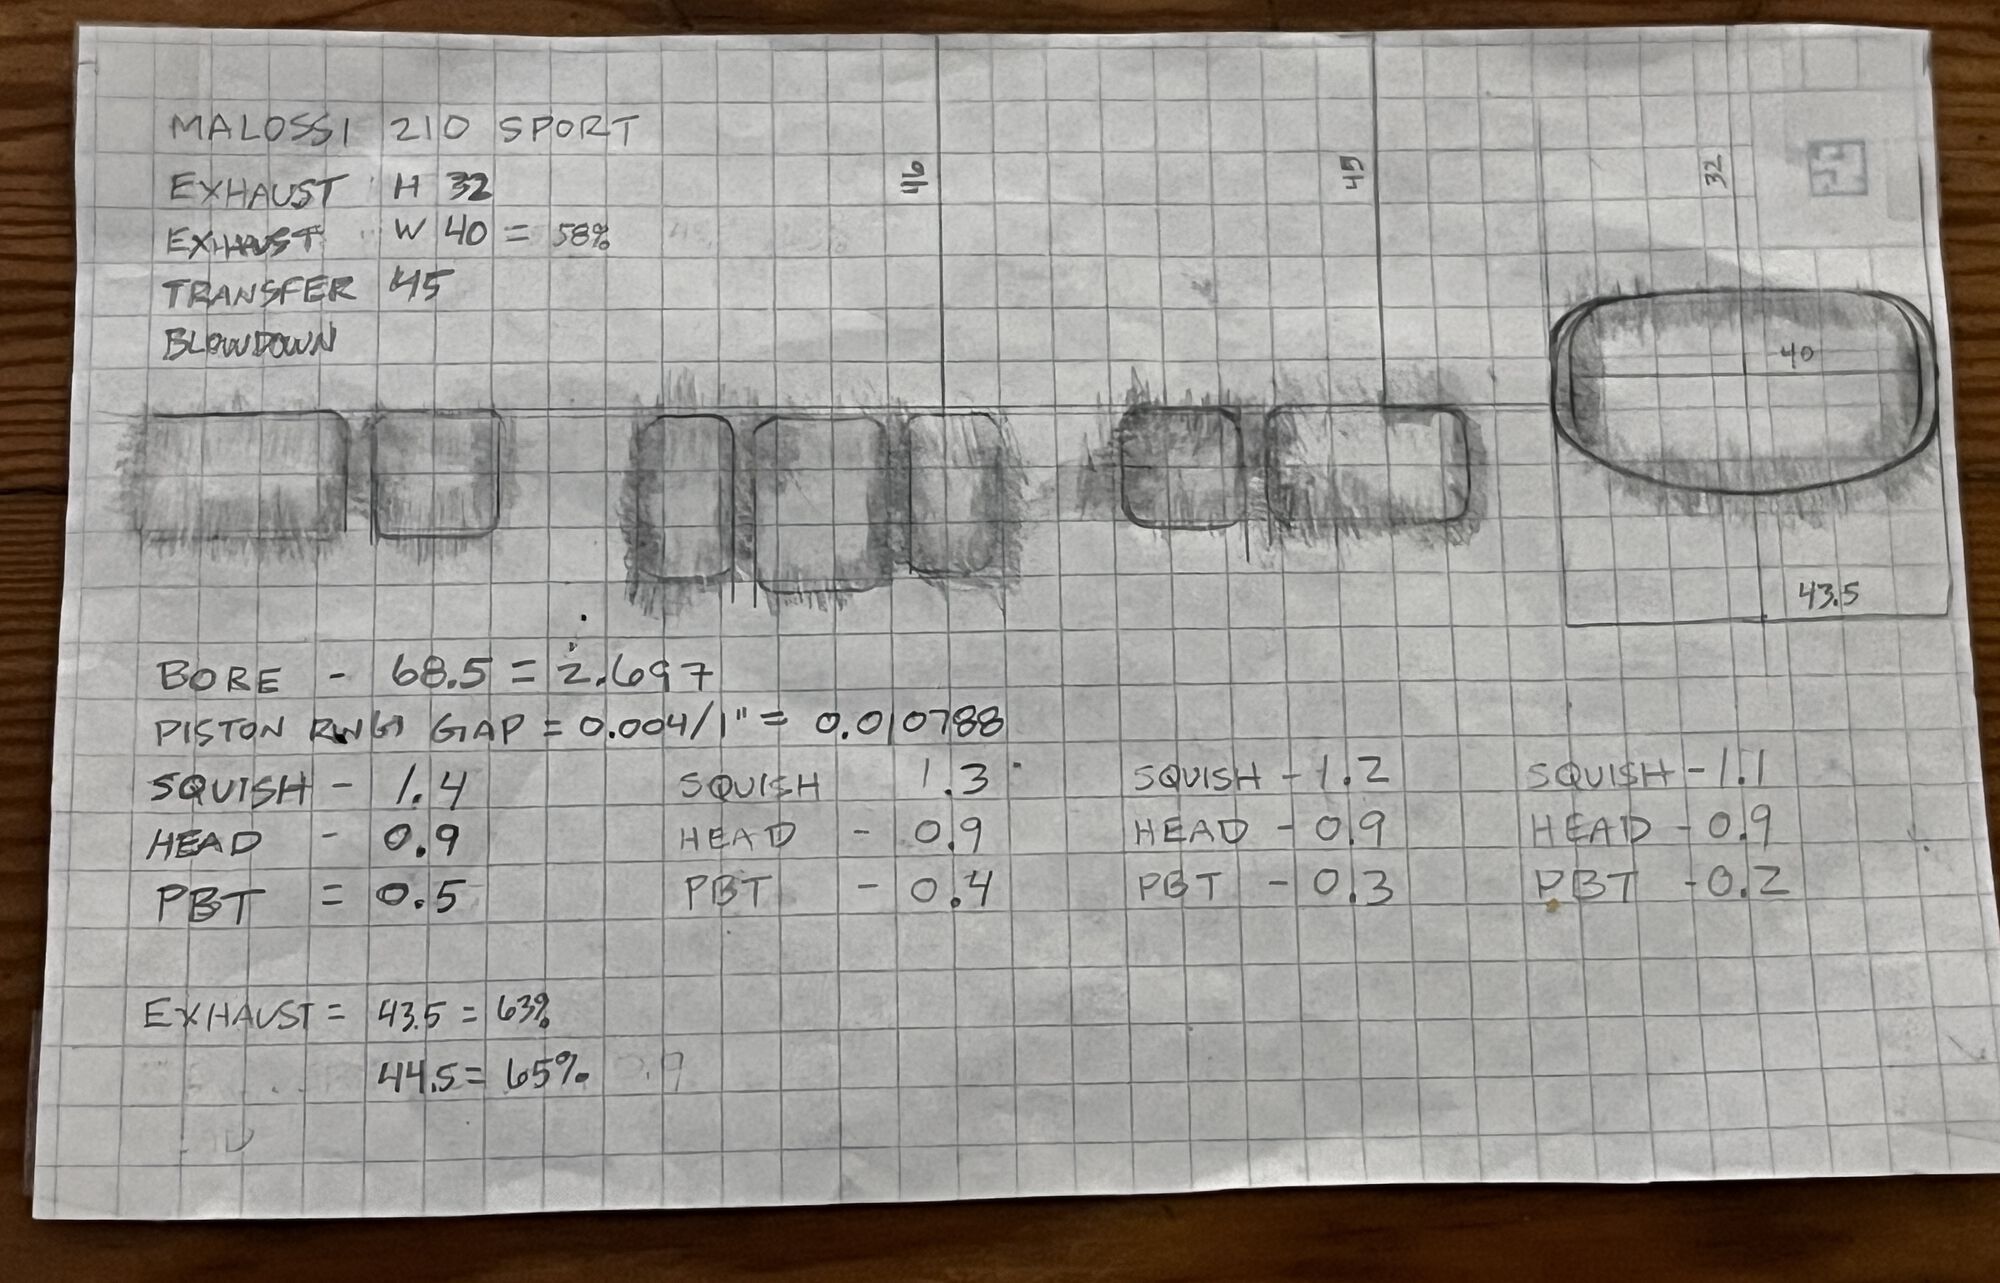
Port map, with some initial notes & calculations; most of which can be ignored
Forum member supplied image with no explanatory text
@orwell84 avatar
UTC

Ossessionato
Joined: UTC
Posts: 4099
Location: northern New York
 
Ossessionato
@orwell84 avatar
Joined: UTC
Posts: 4099
Location: northern New York
UTC quote
Jack221 wrote:
These are not the usual transfer numbers for a sport kit. They're more like MHR numbers.
https://www.scooter-center.com/en/cylinder-malossi-210-cc-sport-mk2-2021-vespa-p200-rally200-with-cylinder-head-m3118591
These numbers from SC are more the usual range. Wonder if you got delivered an MHR cylinder in that box.
These are my numbers for the sport.
Forum member supplied image with no explanatory text
OP
@geeklion avatar
UTC

The Dude
Too Many piles of Junk that need too much work and too much money
Joined: UTC
Posts: 2688
Location: PNW from LBC
 
The Dude
@geeklion avatar
Too Many piles of Junk that need too much work and too much money
Joined: UTC
Posts: 2688
Location: PNW from LBC
UTC quote
orwell84 wrote:
These are my numbers for the sport.
Thats the same as what I have here with my kit. Which I believe to be the Sport as well.

Digging a bit deeper on the worldwideinterwebs, I can see two distinct visual cues between the MHR kit, and the Sport kit.

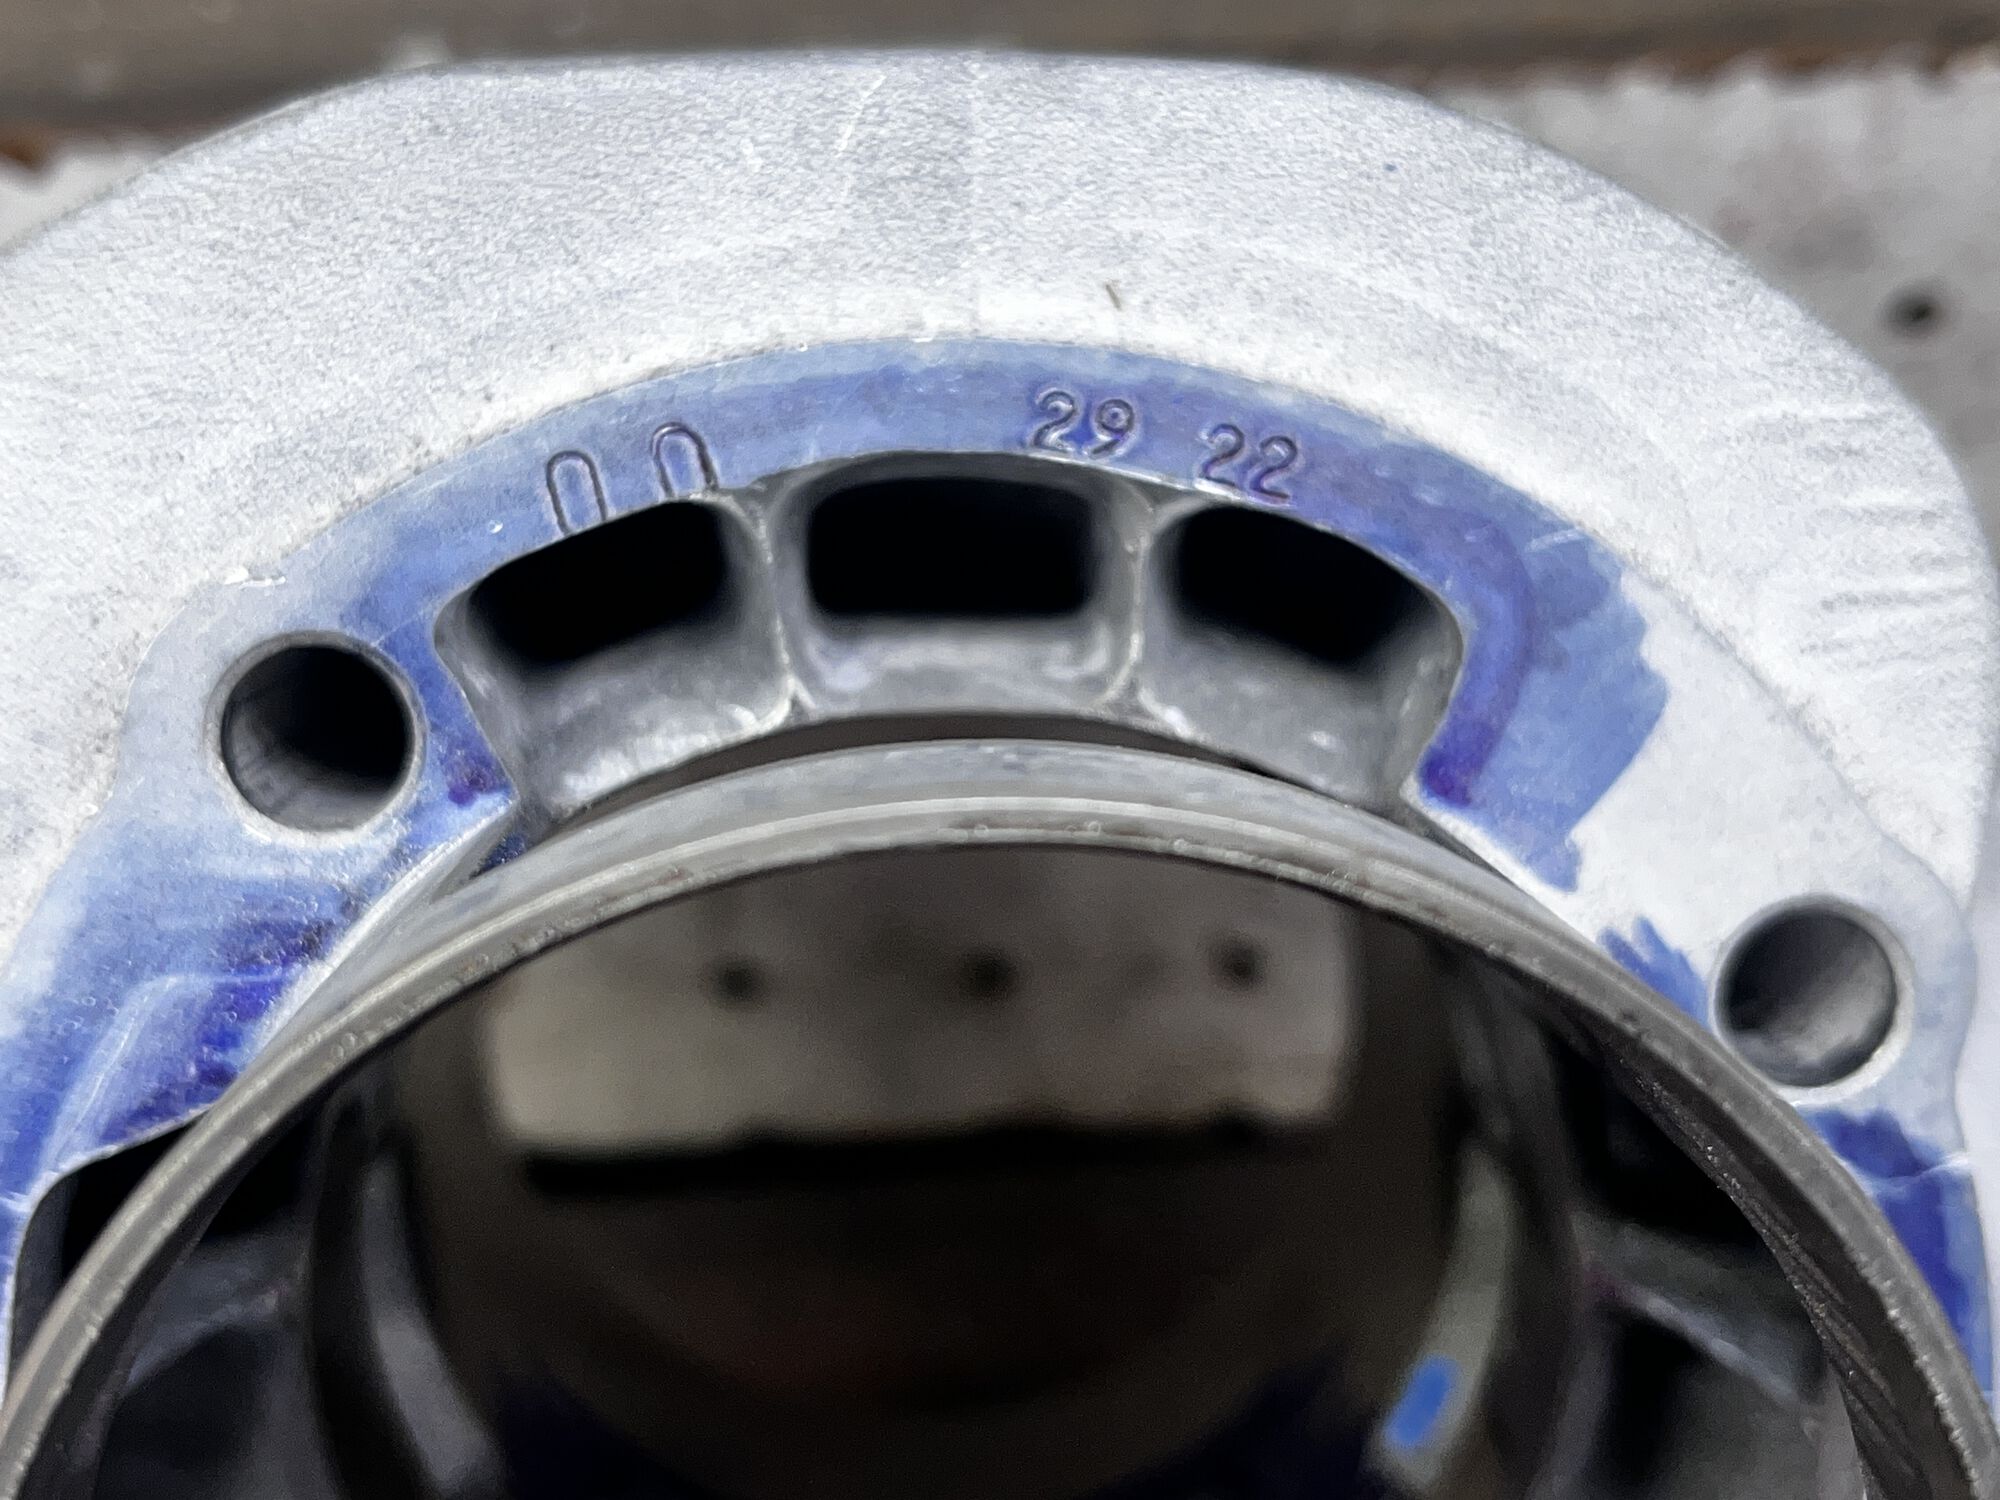
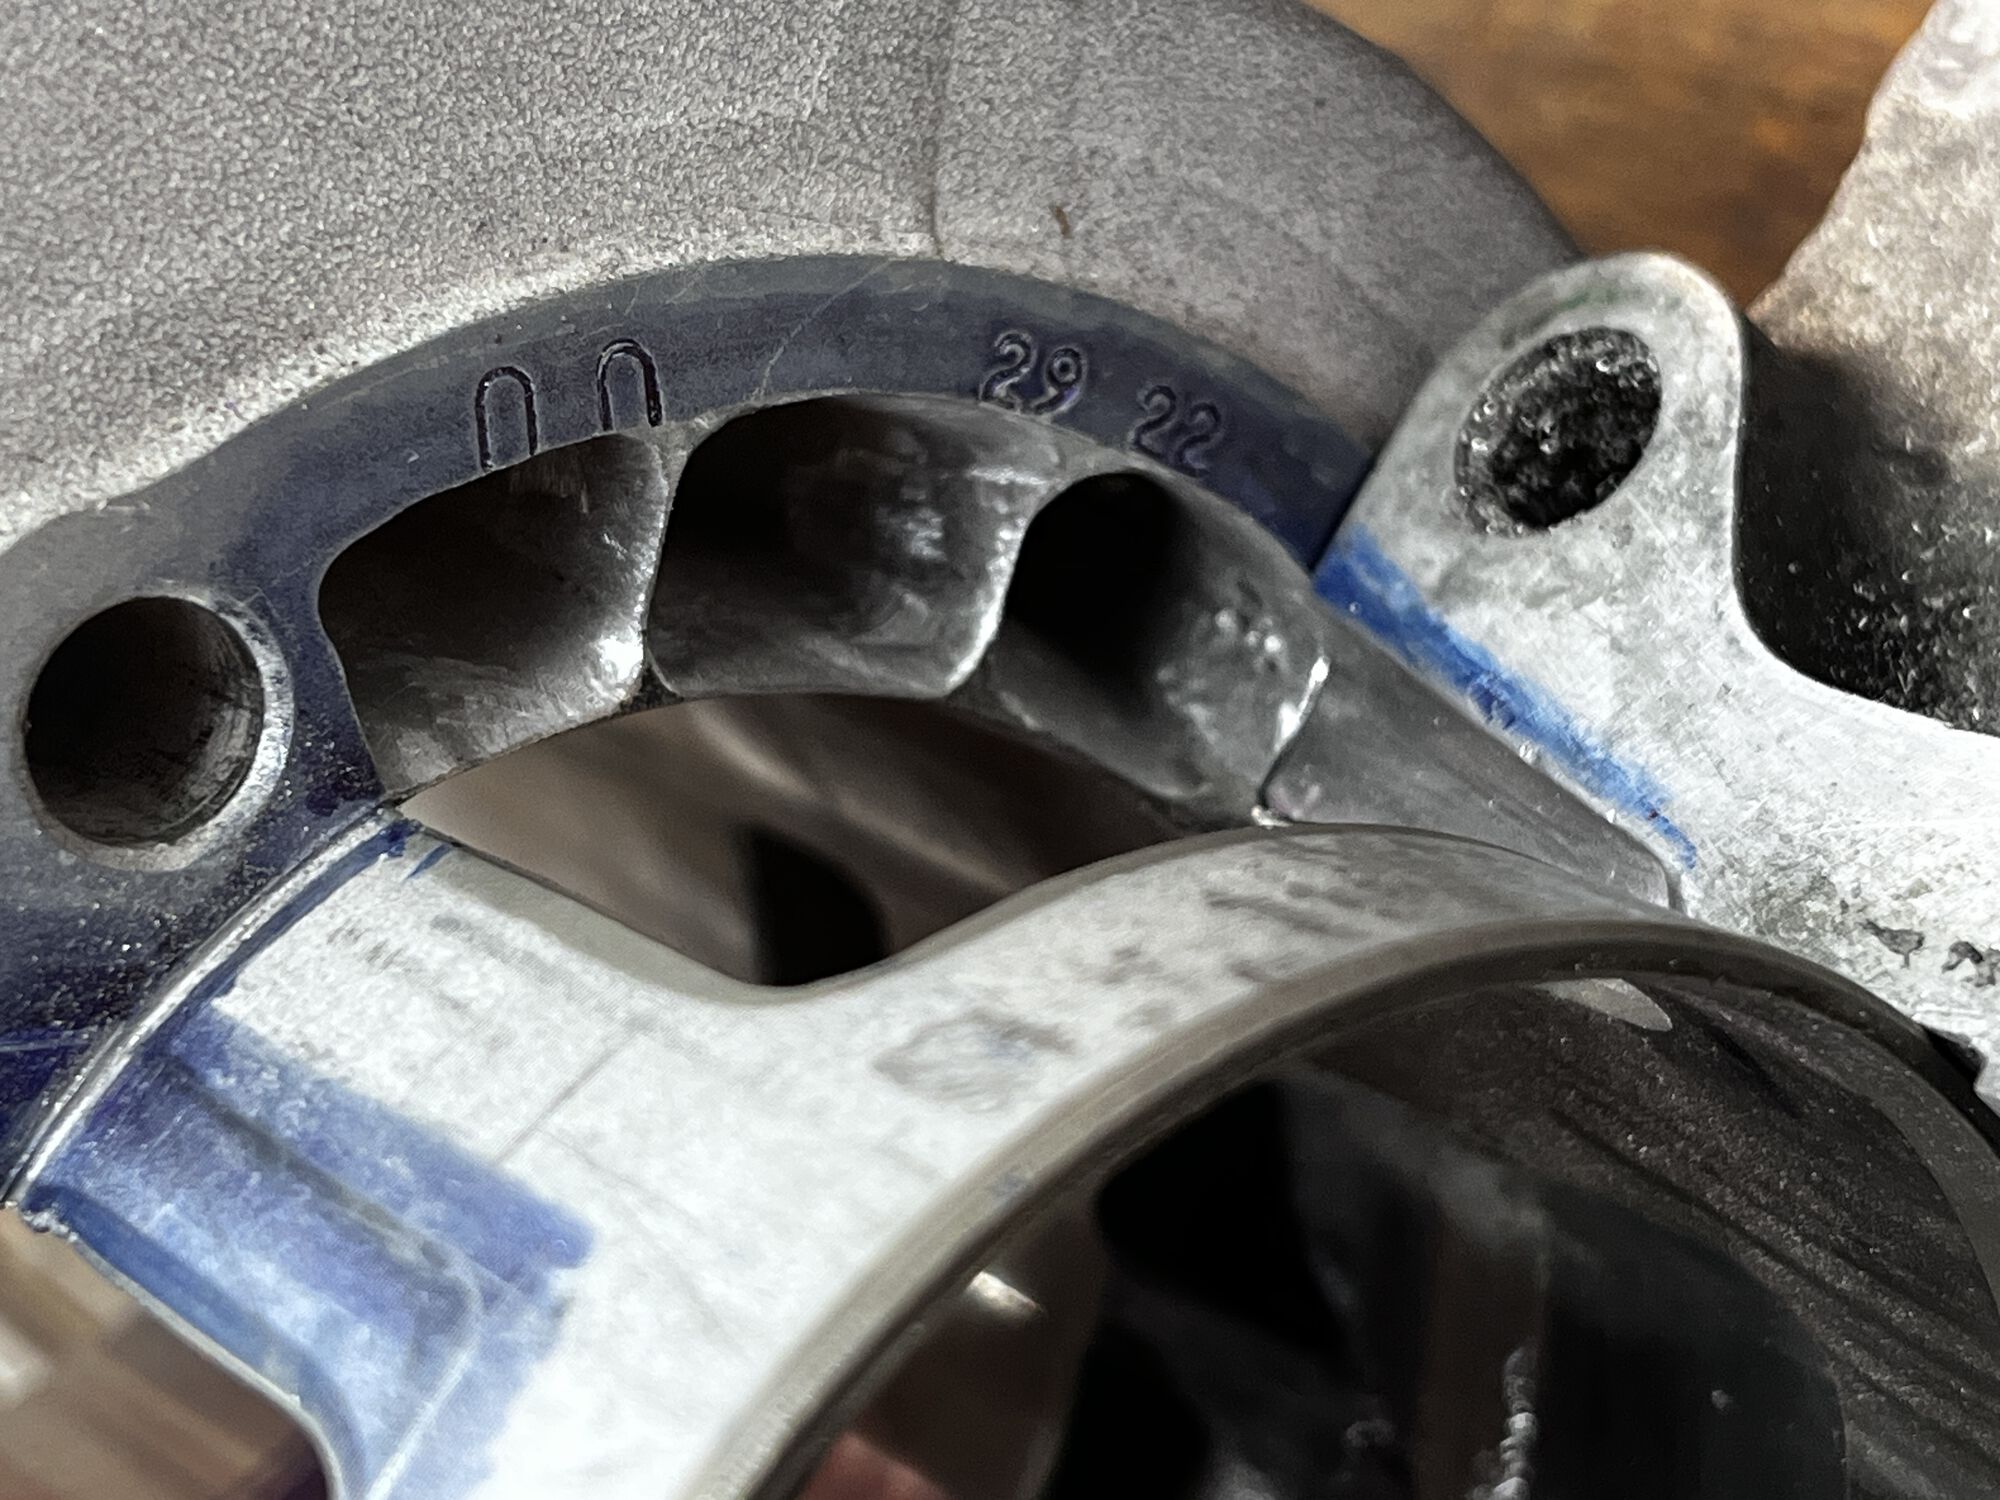
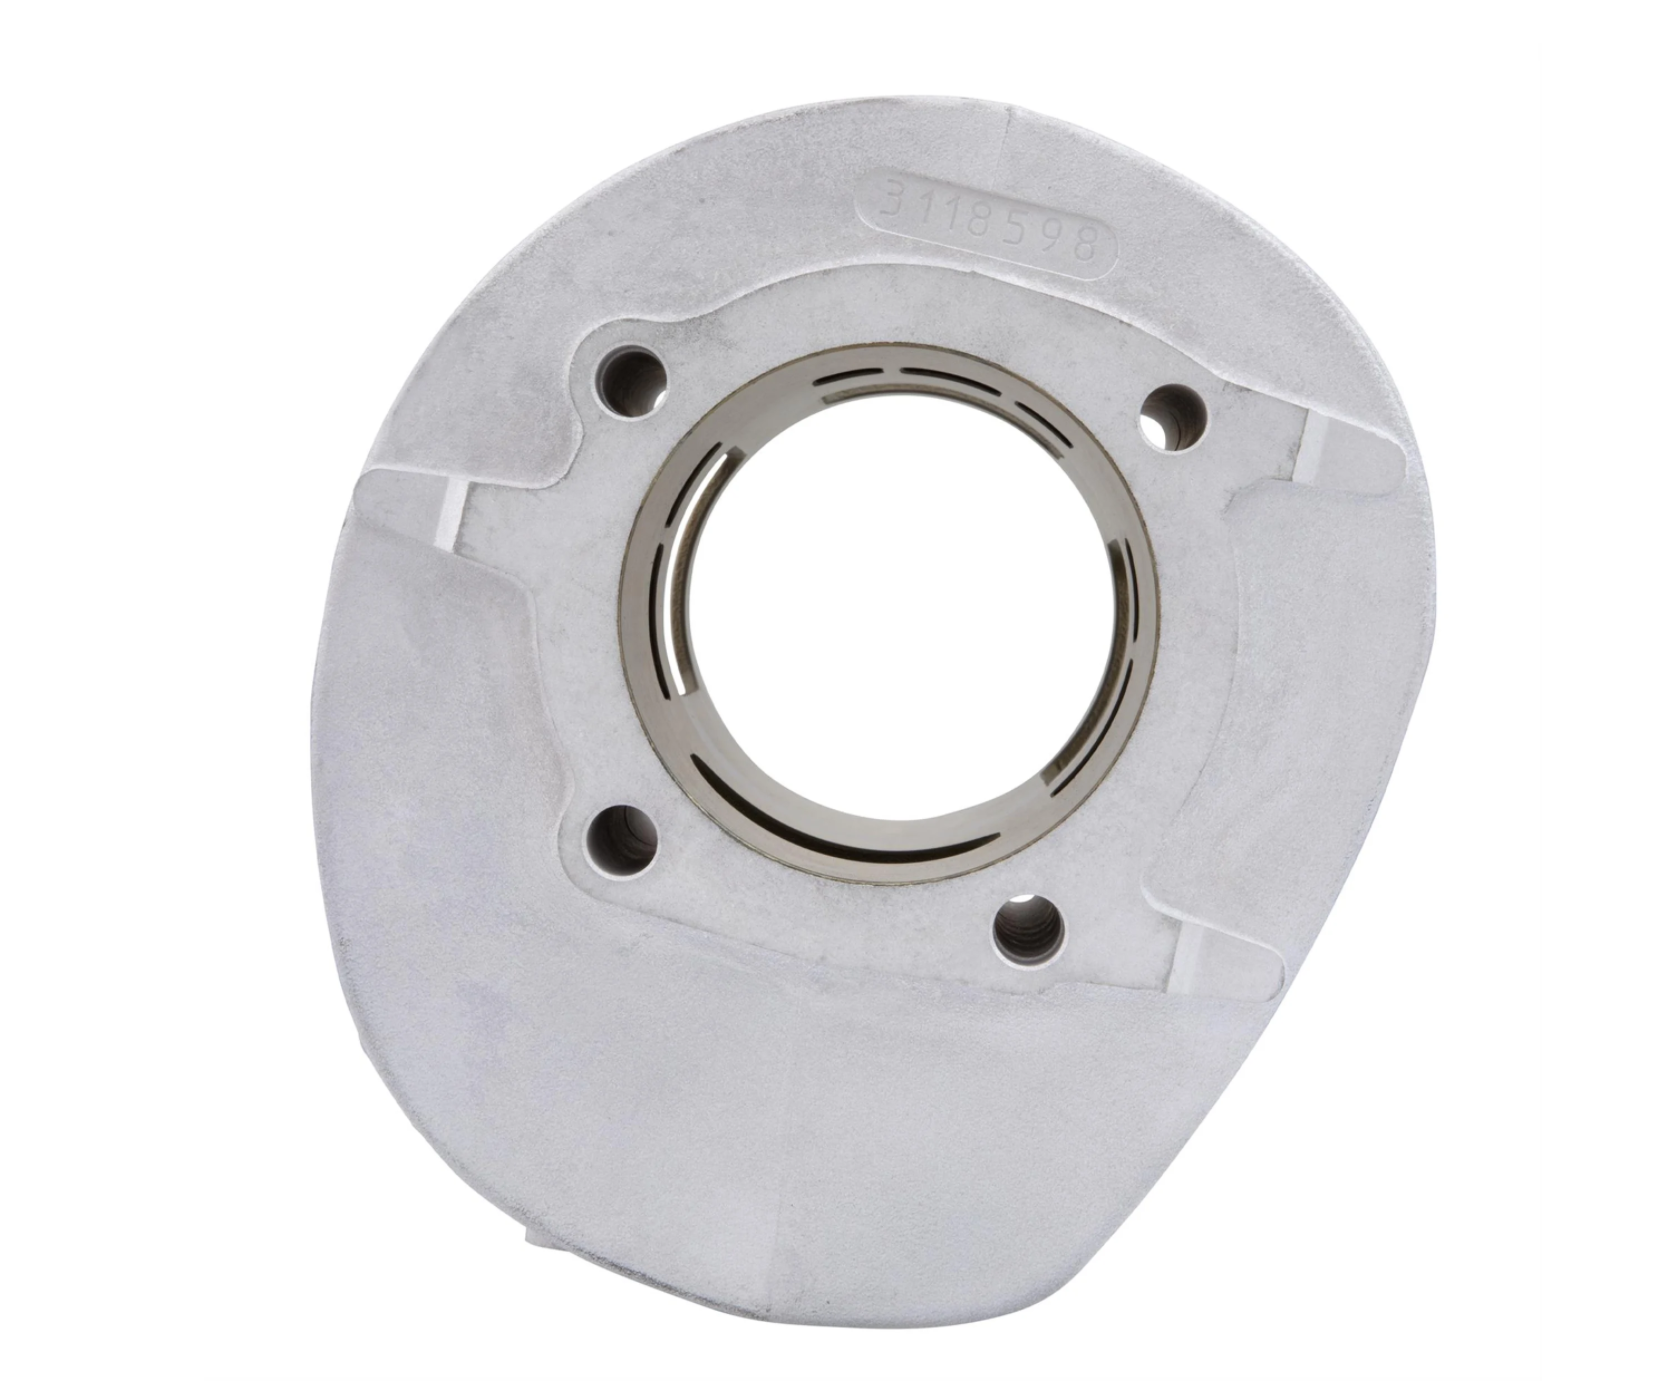
The MHR kit has the product number stamped into the upper face of the cylinder. #3118598. It shows the same on SIP/SCK websites.

The Sport kit has the product number cast into the lower clutch side of the cylinder. #18592. Neither SIP/SCK have clear photos of this side, but it can be barely seen in one photo.

My cylinder has the #18592 cast into the side, and no number stamped on top. So Sherlock says its likely the sport kit, regardless of what the SCK says in their description about timings.

This is why it feels frustrating to not have port measurements & port maps published by the manufacturers. Posted timings kinda mean little, considering there are so many variables to consider with strokes, con rods, base, packer, squish, etc.

I'd still like to see if anyone has a MHR kit on the shelf, and the accompanying port map and measurments. Real world data.
Malossi MHR, 60mm; top view. #3118598
Malossi Sport, 57mm, top view. No number on top, but not shown is the cast in number on side #18592
UTC

Jet Eye Master
PX221 MHR heavily tuned, PX200 O tuned, PX181 M1XL tuned, PX166 tuned a quite bit and some motorbikes
Joined: UTC
Posts: 5463
Location: London UK
 
Jet Eye Master
PX221 MHR heavily tuned, PX200 O tuned, PX181 M1XL tuned, PX166 tuned a quite bit and some motorbikes
Joined: UTC
Posts: 5463
Location: London UK
UTC quote
I'm not at home so can't check any stock. I hadn't noticed the MHR 210 had been discontinued but seems to be true. I would imagine it was during the re design in 2021. If it was 2016 I really have been sleeping on the job.
The original 210 Sport kit and 210 MHR had many small differences but one easy way to tell was the main transfers. Sport was 47mm and MHR was 45mm. The other way to tell the difference was the MHR had a great big MHR logo cast in the side and the Sport kit didn't.

If you're all measuring 45mm on Sport kits, I'd guess both kits got cancelled and all the good bits of the two kits were amalgamated into the new Sport kit.
@safis avatar
UTC

Veni, Vidi, Posti
1979 P150X, 1983 P200E, 1987 PK125XL Elestart, 1988 T5, 1995 PX200E, 2024 GTS 300
Joined: UTC
Posts: 5533
Location: Veria, Greece
 
Veni, Vidi, Posti
@safis avatar
1979 P150X, 1983 P200E, 1987 PK125XL Elestart, 1988 T5, 1995 PX200E, 2024 GTS 300
Joined: UTC
Posts: 5533
Location: Veria, Greece
UTC quote
The normal MHR is cancelled. It's only available for a 60mm stroke (longer barrel)...

https://www.malossistore.com/en/gr/aluminium-cylinder-kit-685-cvf2-pin-16-mhr-stroke-60-mm-for-vespa-cosa-px-e-2t-200-cc-vespa-px-e-200-2t-3118599-vepx200-M-P

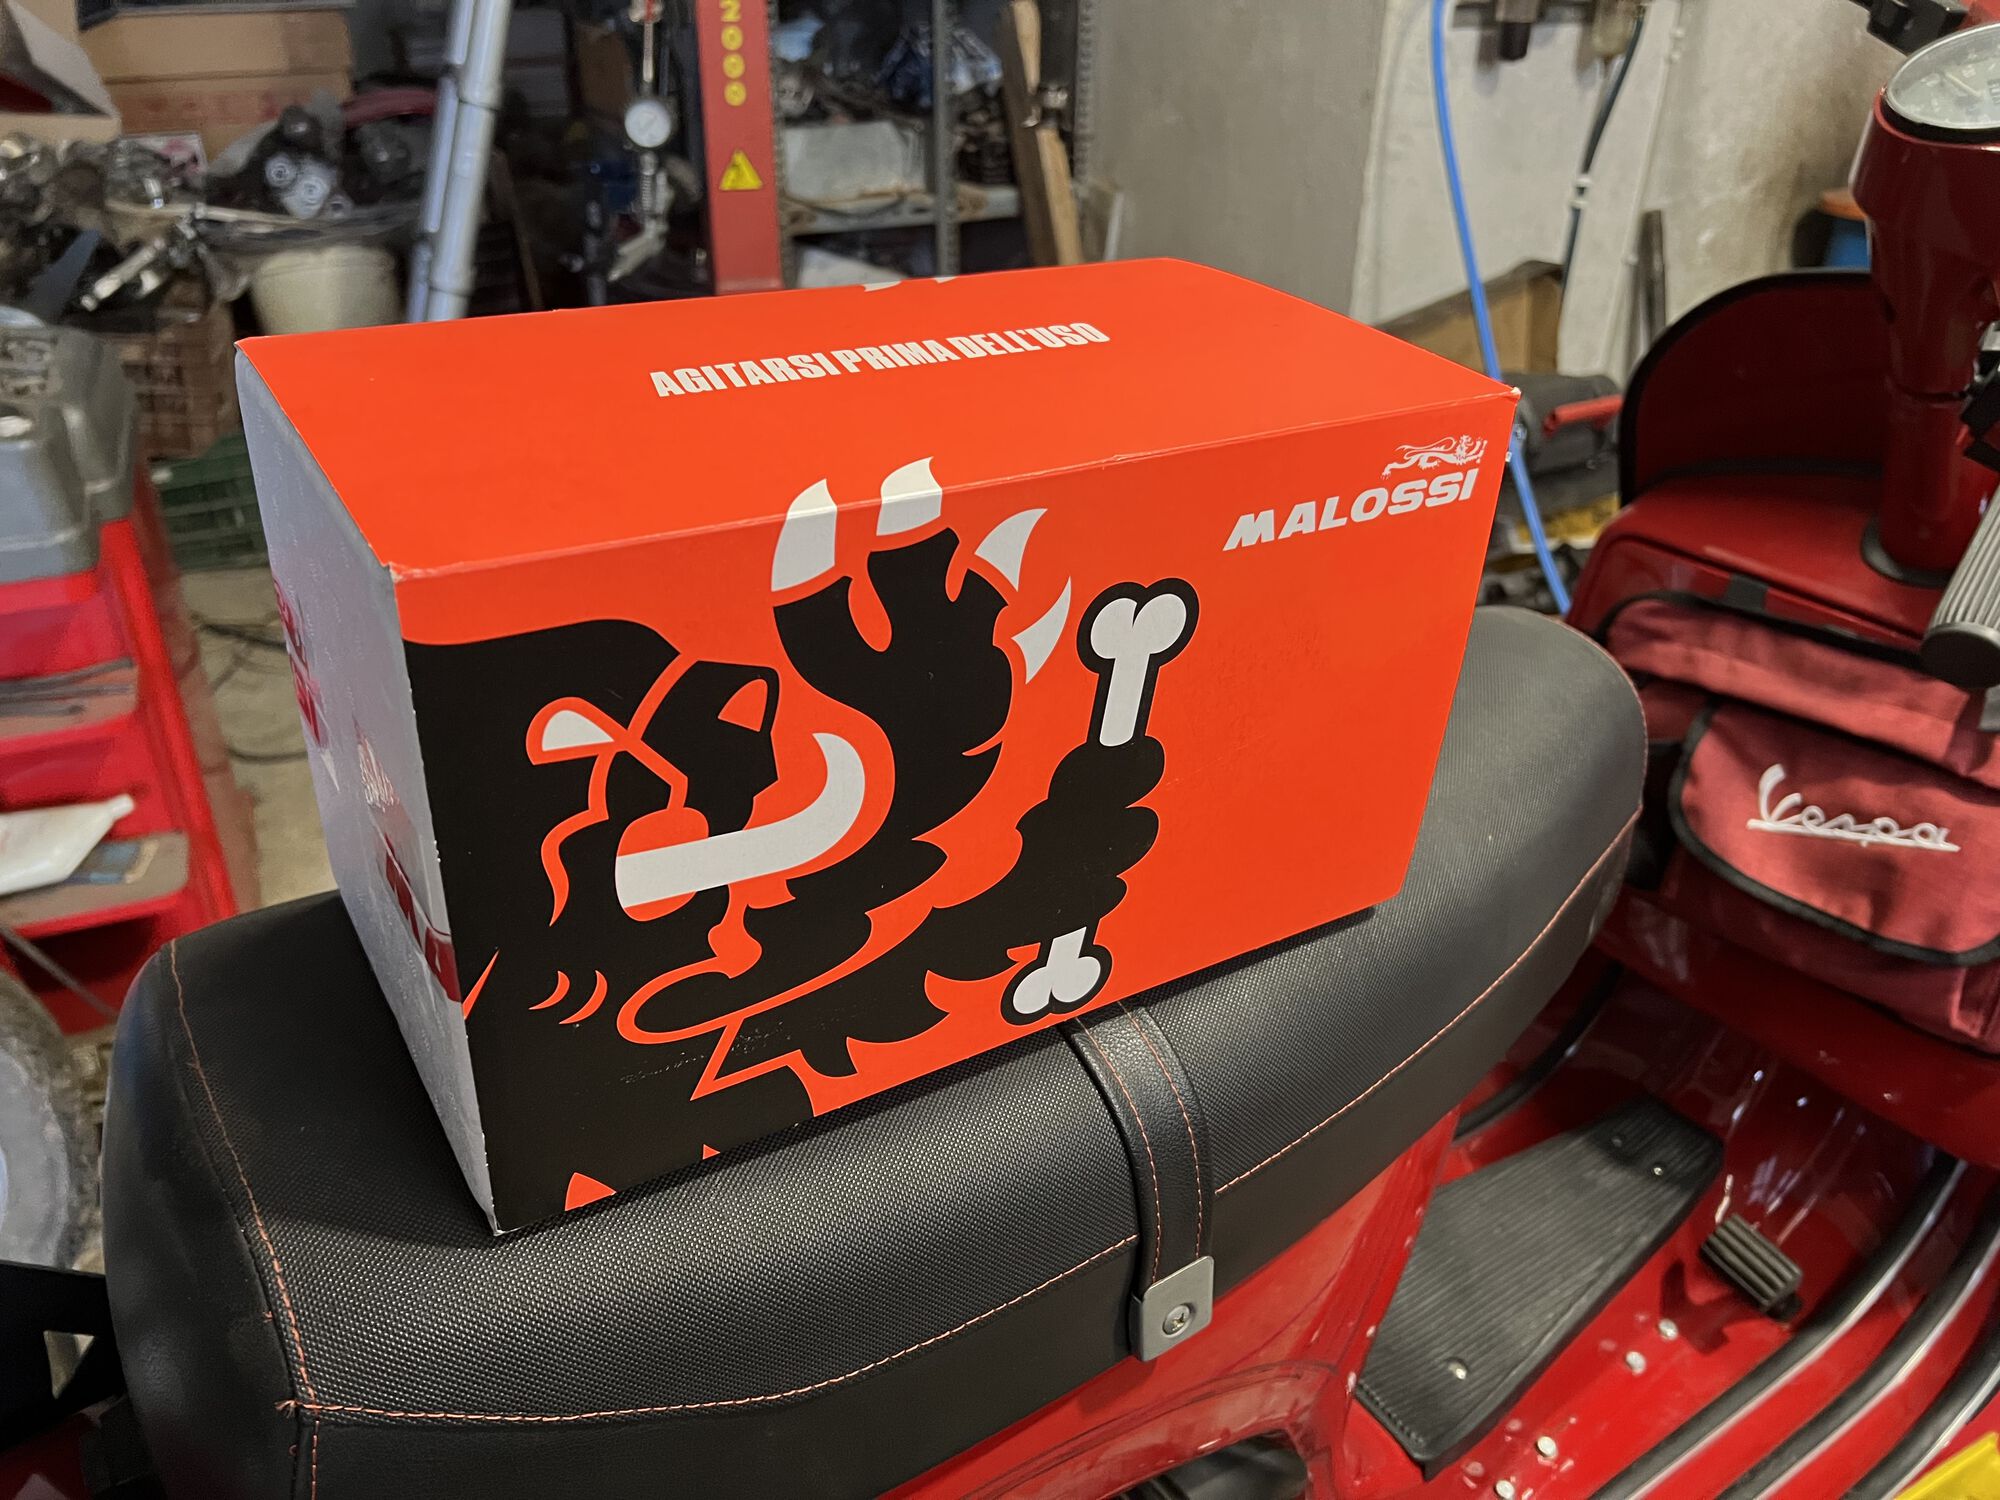
I'll measure a new Sport kit I got yesterday with the new orange packing...
@orwell84 avatar
UTC

Ossessionato
Joined: UTC
Posts: 4099
Location: northern New York
 
Ossessionato
@orwell84 avatar
Joined: UTC
Posts: 4099
Location: northern New York
UTC quote
Jack221 wrote:
I'm not at home so can't check any stock. I hadn't noticed the MHR 210 had been discontinued but seems to be true. I would imagine it was during the re design in 2021. If it was 2016 I really have been sleeping on the job.
The original 210 Sport kit and 210 MHR had many small differences but one easy way to tell was the main transfers. Sport was 47mm and MHR was 45mm. The other way to tell the difference was the MHR had a great big MHR logo cast in the side and the Sport kit didn't.

If you're all measuring 45mm on Sport kits, I'd guess both kits got cancelled and all the good bits of the two kits were amalgamated into the new Sport kit.
My measurements were quick and dirty, but definitely more like 45mm and not 47.

Some cylinders list port timings on their spec sheets and I never understood what they were for, whether:

These are the optimal timings on this kit and you should set it up for these timings.

OR

These are the base cylinder timings you would get if you just plunked it on the engine with a standard crank and no spacer.

I have seen a couple of charts from SiP that give general descriptions for popular kits of how different arrangements of spacers/shims would affect the power band. Beyond that, I have a general idea of what sort of timings work better for box exhaust vs pipe, tourer vs city racer, etc.

The Malossi kit looks well made, certainly nicer than the cast iron kits I have used in the past.

Sorry for my ramblings in your thread.
@safis avatar
UTC

Veni, Vidi, Posti
1979 P150X, 1983 P200E, 1987 PK125XL Elestart, 1988 T5, 1995 PX200E, 2024 GTS 300
Joined: UTC
Posts: 5533
Location: Veria, Greece
 
Veni, Vidi, Posti
@safis avatar
1979 P150X, 1983 P200E, 1987 PK125XL Elestart, 1988 T5, 1995 PX200E, 2024 GTS 300
Joined: UTC
Posts: 5533
Location: Veria, Greece
UTC quote
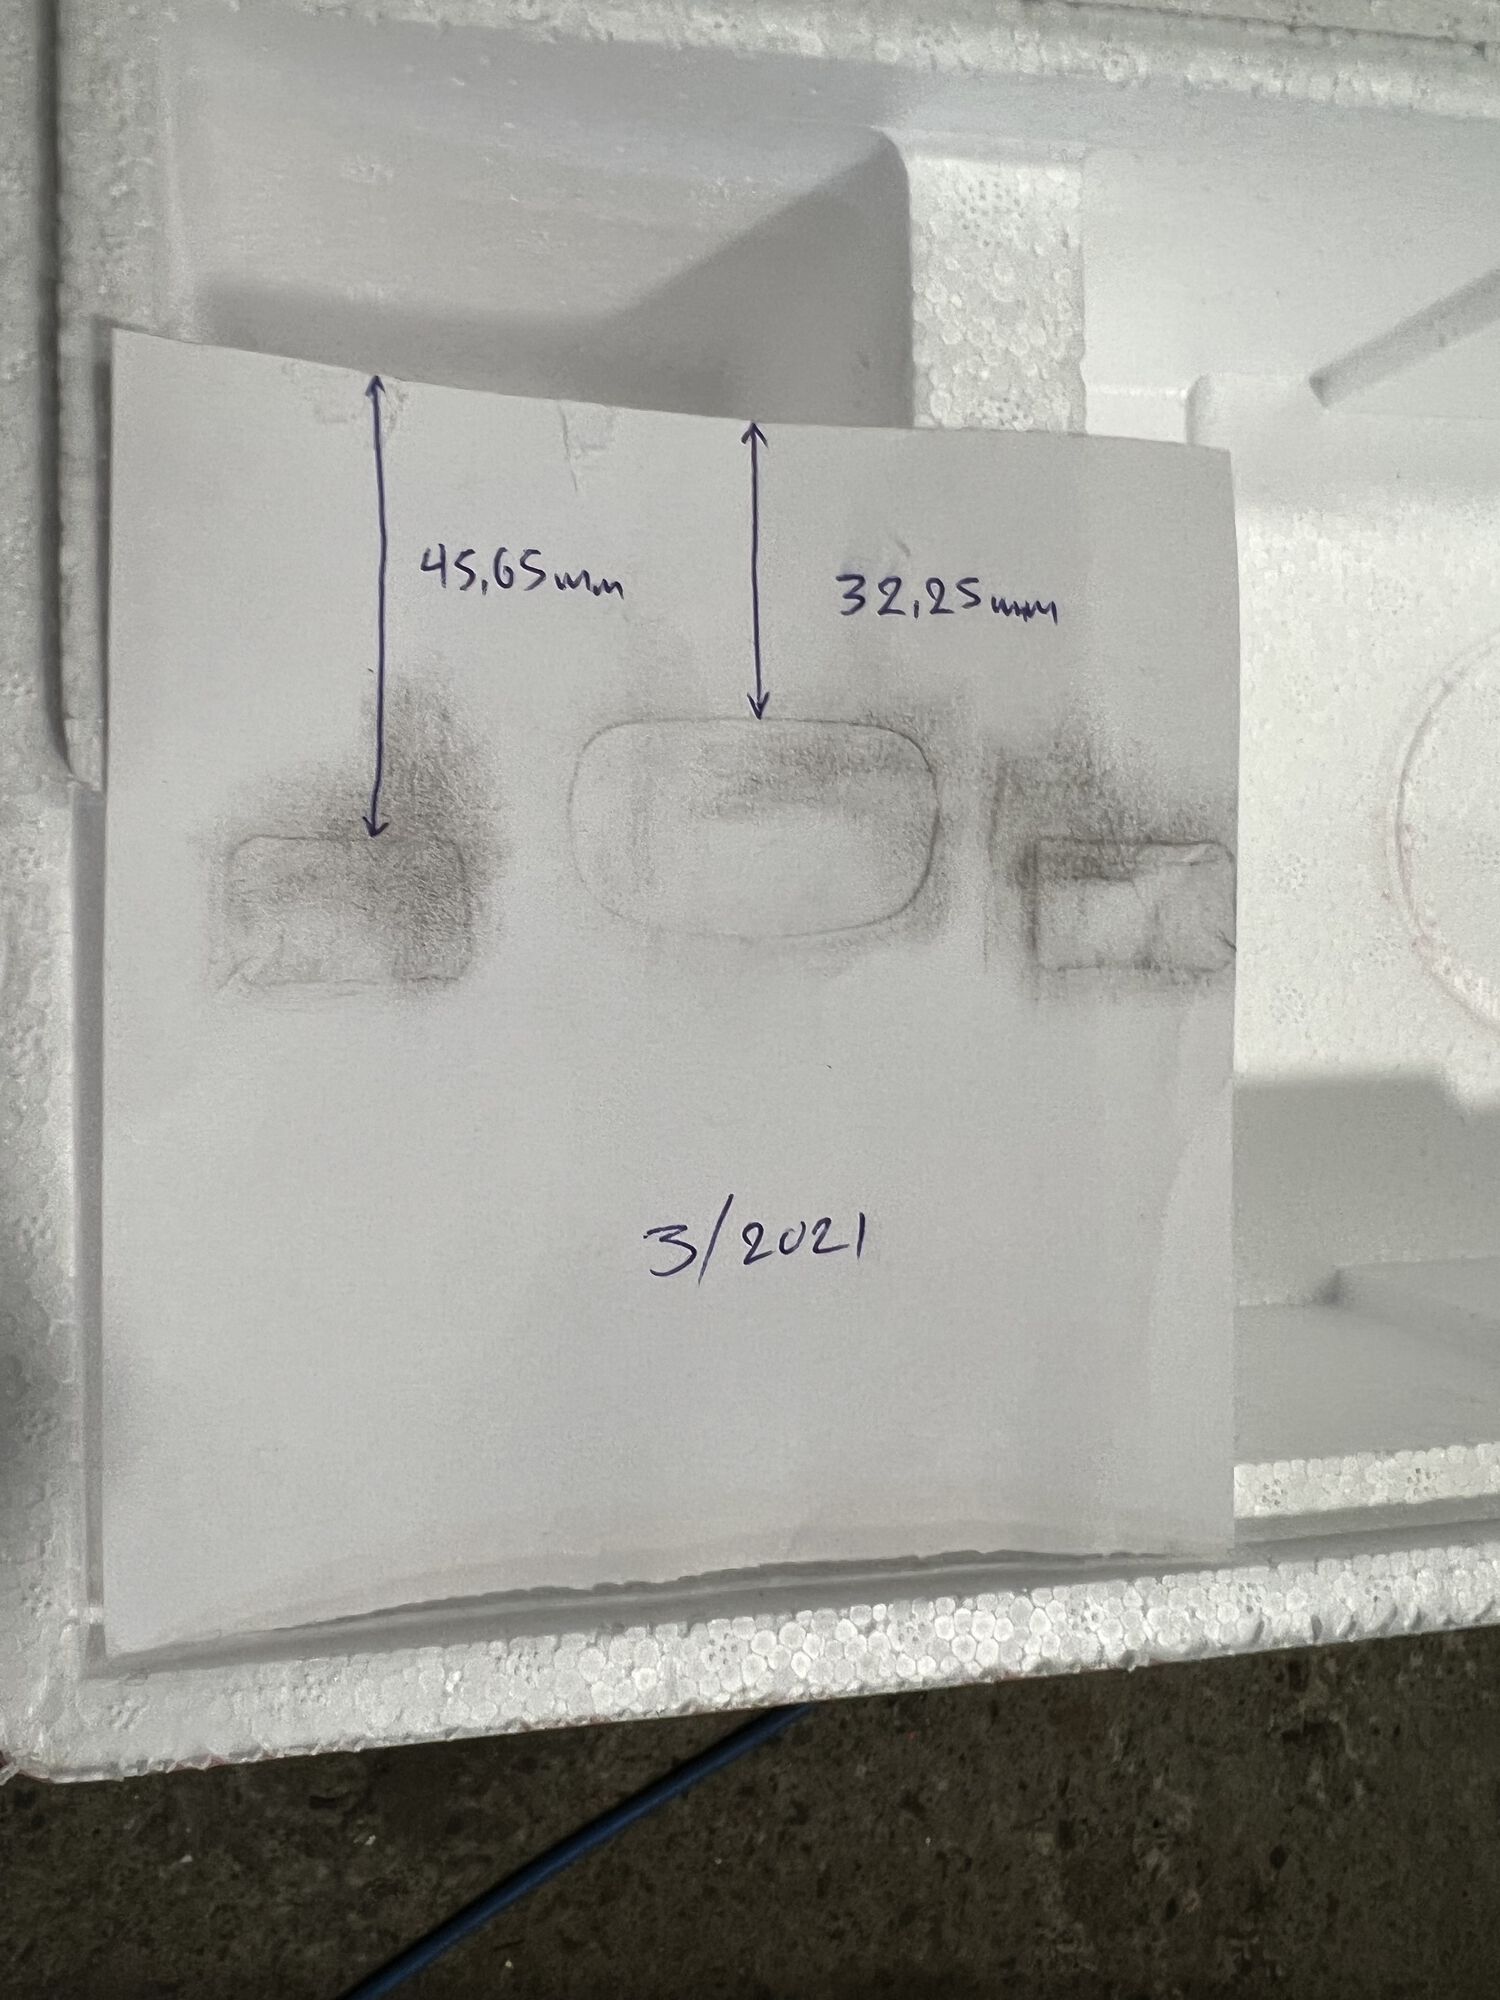
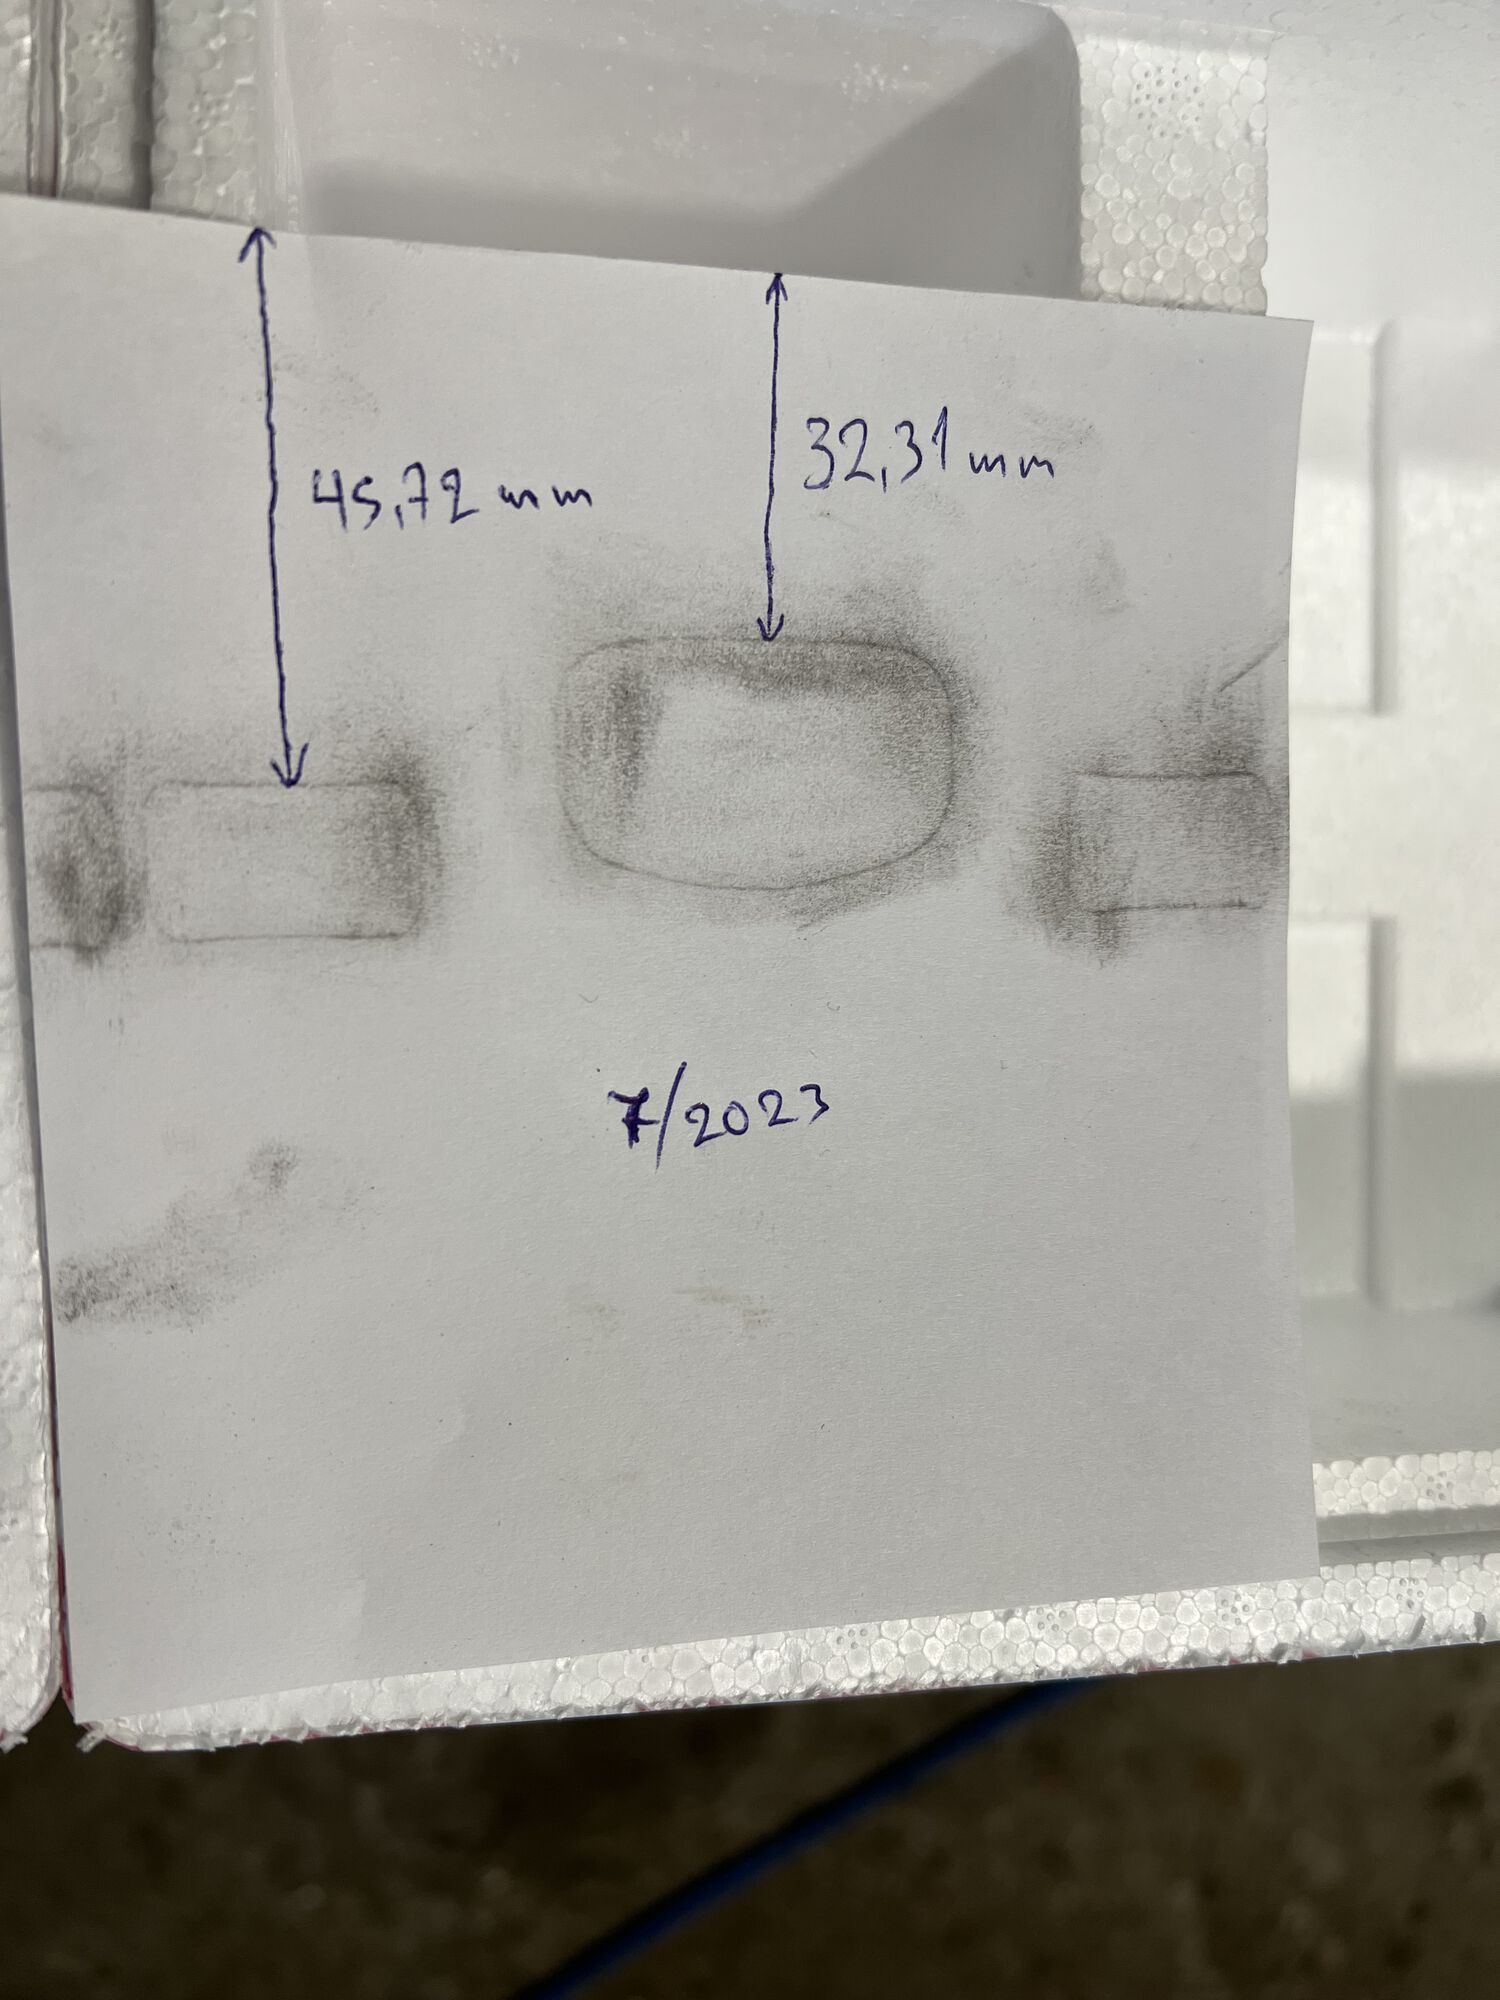
Measured two MKII Sport cylinders, one I had on the shelf (03/2021) and the new one (07/2023) I got yesterday (new Malossi packaging). Both are more or less the same and close to my MKI Sport (32.70mm / 45.60mm) I run on my blue P...
Forum member supplied image with no explanatory text
OP
@geeklion avatar
UTC

The Dude
Too Many piles of Junk that need too much work and too much money
Joined: UTC
Posts: 2688
Location: PNW from LBC
 
The Dude
@geeklion avatar
Too Many piles of Junk that need too much work and too much money
Joined: UTC
Posts: 2688
Location: PNW from LBC
UTC quote
Thanks Jack, Orwell, and Safis for checking and providing more info. All very helpful!

My kit arrived in the Orange package, date stamped on cyl is 05/22. No MHR logo, main transfer height 45mm. So I'm confident it is a Sport kit.
UTC

Jet Eye Master
PX221 MHR heavily tuned, PX200 O tuned, PX181 M1XL tuned, PX166 tuned a quite bit and some motorbikes
Joined: UTC
Posts: 5463
Location: London UK
 
Jet Eye Master
PX221 MHR heavily tuned, PX200 O tuned, PX181 M1XL tuned, PX166 tuned a quite bit and some motorbikes
Joined: UTC
Posts: 5463
Location: London UK
UTC quote
SaFiS wrote:
Measured two MKII Sport cylinders, one I had on the shelf (03/2021) and the new one (07/2023) I got yesterday (new Malossi packaging). Both are more or less the same and close to my MKI Sport (32.70mm / 45.60mm) I run on my blue P...
This fmp video is 6 years old. The Sport kit wasn't 45mm transfers then. But I doubt it was that new. Most likely the 2016 kit.
This all points to the 2021 Sport kit being the discontinued 2016 57mm MHR cylinder with a 2 ring piston.
UTC

Jet Eye Master
PX221 MHR heavily tuned, PX200 O tuned, PX181 M1XL tuned, PX166 tuned a quite bit and some motorbikes
Joined: UTC
Posts: 5463
Location: London UK
 
Jet Eye Master
PX221 MHR heavily tuned, PX200 O tuned, PX181 M1XL tuned, PX166 tuned a quite bit and some motorbikes
Joined: UTC
Posts: 5463
Location: London UK
UTC quote
GeekLion wrote:
Thanks Jack, Orwell, and Safis for checking and providing more info. All very helpful!

My kit arrived in the Orange package, date stamped on cyl is 05/22. No MHR logo, main transfer height 45mm. So I'm confident it is a Sport kit.
With all the Dremel work you've done, I get the feeling your intention is wanting something fast. With the port timing you now have, it has much potential.
OP
@geeklion avatar
UTC

The Dude
Too Many piles of Junk that need too much work and too much money
Joined: UTC
Posts: 2688
Location: PNW from LBC
 
The Dude
@geeklion avatar
Too Many piles of Junk that need too much work and too much money
Joined: UTC
Posts: 2688
Location: PNW from LBC
UTC quote
Jack221 wrote:
This fmp video is 6 years old. The Sport kit wasn't 45mm transfers then. But I doubt it was that new. Most likely the 2016 kit.
This all points to the 2021 Sport kit being the discontinued 2016 57mm MHR cylinder with a 2 ring piston.
This is an interesting fact to point out. Thanks for that. I geek out on the numbers and comparisons.

I am definitely aiming for fast. Better way to put it is that I'm aiming to optimize everything that is going into it.

This engine has always been my 'fast' engine, as I originally converted to reed & a kit waaay back in the year 2000. ( bonus points if you read that in Conan Obriens voice). It'll be nice to update it with new go fast goodies. Not too much longer now and it'll be on the road. If only it wasn't so cold my fingers freeze…might be a engine build in the living room type of situation.
@qascooter avatar
UTC

Veni, Vidi, Posti
79 P200E (Ruby), 62 Allstate (B-62), 63 VBB (Storm)
Joined: UTC
Posts: 5299
Location: Florence, OR
 
Veni, Vidi, Posti
@qascooter avatar
79 P200E (Ruby), 62 Allstate (B-62), 63 VBB (Storm)
Joined: UTC
Posts: 5299
Location: Florence, OR
UTC quote
Kitchen table Razz emoticon
OP
@geeklion avatar
UTC

The Dude
Too Many piles of Junk that need too much work and too much money
Joined: UTC
Posts: 2688
Location: PNW from LBC
 
The Dude
@geeklion avatar
Too Many piles of Junk that need too much work and too much money
Joined: UTC
Posts: 2688
Location: PNW from LBC
UTC quote
qascooter wrote:
Kitchen table Razz emoticon
That would be a better indoor work bench
@orwell84 avatar
UTC

Ossessionato
Joined: UTC
Posts: 4099
Location: northern New York
 
Ossessionato
@orwell84 avatar
Joined: UTC
Posts: 4099
Location: northern New York
UTC quote
The thing about fast…Once you've had a little taste, it's hard to live without. When I had my first scooter in the 80's, I never considered trying to make it faster. But decades later, it's fairly easy to get big performance gains with plug and play setups. At first, it was scary going faster. But then you get used to it, your riding skills improve and you go a little faster.

Building my own Malossi 210 engine, I realized it was overkill in comparison to my original goals of having a reliable scooter that could do 55-60 mph all day long. Both my scooters can do that already. So there is no logical or practical need.

But I'll admit, I'm addicted to the coffee table engine builds, the smokey first starts and even juggling brass bits by the side of the road.
OP
@geeklion avatar
UTC

The Dude
Too Many piles of Junk that need too much work and too much money
Joined: UTC
Posts: 2688
Location: PNW from LBC
 
The Dude
@geeklion avatar
Too Many piles of Junk that need too much work and too much money
Joined: UTC
Posts: 2688
Location: PNW from LBC
UTC quote
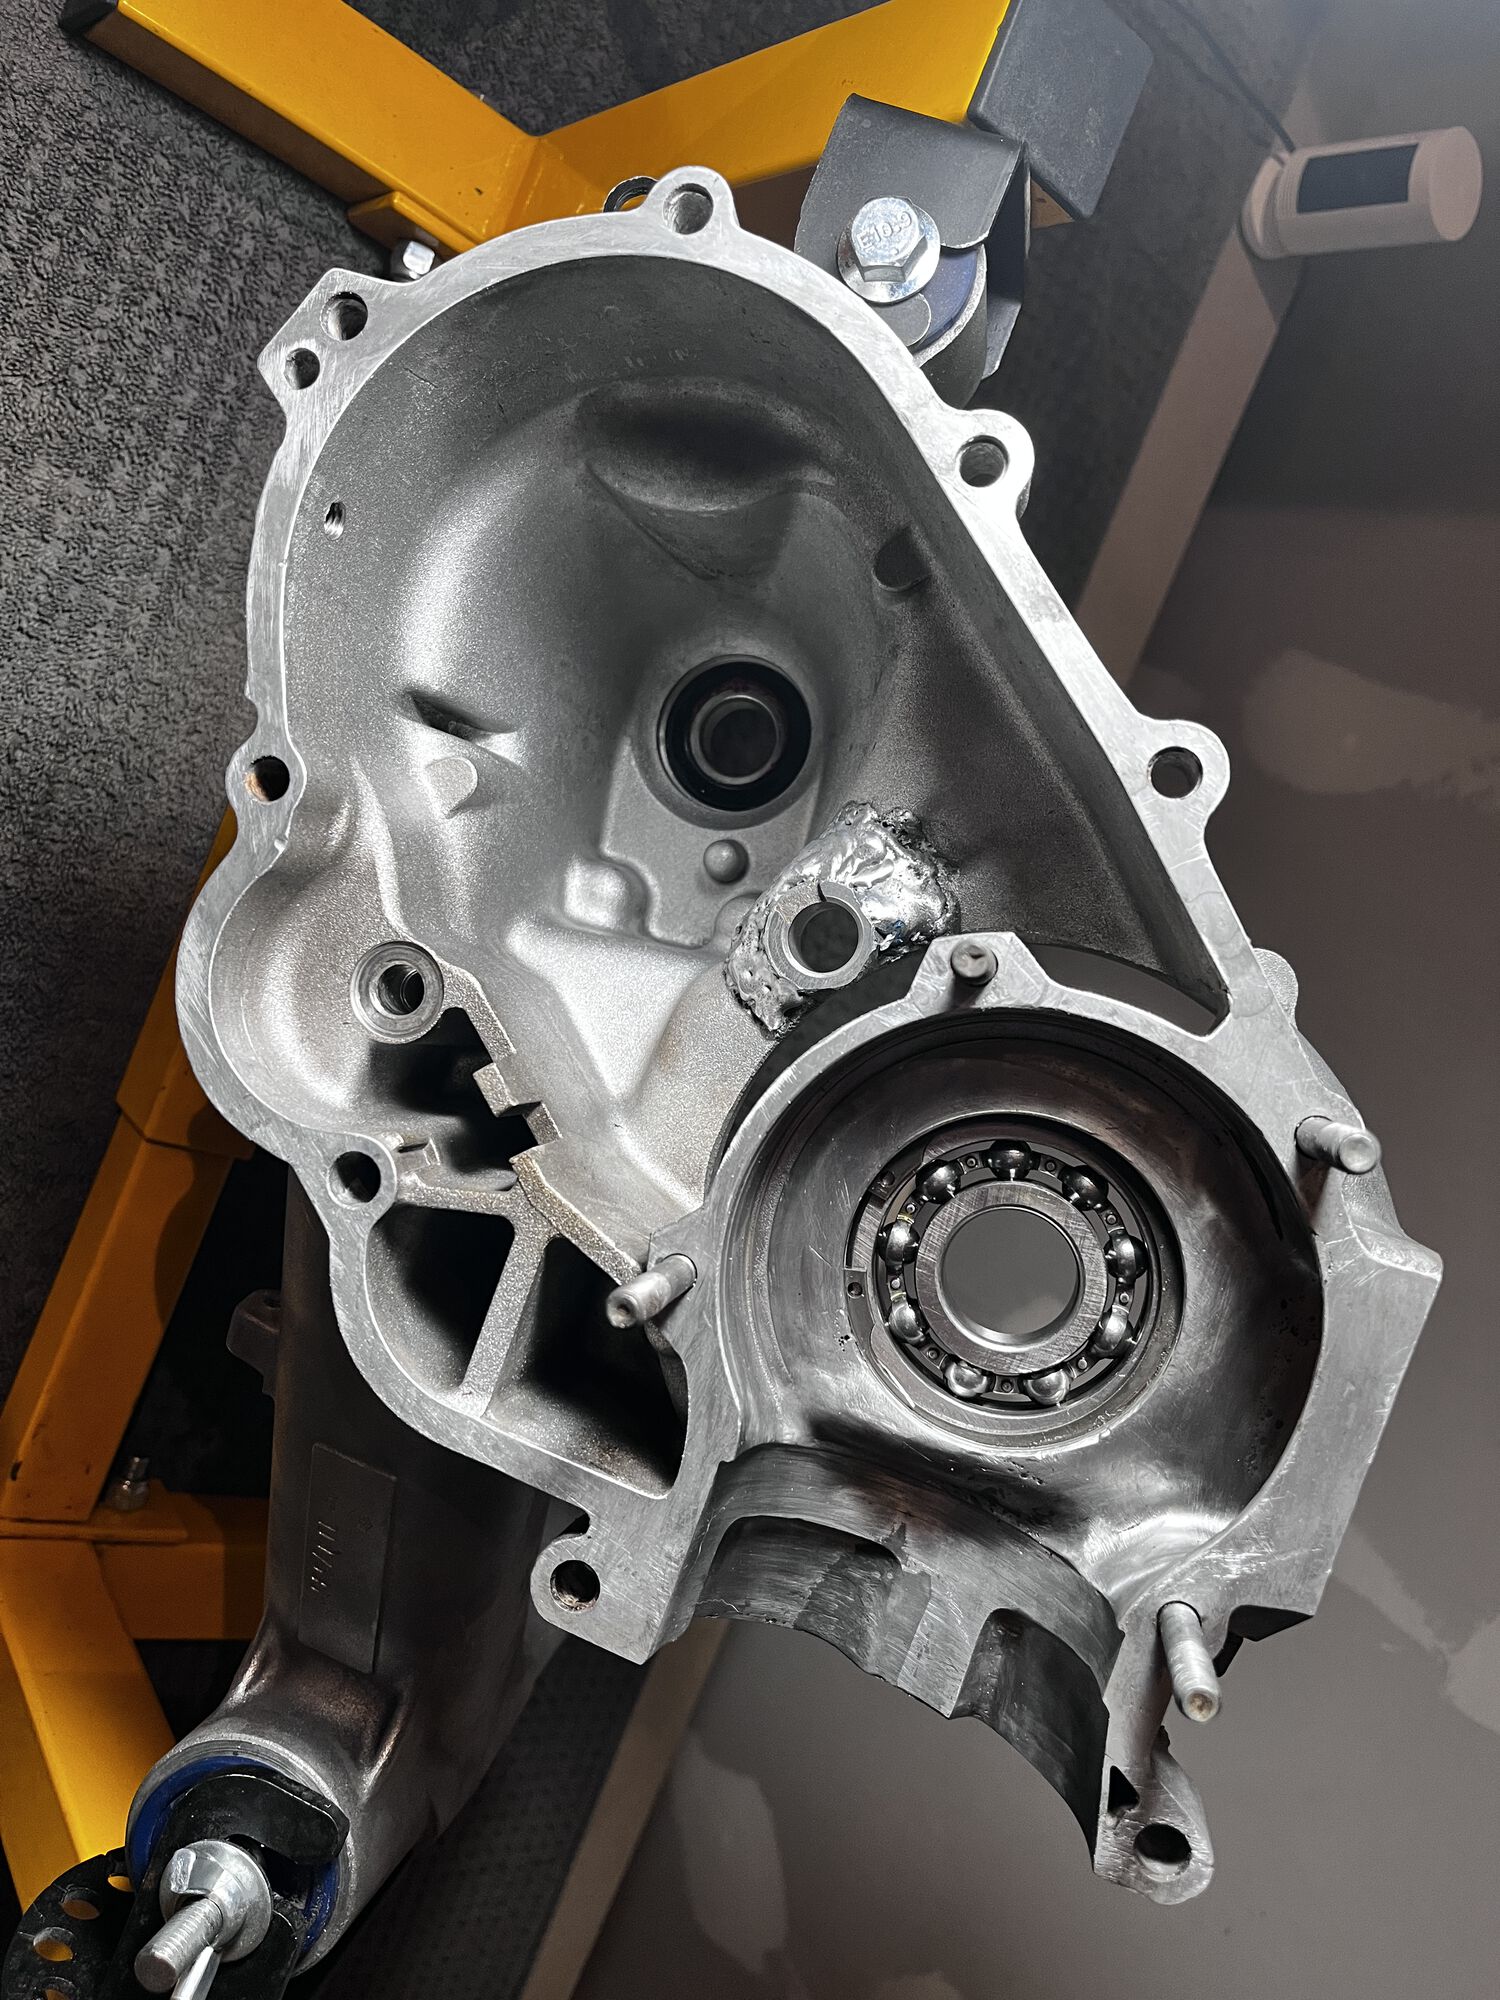
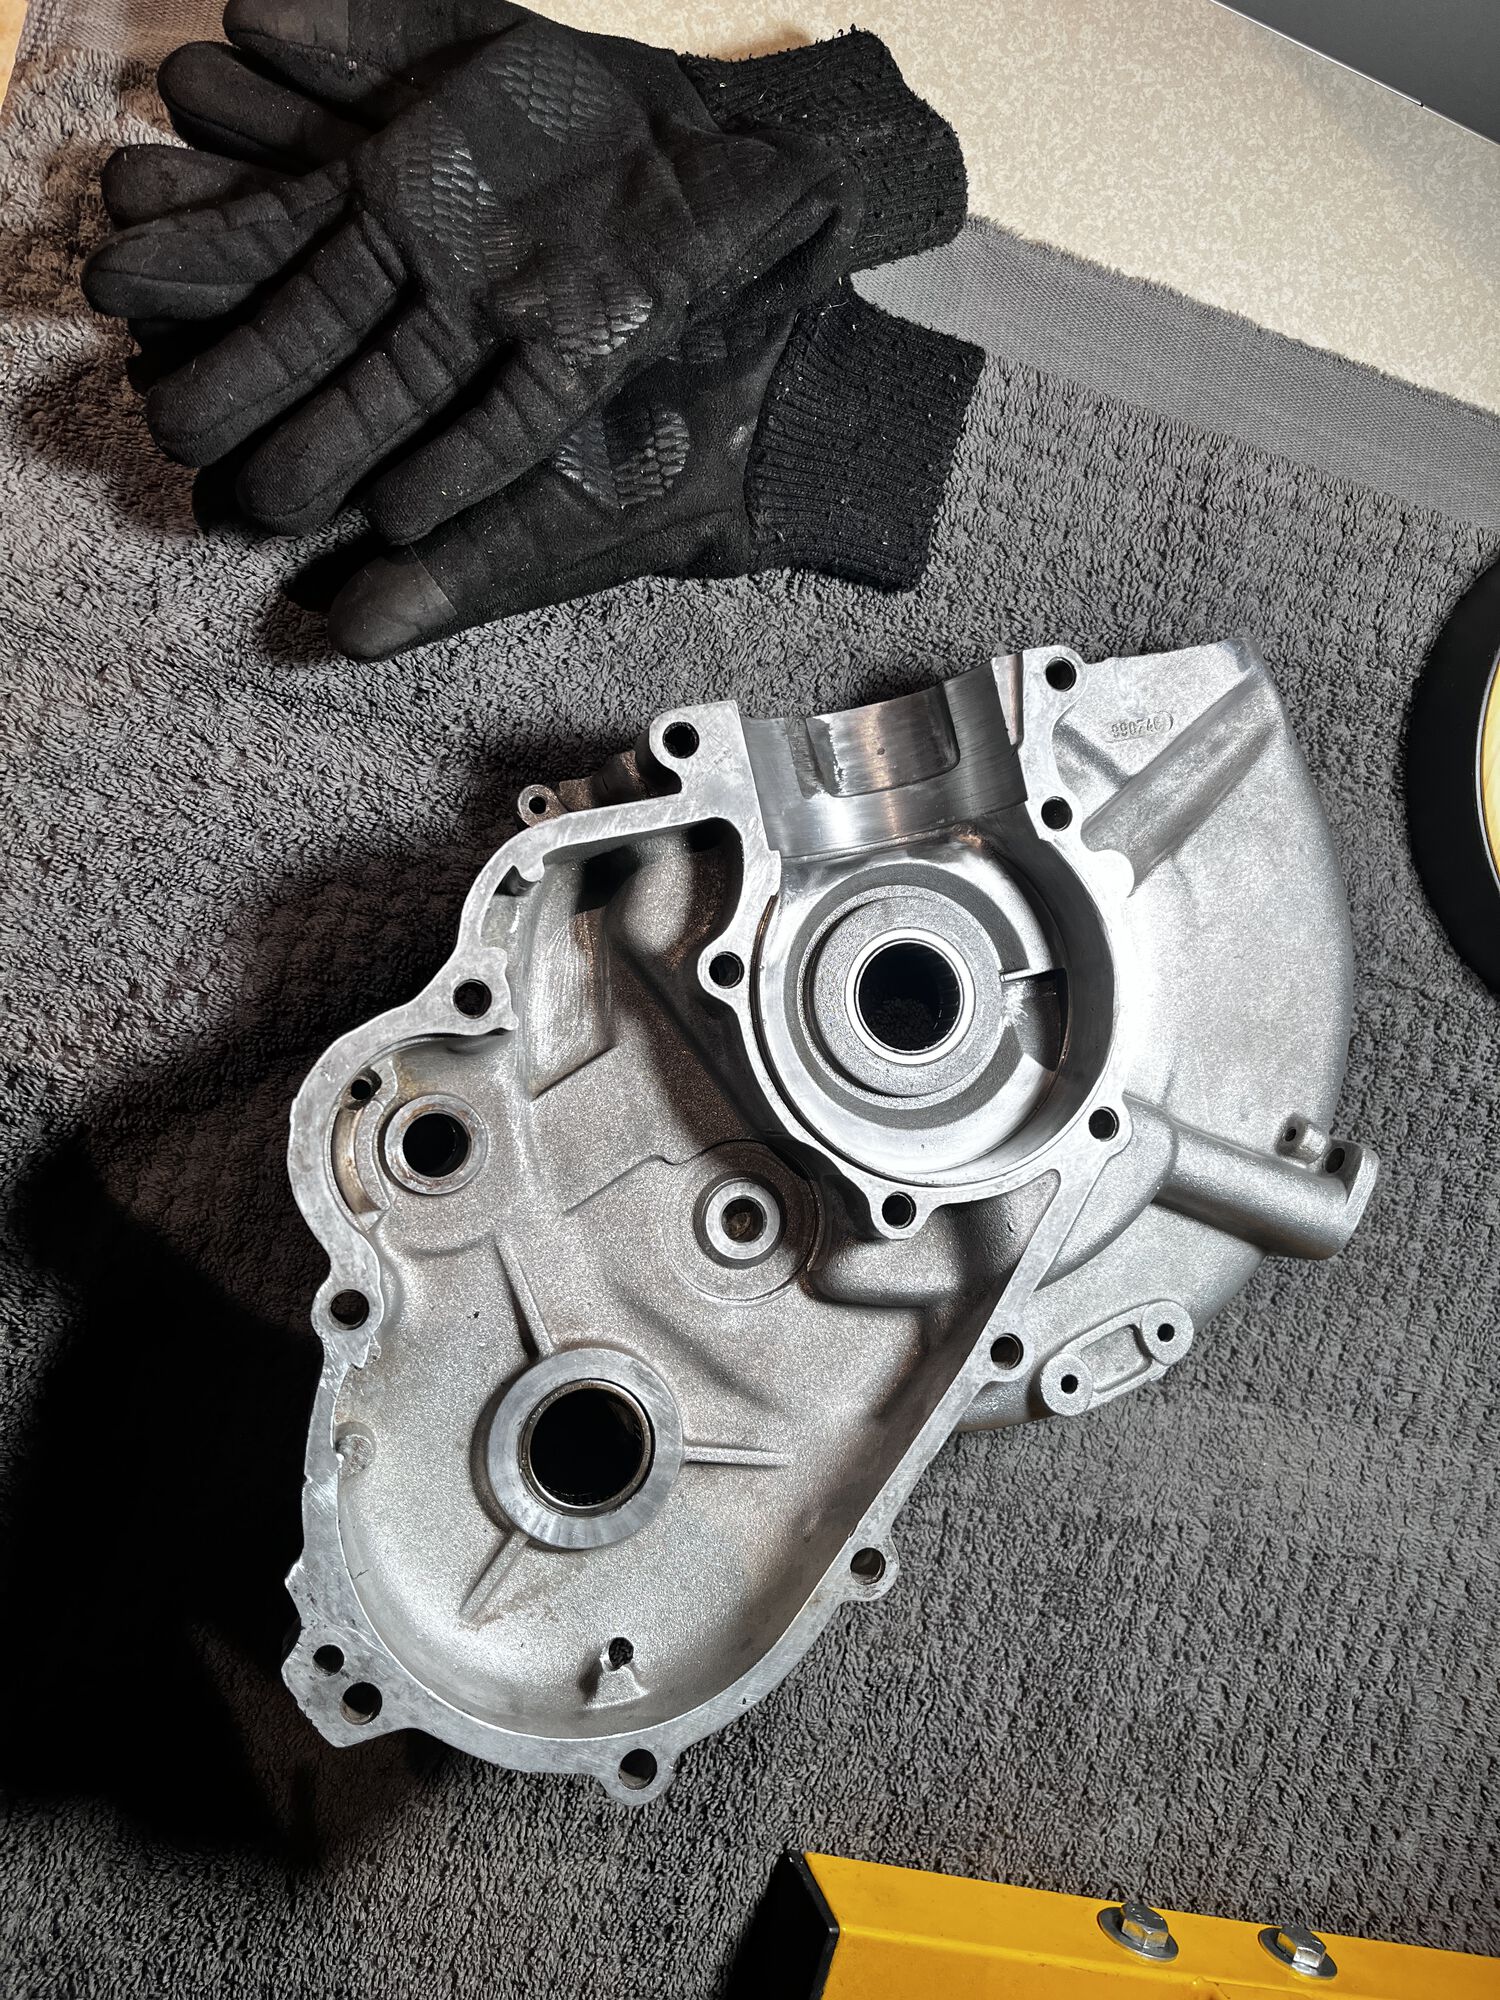
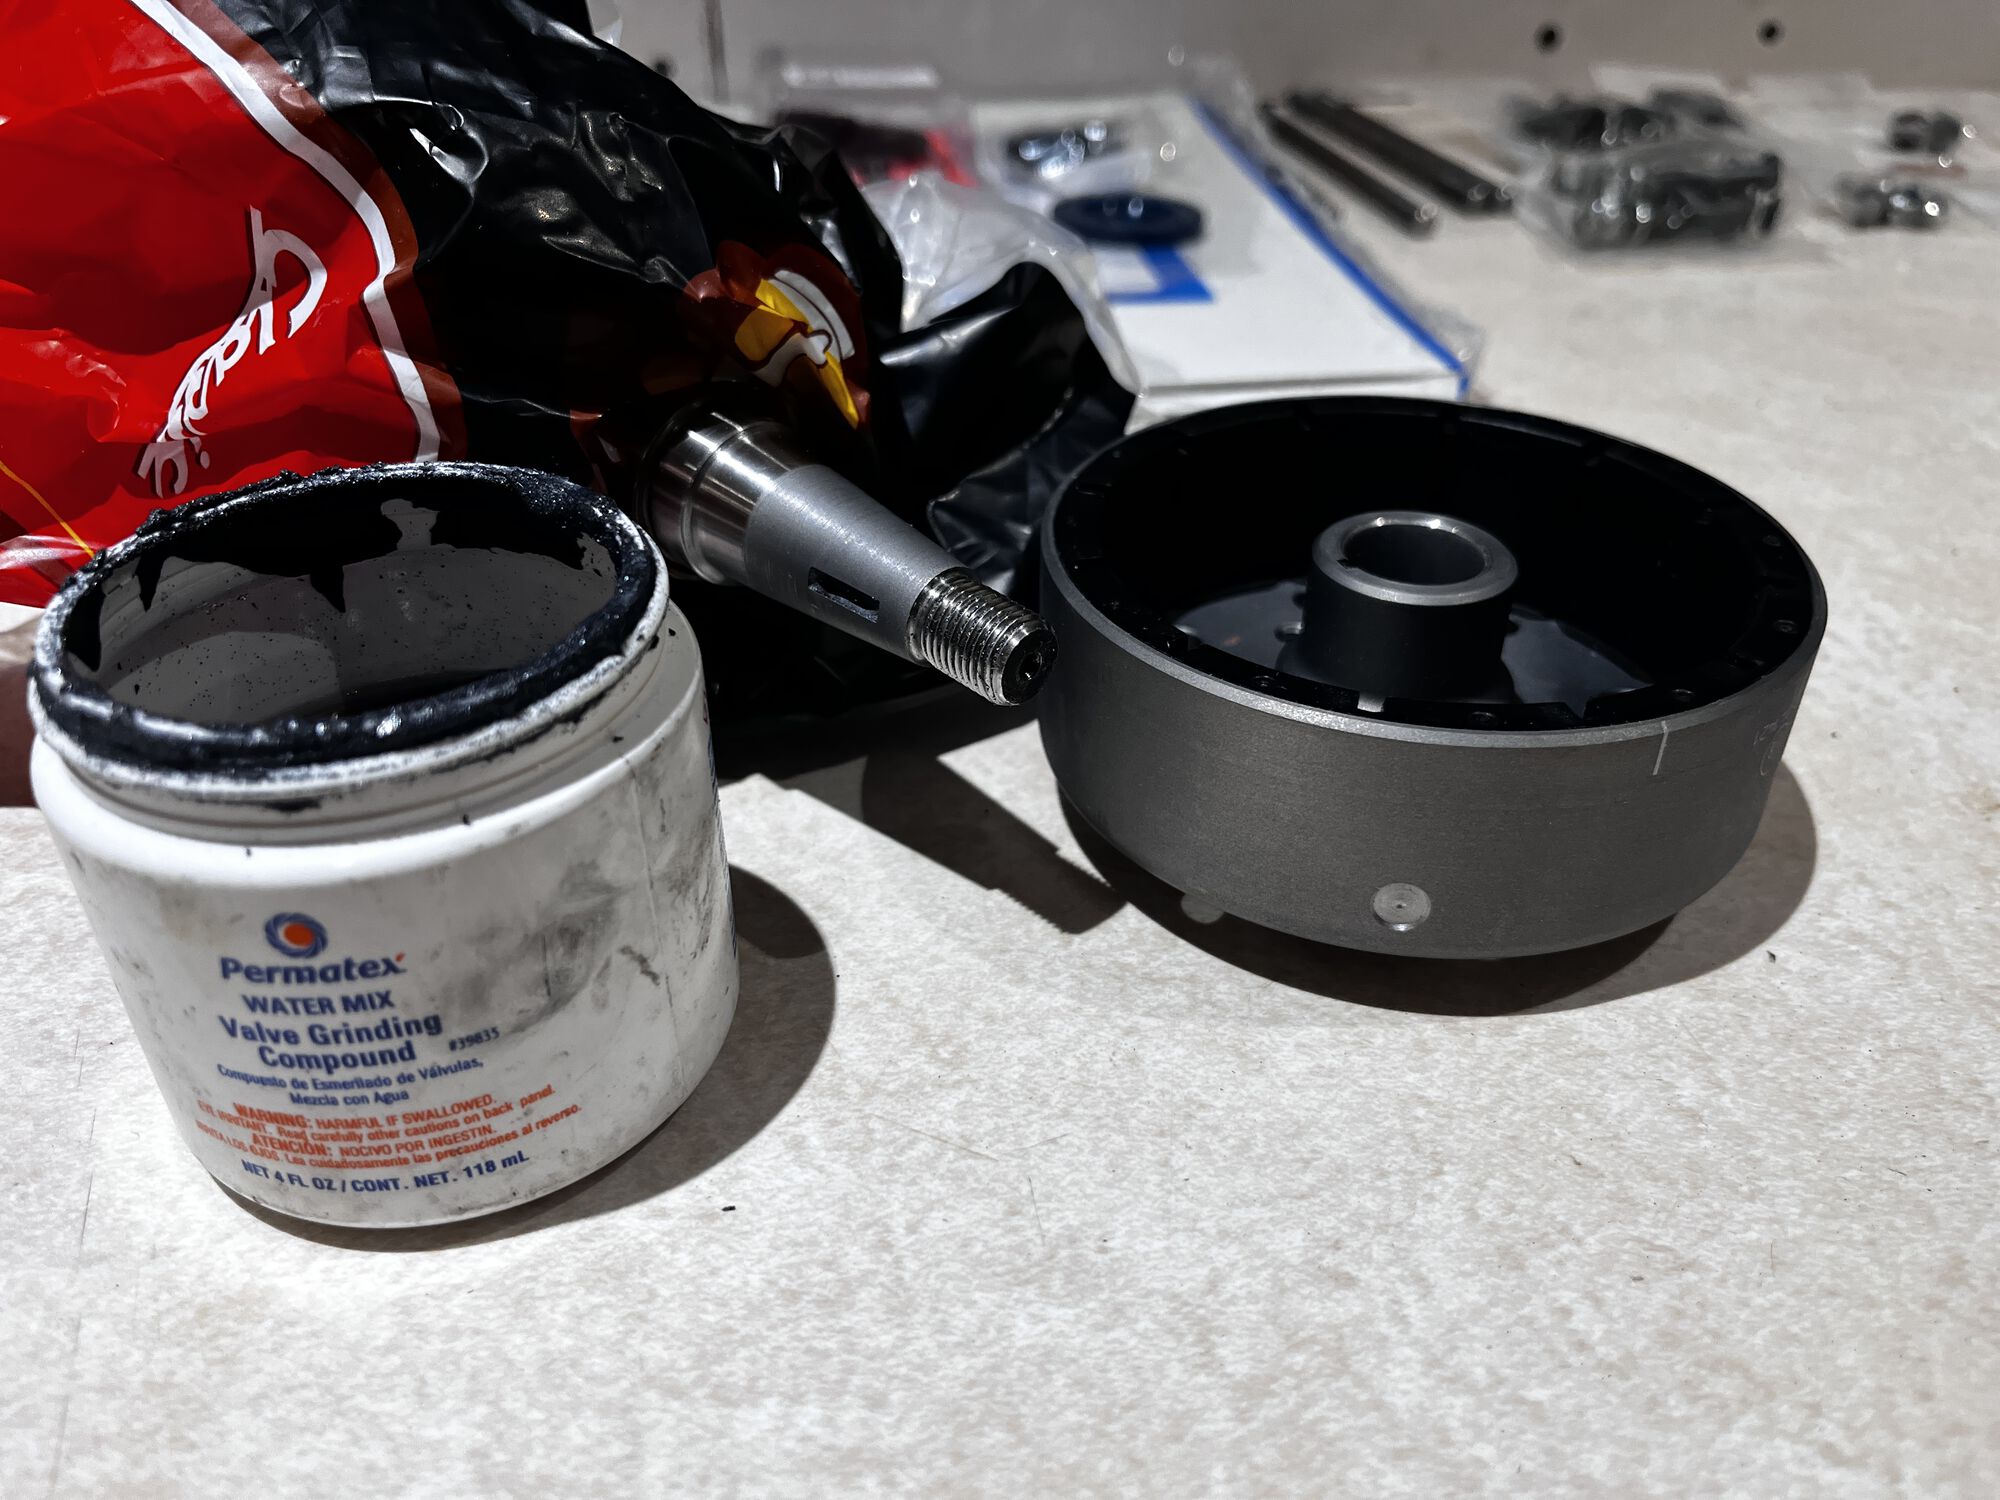
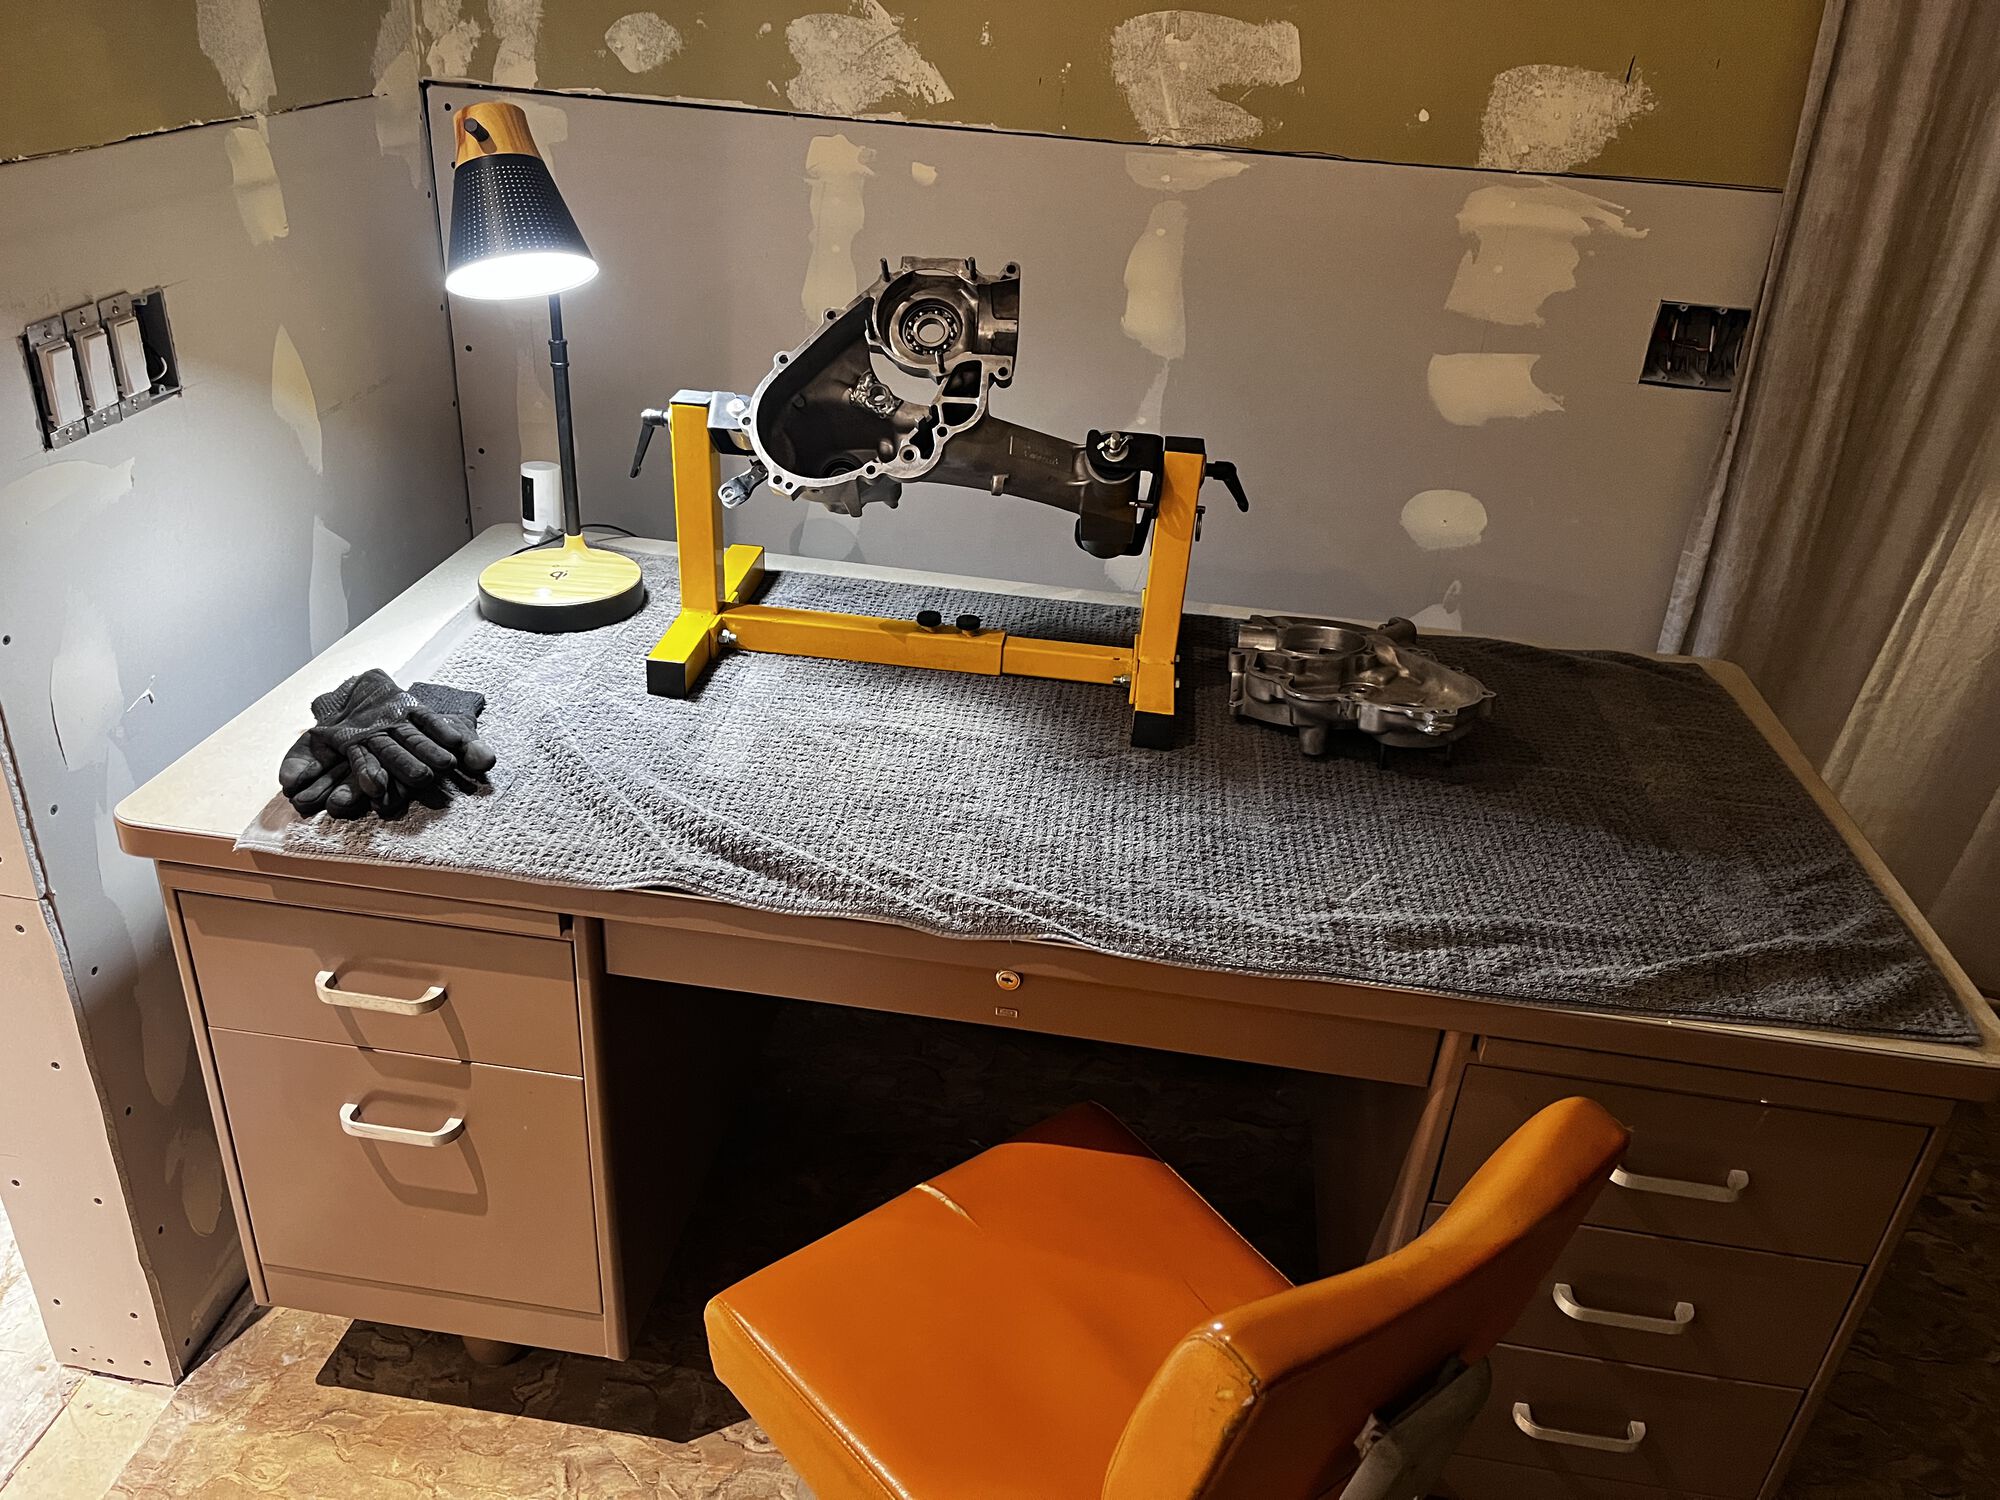
Little bit of progress on the build up. Bearings seated in the case halves, flywheel lapped to the crank, and all the necessary parts moved inside the house; cuz COLD. Little progress bit big steps as far as I'm concerned. Moving forward…slowly.

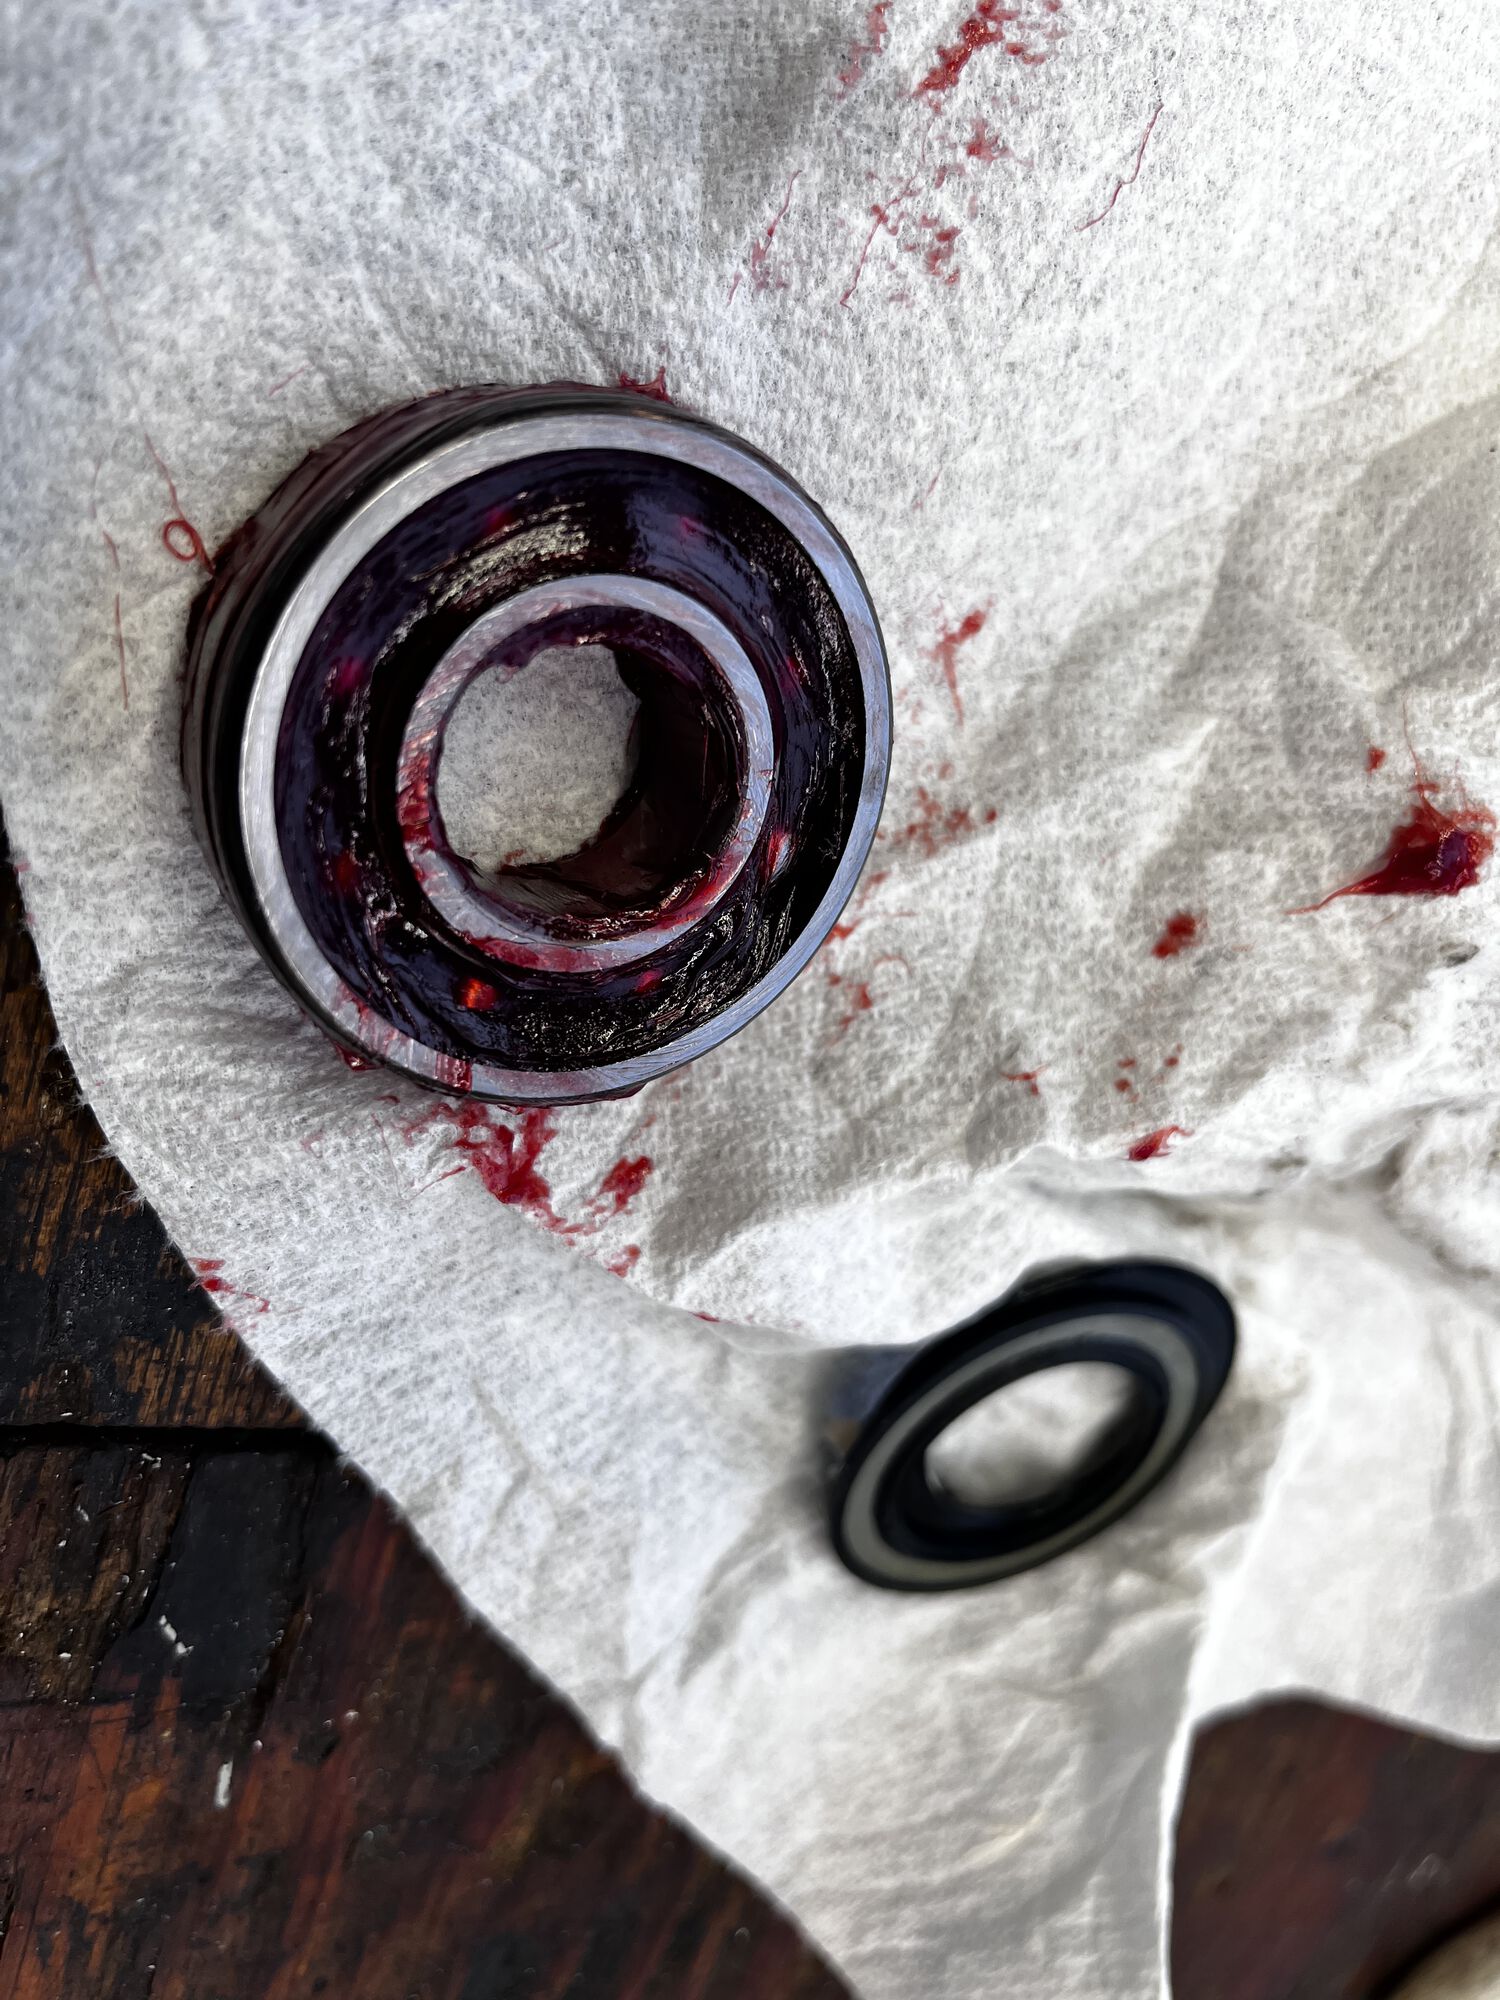
I'm using a FIS 9 ball clutch side crank bearing, Nadella fly side crank bearing. A standard selector bearing, and SKF sealed drive shaft bearing. I opened and re-greased the drive bearing; as the factory grease is minimal at best. Red high temp grease packed full, I'll also use an internal seal, as well as external seal for double assurance against grease in the brakes.
Bearings set, Clutch side.
bearings set, flywheel side
Rear drive shaft bearing, seals removed, grease packed and ready to rock.
Flywheel + Crank lapped with valve grinding compound; taper fit tight!
Vespa engine on my work desk. Where its nice and toasty.
⚠️ Last edited by GeekLion on UTC; edited 1 time
@charlieman22 avatar
UTC

Nedminder
62 VBB1T Round Tail W/ leaner sidecar
Joined: UTC
Posts: 4914
Location: california
 
Nedminder
@charlieman22 avatar
62 VBB1T Round Tail W/ leaner sidecar
Joined: UTC
Posts: 4914
Location: california
UTC quote
Awesome!
Also: you left the butter out.
Forum member supplied image with no explanatory text
OP
@geeklion avatar
UTC

The Dude
Too Many piles of Junk that need too much work and too much money
Joined: UTC
Posts: 2688
Location: PNW from LBC
 
The Dude
@geeklion avatar
Too Many piles of Junk that need too much work and too much money
Joined: UTC
Posts: 2688
Location: PNW from LBC
UTC quote
charlieman22 wrote:
Awesome!
Also: you left the butter out.
lol! I sure did! Vintage Snowflake Garland Pyrex. Sometimes refered to as as the Boob-Garland pattern
OP
@geeklion avatar
UTC

The Dude
Too Many piles of Junk that need too much work and too much money
Joined: UTC
Posts: 2688
Location: PNW from LBC
 
The Dude
@geeklion avatar
Too Many piles of Junk that need too much work and too much money
Joined: UTC
Posts: 2688
Location: PNW from LBC
UTC quote
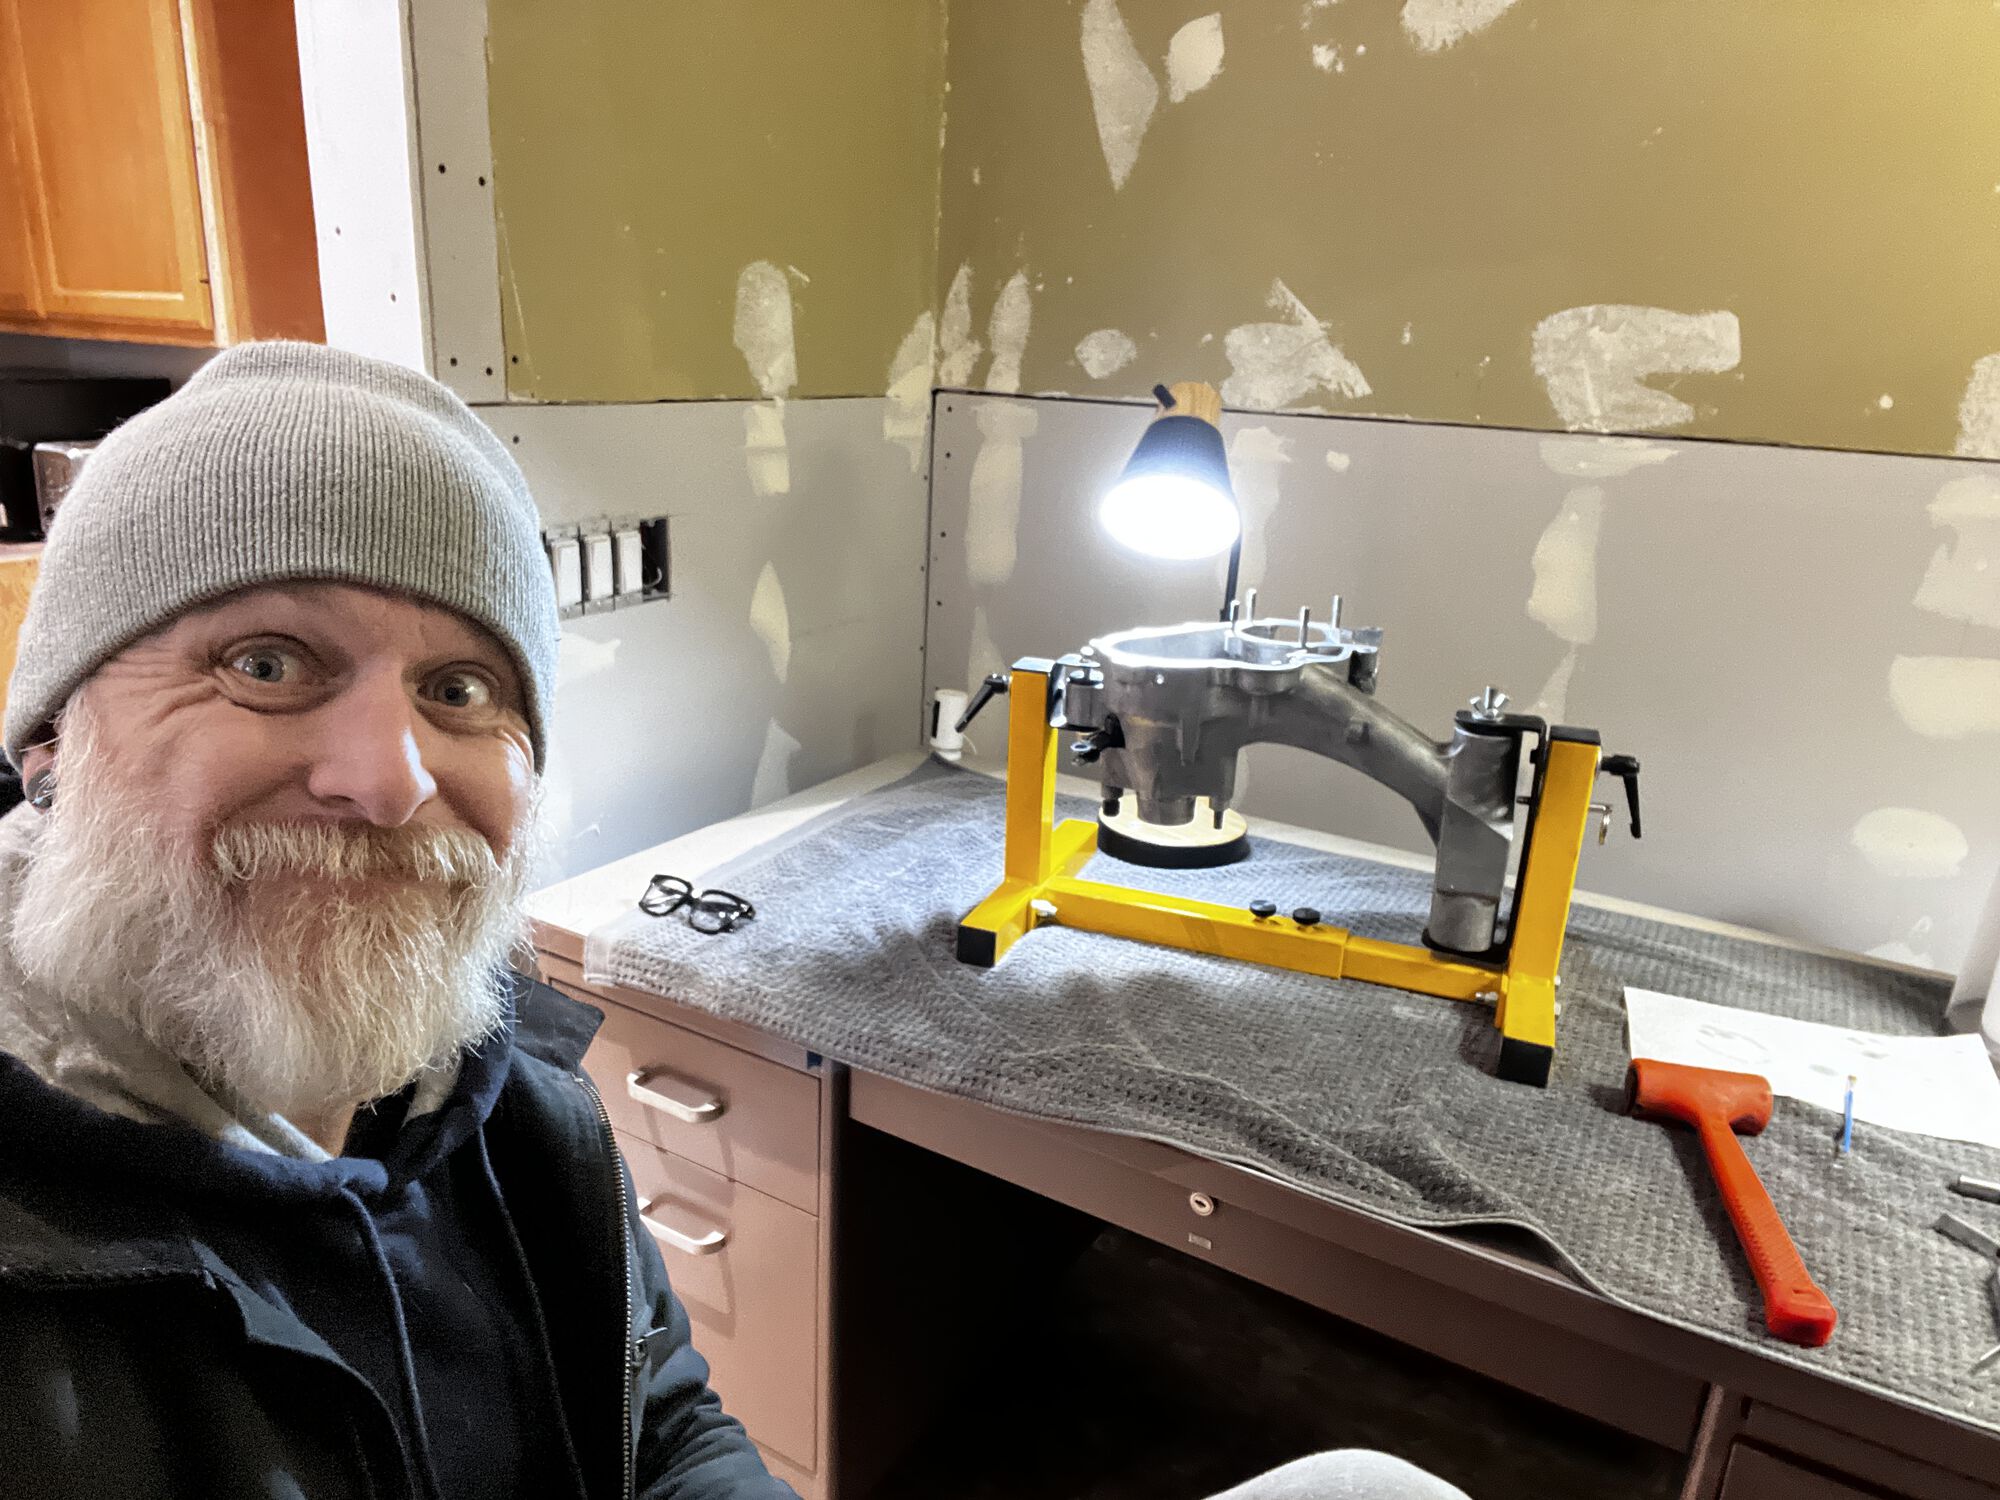
Cases closed! All went smooth with no hiccups.

I'm using genuine Piaggio gaskets, Yamabond sealer, and did the FMP oil sucker trick; so hopefully that helps.
Also using Malossi FKM crank seals, and Corteco blue rear drive outer seal. The inner seal did not fit my cases, as the seal diameter is slightly too small or my cases too big, so I'll just run the outer seal with the sealed bearing; as I've done before.

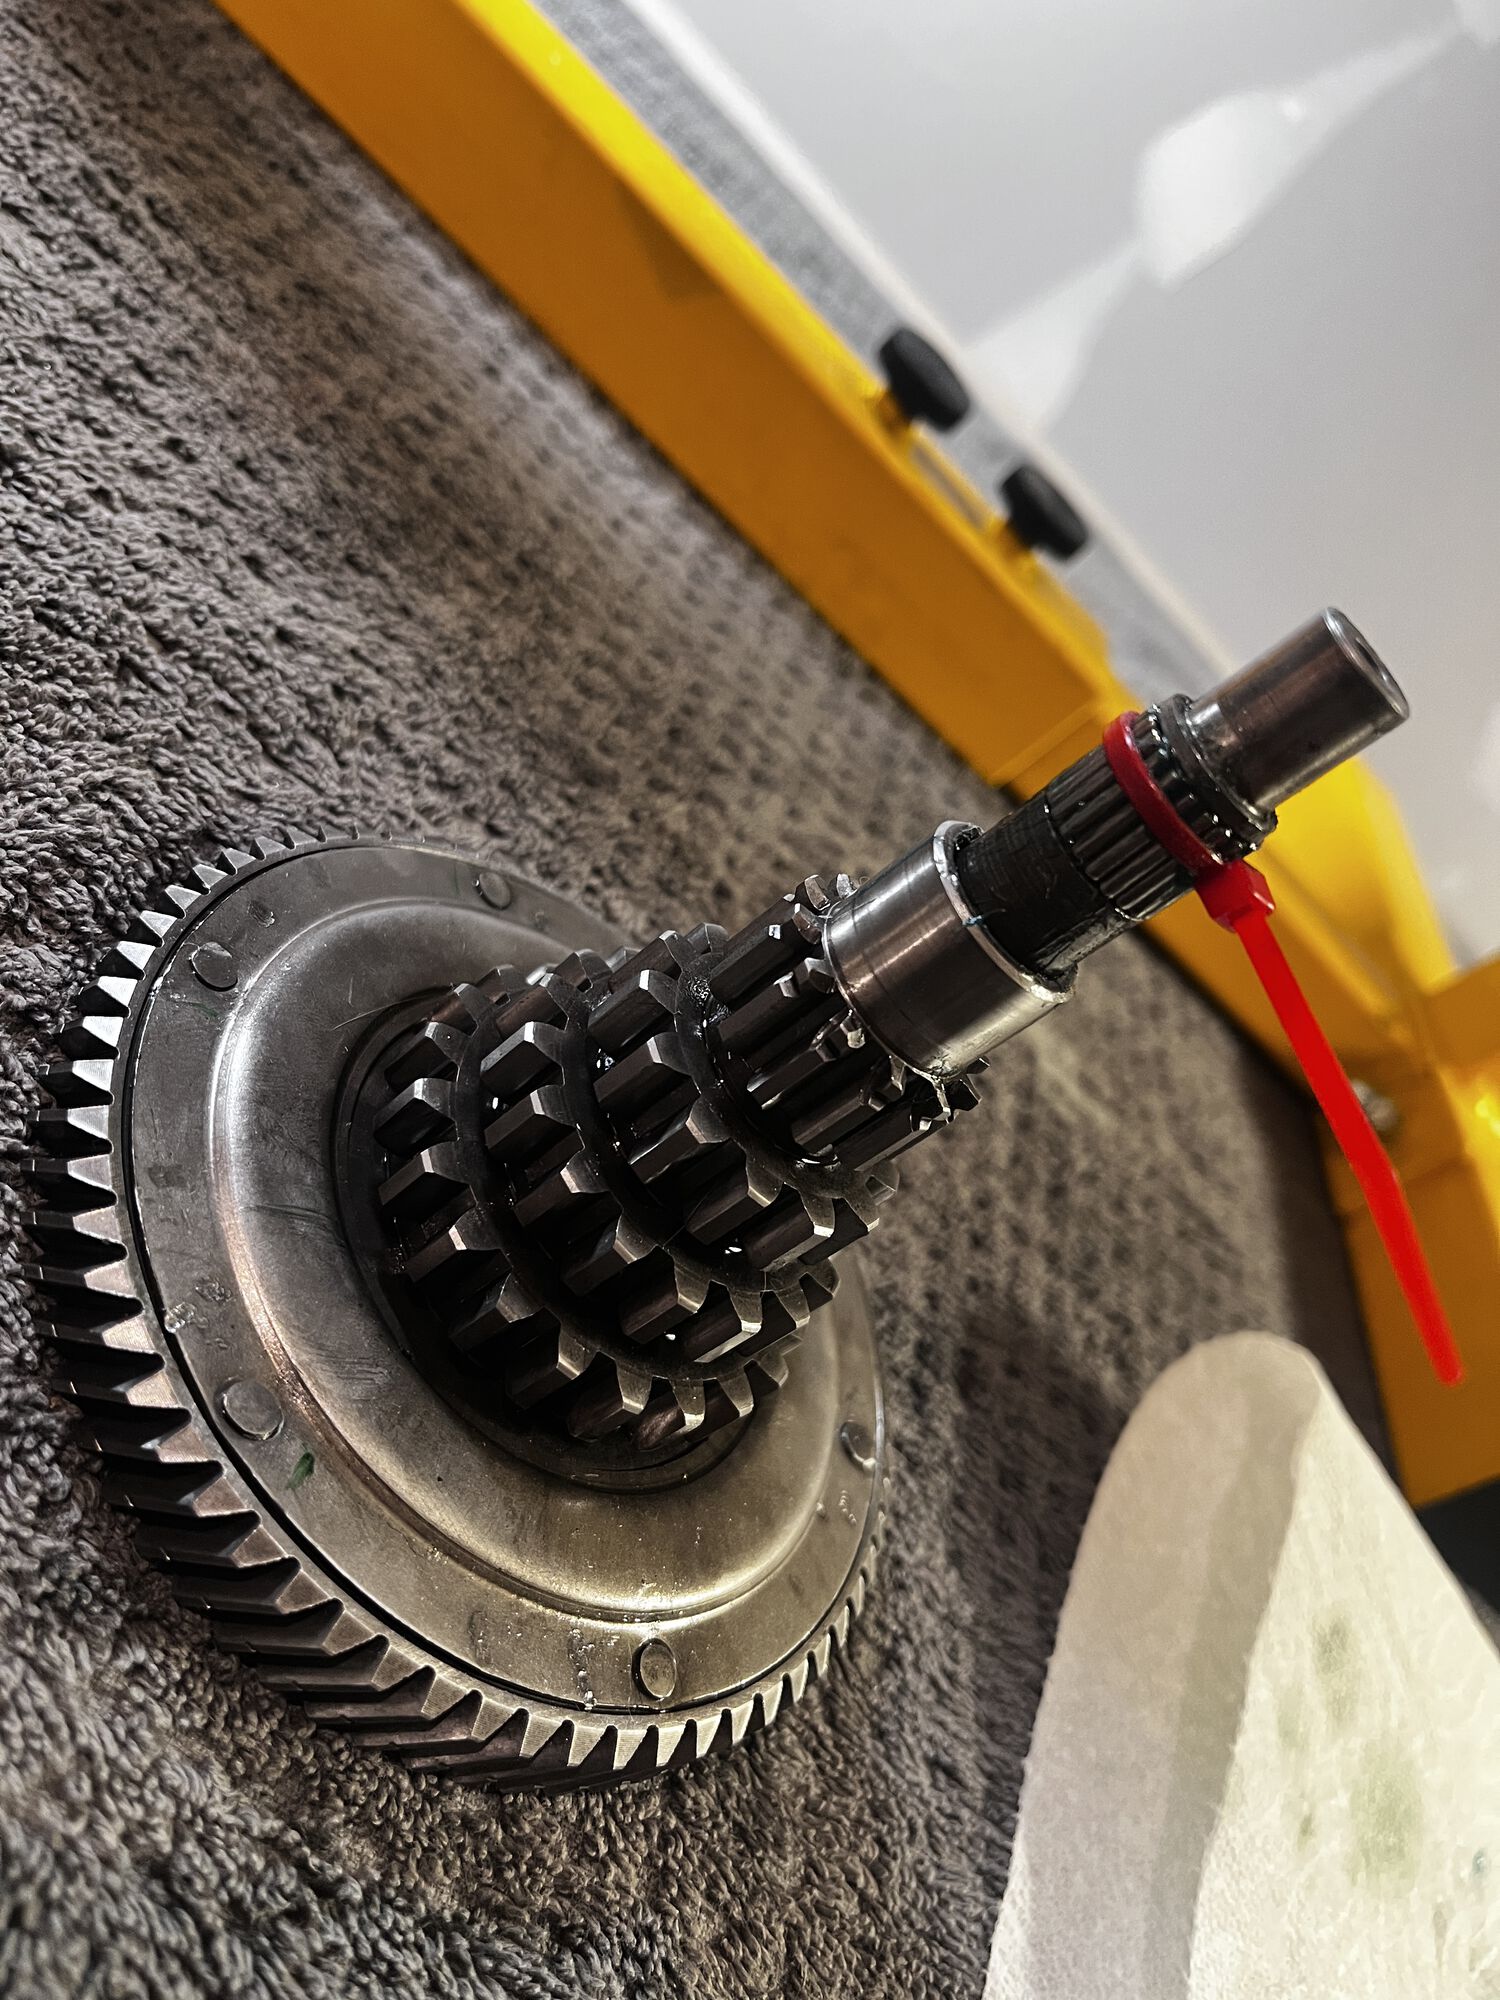
DRT cyl studs, Piaggio case bolts, new zinc M7 nuts and washers. Primary was already rebuilt using DRT springs. Main drive is EFL CIF gears, piaggio shaft, BGM cruciform.

Apologies for being light on the photos, I was in a groove. Not a funk, but a funky groove.

Next up is setting the base gasket and squish. Then seal up the cylinder. Then leak down test. Then….all the rest
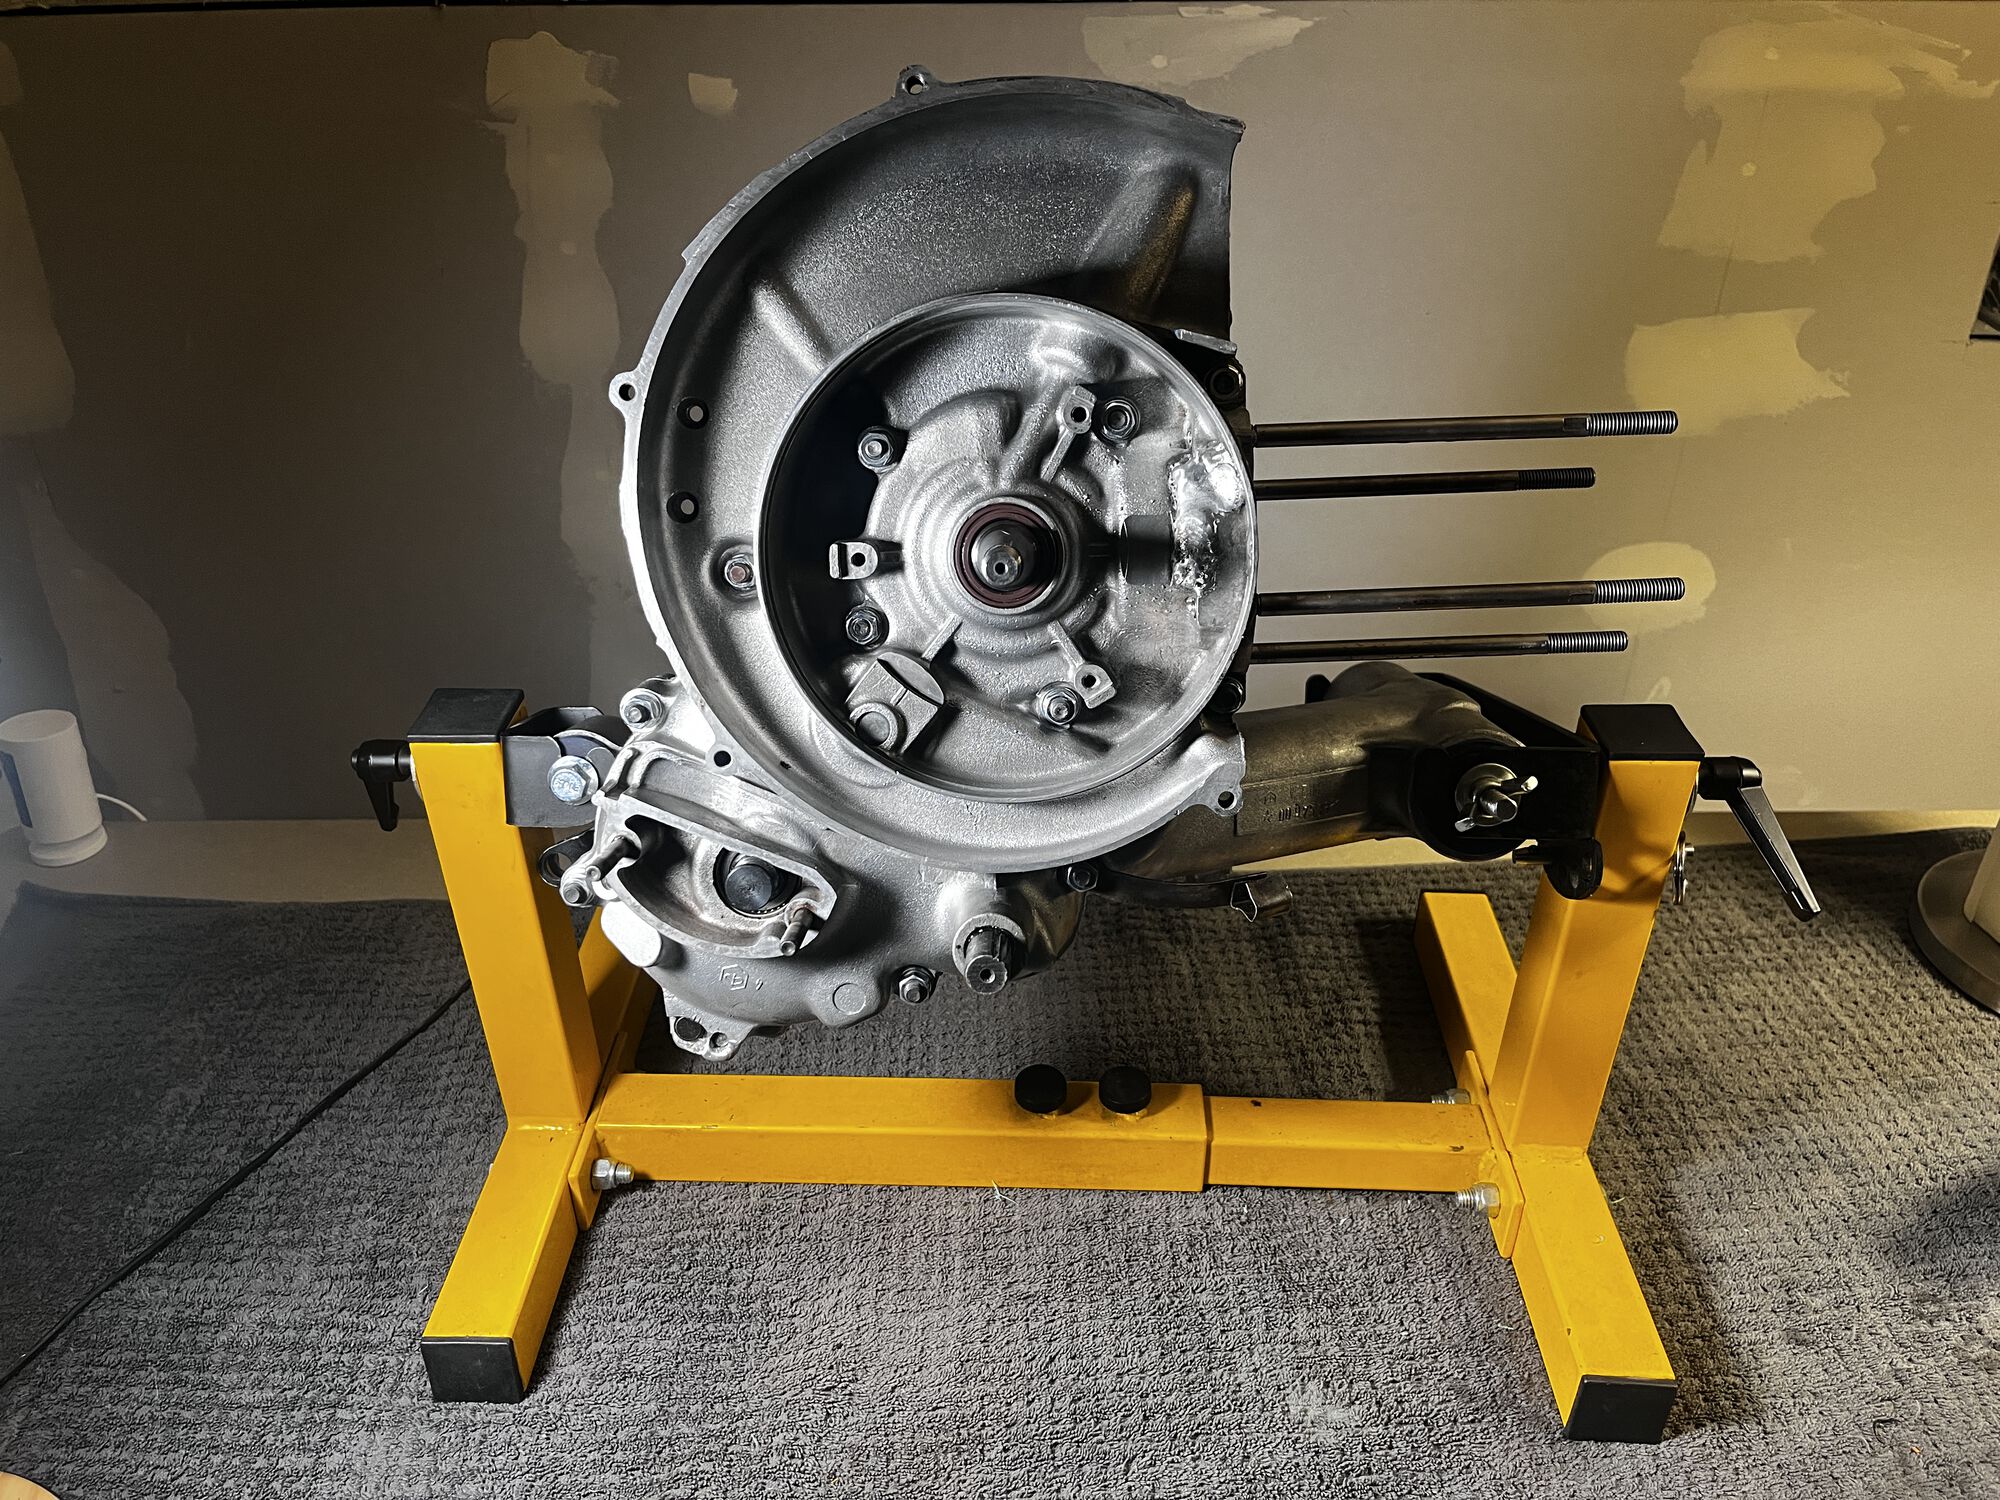
Geeklion in a groove. Thankfully this room is already under construction, so I might as well construct a Vespa engine in here as well
21 Needle Bearing salute
Thats a wrap! Case closed!
@qascooter avatar
UTC

Veni, Vidi, Posti
79 P200E (Ruby), 62 Allstate (B-62), 63 VBB (Storm)
Joined: UTC
Posts: 5299
Location: Florence, OR
 
Veni, Vidi, Posti
@qascooter avatar
79 P200E (Ruby), 62 Allstate (B-62), 63 VBB (Storm)
Joined: UTC
Posts: 5299
Location: Florence, OR
UTC quote
RIGHT ON BROTHER! Progress 😁👍👌
@johndon avatar
UTC

Hooked
P200E - px177
Joined: UTC
Posts: 234
Location: Brooklyn, NY
 
Hooked
@johndon avatar
P200E - px177
Joined: UTC
Posts: 234
Location: Brooklyn, NY
UTC quote
so awesome
UTC

parallelogramerist
Joined: UTC
Posts: 6253
 
parallelogramerist
Joined: UTC
Posts: 6253
UTC quote
GeekLion wrote:
Cases closed! All went smooth with no hiccups.

I'm using genuine Piaggio gaskets, Yamabond sealer, and did the FMP oil sucker trick; so hopefully that helps.
Also using Malossi FKM crank seals, and Corteco blue rear drive outer seal. The inner seal did not fit my cases, as the seal diameter is slightly too small or my cases too big, so I'll just run the outer seal with the sealed bearing; as I've done before.

As you found out, the inner axle seal only fits the EFL cases. It has a too small of an OD to fit tightly in the early P cases. Installing that sealed axle bearing is the winning ticket. Sometimes i'll install that bearing with the inner seal removed, just so that the balls will run in a constant oil bath. Other times i've kept both seals in place. Dunno if one way is much better than the other. Just as long as oil isn't weeping past the outer axle seal and onto the brake shoes is the goal.
OP
@geeklion avatar
UTC

The Dude
Too Many piles of Junk that need too much work and too much money
Joined: UTC
Posts: 2688
Location: PNW from LBC
 
The Dude
@geeklion avatar
Too Many piles of Junk that need too much work and too much money
Joined: UTC
Posts: 2688
Location: PNW from LBC
UTC quote
whodatschrome wrote:
As you found out, the inner axle seal only fits the EFL cases. It has a too small of an OD to fit tightly in the early P cases. Installing that sealed axle bearing is the winning ticket. Sometimes i'll install that bearing with the inner seal removed, just so that the balls will run in a constant oil bath. Other times i've kept both seals in place. Dunno if one way is much better than the other. Just as long as oil isn't weeping past the outer axle seal and onto the brake shoes is the goal.
Yep! Clearly I found out the hard way ROFL emoticon Like most of my life. NBD. I've done the same with the sealed bearing, sometimes inner seal removed, sometimes not. This time both seals are in place, with fresh hitemp red grease.
@cdevillasante avatar
UTC

Addicted
1975 Rally 200, 2007 GT 200
Joined: UTC
Posts: 701
Location: San Francisco Bay Area
 
Addicted
@cdevillasante avatar
1975 Rally 200, 2007 GT 200
Joined: UTC
Posts: 701
Location: San Francisco Bay Area
UTC quote
Congrats! Looking great and very inspiring
Can't wait for next steps Clap emoticon

Modern Vespa is the premier site for modern Vespa and Piaggio scooters. Vespa GTS300, GTS250, GTV, GT200, LX150, LXS, ET4, ET2, MP3, Fuoco, Elettrica and more.
Modern Vespa is made possible by our generous supporters.
Buy Me A Coffee
 

Shop on Amazon with Modern Vespa

Modern Vespa is a participant in the Amazon Services LLC Associates Program, an affiliate advertising program designed to provide a means for sites to earn advertising fees by advertising and linking to amazon.com


All Content Copyright 2005-2026 by Modern Vespa.
All Rights Reserved.


[ Time: 0.0257s ][ Queries: 4 (0.0179s) ][ live ][ 343 ][ ThingOne ]