beberly37 wrote:
The first being the rpm limit of the engine, this can be fixed by CDI tuning and hoping you don't cause failure or crank mods that allow for higher rpm's and CDI mods, the later of which is outside the realm of cheap.
.
|
OP
|
UTC
quote
beberly37 wrote: The first being the rpm limit of the engine, this can be fixed by CDI tuning and hoping you don't cause failure or crank mods that allow for higher rpm's and CDI mods, the later of which is outside the realm of cheap. . |
|
OP
|
UTC
quote
.
Some more news..... The 130/70-10 tyre is on the way on a sale or return basis!!!! So will offer it up tonight to see if it will fit. If it does I'm hoping for a 3%-5% gearing uplift - I need to replace the rear tyre at some stage anyway so this may just do the job. Also I'm thinking that the replacement I made of the 12mm Weber with the 17.5 Dellorto needs a re-think and perhaps go up again to a 19mm or 21mm carb - what are your thoughts? . |
|
UTC
Veni, Vidi, Posti
2007 Vespa LX 190, 2011 LXV150ie
Joined: UTC
Posts: 8758 Location: Annapolis, MD, USA |
|
|
Veni, Vidi, Posti
2007 Vespa LX 190, 2011 LXV150ie
Joined: UTC
Posts: 8758 Location: Annapolis, MD, USA |
UTC
quote
Fabio Dougie wrote: . Some more news..... The 130/70-10 tyre is on the way on a sale or return basis!!!! So will offer it up tonight to see if it will fit. If it does I'm hoping for a 3%-5% gearing uplift - I need to replace the rear tyre at some stage anyway so this may just do the job. Also I'm thinking that the replacement I made of the 12mm Weber with the 17.5 Dellorto needs a re-think and perhaps go up again to a 19mm or 21mm carb - what are your thoughts? . |
|
OP
|
UTC
quote
Silver Streak wrote: I had a 19mm Arreche on my kitted Vino, and it worked well. I don't have any basis of comparison with other sizes, however. Going TOO big will not gain you anything, and may cost you. . |
|
Moderibbit
1980 P200E - "Old Rusty", 1976 ET3 Primavera
Joined: UTC
Posts: 8891 Location: Atlanta, GA |
|
|
UTC
quote
just read through the thread, first off i wouldnt worry too much about gearing just yet, you should be able to extract a few more mph without changing your gearing. scootershack.co.uk is a very good website for tuning 2 strokes, loads of guides/info there and a forum that will help you solve most problems. i know of 50's that will do 70mph but they are in a much higher state of tune with a fair bit more money spent on them and are using single ringed aluminium kits which are short lived by design. all said and done I would be aiming for 65ish mph all said and done(on the speedo)
i built an et2 this year DR 70cc kit 21mm dellorto leovince zx(one of the poorer tuning pipes) and either 4.3 or 4.7g rollers (cant remember exactly now but those 2 are in my previous items on sip.) got an indicated 60mph the whole time and im a fat fucker. have heard of guys getting a good bit more. http://www.scootershack.co.uk/viewtopic.php?f=8&t=17307 my project from when i built it so if you read the thread you can see everything i did with it. good to see another et2 being done up. keep her lit brother, sean |
|
OP
|
UTC
quote
.
Sean Brilliant link to scootershack, I occasionally look at scootershack but I hadn't seen your thread - much appreciated. What would you suggest I look at improving next on my ET2, a larger carb? I'm currently running a 17.5 dellorto, should I go to a 19mm of 21mm do you think? All the best, and thanks for your support. . |
|
|
UTC
quote
you have to remember with a carb after a certain size it wont do anything for your setup bar make it guzzle more fuel, 21 seems quiet popular though, i ran it but put it on at the same time as my 70 so ive nothing to go on as far as what is better is concerned.
i wouldnt be going much bigger than a 21 anyway, read somewhere but im not entirely sure on this one, you can get standard 125 2t carbs (20.5mm or thereabouts) for fuck all because 125 tuners always bolt on somthing bigger and theres a good few going around. |
|
OP
|
UTC
quote
seancullen wrote: you have to remember with a carb after a certain size it wont do anything for your setup bar make it guzzle more fuel, 21 seems quiet popular though, i ran it but put it on at the same time as my 70 so ive nothing to go on as far as what is better is concerned. i wouldnt be going much bigger than a 21 anyway, read somewhere but im not entirely sure on this one, you can get standard 125 2t carbs (20.5mm or thereabouts) for fuck all because 125 tuners always bolt on somthing bigger and theres a good few going around. Yes I like the sound of that !!! - a 20.5mm off say a 2T Gilera Runner for very little money - just my sort of thing!! I'll get on the look out for one !! . |
|
OP
|
UTC
quote
.
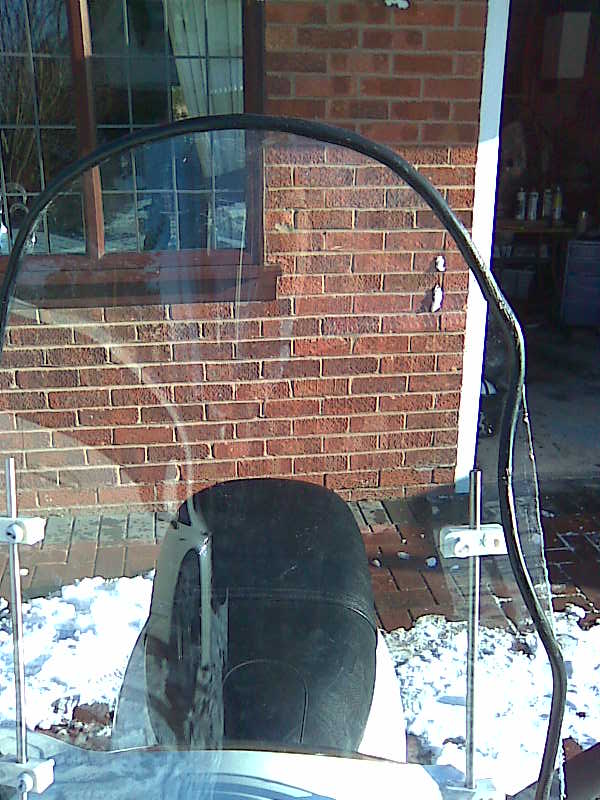
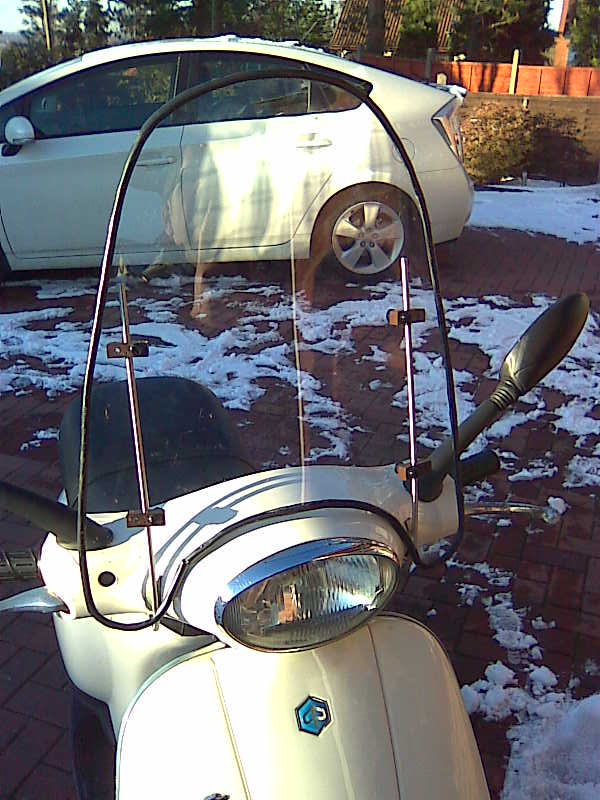
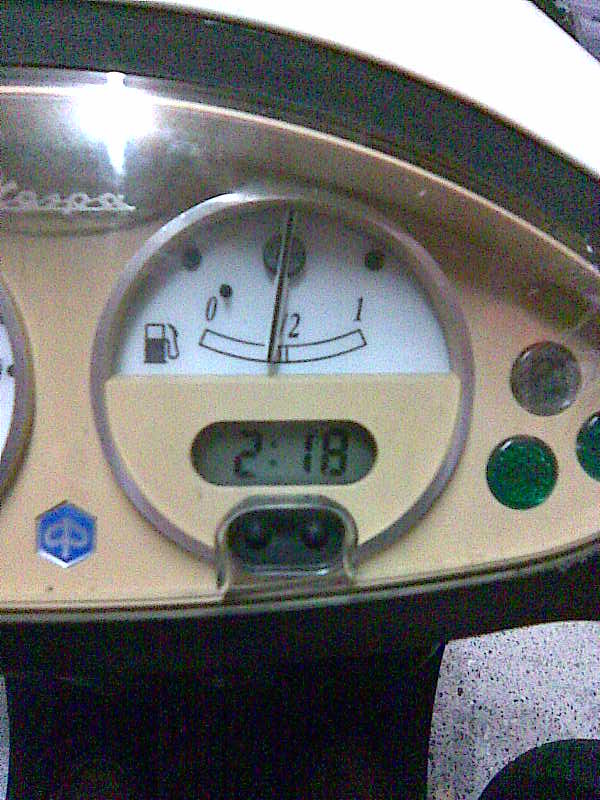
Weather bad here today, -2C at the moment and snow on the ground. 84 Main Jet arrived today, I've fitted it and at the same time reset the needle clip to the top slot (leanest setting) but not able to try the scoot because of the weather (damn!!). Took the opportunity to finish off the fly-screen, all done now. Edged the screen with some rubbery flex outer which I had in the garage and repositioned the screen's frame so its stronger and less vibration (mind you there wasn't a great deal in the first place) also replaced the fittings from the original white ones to blacky/brown. Added an extra 80p to the cost of the Flyscreen (Damn again!!) so cost of this is now £11. Can't wait to get out when the snow's lifted to try the main jet and the screen out. Also on Friday night I had a go at fixing the digital clock which on the ET2 and ET4 models is notoriously bad - I seem to have had some success because its not gone off as of yet and it seems to be keeping good time (still on Today), watch this space with this one and if I've cured the problem then i'll post what I did to fix it. .
Not scooting weather !
Fixing the Edging,
All Done.
Yay! - its working.
|
|
|
UTC
quote
Fabio, great post. I like the fact that your here sharing your project and having fun with them. Very cool.
|
|
OP
|
UTC
quote
..
175mws... Thanks for the great comments. really appreciated. One thing that I would like to say is that I'm so impressed by the majority of MVers. They are very supportive and they encourage me on with my project, only a few negative comments but these always seem to be from Negative biased posters. I'd encourage everyone to contribute that can, I can see that this thread already has had approaching 4000 views so there is obviously a load of interest in what I'm doing (or trying to do hehe!) - so anybody that can contribute with positive help, support or info no matter how trivial I encourage you to do so. We'll all learn better and quicker that way... Thanks once again - I'll click the kudos "thumbs up" button for your post !!!! . |
|
OP
|
UTC
quote
.
So.... .. to update you on the list of 6 'tinkerings' that I'm thinking about.... 1 - Poor-mans Gear-Up kit (bigger back tyre) - TYRE HAS ARRIVED !! so I'm going to offer it up to the scoot tomorrow - will report back with my findings. 2 - Flyscreen - DONE! 3 - Exhaust wrap - looks good/retro-ish and from what I can gather may make a slight increase in HP hence its of interest to me. GOT TO MEASURE UP THE EXHAUST YET. 4 - Clutch springs - ORDERED - SPRINGS ON THE WAY. 5 - Contra Spring - but I've got to understand more about this as of yet and what benefits it may bring me - I STILL DONT UNDERSTAND THIS YET I MUST ADMIT. 6 - Spotlight - GOING TO TRY AND MOUNT ONE IN THE HORN GRILL ON THE HORNCAST. Anybody tried this??? . |
|
OP
|
UTC
quote
.
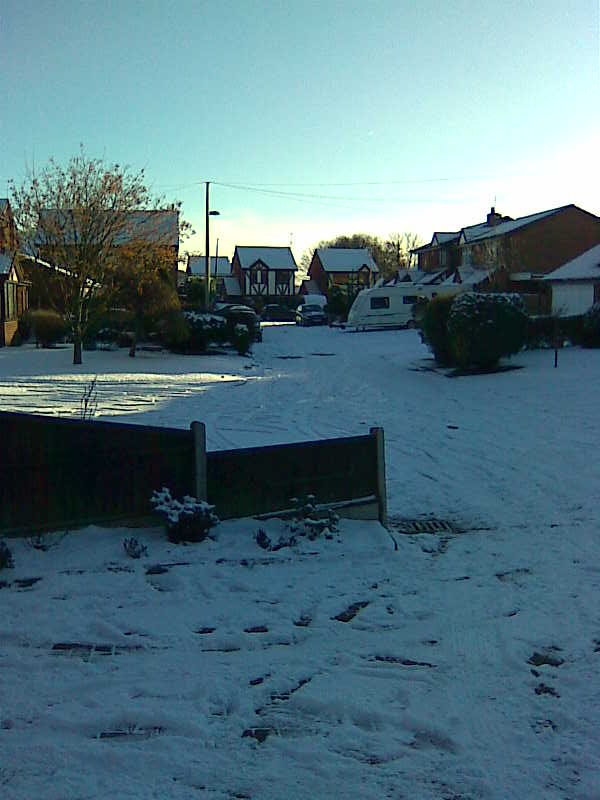
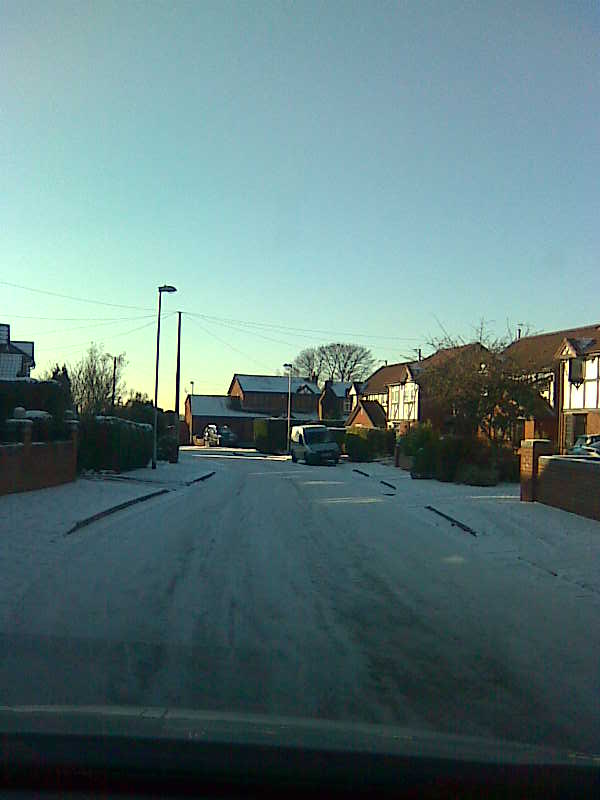
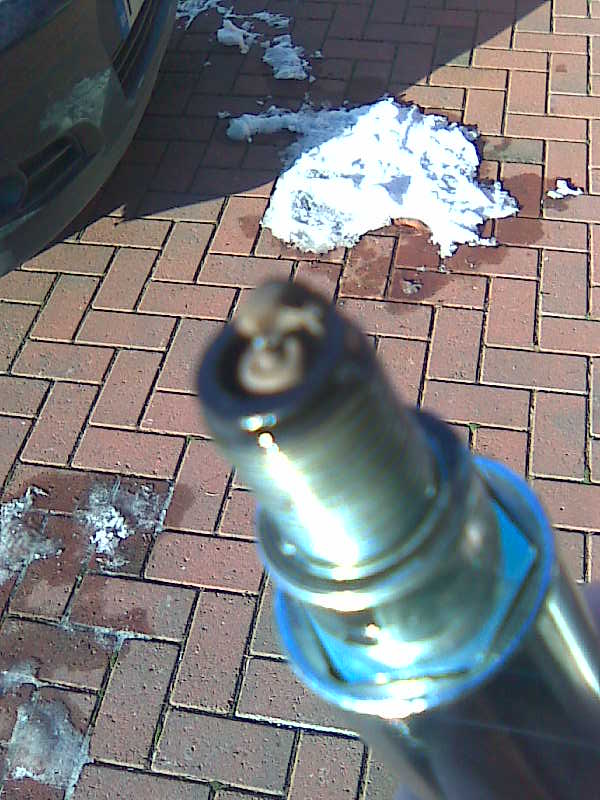
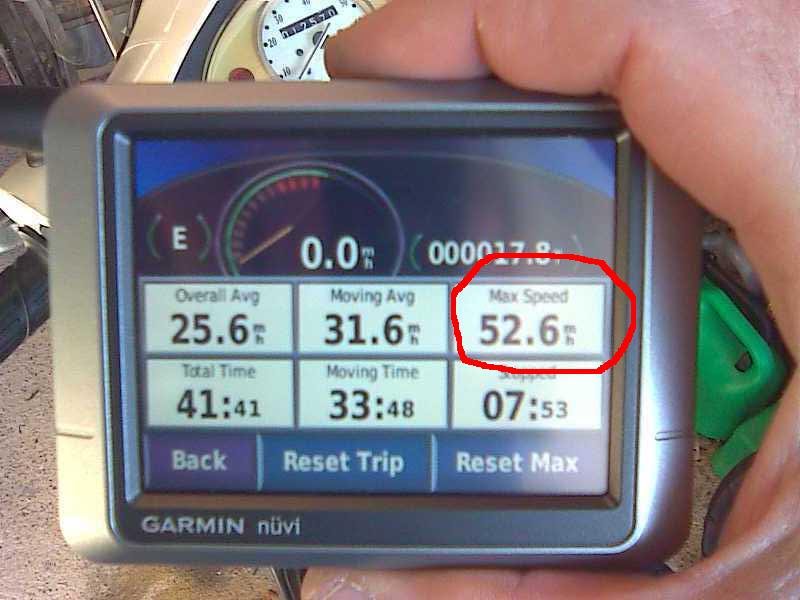
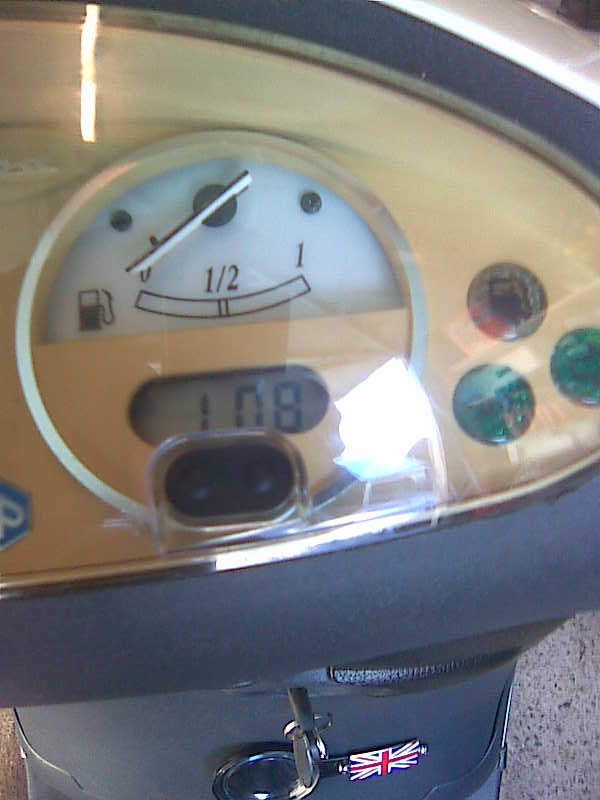
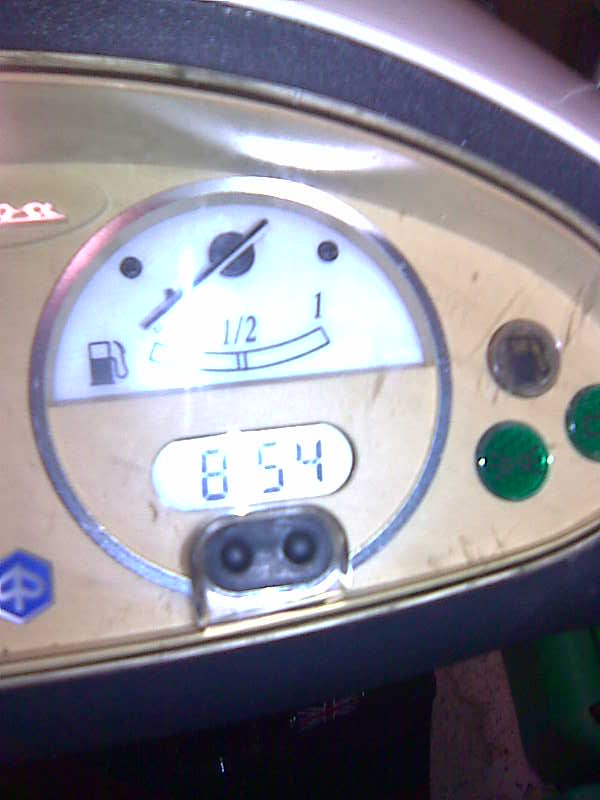
Today's update..... Weather still bad here -2degreesC again - today's photo of the street attached.... Decided to brave it in the snow and I hoped that when i got to the main roads that it'd be clearer, and luckily I was right. I wouldn't have normally taken the risk of falling in the bad weather....er.... but I wanted to check out the 84 Main jet that I'd fitted and do a plug chop, I'd also leaned out the needle by resetting it to the top clip. The plug chop looked better (lighter brown, a dark coffee and cream colour) which I was quite chuffed with. (Sorry for the slightly blurred photo!) I decided to take the GPS in my pocket when I went to gauge the actual speed that I was hitting with the 84 and the flyscreen (which I must say performed exceptionally well, I was warm and dry, the screen was firm with no vibration, and it looked good too!) and encouragingly enough managed to record a 58 on the speedo for a longer period of time now which equated to a 52.6mph on the GPS. Haven't had chance to offer up the new tyre yet that I'm hoping will give me a 3-5% top speed uplift, too cold in the garage for lying on the floor! Final bit of news is that the digital clock is still working and also telling the correct time too. .
Not as bad today, but still pretty dangerous!
Better plug chop with the 84 MJ !? (My apologies for the blurred image)
52.6mph in the "snow" hehe!
Still working - 2 days on from the repair!
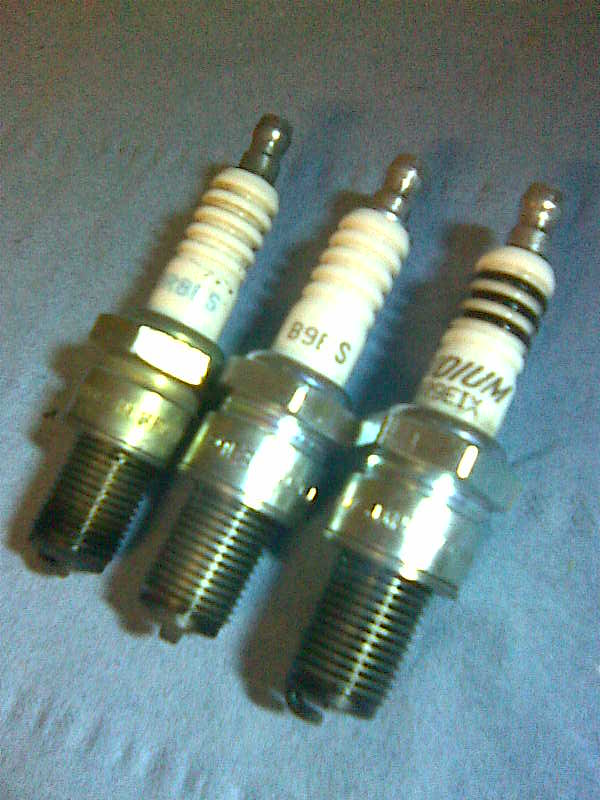
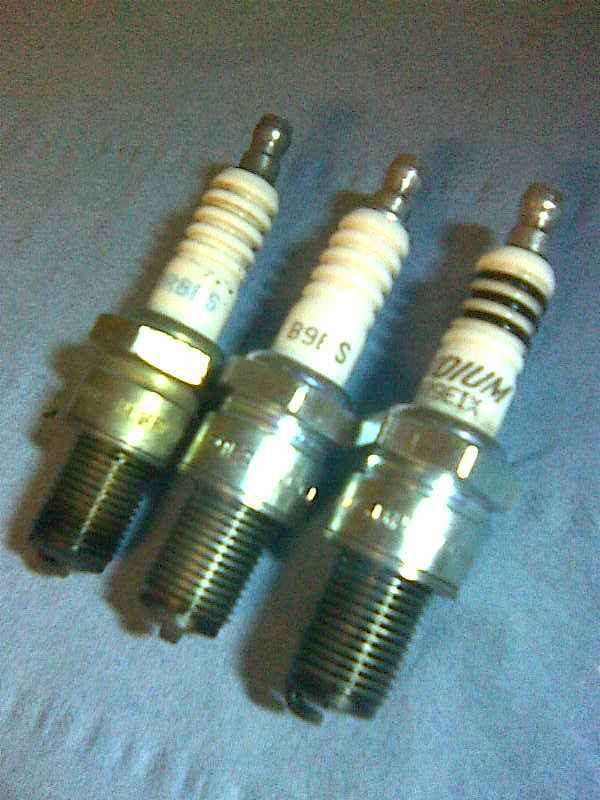
Here's the choice of plugs I've got, left to right....BR8ES,B9ES, Iridium BR9EIX
⚠️ Last edited by Fabio Dougie on UTC; edited 1 time
|
|
OP
|
UTC
quote
.
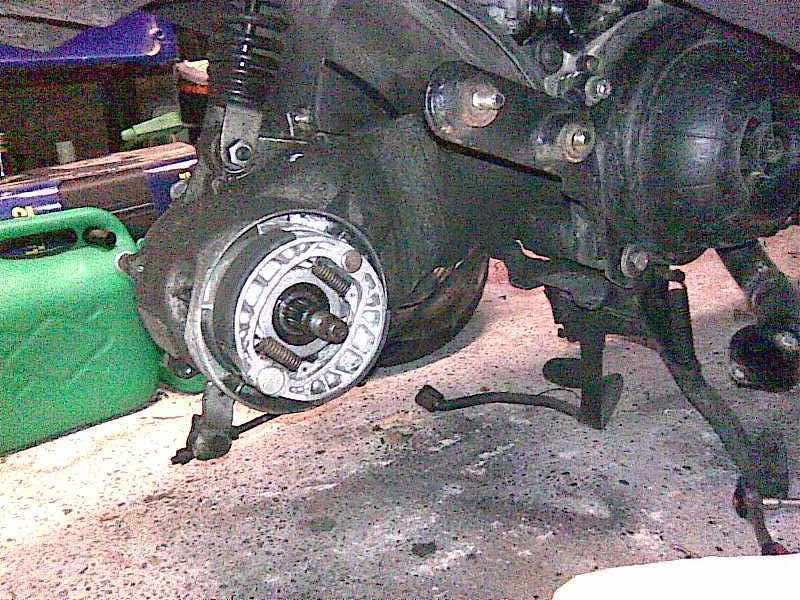
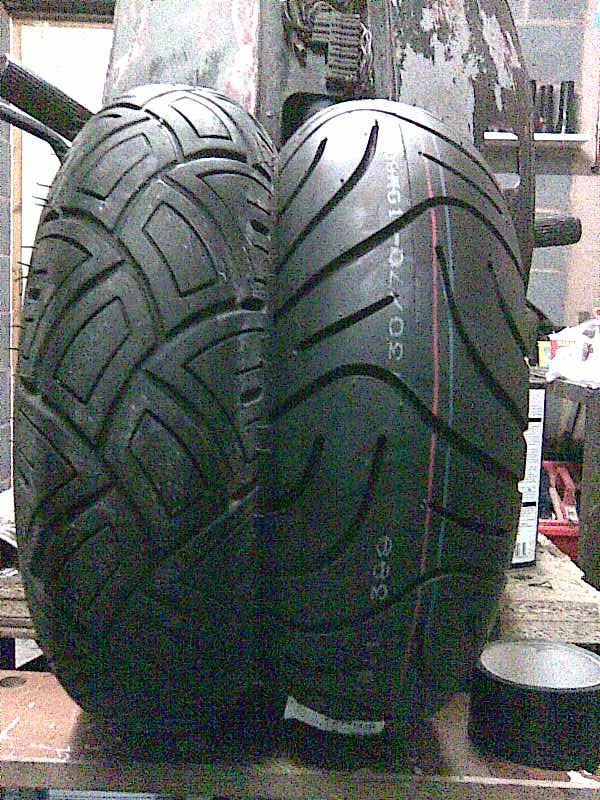
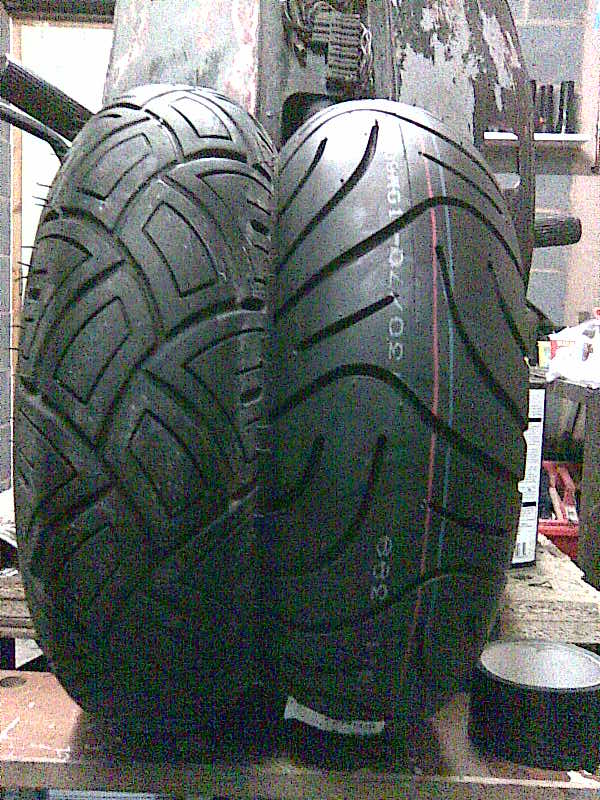
Seems like this is getting to be a bit of a daily diary.... so here's.....Monday's Diary ! Still terrible weather here, -3degC at the moment and the forecast is for more snow sometime this evening, a bit too cold on the garage floor even when wrapped up well... but I'm still too keen to find out if my "Poor-Man's-Gear-Up" idea works, so here I am lying on the concrete floor. The Sale-Or-Return tyre arrived over the weekend but I hadn't found time to offer it up till tonight. You'll probably remember I'd tried a 120/90-10 previously in an attempt to find an inexpensive way of "Gearing-Up" the scoot but the 120/90 was just way too big... So, the new SOR tyre I'm attempting to fit is a 130/70-10 and again its disappointing news, after removing the exhaust and rear wheel and offering the SOR tyre up to the scoot my feelings are that its too wide to clear the shocker/ fittings but I'm also a bit disappointed too that it doesn't look any taller than the standard 120/70 that I'm trying to replace.... photos below. The theory went that the current tyre should have stood (130-120)*70%x2=14mm higher than the SOR one but it just doesn't feel right, you can see in the photo that the 130/70 looks smaller, and yes I know its not inflated but my feelings aren't good about fitting this tyre. Ideally what I need is a 120/80-10 which would be the correct width and 24mm 'taller' than the stock tyre but this tyre size doesn't seem to exist, unless someone out there knows differently. Disappointing news I know - but on a brighter side the digital clock is still going strong after 3 whole days - however cos of the snow I've not been out on the scoot much so this may yet be a false dawn..... .
Removed Exhaust and Rear Wheel
Old 120/70 on left - SOR 130/70 on right.
3 days in.... and still working !
|
|
OP
|
UTC
quote
Fabio Dougie wrote: Ideally what I need is a 120/80-10 which would be the correct width and 24mm 'taller' than the stock tyre but this tyre size doesn't seem to exist, unless someone out there knows differently. Some news here - I've located a 120/80-10 - its coming on Friday!!!! Yay! . |
|
Moderibbit
1980 P200E - "Old Rusty", 1976 ET3 Primavera
Joined: UTC
Posts: 8891 Location: Atlanta, GA |
UTC
quote
Sweet! One thing to consider is because having a different wheel size will change the RPMs you'll be rocking for a given speed, there might be some more roller weight tweaking to get the ride just right.
|
|
OP
|
UTC
quote
.
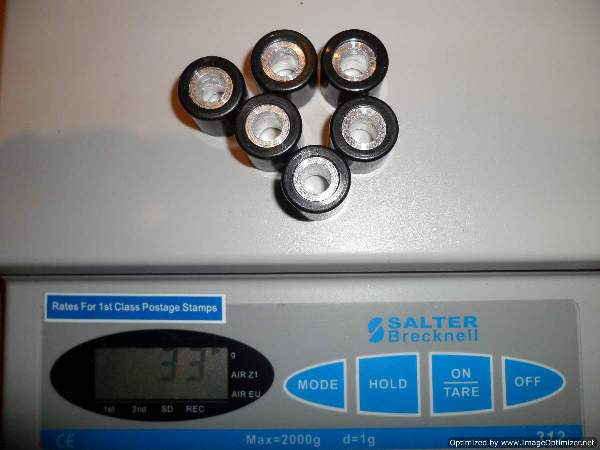
Xantu Yes I'm thinking about drilling the rollers out a bit more to say 5.0g or even maybe lighter - what weight would you have in mind if it was you? (they were 6.5g and I drilled them out to 5.5g previously). I've got some stiffer clutch springs on the way and also I'm looking out for an inexpensive Contra/Contrast/Torque spring too. Going to fit them all (one at a time so that I can judge the improvements/detriments of each), so prob in this order...... Clutch Springs (to get a better take off) Tyre (to achieve a better top-end speed and a more useable speed to rpm ratio) Drill out the rollers (to ensure I get back into the rev range if indeed i drop out of it) Contra Spring (to get better use of the gearing at speed) .... and as you have come to expect with me I'll post the results right here for all to see. I just can't wait to get rid of this terrible weather we're having here. .
As they are currently - 5.5g
|
|
UTC
Molto Verboso
S 150, VNB 150, 101 Allstate, 01 ET2, 2005 PX
Joined: UTC
Posts: 1504 Location: CT |
|
|
Molto Verboso
S 150, VNB 150, 101 Allstate, 01 ET2, 2005 PX
Joined: UTC
Posts: 1504 Location: CT |
UTC
quote
one thought with the snow on the ground. be careful becouse i ride year round. there was no snow on the road for about a week. comming around a blind corner someone must have got back from vacation or something, and plowed all the snow into the street. real lucky i did not go down. just a word to the wise. real cool how you tuned the two stroke. love the noise.
|
|
OP
|
UTC
quote
orange s150 wrote: Real cool how you tuned the two stroke. Love the noise. Thanks Orange for the nice words and also the snow warning - very much appreciated. Re the "Noise" - Here's something you might appreciate! |
|
OP
|
UTC
quote
.
I'm getting fed up with the weather we've got here now (-7degC today!) and I'm itching to get tinkering with my scoot again, because I've got my hands on these...... 20.5 Dell'orto PHVB carb - cleaned it up last night in anticipation of fitting it this weekend (if the weather improves - hehe). Not too sure if the current manifold and air intake pipe will fit or whether I can modify them to fit or whether i'll have to locate larger ones, I'm hoping they will fit and that I can smooth the inside of the rubbers somehow to get a better airflow (anyone tried this?). Also I'm assuming that I might have to upjet again? - I've not thought this through properly about the jet size required so it'll be a bit of experimentation here. Stiffer clutch spring set has arrived, not too sure which ones to fit yet 1000,1500 or 2000rpm, guess it'll prove to be a trail and error process. Not managed to locate a cheap (or hopefully free) Conta/Contrast/Torque spring as of yet, still looking. On the tyre front, the 120/80-10 is due to turn up on a S-O-R basis either this weekend or Mon/Tues, fingers crossed - third time lucky with that mod I hope!! Then I'll probably need to lighten the rollers again if the whole setup makes the scoot fall out of the 'rev range'. On the Digital Clock front - its still working 7 days on now so I'm quite chuffed, but the scoot still hasn't moved very far this week so I'm not going to post a complete success as of yet till its tested out a bit more. . |
|
OP
|
UTC
quote
.
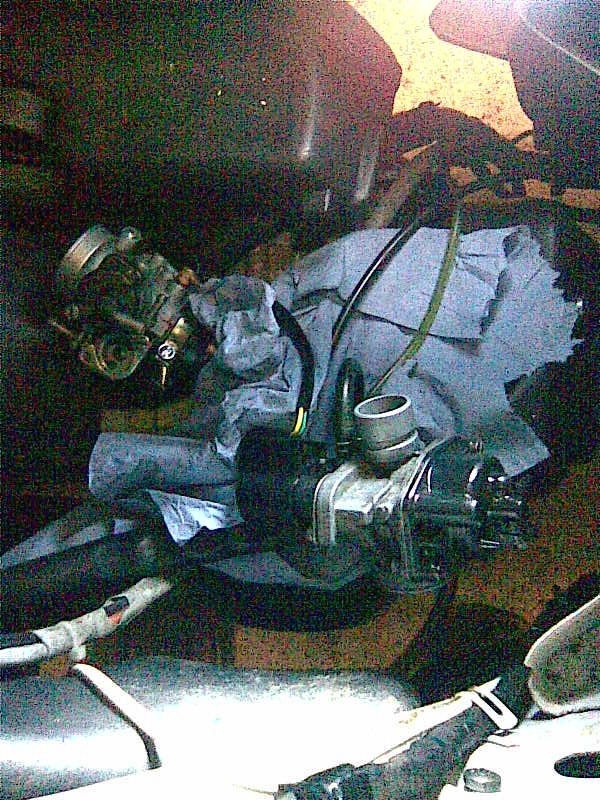
Ok.... I admit it.... I couldn't resist..... Went out to the garage in the freezing cold and spent about 1&1/2 hours removing the 17.5 PHVA and replacing it with the 20.5 PHVB. I decided to leave the Main Jet in that it came with for the time being until I've had chance to plug chop it (there was an 86 MJ in the carb, It was the stock carb off a 125 Gilera Runner). The jet that I'd become happy with in the 17.5 PHVA was an 84, but I'm guessing that if the carb will be flowing more air/fuel through it due to its greater size then I will have to upjet maybe - I'm still not too sure of my logic on this though, so please shout up if you know the answer to this one!! Luckily the rubber engine manifold and the air box intake fitted the larger carb after a bit of persuasion, just had to loosen the airbox and then re-tighten afterwards to allow access room. I'm thinking that I may need to open up the inner diameter of the manifold and air box pipes to get the best flow but again i'd be pleased to take any advice on this that you may all have. Connected everything up, double and triple checked all my connections and settings and then went for a start-up. It kicked in first time, about 2 secs after one press of the starter button, result!!! Ran well and the automatic choke seemed to kick in and then off when it was warm correctly, so I'm well pleased. Just got to wait for the snow and ice to go now so I can try it out and tinker with it to get it set up to the best settings. .
Original Weber 12mm - small throat size!
Replaced the Weber with a Dell'orto 17.5 PHVA - much bigger throat size
Then upgraded to the 20.5 PHVB Dell'orto - just look at the throat on that !!! - compared to the original 12mm Weber its a monster!
Dellorto 20.5 PHVB ready to take over from the 17.5 PHVA - picture shows me just disconnecting the 17.5 (on the right) with the 20.5 sitting on the left of the picture ready to be snug fitted into the manifold.
Dellorto 20.5 PHVB now fitted and all connected up to the scoot
|
|
OP
|
UTC
quote
.
It didn't last too long....... I managed to get some time today out and about with the Snow starting to disappear. I've had some problems with the 20.5 carb, its very hard to get it to tick over correctly and also top end its not responding at all, I was going to persevere with it and get it re-jetted until I had some very good advice from a knowledgeable tuning guy here on modernVespa. Quote: It's been a while since I did one, but I remember the auto choke needs to be converted to a manual as it makes the engine massively rich for too long, also the low speed jet will need making smaller too. After lots of dyno messing about over the years, without a doubt the 17.5mm carb makes the most power on a iron barrel... Any bigger and the torque suffers too badly. Thanks for the advice Cheeky!!! That's what I love about MV, lots of members prepared to give good sound advice, advice that would normally cost a fortune from a Dealer. I don't mind trying something and then having to go backwards to refit the old item, because in that way I've learnt the limits of that part of the engine. I'll probably move onto the clutch springs next and if I can locate a cheap contra/contrast/torque spring that'll go in too. I've already spoken to someone who's keen to try the 20.5 carb on his 125cc so I think that cash-wise I'll probably be up too! . |
|
OP
|
UTC
quote
.
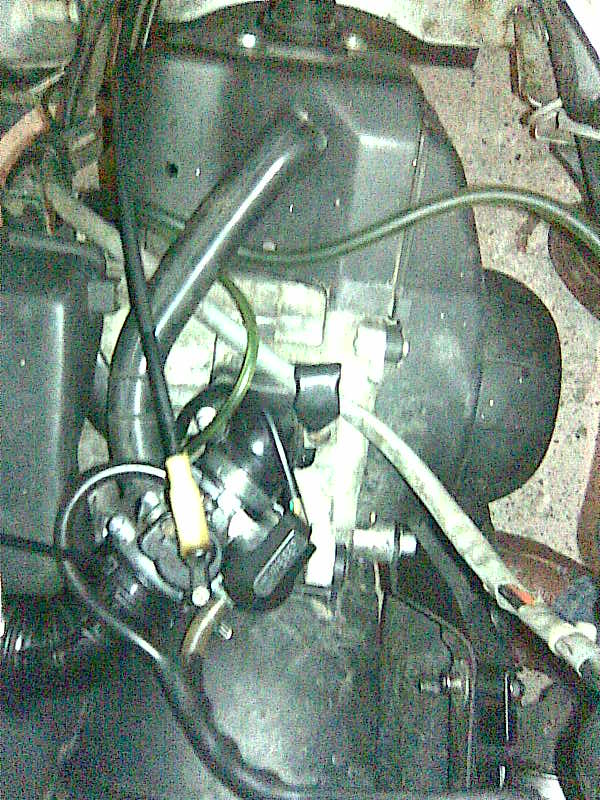
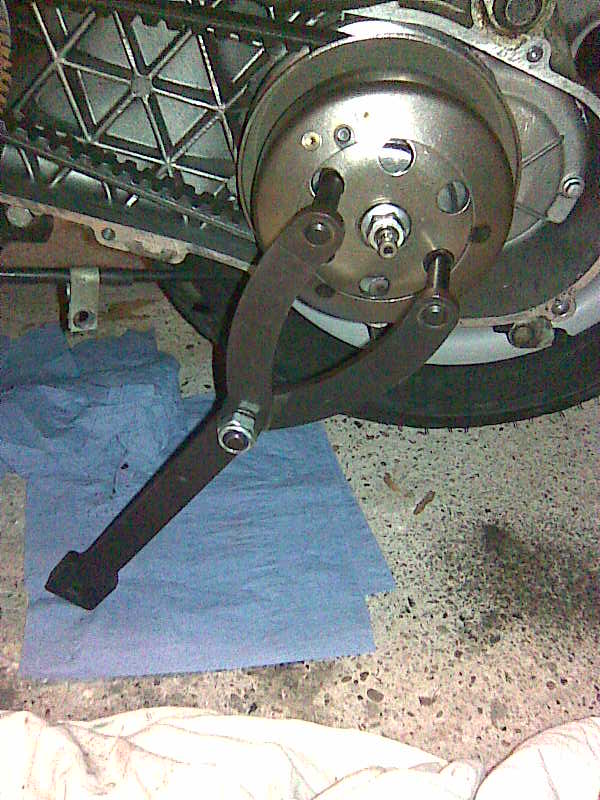
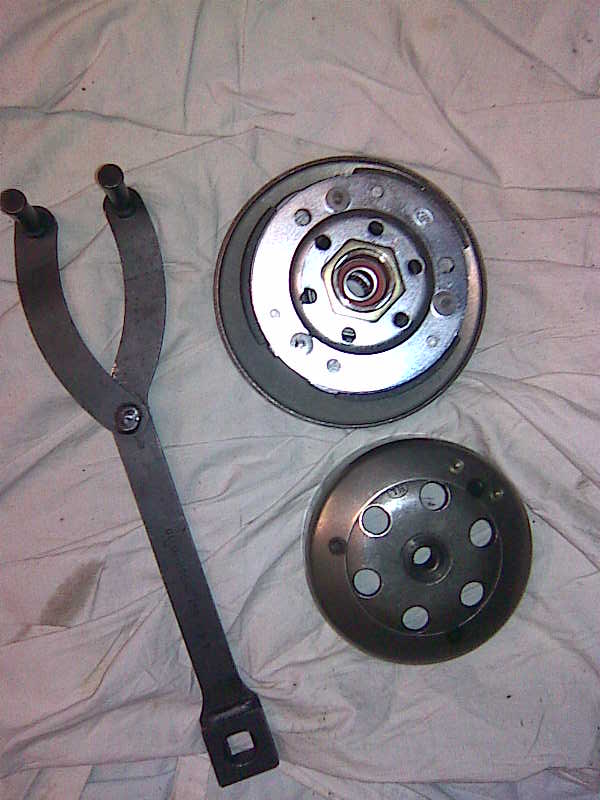
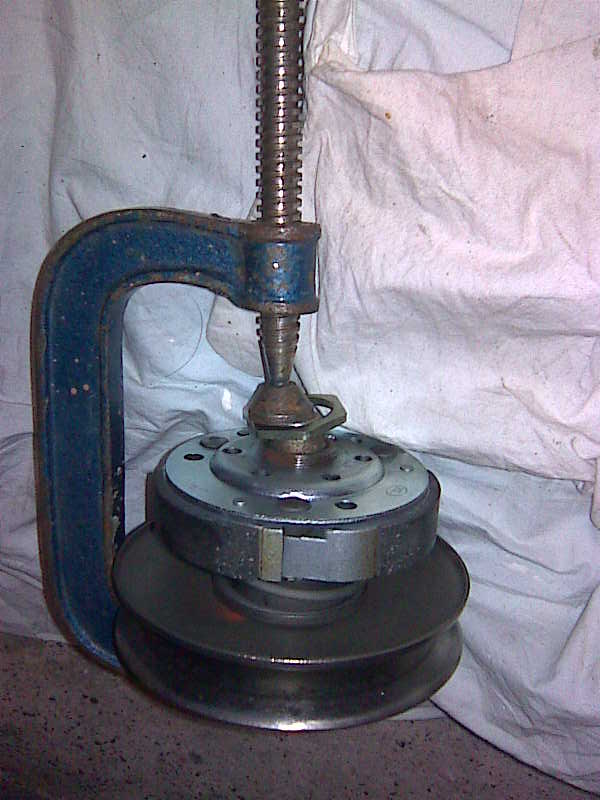
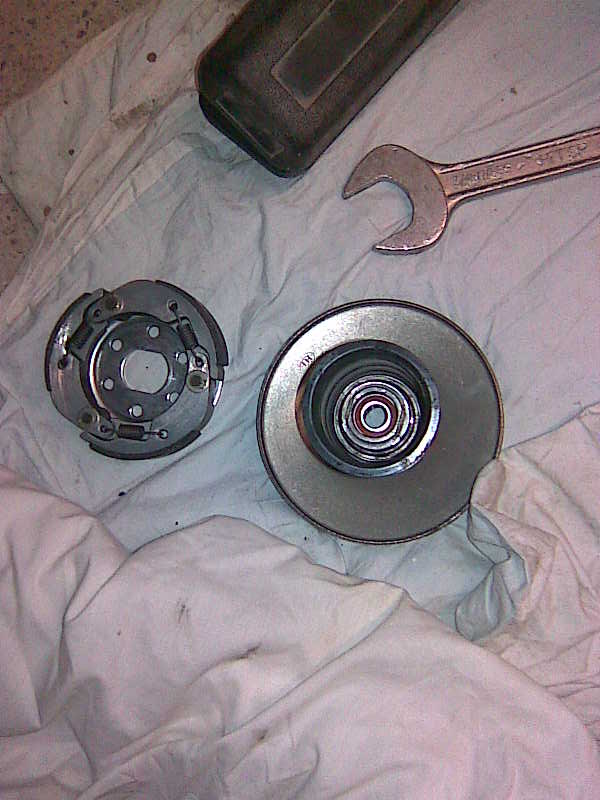
Oh the weather outside is frightful.... so clutch springs to fit would be delightful.... (oops sorry, way too christmassy!) I had some concerns about swapping them because of things that I'd heard and read about.... getting special tools to remove the clutch bell nut, and then the clutch assembly being spring loaded and may shoot off, and then even that the clutch springs themselves were virtually impossible to fit.... All of these simply were not true if you think about how to do it in advance, and also what tools to use... most are probably already available in your garage. First thing to do was to remove the drive belt cover, and then when inside to undo the clutch bell nut. I borrowed a tool that locked the clutch bell because I was offered one to use, but I thought about using a longish piece of plywood that would attach with bolts to the holes in the clutch bell and touch the floor to give some leverage. The nut came away fairly easily with a long handled socket set. When the nut was removed the clutch bell slid off easily and the clutch assembly was also easy to slide off its spline. I decided to use a G-Clamp to take the tension off the clutch assembly whilst I undid the assembly nut and then to slowly and safely release the tension by undoing the G-Clamp a bit at a time. This worked a treat, and then I could take apart the clutch assembly to get at the clutch springs. While it was apart I took the opportunity to de-glaze the clutch bell and clutch pads, lots of pad material left so very useable and overall condition looks to be good. I thought I'd struggle to get the springs replaced but I found an easy way of doing this after 15 minutes of struggling and cursing. I clicked one side of each spring into its locating hole and then used a bradawl to lever the other side of each spring by using the tip of the bradawl in the receiving spring hole and levering over so that the spring stretched slightly and popped into the hole. Three springs only took about 5-8 minutes in total using this method. I chose to fit the strongest springs (rightly or wrongly) on the assumption that I'd then know how great a difference they would make and then I could come down in strength if they felt too much for me. Fitted everything all back together using the correct torque settings, started the scoot up and all seemed to be ok and as I expected. Just waiting for the bad weather to go now so that I can try it out.
Undoing the Clutch Bell nut. Note that the drive belt case still has no belt dust evident - so I guess that I've cured that problem.
Clutch Bell and Clutch Assembly removed
"Take the Strain" !!!
Removed the clutch from the clutch assembly.
Using the bradawl made quick work of the spring fitting
All springs in their places
|
|
OP
|
UTC
quote
.
Fabio wrote: On the tyre front, the 120/80-10 is due to turn up on a S-O-R basis either this weekend or Mon/Tues, fingers crossed - third time lucky with that mod I hope!! Didn't even bother removing the back tyre to compare it this time....it was obvious just by looking that it wasn't any 'taller' - in fact it had a very strange shaped tread profile to it, where my current tyre is nicely shaped (see picture) the new one was almost flat in profile - not too sure about this at all???? .
Current rear tyre on the left
New tyre's profile was more like this ????
|
|
OP
|
UTC
quote
.
Braved the weather tonight - went for a 10 mile scoot around - very slippery in the street (still icy and the rain is making the already slippery road even more so) Wanted to try out the red clutch springs that I'd fitted on Monday evening - and I'm happy to report that they worked a treat. Take off is just fantastic now, the scoot revs up a little more than usual (nothing too excessive mind you!) and when the clutch bites the scoot is off and away, no hesitation now - I'm very impressed!!! The red springs were the 2000rpm ones (I'm guessing that the rpm in this case refers to the rpm of the clutch bell and not the engine?) and according to the notes that came with the springs the normal rpm range for clutch bite would be more in the 750-1000rpm region. I thought that the extra revving would be excessive maybe, but I'm very pleasantly surprised. The rev level isn't too much greater than before the modification and the better take-off achieved is fab. Overall a very worth-while mod, I'll report back when I've had a few more trips after I've gotten used to it some more and tried it in differing traffic situations. . |
|
OP
|
UTC
quote
.
Ok - since my last post, I've tried a few combination of things. #1 - Spark plugs - Ive got an 8, 9 and an Iridium 9 Took the Iridium 9 spark plug out of the scoot so i could line it up with the other two, here's the picture at the foot of this post. - 8 on the left... my scoot came with this one fitted by the previous owner. - 9 in the middle, which is the recommended plug for this scoot. - Iridium on the right, which is the one that I'm currently using. With the Iridium it's supposed to not wear down the electrode as much as regular plugs. Apparently iridium withstands the arc jumping across so they wear a lot less so you don't have to change your plugs as often. I've also read that the spark is more consistent and a touch more 'clean' if you get what I mean, but I have no evidence for this. Mine are all NGK and are..... - 8's - BR8ES - 9's - B9ES - Iridium - BR9EIX My understanding is that an 8 is a 'hotter' spark plug than a 9 but I'm not too sure that changing from one to the other would particularly make much difference. I took out the Iridium and replaced it with the 8 - and noticed that it didnt seem to run as well at top speed as the Iridium. I then removed the 8 and had a look at the plug after a 15 mile ride and noticed it was much lighter in colour than the plug chops I'd done previously on the Iridium 9. I'm guessing its because the 8 runs hotter and therefore runs leaner if that makes any sense whatsoever??? I put the Iridium back in and took a very similar road route, the Iridium seemed to be slightly more responsive and top end seemed to revert back to its original mph. #2 - Flyscreen - I then tried the scoot without the screen to try to compare how it ran versus with the screen. First thing obviously noticeable was that it was a lot colder around my chest and face and it felt like my jacket was acting like a bit of a parachute. Soon got used to it mind you, and after a while it felt quite normal. Top speed was down by about 3-4 mph and 'go-ability' was a touch reduced over a certain speed, say above 40mph when the air drag built up. I haven't put the screen back on as of yet - not too sure I've made up my mind whether I like the styling or whether I prefer the scoot 'naked' .
From left to right....BR8ES, B9ES, Iridium BR9EIX
|
|
|
UTC
quote
Firstly, well done for staying with the 50. Or rather 70 . I will share my thoughts on this project.
First, the tyre. I have only skimmed what you wrote, but did you fit the new tyre before comparing the heights? The profile will differ fairly drasticly between a tyre on the rim, and a tyre off the rim. Next, the plug. You seem to have a good grasp of it, the hotter plug may be making it run slightly leaner, and anyway, an engine running hot is nearly always bad. Thats all i have to add i'm afraid, and it may be no help at all But i just have to ask. have you spent less on all the modifications that you would have on just the 70 kit, new rollers and a gear down kit? I'm just curious to know. Alex |
|
OP
|
UTC
quote
Alexander wrote: But i just have to ask. have you spent less on all the modifications that you would have on just the 70 kit, new rollers and a gear down kit? I'm not too sure I follow your question, but I think that this may answer it perhaps..... The 70cc kit cost me £30 second hand - new ones retail at about £150ish I think at the moment. I'm pretty good at getting lots for little money as you can probably tell - Giannelli 'Frankenstein' exhaust cost me £15 all up, 17.5 Dell'orto only £18 second hand, new rollers springs main jets etc etc £15, self-designed and built flyscreen only about £11. All up i've spent just short of £90 on all of the modifications that I'd posted about. Thanks once again for the post - I'd given up on posting any more to this thread because it seemed to be only me posting and I guessed that others had lost interest or found the content un-useful. . |
|
|
UTC
quote
Ah do keep posting, there isn't much out there on the ET2 scooter. I have one myself, and i love it.
I am also in the process of making mine go faster, but i must admit i will take the easier if a bit more expensive route of a powerful 70cc kit, and a secondary AND primary gear kit. Yeah my question was, aside from the 70 kit, how much did you spend on the mods, and could you not have just bought a primary gear kit. I think you could have, but i can see thats not really the point of this project, and i can appreciate that. Alex |
|
OP
|
UTC
quote
.
I'd love to drop onto a cheap primary gear-up kit, even a second-hand one would do nicely. New ones are quite expensive for what they are. . |
|
|
UTC
quote
Hello fabio,
Loving your thread, i only found it today, have read the whole lot and have learnt a few little things i could do to my bike so thank you and thank you to everyone else's input you all help me out, I have a few things i would like help with and i thank you in advance for all help given. 1, i have a 99 ET2 and my engine is running a little bit to rich and im not sure how to adjust my oil/fuel mixture, can someone help me please My 2nd thing is how to tune my carb? my scoot is completly standard and does about 40mph(on the clock) the carb is vespa stock but i wanna have a fiddle with it before i buy a bigger one and get a bore kit, just incase i dnt need to.. Thirdly, Fabio where did you get the looking tool to remove the clutch assembly? and where did get your clutch srping from?? As for my input to you guys it to do with the CDI unit... im pretty certain that on no et2 model is there a restriction on the CDI unit, its jst rubbish lol |
|
OP
|
UTC
quote
Hi MiniM
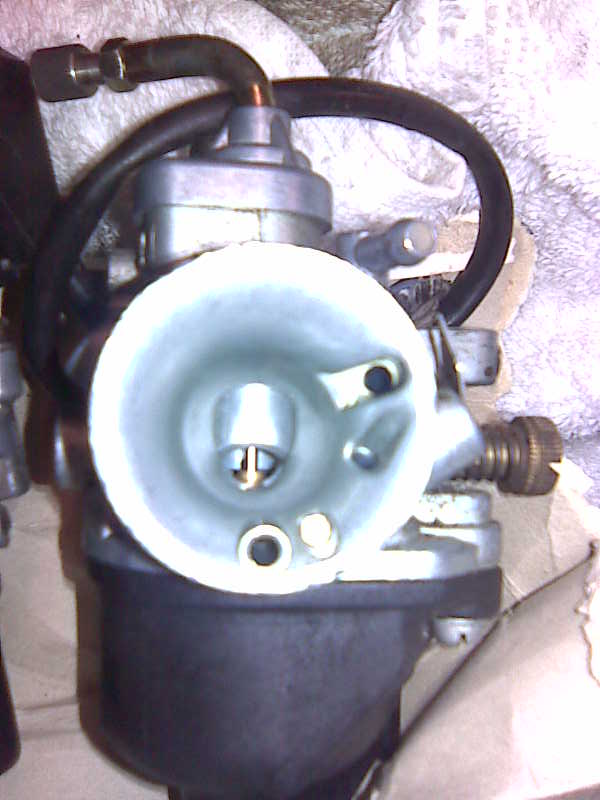
On the stock Dell 17.5 PHVA carb there are three ways to adjust the mixture. To do this well you have to understand what parts of the carb do what but the general gist of it is that 3 adjustments cover 3 parts of the rev range. From idle to about 1/4 throttle you are mainly looking at adjustments to the idle mixture screw From 1/4 throttle to about 3/4 throttle the needle position comes into play. From 3/4 to Wide Open Throttle (WOT) the main jet size is the one to look at. So here's the way I'd set it up (please remember that I'm no expert and don't profess to be, I've leant by reading through topics on the internet and messing/tinkering with settings over and over.... So don't be surprised if I'm totally way off in some areas of with my understanding of best-practice with this sort of thing - its just my understandings and opinions ) 1) I'd tackle the Main Jet first - to do this I'd do some Plug Chops. This means to run the scooter at WOT for a few blocks and then cut the engine dead, remove the spark plug and have a look at its condition. If its black or/and overly oily then its too rich, if its pale and whiteish then its too lean, you're looking for a medium brownish colour (creamy coffee colour) but if its a tad rich (slightly darker brown) then thats ok too because running too lean will risk siezing you engine. Here's 2 links with more detailed instructions... http://www.kawtriple.com/mraxl/carb/plugchop.htm and http://www.incriminators.com/plugchop.html When you see the results of your plug chop then its time to swap out the main jet for one either bigger or smaller, go bigger if you want the carb to be richer, smaller if you want it to be leaner. The main jet can be found in the float bowl at the bottom of the carb. Then when you've swapped the main jet try plug chopping again and assess the colour/condition again. You'll have to do this main jet swapping on a trial and error basis until the colour of the plug is correct when its inspected. The higher the number of jet, the richer it is. It is best when setting the main jet to start rich, and come down one step at a time to get it correct. Hope that makes sense. On my scoot I only needed to undo 2 screws to get at the carb (one fastening the carb to the inlet manifold, the other fastening it to the airfilter box though this screw may be replaced by a cable tie on some scoots), then turn it up side down and remove another 2 screws holding on the carb bowl. A splash of petrol will likely come out but its not too much, just put some paper towels down over the engine first. You will see 3 brass jets. The Main jet is indicated in the photo. 2) When you're happy with the main jet then go onto the idle mixture setting, you need to be able to set this so that the engine idles correctly for a long period without stalling and also without the engine revs rising and dropping. Roughly speaking if your scooter revs up and down on its own it will be weak, if the scooter ticks over unevenly and lumpy it will be too rich. It's easy to diagnose that the idle mix is wrong when you quickly twist the throttle from idle to full. If the engine bogs or labours for a second before it revs, then wind the idle screw in half a turn and try again, if this makes it worse wind it back and past where it was originally. Set and do another half turn. One direction will make the bike run better at initial pull off so keep winding the idle screw that way until all seems right. To start of..... I'd look to see if the slow idle screw is set correctly as per the manual - for ET2's its usually 1.5 full turns from fully closed, and starting to diagnose the air/fuel mixture from this idle setting has cured problems on my ET2 in the past. All you need to do is to locate the slow idle screw and turn it fully closed (whilst at the same time counting how many full turns so that you can turn it back if you want to) and then open it 1.5 full turns and then try that. 3) The 3rd setting is the needle clip setting....As you twist the throttle, the carb lets in more fuel by moving the needle in/out of the bore of the main jet, the needle lifts as you twist the throttle, this needle is adjustable and can be lifted or dropped by moving a clip up or down at the top of the needle shaft. The clip is mounted in the throttle slide and it's basically a kind of stopper. Moving the clip up or down a notch can affect the richness of the mixture over the 1/4 to 3/4 throttle range. You could tell while running, if your scooter feels as if it has a flat spot on and around mid range, or it does not start to perform until the throttle is fully open, it will be too weak. If too rich the scooter will splutter at this position, but it will probably clear as you go onto full throttle. The needle must be dropped if the engine struggles to rev at all, if there's a strong smell of fuel or the engine pops or backfires. Finally...... the larger thumb-wheel type of knob on the carb is the idle speed setting and this is where you can set the revs at which the engine ticks over. If its racing turn it down a touch, if its stalling a bit then screw it in a bit to raise the revs slightly. On your first outing with a new carb set up its best to start of at a slower pace, and gradually increase speed once you are happy that everything is running fine. If the scooter feels wrong in any throttle position, stop and adjust your settings until it becomes correct. Keep an eye on your spark plug colour until you are totally happy it is the correct colour and all is fine. Some other thoughts - if the carb is running too rich, the engine tone will deepen when you go to full throttle, it will possibly bog down too. If the running lean, you'll hear the engine tone soften up although still revving it may sound very flat and can also just die out too. Hope this helps. .
outline diag of outside of Carb
Dellorto from underneath showing main jet
Needle clip setting
Main Jet
⚠️ Last edited by Fabio Dougie on UTC; edited 2 times
|
|
|
UTC
quote
This is AMAZING help, thank you so much, this is very helpful for me.
im perfectly fine with cars and 4-strokes engines but put 2-strokes and carbs in front of me and im like "duuuhhh" =] Im going to do all this this weekend and ill let you know how it goes =] |
|
|
UTC
quote
Probably pointing out the obvious here, but certainly in the UK, as regards vehicle insurance, if you make any modifications to your vehicle, in particular as regards engine & performance so that it is over and above what it is when you took out your current insurance, you MUST inform your insurance company and if necessary, pay any increase in premium. If you don't and you find yourself in the position of having to make a claim on the insurance, you may well find yourself uninsured. And if you're uninsured, you're breaking the law, so you may end up finding out that Mr Plod is not best pleased with you either. Best to be safe than sorry.
|
|
OP
|
UTC
quote
minimotty wrote: This is AMAZING help, thank you so much, this is very helpful for me. Im perfectly fine with cars and 4-strokes engines but put 2-strokes and carbs in front of me and im like "duuuhhh" Im going to do all this this weekend and ill let you know how it goes My pleasure MiniM, any help I can give you (or anyone else for that matter!) just shout up. . |
|
|
UTC
quote
wafflycat wrote: Probably pointing out the obvious here, but certainly in the UK, as regards vehicle insurance, if you make any modifications to your vehicle, in particular as regards engine & performance so that it is over and above what it is when you took out your current insurance, you MUST inform your insurance company and if necessary, pay any increase in premium. If you don't and you find yourself in the position of having to make a claim on the insurance, you may well find yourself uninsured. And if you're uninsured, you're breaking the law, so you may end up finding out that Mr Plod is not best pleased with you either. Best to be safe than sorry. Your right in what your saying but the term "modification" means to add a part of device onto your vechicle that it designed to make your vechicle increase in speed, acceleration and BHP. a 70CC bore kit is a mod, But if i was to add a new carb onto my bike that is the exact same spec as a stock one but just happens to run better then that isnt a mod even if i do get more speed the normal. I dont mean to sound like im correcting you, that isnt my intention, im just explaining the loop holes.. coz knowing the loop holes saves money and you dont get in trouble |
|
|
UTC
quote
I certainly wouldn't want to rely on a loophole in the event of a crash and need that insurance cover. From experience in the insurance business - insurance companies will try and get out of their obligations if they can... and if that means delay due to arguing about a loophole, I'd rather be upfront at the start and stop any potential for insurance hassle from even starting.
|
|
|
UTC
quote
great thread, I know that I can get some help with some of the simple problems I have here and there on my daughters et2
I have learnt a lot, regarding how the engine, clutch, rollers etc all work. It does seem like a lot of effort, but people overclock computers all the time, as a hobby. just piping up about the insurance they will nearly always pay out on a third party claim and being that the owner has only spent a few hundred on the whole project (apart from the extensive hours etc) I doubt the payment on fully comp will be much more than the excess anyway. |
|
Member
2015 Vespa GTS 300 Super, 2016 MP3 500 Sport ASR/ABS
Joined: UTC
Posts: 29 Location: Portland, OR USA |
UTC
quote
This thread is really encouraging, I'm a big guy and I got my 2003 two-stroke et2 for $800 in running condition and pretty good shape (although the side of the right foot board is missing a little of the plastic on the side but other than that it's in mint condition with rain cover). I'm 6'7" and almost 300 pounds and if my scoot could go about 10 mph faster than the 35 it claims to be doing on the speedometer and accelerate 20% faster it would be perfect for my uses. trying to find a 70cc kit right now and I plan on at least removing the tube off the exhaust pipe for more performance.
⚠️ Last edited by sousapro on UTC; edited 1 time
|
Modern Vespa is the premier site for modern Vespa and Piaggio scooters. Vespa GTS300, GTS250, GTV, GT200, LX150, LXS, ET4, ET2, MP3, Fuoco, Elettrica and more.